Dell Monitor Not Displaying Full Screen: Troubleshooting Tips
If your Dell monitor is not displaying in full screen, try adjusting the settings on the monitor itself. Look for a setting that enables full screen mode and make sure it is turned on.
You can also try adjusting the screen resolution through the Control Panel on your computer. Go to Start, then Control Panel, and click on Adjust Screen Resolution under Personalization. From there, you can modify the display properties to fit the entire screen.
Additionally, if you are using a laptop connected to the monitor via VGA, make sure the image settings are set to take up the full screen size.

Credit: www.nytimes.com
Common Causes For Display Issues
When using a Dell monitor, you may encounter issues where the screen does not display in full screen mode. This can be frustrating and hinder your ability to fully enjoy your visual content. There are several common causes for display issues, including:
Incompatibility Between Resolution Settings And Monitor Capabilities
One of the most common causes of display issues is an incompatibility between the resolution settings on your computer and the capabilities of your Dell monitor. When the resolution settings do not match the monitor’s native resolution, the screen may not display in full screen mode. To address this issue, you can adjust the resolution settings on your computer to match the recommended resolution for your Dell monitor. This can usually be done through the Display Settings or Control Panel on your computer.
Incorrect Aspect Ratio Configuration
Another potential cause of display issues is an incorrect aspect ratio configuration. Aspect ratio refers to the proportional relationship between the width and height of the display. If the aspect ratio is set incorrectly, the screen may not display in full screen mode. To fix this issue, you can check the aspect ratio settings on your computer and adjust them to match the recommended aspect ratio for your Dell monitor.
Outdated Or Corrupted Graphics Drivers
Outdated or corrupted graphics drivers can also lead to display issues on your Dell monitor. Graphics drivers are responsible for translating the data from your computer into a format that can be displayed on the monitor. If these drivers are outdated or corrupted, it can result in a distorted or incomplete display. To resolve this issue, you can update your graphics drivers to the latest version available from the Dell website or the manufacturer’s website.
Hardware Connections And Cable Integrity
Finally, display issues can also be caused by hardware connections and cable integrity. If the cable connecting your computer to the Dell monitor is loose or damaged, it can result in a poor connection and lead to a partial or distorted display. To fix this issue, you can check the hardware connections and ensure that the cables are securely plugged in. If necessary, you can also try using a different cable to see if that resolves the display issues.
By addressing these common causes of display issues, you can ensure that your Dell monitor displays in full screen mode, allowing you to fully enjoy your visual content without any hindrances.
Check And Adjust Resolution Settings
If you’re experiencing the issue of your Dell monitor not displaying full screen, the first step to troubleshoot this problem is to check and adjust the resolution settings. Your monitor’s resolution needs to match the specs of your monitor to ensure optimal display. By following this step-by-step guide, you can easily match the resolution with your monitor’s specifications.
Step-by-step Guide To Matching Resolution With Monitor Specs
- Click on the “Start” button on your computer’s taskbar.
- Select “Control Panel” from the Start menu.
- In the Control Panel window, click on “Appearance and Personalization”.
- Under the Personalization section, click on “Adjust Screen Resolution”.
- A new window called “Display Settings” will open.
- In the Display Settings window, you will find a slider under the “Resolution” section.
- Drag the slider to adjust the resolution and try different options to see which one fits your monitor.
- Once you have found the resolution that matches your monitor’s specifications, click “Apply” and then “OK” to save the settings.
By following these step-by-step instructions, you will be able to match the resolution with your monitor’s specifications and resolve the issue of your Dell monitor not displaying full screen.
Exploring Windows Display Settings For Optimal Screen Use
Windows provides various display settings that you can explore to ensure optimal screen use. Here are some key settings you can modify:
- Screen Refresh Rate: Click on “Advanced” in the Display Settings window and then navigate to the “Monitor” tab. Under “Monitor settings”, you will find the “Screen refresh rate” drop-down menu. Select the refresh rate that works best for your monitor.
- Color Depth: You can adjust the color depth of your screen to enhance the display quality. This option is also available in the Display Settings window.
- Size of Fonts and Icons: If you find that the fonts and icons on your screen are too small or too large, you can modify their size to your preference. Look for the “Size” settings in the Display Settings window.
By exploring these Windows display settings, you can enhance your screen experience and ensure optimal use of your Dell monitor.
Update Or Reinstall Graphics Drivers
If you’re experiencing the frustrating issue of your Dell monitor not displaying in full screen, one possible solution is to update or reinstall your graphics drivers. Graphics drivers are essential software that allow your computer to communicate with and control the hardware components responsible for displaying images on your monitor. Over time, these drivers can become outdated or corrupted, resulting in various display issues, including a screen that doesn’t fill up the entire monitor.
Locating And Upgrading To The Latest Driver Versions
The first step in resolving this issue is to locate the latest driver versions for your graphics card. Thankfully, Dell makes this process relatively simple by providing a dedicated support page on their website. To get started, follow these steps:
- Visit the Dell Support website.
- Enter the service tag or model number of your Dell monitor in the search box.
- Once your monitor is identified, locate the “Drivers & Downloads” section.
- Under the “Video” category, you should find the graphics drivers associated with your monitor model.
- Download the latest driver version compatible with your operating system.
- Once the download is complete, double-click the file to run the installation wizard.
- Follow the on-screen instructions to complete the driver installation process.
By upgrading to the latest driver versions, you’ll ensure that your graphics card has the necessary software to properly communicate with your Dell monitor and display images in full screen.
Complete Walkthrough For Driver Reinstallation On Windows
Alternatively, if updating your graphics drivers doesn’t resolve the issue, reinstalling them might do the trick. Here’s a step-by-step guide to help you through the process on a Windows computer:
- Press the
Windows + Xkeys on your keyboard and select “Device Manager” from the menu that appears. - In the Device Manager window, locate and expand the “Display adapters” category.
- Right-click on your graphics card driver and select “Uninstall device”.
- Confirm the uninstallation by clicking “Uninstall”.
- Once the driver is uninstalled, restart your computer.
- After the restart, the default graphics drivers will be automatically installed.
- Visit the Dell Support website as mentioned earlier and download the latest driver version.
- Double-click the downloaded file and follow the on-screen instructions to reinstall the graphics drivers.
- Restart your computer once again to complete the installation process.
Reinstalling the graphics drivers can sometimes resolve compatibility or corruption issues, allowing your Dell monitor to display in full screen once again.
Remember, ensuring that your graphics drivers are up to date is crucial for optimal performance and compatibility with your Dell monitor. Whether it’s updating or reinstalling them, these steps should help you tackle the issue of your monitor not displaying in full screen. Give them a try and enjoy your content in all its grandeur.
Aspect Ratio And Scaling Options
If you’re having trouble with your Dell monitor not displaying full screen, try adjusting the settings on the monitor itself. Look for an option that enables full screen mode and make sure it is turned on. You can also try adjusting the screen resolution and refresh rate on your Windows desktop to see if that resolves the issue.
How To Correctly Set Aspect Ratio For Full Screen Display
If you are facing the issue of your Dell monitor not displaying in full screen, it may be due to incorrect aspect ratio settings. Follow these steps to ensure that your aspect ratio is correctly set:
- Click on the Start menu and go to Control Panel.
- Under Appearance and Personalization, click on “Adjust Screen Resolution”.
- In the Display Properties window, click on the “Monitor” tab.
- Click on the “Screen refresh rate” drop-down menu under Monitor settings and select the appropriate refresh rate.
By correctly setting the aspect ratio, you can ensure that your Dell monitor displays the content in full screen without any cropping or black bars.
Manual Scaling Options For Edge-to-edge Screen Display
If adjusting the aspect ratio does not resolve the issue, you can try manual scaling options to achieve an edge-to-edge screen display. Here’s how:
- On your Dell monitor, navigate to the “Menu” or “Menu/Select” button on the bezel.
- Use the “+” and “-” keys or the arrow keys on the monitor bezel to navigate to the “Auto Adjust” option.
- Press the “Menu” or “Menu/Select” button to choose the “Auto Adjust” option. If it is not in the main menu, select the “Image Settings” submenu.
By following these steps, you can manually adjust the scaling settings on your Dell monitor to achieve a full screen display.
Conclusion
By correctly setting the aspect ratio and trying manual scaling options, you can resolve the issue of your Dell monitor not displaying in full screen. Ensure to follow these steps to enjoy edge-to-edge screen display without any cropping or black bars.
Refresh Rate And Color Depth Adjustments
If you are experiencing the issue of your Dell monitor not displaying full screen, there are a few adjustments you can make to resolve this problem. One of the adjustments you can try is changing the monitor’s refresh rate for improved stability. Another adjustment you can make is tweaking the color depth for better image quality and fit. In this section, we will discuss these adjustments in detail.
Changing The Monitor’s Refresh Rate For Improved Stability
The refresh rate of your monitor refers to how often it refreshes the image on the screen. A higher refresh rate can result in smoother motion and reduce screen flickering. To change the refresh rate on your Dell monitor, follow these steps:
- Click the Start button.
- Select Control Panel.
- Go to Appearance and Personalization.
- Click on Adjust Screen Resolution.
- In the Display Properties window, click Advanced.
- Click the Monitor tab.
- Under Monitor settings, select the refresh rate from the drop-down menu.
By adjusting the refresh rate, you may find that your Dell monitor displays the full screen properly and provides a more stable viewing experience.
Tweaking Color Depth For Better Image Quality And Fit
Another adjustment you can make to resolve the issue of your Dell monitor not displaying full screen is tweaking the color depth. Color depth refers to the number of colors that can be displayed on the screen. A higher color depth can result in more vibrant and accurate colors.
To adjust the color depth on your Dell monitor, follow these steps:
- Click the Start button.
- Select Control Panel.
- Go to Appearance and Personalization.
- Click on Adjust Screen Resolution.
- In the Display Properties window, click Advanced.
- Click the Monitor tab.
- Under Monitor settings, click the Color quality drop-down menu.
- Select the desired color depth for better image quality and fit.
By tweaking the color depth, you may find that your Dell monitor displays the full screen properly and provides a more vibrant and accurate image.
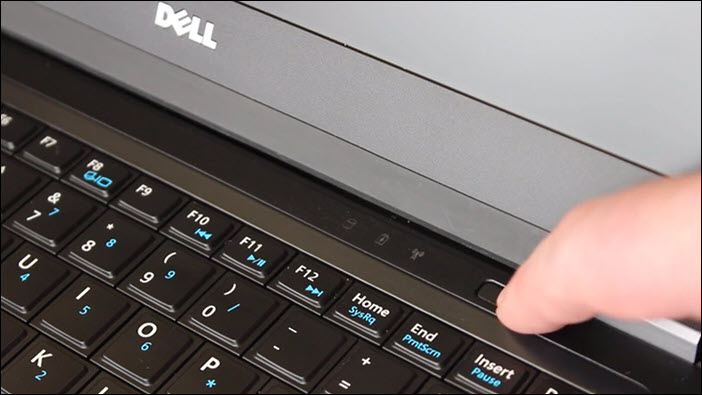
On a Dell laptop, you can also use keyboard shortcuts to maximize windows to full screen or adjust their position on the screen.
Remember, refreshing the monitor’s rate and adjusting the color depth are just a couple of potential solutions to the issue of your Dell monitor not displaying full screen. If these adjustments don’t resolve the problem, you may need to explore other troubleshooting options or seek assistance from Dell support.
Navigating On-screen Display (osd) Menus
When your Dell monitor is not displaying in full screen, it can be frustrating. However, there is a solution to this problem that is easily accessible through the On-Screen Display (OSD) menus. By accessing and using the OSD menus on your Dell monitor, you can make the necessary display adjustments to ensure that your screen is showing in full screen mode.
Accessing And Using The Osd For Display Adjustments
To access the OSD menus on your Dell monitor, follow these simple steps:
- Press the menu button on your Dell monitor, usually located on the front or side.
- Navigate through the OSD menus using the arrow buttons on your monitor’s bezel.
- Look for the “Display” or “Image Settings” option in the OSD menu and select it.
- Within the “Display” or “Image Settings” menu, look for options such as “Auto Adjust” or “Aspect Ratio”. These options are commonly used to adjust the display to fit the entire screen.
- Select the desired option and press the “Menu” or “Menu/Select” button on your monitor to apply the changes.
By following these steps, you can now make the necessary adjustments in the OSD menus of your Dell monitor to ensure that it displays in full screen mode.
It is important to note that the specific OSD menu options and navigation may vary depending on the model of your Dell monitor. Therefore, it is recommended to refer to your monitor’s user manual or Dell’s official support website for detailed instructions specific to your monitor model.
Utilizing Auto-adjust And Manual Adjustments
If you’re experiencing issues with your Dell monitor not displaying content in full screen, there are a few steps you can take to fix the problem. In this article, we will explore how to utilize the auto-adjust feature and make manual adjustments to fine-tune the display.
H3when And How To Use The Auto-adjust Feature/h3
One of the easiest solutions for a Dell monitor not displaying full screen is to utilize the auto-adjust feature. This feature automatically adjusts the monitor’s settings to optimize the display. To use the auto-adjust feature, follow these steps:
- Press the “Menu” or “Menu/Select” button on the monitor bezel to access the main menu.
- Use the “+”, “-“, or arrow keys to navigate to the “Auto Adjust” option.
- Press the “Menu” or “Menu/Select” button again to select the option.
If the auto-adjust option is not available in the main menu, you can try accessing it through the “Image Settings” submenu. This feature automatically calibrates the monitor to fit the screen properly, resolving any issues with the display not filling the entire screen.
H3fine-tuning Display With Manual Monitor Settings/h3
If the auto-adjust feature doesn’t resolve the issue, you can manually adjust the monitor settings to fine-tune the display. Follow these steps to make manual adjustments:
- Click on the “Start” button and select “Control Panel.”
- In the Control Panel window, click on “Appearance and Personalization.”
- Under personalization, click on “Adjust Screen Resolution.”
- In the screen resolution settings, you can adjust the resolution, color depth, refresh rate, and size of fonts and icons to optimize the display.
By experimenting with these settings, you can find the best configuration that ensures the content on your Dell monitor is displayed in full screen.
Remember to save the changes and exit the settings menu, and check if the display is now properly filling the entire screen. If the issue persists, consider updating the graphics driver or contacting Dell support for further assistance.
Ensuring Proper Hardware Connections
If you are facing the issue of a Dell monitor not displaying full screen, the problem may lie in the hardware connections. It is important to confirm that all the hardware connections are properly set up and functioning correctly. Here are some key steps to follow:
Confirming Cable Types, Connections, And Integrity Checks
First, check the cable type being used to connect your monitor to the computer. There are different types of cables available, such as VGA, DVI, HDMI, and DisplayPort. Ensure that you are using the correct cable for your setup.
Next, inspect the cable connections at both ends to ensure they are securely plugged in. Loose or faulty connections can cause display issues. Make sure there are no bent or damaged pins on the connectors as well.
To check the integrity of the cable, you can try using a different cable or swap with a known working cable to see if the issue persists. Sometimes, a faulty cable can result in incomplete or distorted display.
Ensuring Each H3 Heading Adheres To Html Syntax
| HTML Syntax | Heading |
|---|---|
Confirming cable types, connections, and integrity checks |
Confirming cable types, connections, and integrity checks |
Adjusting Display Settings On The Monitor
If the cable connections are fine, it’s worth checking the monitor settings for any display options that may be affecting the full-screen mode. On the monitor itself, navigate through the settings menu and look for an option that enables full-screen mode. Sometimes, this setting needs to be manually turned on to ensure the display takes up the entire screen.
Optimizing Screen Resolution And Refresh Rate
Another important aspect to consider is the screen resolution and refresh rate settings on your computer. These settings directly impact the display quality and can influence the full-screen experience. To adjust the screen resolution and refresh rate:
- Right-click on your desktop and select “Display settings”.
- In the “Display settings” window, scroll down to the “Resolution” section and select the desired resolution that suits your needs. Choosing the native resolution of your monitor is usually recommended.
- Click on “Advanced display settings” located at the bottom of the window.
- In the “Advanced display settings” window, click on the “Display adapter properties” link.
- Switch to the “Monitor” tab and select the appropriate refresh rate from the drop-down menu. Higher refresh rates can often result in a smoother display.
By adjusting the screen resolution and refresh rate, you can ensure that your Dell monitor displays content in full screen without any cropping or black borders.
Seeking Further Assistance From Dell Support
Having trouble with your Dell monitor not displaying in full screen? Start by checking the settings on the monitor itself and look for a setting that enables full screen mode. If that doesn’t work, try adjusting the screen resolution and refresh rate in the control panel.
Utilizing Dell’s Online Resources And Customer Service
If you’ve tried adjusting the settings on your Dell monitor and are still experiencing issues with it not displaying full screen, it may be time to seek further assistance from Dell support. Dell provides a range of online resources and customer service options to help troubleshoot and resolve monitor-related issues. Here are a few ways you can use these resources to your advantage.Linking To Video Tutorials For Visual Aid And Extra Help
One helpful resource offered by Dell is their collection of video tutorials. These tutorials provide step-by-step instructions and visual aid to help you troubleshoot and fix common monitor issues, including problems with full screen display. By linking to these video tutorials, you can gain extra help in resolving your particular issue. In the following table, you will find a list of video tutorials related to Dell monitor troubleshooting. Each tutorial covers a specific topic and provides detailed guidance on how to address the issue at hand.| Tutorial Title | Description | Link |
|---|---|---|
| How to Resolve Monitor or Laptop Display Issues | This tutorial covers a range of display issues, including problems with screen size and resolution. | Watch Now |
| How to Scale Display Image to Full Screen (Intel HD Graphics, Dell Laptop) | This tutorial specifically addresses the issue of display image not filling the entire screen. | Watch Now |
| How to Adjust a Dell Flatscreen Monitor | This tutorial provides instructions on adjusting various settings on your Dell flatscreen monitor. | Watch Now |
Frequently Asked Questions Of Dell Monitor Not Displaying Full Screen
How Do I Make My Dell Monitor Fit The Screen?
To make your Dell monitor fit the screen, follow these steps: 1. Press the “Menu” or “Menu/Select” button on the monitor bezel. 2. Use the “+”, “-“, or arrow keys to navigate to the “Auto Adjust” option. 3. Press the “Menu” or “Menu/Select” button to choose that option.
4. If “Auto Adjust” isn’t in the main menu, select the “Image Settings” submenu. 5. Adjust the settings until the display fits the screen properly. Source: Dell monitor not displaying full screen – DELL Technologies
How Do I Fix My Monitor Is Not Showing Full Screen?
To fix your monitor not showing full screen, try adjusting the settings on your monitor. Look for a setting that enables full screen mode and turn it on. If that doesn’t work, search online for specific instructions for your Dell monitor model.
How Do I Make My Dell Screen Full Screen?
To make your Dell screen full screen, try adjusting the settings on your monitor. Go to Start, then Control Panel and click on Appearance and Personalization. Under Personalization, select Adjust Screen Resolution. If that doesn’t work, navigate to the Monitor tab and click on the Screen refresh rate drop-down menu.
Choose the appropriate refresh rate. You can also use keyboard shortcuts like WIN + Up to maximize the screen.
How Do You Restore A Full Screen?
To restore a full screen on a Dell laptop or monitor, follow these steps: 1. Click on the Start button and go to Control Panel. 2. Under Appearance and Personalization, click on Adjust Screen Resolution. 3. In the Display Properties window, click on Advanced, then go to the Monitor tab.
4. Under Monitor settings, select the Screen refresh rate from the drop-down menu. 5. Finally, click Apply and OK to save the changes. If this doesn’t work, you can also try adjusting the settings on the monitor itself, such as finding an option for full screen mode and turning it on.
Conclusion
To ensure your Dell monitor displays the full screen, you can try adjusting the settings on both the monitor itself and your computer. Start by checking for any settings on the monitor that may need to be enabled for full screen mode.
Additionally, navigate to your computer’s display settings and adjust the screen resolution, color depth, refresh rate, and font/icon size if necessary. If you encounter any issues, referring to Dell’s support resources or seeking technical assistance can help resolve the problem.


