Volume Not Working When Connected to Monitor: Troubleshooting Tips
If the volume is not working when connected to a monitor, first check the cable connection and ensure that it is functioning properly. Second, verify that the monitor has power.
These are common reasons why the volume may not be working. Having trouble with the volume when your monitor is connected? Don’t worry, we have some solutions for you. We will explore why the volume may not be working when you connect your monitor to a computer or laptop.
We will provide some troubleshooting steps to help you fix the issue. By the end, you’ll have a better understanding of the possible causes and solutions for when the volume is not working when connected to a monitor. Let’s dive in!
Identifying The Problem Source
To troubleshoot the issue of volume not working when connected to a monitor, you can try the following steps: Right-click on the speaker icon in the system tray and select the sound settings. Ensure that the correct audio output is selected.
Update or reinstall the sound card drivers. Check the HDMI cable for any issues and ensure it is properly connected. Adjust the audio output settings on your source device.
When you connect your computer to a monitor and find that the volume is not working, it can be frustrating. However, by identifying the problem source, you can troubleshoot and resolve the issue more effectively. Here are some steps you can take to identify the source of the problem:
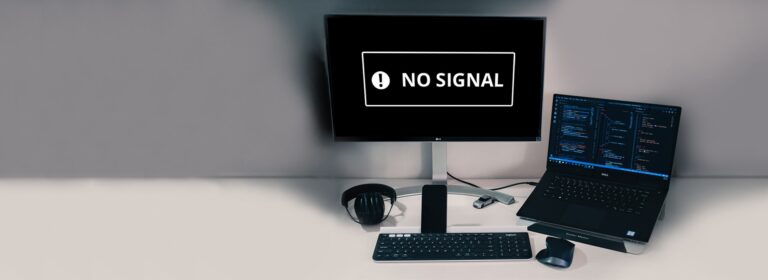
Check If The Monitor Is Recognized By The System
If the monitor is not recognized by the system, it may lead to volume issues. To check if the monitor is recognized:
- Right-click on the speaker icon located in the system tray.
- Select Sounds or Playback Devices from the menu that appears.
- The Sound window will open.
- On the Playback tab, see if the monitor is listed as one of the audio devices.
Verify If The Volume Is Muted Or Set Too Low On The Computer
Another common issue that can cause volume problems is muted or low volume settings on your computer. To verify if the volume is muted or set too low:
- Right-click on the speaker icon located in the system tray.
- Select Open Volume Mixer.
- Ensure that the volume slider for your monitor is not set to the minimum or muted.
- If the volume is low, adjust the slider to increase the volume.
Confirm That The Monitor Is Set As The Default Playback Device
It’s possible that the default playback device on your computer is set to a different device, causing the volume issue. To confirm that the monitor is set as the default playback device:
- Right-click on the speaker icon located in the system tray.
- Select Sounds or Playback Devices from the menu that appears.
- The Sound window will open.
- On the Playback tab, find your monitor in the list of devices.
- Right-click on your monitor and select Set as Default Device.
Inspect If The Audio Cable Or Port Is Damaged
Damage to the audio cable or port can also cause volume issues. To inspect if the audio cable or port is damaged:
- Check if the audio cable is securely connected to both the computer and the monitor.
- Ensure that the cable is not visibly damaged or frayed.
- If possible, try using a different audio cable or port to see if that resolves the issue.
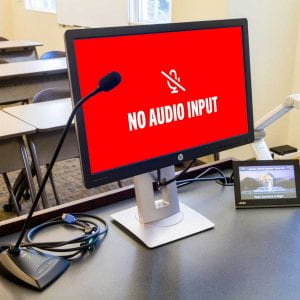
Credit: blog.smu.edu
Resolving Audio Via Hdmi Connection
When the volume is not working while connected to a monitor, there are several troubleshooting steps you can take. Check the audio settings on your source device and ensure it is set to output sound through HDMI. Additionally, make sure the HDMI cable is functioning properly and that the monitor has power.
Ensure Hdmi As Default Sound Output
When experiencing volume issues while connected to a monitor via HDMI, one of the first steps to resolve this problem is to ensure that HDMI is set as the default sound output on your computer. To do this, follow these simple steps: 1. Right-click on the Speaker icon located on the system tray of your computer. 2. From the context menu that appears, select SoundsPlayback Devices. 3. This will open the Sound window, where you can select from various audio devices. 4. On the Playback tab, look for the HDMI device and select it. 5. Click the Set Default button. 6. Finally, click ApplyOK to save the changes. By setting HDMI as the default sound output, you ensure that the audio signals are directed to the external monitor, allowing you to enjoy sound while connected.Update Or Reinstall Graphics And Audio Drivers
If setting HDMI as the default audio device does not resolve the volume issue, it might be due to outdated or corrupted graphics and audio drivers. To update or reinstall these drivers, follow these steps: 1. Open the Device Manager on your computer. You can do this by right-clicking on the StartDevice Manager from the menu. 2. In the Device ManagerGraphicsSound, video and game controllers. 3. Right-click on each device under these categories and select Update driverUninstall device if an update is not available. 4. Follow the on-screen instructions to update or reinstall the drivers. 5. Once the process is complete, restart your computer and check if the volume issue is resolved. Updating or reinstalling the graphics and audio drivers ensures that your computer can properly communicate with the monitor and transmit the audio signals via HDMI.Look Into The Monitor’s Menu Settings For Audio Options
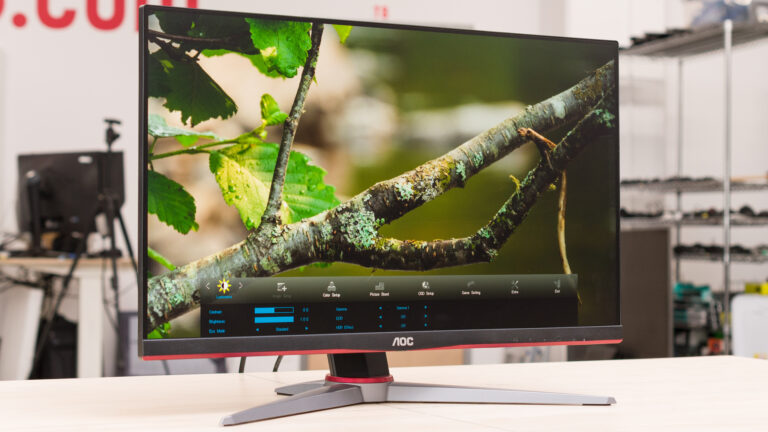
In some cases, the volume issue might be due to the monitor’s audio settings. To check and adjust these settings, follow these steps: 1. Access the menu settings on your monitor. The method may vary depending on the make and model of your monitor. 2. Look for the audiosound options within the menu. 3. Ensure that the audio inputHDMI or the appropriate HDMI port. 4. Adjust the volumemute settings within the monitor’s menu as needed. 5. Save any changes made and exit the menu. By checking and adjusting the audio settings on your monitor, you can ensure that the volume is enabled and set to the desired level.Test With A Different Hdmi Cable
If none of the above solutions work, the issue might be with the HDMI cable itself. Sometimes, a faulty or incompatible HDMI cable can result in volume problems. To troubleshoot this issue, follow these steps: 1. Disconnect the current HDMI cable from both the computer and the monitor. 2. Replace it with a different HDMI cable, preferably a high-quality one. 3. Connect the new HDMI cable securely to both the computer and the monitor. 4. Ensure that the cable is properly inserted and seated in the HDMI ports. 5. Test the volume again to see if it works with the new HDMI cable. Using a different HDMI cable can help identify if the issue lies with the cable itself, allowing you to address the problem accordingly. In conclusion, resolving audio issues when connected to a monitor via HDMI requires a combination of software and hardware troubleshooting. By ensuring that HDMI is set as the default sound output, updating or reinstalling graphics and audio drivers, checking the monitor’s audio settings, and testing with a different HDMI cable, you can overcome volume problems and enjoy a seamless audio experience while connected to your monitor.Usb-c And Displayport Audio Issues
When connecting your device to a monitor using USB-C or DisplayPort, it’s not uncommon to encounter volume issues. This can be frustrating, especially when you’re unable to enjoy the full audio experience while using your external display. In this section, we will explore some troubleshooting techniques and provide solutions to help resolve USB-C or DisplayPort audio discrepancies.
Troubleshoot Usb-c Or Displayport Connection Discrepancies
If you’re experiencing volume problems while connected to a monitor via USB-C or DisplayPort, it’s essential to check for connection discrepancies. Here are some steps you can take:
- Ensure that the USB-C or DisplayPort cable is securely plugged into both the device and the monitor.
- Verify that the cable is not damaged or faulty. Replace the cable if necessary.
- Try connecting the device to a different USB-C or DisplayPort port on the monitor.
- Restart both your device and the monitor to refresh the connection.
- Check if there are any firmware updates available for your device, as these updates can often address audio-related issues.
Check If The Output Device Is Configured Correctly
Another reason for volume not working when connected to a monitor via USB-C or DisplayPort is incorrect configuration of the output device. Follow these steps to ensure that the output device is set up properly:
- Right-click on the sound icon located in the system tray of your computer.
- Select the “Sounds” or “Playback Devices” option from the context menu.
- In the Sound window that opens, navigate to the “Playback” tab.
- Select the audio device that corresponds to your external display.
- Click on “Set Default” to make the selected audio device the default output device.
Adjust Audio Settings Specific To Usb-c Or Displayport In The System
If you’ve followed the previous steps and are still experiencing volume issues, it’s worth adjusting the audio settings specific to USB-C or DisplayPort in your system. Here’s how:
- Go to the system preferences on your device (e.g., Control Panel on Windows or Apple menu on macOS).
- Locate the sound settings or sound preferences.
- Select the audio output tab.
- Check if the built-in speakers or the appropriate audio device for your monitor is selected as the output.
- Make any necessary adjustments to the volume levels or audio configurations.
By troubleshooting USB-C or DisplayPort connection discrepancies, ensuring correct output device configuration, and adjusting audio settings specific to USB-C or DisplayPort, you should be able to resolve volume issues when connected to a monitor. Try these solutions and enjoy a seamless audio experience on your external display!
Software And System Configurations
If you’re experiencing volume issues when connected to a monitor, it’s important to check your software and system configurations. Sometimes, irregularities in your playback device settings or the operating system can cause audio problems. By inspecting these settings and taking a few troubleshooting steps, you may be able to resolve the issue and restore sound to your monitor.
Inspect Playback Devices Settings For Any Irregularities
One of the first steps in troubleshooting audio issues when connected to a monitor is to inspect the playback device settings. Follow these steps to check for any irregularities:
- Locate the Speaker icon on the system tray of your computer.
- Right-click on the speaker icon.
- Select the “Sounds” or “Playback Devices” option.
- A new window, called the Sound window, will open.
- Within the Sound window, navigate to the “Playback” tab.
- Ensure that the correct audio output device is selected.
- If necessary, set the correct device as the default playback device.
- Make sure that the volume is not muted or set too low.
By inspecting and adjusting these playback device settings, you may be able to fix the volume issues when connected to your monitor.
Look Into The Audio Troubleshooter In The Operating System
Many operating systems have audio troubleshooters built-in that can help identify and resolve audio problems. Follow these steps to use the audio troubleshooter:
- Open the Control Panel in your operating system.
- Navigate to the “Sound” or “Audio” settings.
- Look for a troubleshooting option or a troubleshooter specifically related to audio.
- Run the audio troubleshooter and follow the on-screen instructions.
- The troubleshooter will attempt to identify and fix any issues with your audio settings.
Running the audio troubleshooter can help you pinpoint the exact cause of the volume problem when connected to your monitor and provide potential solutions.
Check For And Apply Any Pending Os Updates
Keeping your operating system up to date is crucial for maintaining proper functionality, including audio output. Follow these steps to check for and apply any pending OS updates:
- Click on the Start menu or the system tray located in the bottom right corner of your screen.
- Open the settings menu or the control panel.
- Look for an option related to system updates or software updates.
- Click on the option to check for updates.
- If there are any pending updates, click on the “Install” or “Update” button.
- Wait for the updates to download and install.
- Restart your computer if prompted.
By checking for and applying any pending OS updates, you ensure that your system has the latest audio drivers and software compatibility, which can help resolve volume issues when connected to your monitor.
Tips And Tricks For Preventing Audio Problems
The HDMI audio playback in the sound settings and set your desired audio source as the default input. This will prevent audio problems and ensure that the volume works when connected to the monitor.
Proactive Methods To Maintain Sound Function When Connecting Monitors
When connecting your computer to a monitor, it can be frustrating to encounter audio problems. Fortunately, there are proactive steps you can take to maintain sound functionality and prevent such issues. By following these tips and tricks, you can ensure a seamless audio experience when using an external monitor.
The Importance Of Keeping Cables Organized And Undamaged
One of the main culprits behind audio problems when connecting monitors is damaged or improperly connected cables. To prevent this, it is crucial to keep your cables organized and undamaged. Make sure to inspect your cables regularly for any signs of wear or fraying. If you notice any damage, replace the cable immediately to maintain optimal sound quality.
Recommendations For Routinely Updating Drivers And Software
An outdated driver or software can also cause audio problems when connecting a monitor. To avoid this, it is essential to routinely update your drivers and software. Check for any available updates from the manufacturer’s website or through your computer’s settings. By keeping your drivers and software up to date, you can ensure that your audio functions properly and avoid any compatibility issues.
Frequently Asked Questions On Volume Not Working When Connected To Monitor
Why Is There No Sound When I Use A Monitor?
When using a monitor, the lack of sound may be due to incorrect settings or faulty connections. To fix this issue, try the following steps: 1. Check the cable connection and ensure it is functioning properly. 2. Make sure the monitor has power.
3. Right-click on the speaker icon in the system tray and check the sound settings. 4. Update or reinstall the sound card drivers. 5. Adjust the audio output settings on your source device. By following these steps, you should be able to resolve the no sound issue when using a monitor.
How Do I Get Sound When Connected To My Monitor?
To get sound when connected to your monitor, follow these steps: 1. Locate the Speaker icon in the system tray. 2. Right-click on the speaker icon and select “Playback Devices” or “Sounds”. 3. Check if the external monitor is selected as the default audio device.
4. If not, select the monitor and set it as the default device. 5. Test the sound to ensure it is working properly. Remember to check the cable connection and ensure it has power. If the issue persists, update or reinstall the sound card drivers.
Why Is There No Sound After Connecting Hdmi Cable To Monitor?
After connecting an HDMI cable to a monitor, the lack of sound can be due to the audio output settings. Ensure that the source device’s audio settings are compatible with the monitor and check if the speakers are enabled. Additionally, make sure the HDMI cable is functioning properly.
If the issue persists, updating or reinstalling the sound card drivers may restore sound.
Why Does My Audio Cut Out When I Connect A Monitor?
When you connect a monitor, the audio may cut out because the monitor automatically takes the HDMI sound as the default input. Try disabling and enabling the speakers to see if it helps. Make sure your cable is functioning properly and has power.
Also, check the audio output settings on your source device.
Conclusion
Experiencing volume issues when connecting your monitor can be quite frustrating. However, there are several troubleshooting steps you can take to resolve this problem. First, check your cables and ensure they are functioning properly. Second, make sure your monitor has power.
Additionally, you can try updating or reinstalling your sound card drivers, as outdated or corrupted drivers can cause audio problems. Lastly, check the audio output settings on both your source device and monitor to ensure they are properly configured. By following these steps, you should be able to get your volume working seamlessly when connected to your monitor.