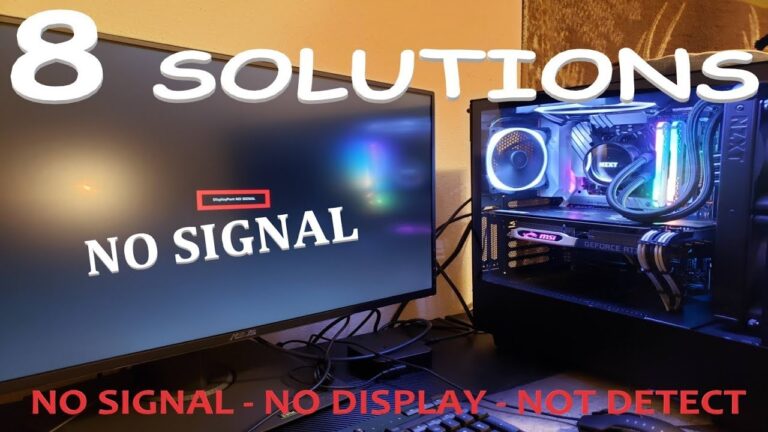
Ubuntu Second Monitor Not Detected After Restart: Troubleshooting Guide
To fix the issue of Ubuntu not detecting a second monitor after a restart, navigate to the System Settings pane and click on the Displays pane. If both displays are not showing up, check the cables to ensure they are securely connected and not damaged.
Additionally, try updating the graphics card drivers or uninstalling and reinstalling them. It is also worth verifying the problem by checking the list of monitors and trying a different cable if necessary. If these steps do not resolve the issue, there may be a hardware failure with either the cable or the monitor itself.

Credit: plugable.com
Initial Checks For Monitor Detection
When using Ubuntu, it can be frustrating to encounter issues with your second monitor not being detected after a restart. However, before diving into complex troubleshooting steps, it’s essential to perform some initial checks to ensure that the problem is not easily solvable. In this section, we will go through a series of steps to verify physical connections, inspect cable integrity, and confirm power to your second monitor.
Verify Physical Connections
The first step is to ensure that all physical connections between your computer and the second monitor are properly plugged in. This includes checking the cables connecting your second monitor to your computer, such as HDMI, DVI, or DisplayPort cables. Verify that they are securely plugged in on both ends, eliminating any loose connections that may prevent the monitor from being detected.
Inspect Cable Integrity
Next, it’s important to inspect the integrity of the cables themselves. Check for any visible signs of damage or wear, such as frayed or bent connectors. Damaged cables can lead to intermittent or no signal transmission, causing the second monitor not to be detected. If you find any issues with the cables, consider replacing them with new ones to ensure a reliable connection.
Confirm Power To Second Monitor
An often overlooked aspect of troubleshooting monitor detection is confirming power to the second monitor. Ensure that the monitor is powered on and receiving power by checking if the power indicator is illuminated. If the monitor is not receiving power, it will not be detected by your computer. Double-check the power cable connection and try plugging the monitor into a different power outlet to rule out any power-related issues.
By performing these initial checks for monitor detection, you can identify any potential issues with physical connections, cable integrity, or power supply. Once these basic troubleshooting steps are completed, if the second monitor is still not being detected, we can explore further solutions to resolve the problem.
Understanding Ubuntu Display Settings
If you’re experiencing the issue of Ubuntu not detecting your second monitor after a restart, try checking the cables for secure connections and potential damage. You can also update your graphics card drivers or manually update them using Device Manager.
Explore The Ubuntu Display Configuration
When it comes to setting up a second monitor on Ubuntu, it can be frustrating if the display is not detected after a restart. Understanding Ubuntu display settings and knowing how to assess and manage them is crucial for resolving this issue. In this section, we will explore the Ubuntu display configuration and discover how to use the xrandr command for display management.
Use Of Xrandr Command For Display Management
The xrandr command is a powerful tool for managing displays in Ubuntu. It allows you to control various display settings, including the resolution, position, and orientation of each monitor. By utilizing the xrandr command, you can manually configure your displays and ensure that both screens are recognized after a restart.
To use the xrandr command, open a terminal and type the following command:
xrandrThis command will display a list of connected displays along with their available resolutions. You can then use additional xrandr command options to configure your displays according to your preferences.
Assessing Settings Post-restart
After a restart, it is essential to assess the display settings in Ubuntu to ensure that the second monitor is detected. Here are a few steps you can follow:
- Check the physical connections: Make sure that the cables connecting your second monitor to your computer are securely plugged in and not damaged. Sometimes, a loose or faulty cable can cause display detection issues.
- Refresh the connection: Turn off your computer and then turn it back on to refresh the connection between the computer and the monitors.
- Verify display recognition: Open the display settings by navigating to the System Settings pane and clicking on the Displays option. Check if both displays are showing up. If not, proceed to the next step.
- Utilize the xrandr command: Open a terminal and use the xrandr command to manually configure your displays. Refer to the previous section on the use of xrandr command for guidance.
- Update display drivers: If the display is still not detected, ensure that your graphics card drivers are up to date. You can check for updates and install them using the appropriate software or package manager for your system.
By following these steps and utilizing the xrandr command, you can effectively troubleshoot and resolve issues related to second monitor detection in Ubuntu. Remember to periodically check for updates and ensure that your cables are securely connected to prevent any future display issues.
Driver Verification And Configuration
If you are experiencing the issue of Ubuntu not detecting your second monitor after a restart, there are several steps you can try to resolve it. First, check the cables and ensure they are securely connected. Next, you can update your graphics card drivers or even uninstall and reinstall them.
If these steps don’t work, it may be due to hardware failure and you may need to seek further assistance.
Identifying Your Graphics Card Model
If your second monitor is not being detected after restarting your Ubuntu system, the first step is to identify your graphics card model. Knowing the make and model of your graphics card will help you determine the correct drivers to install or update.
Checking For Proprietary Driver Usage
Once you have identified your graphics card model, the next step is to check if you are using any proprietary drivers. Proprietary drivers are drivers developed by the manufacturer of your graphics card and can sometimes offer better performance and compatibility.
To check for proprietary driver usage, follow these steps:
- Open the Terminal by pressing Ctrl+Alt+T on your keyboard.
- Type the following command:
lshw -c video
This command will display detailed information about your graphics card.
If you see any mention of “proprietary drivers” or “driver=\
If you are not using a proprietary driver, it is recommended to install or update the necessary drivers to ensure proper functioning of your second monitor.
Installing Or Updating Necessary Drivers
Installing or updating the necessary drivers for your graphics card can often resolve issues with second monitor detection after restarting Ubuntu. Here are the steps to install or update drivers:
- Open the Software & Updates application from the Ubuntu System Settings menu.
- Navigate to the Additional Drivers tab.
- Wait for the system to scan for available drivers.
- If any proprietary drivers are available for your graphics card, they will be listed here.
- Select the desired driver and click Apply Changes to install or update the driver.
- Once the driver installation or update is complete, restart your system.
After restarting, check if your second monitor is being detected. If not, you may need to further troubleshoot the issue or seek additional assistance from Ubuntu forums or support channels.
Remember that updating or installing drivers for your graphics card can significantly improve its performance and compatibility, so it’s important to keep them up to date.
Ubuntu Second Monitor Not Detected: Solving
If you’re facing the frustrating issue of Ubuntu not detecting your second monitor after a restart, don’t worry, we’ve got you covered. In this guide, we’ll explore different solutions to help you get your second monitor up and running again.
Command Line Fixes Using Xrandr
If you’re comfortable with command line interfaces, the xrandr utility can be a handy tool to solve the problem.
- Open the terminal by pressing
Ctrl + Alt + Ton your keyboard. - Enter the command
xrandrto view the connected monitors. - If your second monitor is not listed, try running the command
xrandr --autoto enable it. - If the above step doesn’t work, you can try specifying the resolution and position of the second monitor using the
xrandr --outputcommand.
Gui Solutions Via Display Settings
If you prefer a graphical user interface, you can try the following steps using the Display settings:
- Click on the System Settings icon on the top-right corner of the screen.
- From the dropdown menu, select Displays.
- If both displays are not showing up, click the Identify Displays button to let Ubuntu detect them.
- In case Ubuntu still doesn’t recognize your second monitor, you can try adjusting the resolution or position of the displays using the options provided in the Display settings.
Potential Conflicts With Graphical Server Versions
In some cases, conflicts with graphical server versions may cause issues with second monitor detection. To resolve this problem, you can try the following steps:
- Open the terminal by pressing
Ctrl + Alt + Ton your keyboard. - Enter the command
sudo apt-get install lightdmto install the LightDM display manager. - Restart your computer and check if Ubuntu is now able to detect your second monitor.
- If the issue persists, you can try switching to a different graphical server version by installing an alternative display manager like GDM or SDDM.
By following these troubleshooting steps, you should be able to resolve the issue of Ubuntu not detecting your second monitor after a restart. Remember to check your hardware connections and ensure that all cables are securely plugged in.
If you’ve tried these solutions and the problem still persists, it may be a good idea to seek further assistance from the Ubuntu community forums or consult a professional.
Advanced Troubleshooting Techniques
If your Ubuntu system fails to detect a second monitor after restarting, there are several troubleshooting techniques you can try. Firstly, ensure that the cables connecting your second monitor to your computer are securely plugged in and undamaged. Next, check the system settings and navigate to the Display pane to identify and configure the displays.
If the issue persists, you may need to update your graphics card drivers or seek further assistance.
In some cases, Ubuntu may not automatically detect your second monitor after a restart. This can be frustrating, but there are advanced troubleshooting techniques that can help you resolve the issue. By using these techniques, you can identify the root cause of the problem and find a solution to get your second monitor working again.
Editing Monitor Configuration Files
If Ubuntu is not detecting your second monitor after a restart, you can try manually editing the monitor configuration files. These files contain information about the display settings and can sometimes become corrupted or misconfigured.
To edit the monitor configuration files, follow these steps:
- Open a terminal window by pressing
CTRL+ALT+T. - Enter the following command to open the monitor configuration file in a text editor:
sudo nano /etc/X11/xorg.conf - Find the section that corresponds to your second monitor and make sure the settings are correct. You may need to consult your monitor’s specifications or the manufacturer’s website for the correct values.
- Save the changes by pressing
CTRL+O, then exit the text editor by pressingCTRL+X. - Restart your computer for the changes to take effect.
Using Logs To Identify Issues
If editing the monitor configuration files did not solve the issue, you can use the system logs to identify any errors or issues related to the second monitor detection. The system logs provide detailed information about the computer’s activities, including hardware detection and configuration.
To access the system logs and identify the issues, follow these steps:
- Open a terminal window by pressing
CTRL+ALT+T. - Enter the following command to view the system logs:
tail -f /var/log/syslog - Look for any error messages or warnings related to the second monitor detection. These messages can provide valuable insights into the root cause of the issue.
- If you find any errors or warnings, you can search online for possible solutions or seek help from Ubuntu forums and communities.
Employing Ubuntu Forums & Communities For Support
If you are unable to resolve the issue on your own, it can be helpful to seek support from the Ubuntu forums and communities. These forums are filled with knowledgeable users and experts who can offer guidance and solutions to various Ubuntu-related problems.
To seek support from the Ubuntu forums and communities, follow these steps:
- Visit the Ubuntu forums or community websites.
- Create an account if you don’t already have one.
- Search for posts or threads related to the issue you are facing. There might already be existing discussions that can provide a solution.
- If you don’t find any relevant posts, create a new thread explaining the problem in detail. Be sure to include any error messages, system specifications, and steps you have already taken to troubleshoot the issue.
- Monitor the thread for responses from other users. Engage in the discussions and provide any additional information or clarifications as requested.
By employing these advanced troubleshooting techniques and seeking support from the Ubuntu forums and communities, you can increase your chances of resolving the issue of Ubuntu not detecting the second monitor after a restart. Remember to document the steps you have taken and any solutions you find, as they can be useful for future reference or for helping others who might face similar issues.
Frequently Asked Questions On Ubuntu Second Monitor Not Detected After Restart
Why Is My Computer Not Detecting A Second Monitor After Restarting?
If your computer is not detecting a second monitor after restarting, try the following steps: 1. Check the cables: Ensure that the cables connecting your second monitor to your computer are securely plugged in and not damaged. 2. Refresh the connection: Turn off the computer and then turn it back on to refresh the connection between the computer and the monitor.
3. Choose correct input port: Open the built-in controls of your monitor and make sure you have selected the correct input port. 4. Update graphics card drivers: Update the drivers for your graphics card to ensure compatibility with the second monitor.
5. Check for hardware failure: If none of the above steps work, there might be a hardware issue with the cable or the monitor itself. Try using a different cable or connecting the monitor to another computer to identify the problem.
Why Ubuntu Does Not Detect Second Monitor?
Ubuntu may not detect a second monitor due to hardware failure, faulty cables, or outdated display drivers. To troubleshoot, check that the cables are securely connected and not damaged. Update the NVIDIA graphics card drivers or reinstall them. Alternatively, try different cables or obtain the correct driver for the video card.
Restart the computer with the second monitor plugged in and turned on.
Why Did My Second Monitor Stop Being Detected?
If your second monitor is not being detected, there could be a hardware failure, such as a faulty cable or monitor. First, check the cables and ensure they are securely connected. If that doesn’t work, update your NVIDIA graphics card drivers or try a different cable.
If the issue persists, manually update your graphics card using Device Manager. Restarting the computer and checking the monitor’s input port can also help.
Why Is My 2nd Monitor Not Displaying?
If your second monitor is not displaying, there are a few possible reasons. First, check the cables connecting your monitor to your computer to ensure they are securely plugged in and not damaged. Secondly, try restarting your computer to refresh the connection.
If those steps don’t work, you may need to update your graphics card drivers or check for any software issues.
Conclusion
To troubleshoot the issue of Ubuntu not detecting the second monitor after a restart, there are a few steps you can take. Firstly, ensure that the cables connecting your second monitor are securely plugged in and not damaged. Check the list of monitors and update your NVIDIA graphics card drivers.
If the problem persists, it could be due to a software or physical connection issue. Make sure the second monitor is plugged in and turned on, then restart your computer. By following these steps, you can resolve the issue of Ubuntu not detecting a second monitor and enjoy a seamless display experience.