Thinkvision Monitor Not Detected: Troubleshooting Tips for Display Issues
If your ThinkVision monitor is not being detected, check if the cables are securely connected and try using an alternative monitor or cable. You can also troubleshoot the issue by manually force detecting the monitor in Windows settings.

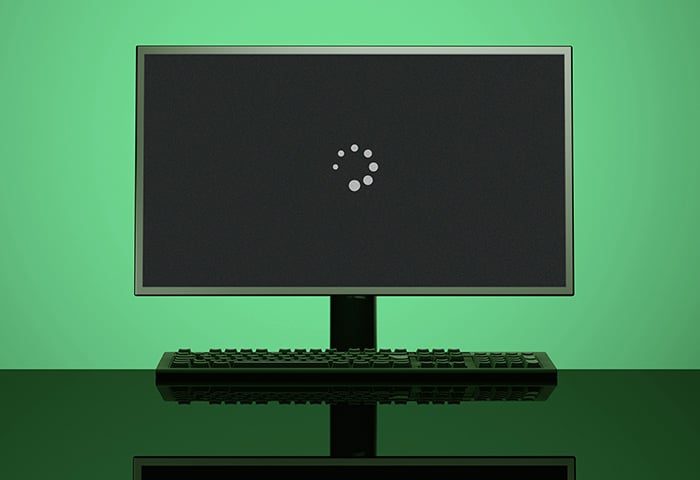
Credit: www.pcmag.com
Identifying Common Display Problems
If you are facing the issue of your ThinkVision monitor not being detected, you can troubleshoot it by checking the cables, making sure they are securely attached, and trying a different monitor or cable if available. You can also try manually force detecting the monitor on your Lenovo laptop.
Visit Lenovo Support for more detailed instructions.
Brief On The Importance Of Monitor Detection
Ensuring that your Thinkvision monitor is properly detected is essential for a smooth and productive computing experience. Proper monitor detection allows for accurate display settings, optimal resolution, and overall visual clarity. Whether you’re using your monitor for work, gaming, or entertainment, it’s important to identify and resolve any display problems to avoid interruptions and frustrations. In this section, we will discuss the symptoms of a Thinkvision monitor not being detected and provide solutions to troubleshoot common display issues.
Symptoms Of Thinkvision Monitor Not Being Detected
If your Thinkvision monitor is not being detected by your device, you may experience the following symptoms:
- No display or black screen
- Blank or flickering monitor
- Incorrect or limited resolution options
- No recognition of external monitor
These symptoms can be caused by various factors such as faulty cables, incompatible drivers, or incorrect display settings. It’s important to address these issues promptly to ensure optimal performance of your Thinkvision monitor.
Initial Checks For Troubleshooting
If you’re facing issues with your Thinkvision monitor not being detected, there are a few initial checks you can perform. Make sure all cables are securely connected and not loose. Consider trying a different monitor or cable if available, and ensure the monitor is connected to the correct port on your PC.
If you are experiencing issues with your ThinkVision monitor not being detected by your computer, there are a few initial checks you can perform to troubleshoot the problem. These checks will help you identify any potential issues and ensure that everything is set up correctly.
Ensuring Cable Integrity
One of the first things you should do is check the integrity of the cables connecting your ThinkVision monitor to your computer. Loose or faulty cables can often cause display issues. Here are the steps you can follow:
- Ensure that the power cable is securely attached to both the monitor and the power outlet. Sometimes, a loose connection can prevent the monitor from being detected.
- Inspect the video cable (HDMI, DisplayPort, or VGA) for any signs of damage, such as bent or broken pins. If you notice any issues, consider trying a different cable.
- If possible, connect the monitor to a different computer using the same cable to check if the issue persists. This will help determine whether the problem lies with the monitor or the computer.
Verifying Power Supply And Connections
Next, you need to ensure that the power supply and connections are functioning properly. Follow these steps:
- Check if your monitor is receiving power by ensuring that the power indicator light is illuminated. If not, double-check the power cable connection and try a different power outlet.
- If your monitor has multiple power-saving modes, make sure it is not in sleep or standby mode. Pressing the power button or moving the mouse should wake it up.
- Ensure that the monitor is properly connected to your computer’s graphics card using the appropriate cable and port. If you are using a dedicated graphics card, make sure the cable is connected to the corresponding port on the card and not the motherboard.
Updating Graphics Drivers
Outdated graphics drivers can often cause compatibility issues with your ThinkVision monitor. To ensure that your drivers are up to date, follow these steps:
- Identify the brand and model of your graphics card. You can usually find this information in the Device Manager or by visiting the manufacturer’s website.
- Visit the manufacturer’s website and navigate to the support or downloads section. Look for the latest graphics driver for your specific card model and download it.
- Run the downloaded driver installer and follow the on-screen instructions to update your graphics drivers.
- Once the driver update is complete, restart your computer and check if the monitor is now being detected.
By performing these initial checks, you can eliminate common issues and potentially resolve the problem of your ThinkVision monitor not being detected. If the problem persists after these troubleshooting steps, it may be necessary to seek further assistance from technical support or a professional.
Advanced Troubleshooting Steps
When faced with the issue of your Thinkvision Monitor not being detected, it can be frustrating and hinder your productivity. Luckily, there are advanced troubleshooting steps you can take to resolve this problem. In this section, we will explore three effective methods:
Configuring Display Settings In The Operating System
If your Thinkvision Monitor is not being detected, one possible solution is to check the display settings in your operating system. Follow these steps:
- Right-click on your desktop and select “Display Settings.”
- Ensure that the correct monitor is selected as the primary display. If not, click on the drop-down menu under “Multiple Displays” and choose the Thinkvision Monitor.
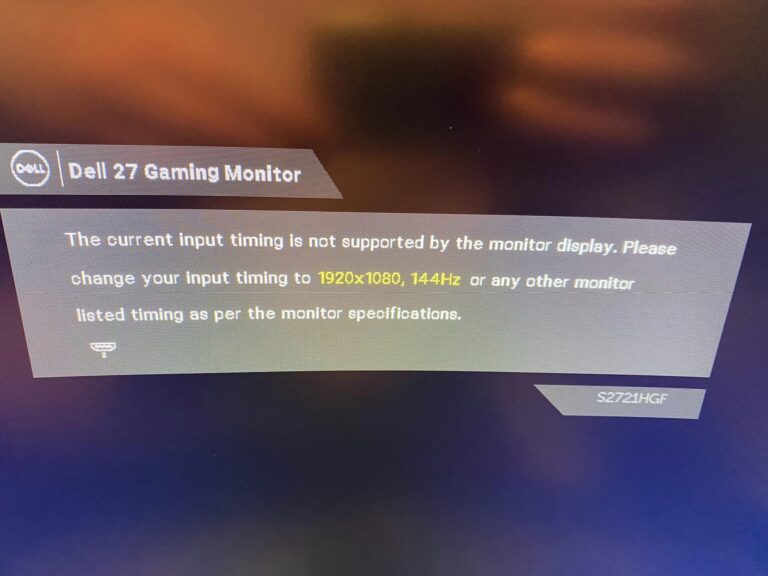
- Check the screen resolution settings and make sure they are compatible with your monitor’s native resolution.
- If necessary, click on the “Detect” button to force the system to recognize the monitor.
Resetting And Diagnosing Thinkvision Monitor Hardware
If configuring the display settings did not resolve the issue, you can try resetting and diagnosing the Thinkvision monitor hardware. Here’s what you can do:
- Turn off the monitor and unplug the power cable from the wall outlet.
- Disconnect all cables from the monitor, including the video cable and power cable.
- Wait for a few minutes, then reconnect all the cables firmly.
- Plug the power cable back into the wall outlet and turn on the monitor.
- If the problem persists, you can diagnose the monitor by connecting it to a different computer or using a different video cable.
Using Alternate Ports For Connectivity Checks
If the previous methods did not solve the issue, you can try using alternate ports for connectivity checks. Here are the steps you can take:
- If you are using HDMI or DisplayPort, try connecting the monitor to a different port on your computer.
- If you have multiple ports available, try connecting the monitor to each of them to see if it gets detected.
- If your Thinkvision Monitor has multiple connectivity options, such as VGA or DVI, try using those as well.
- Ensure that the cables are securely connected to both the monitor and the computer.
By following these advanced troubleshooting steps, you can increase your chances of resolving the issue of your Thinkvision Monitor not being detected. Remember to double-check all connections and settings before seeking further assistance.
Detailed Display Settings Configuration
Introductory paragraphDetailed Display Settings Configuration is essential when troubleshooting display issues such as the Thinkvision Monitor Not Detected. One of the troubleshooting steps involves manually detecting the monitor through system preferences. Another crucial step is adjusting the resolution and refresh rate. In this article, we will delve into each of these settings to help you resolve the issue.
H3 heading: Manual detection through system preferencesManual Detection Through System Preferences
When your Lenovo laptop fails to detect the connected Thinkvision monitor, forcing a manual detection might help resolve the issue. Follow these steps to manually detect the monitor:
- Navigate to the Windows Start menu and click on “Control Panel”.
- Click on “Appearance and Personalization” and then “Display”.
- Select “Detect” to force the computer to search for connected monitors.
By following these steps, you can prompt the system to detect the Thinkvision monitor and establish a connection.
H3 heading: Adjusting resolution and refresh rateAdjusting Resolution And Refresh Rate
If the manual detection does not resolve the issue, adjusting the resolution and refresh rate settings might help. Here’s how you can do it:
- Go to the Windows Start menu and click on “Control Panel”.
- Select “Appearance and Personalization” and then “Display”.
- Click on “Change display settings” and navigate to the “Resolution” option.
- Adjust the resolution to a lower value and check if the monitor is detected.
If the monitor is still not detected, you can also try adjusting the refresh rate:
- Follow the same steps mentioned above to access the “Display” settings.
- Click on “Advanced display settings” and navigate to the “Display adapter properties” option.
- Go to the “Monitor” tab and select a lower refresh rate from the drop-down menu.
After making these adjustments, click on “Apply” and check if the Thinkvision monitor is now detected by the system.
Optional: Add a note or additional informationNote: It is important to ensure that you are using the correct cables and connectors to establish a proper connection between the monitor and your PC. Using incompatible cables or adapters can lead to detection issues.
Seeking Professional Help And Support
If you’re experiencing issues with your Thinkvision monitor not being detected, seek professional help and support. Troubleshooting steps can include checking cables, trying different monitors or cables, and connecting the monitor to a different PC if available. Consider reaching out to Lenovo support or consulting online resources for further assistance.
When To Contact Lenovo Support
If you have tried troubleshooting and your ThinkVision monitor is still not being detected by your Lenovo laptop, it may be time to seek professional help and support. Lenovo has a dedicated support team that can assist you in resolving the issue. There are a few instances when it is appropriate to contact Lenovo support: 1. Persistent Detection Issues: If your monitor is consistently not being detected, even after trying different cables or connecting it to another PC, it is best to reach out to Lenovo support. They can help you troubleshoot the problem and provide further guidance on resolving the issue. 2. Warranty Coverage: If your ThinkVision monitor is still under warranty, it is highly recommended to contact Lenovo support. They can assess the problem and if necessary, arrange for a repair or replacement under warranty. It is important to note that tampering with the monitor or attempting self-repair may void the warranty.Warranty Considerations For Servicing
When contacting Lenovo support for assistance with your ThinkVision monitor, it is important to consider warranty coverage. Here are a few key points to keep in mind: 1. Warranty Period: Check the warranty period of your monitor. Lenovo typically offers a standard warranty that covers manufacturing defects for a specific period of time. If your monitor is still within the warranty period, you may be eligible for free repairs or a replacement. 2. Proof of Purchase: Ensure that you have a valid proof of purchase, such as a receipt or invoice, when contacting Lenovo support. This will help validate your warranty claim and expedite the service process. 3. Service Centers: Lenovo has authorized service centers where you can take your ThinkVision monitor for repairs. These service centers are equipped with trained technicians who can diagnose and fix the issue according to Lenovo’s standards. 4. Out of Warranty: If your monitor is no longer covered under warranty, Lenovo support can still assist you. They can provide you with repair options, cost estimates, or recommendations for replacement parts. Remember, when seeking professional help and support from Lenovo, it is important to provide them with all relevant information about your ThinkVision monitor and the issue you are facing. This will enable them to provide you with the most accurate and efficient assistance, helping you get your monitor up and running again.Mitigating Future Detection Failures
Experiencing issues with your ThinkVision monitor not being detected can be frustrating and disruptive to your work. However, with some regular maintenance and following best practices, you can mitigate future detection failures. Here are some tips to help you:
Regular Maintenance Tips For Monitors
- Clean your monitor regularly: Dust and smudges can accumulate on the screen, affecting the visibility and potentially leading to detection issues. Use a microfiber cloth to gently wipe the screen and remove any dirt or smudges.
- Check the cables: Loose or damaged cables can be a common cause of detection failures. Ensure that the power cable is firmly attached to the monitor and that all other cables are securely connected. Consider trying a different cable if you suspect a faulty connection.
- Update your drivers: Keeping your monitor drivers up to date can help prevent detection issues. Visit the official Lenovo website or use the device manager to check for driver updates regularly.
- Perform regular power cycles: Power cycling your monitor and computer can help refresh the system and resolve any temporary glitches. Turn off both the monitor and the computer, unplug them from the power source, wait for a few minutes, and then plug them back in and power them on.
Best Practices For Preventing Hardware Conflicts
Hardware conflicts can also contribute to detection failures. Here are some best practices to prevent such conflicts:
- Ensure compatibility: When connecting your ThinkVision monitor to a different device, ensure that it is compatible with the device’s hardware and operating system.
- Use high-quality cables: Using high-quality cables that are designed for your specific monitor and device can minimize the chances of hardware conflicts. Avoid using old or damaged cables that may cause signal interference.
- Check your graphics settings: Incorrect graphics settings can sometimes lead to detection issues. Ensure that the display settings on your computer are configured correctly to match the monitor’s specifications.
- Update your system: Keeping your computer’s operating system and firmware up to date can help prevent compatibility issues and ensure smooth communication between your ThinkVision monitor and the device.
By following these regular maintenance tips and best practices, you can minimize the chances of experiencing future detection failures with your ThinkVision monitor. Remember to stay proactive and address any issues promptly to maintain optimal performance.
Frequently Asked Questions On Thinkvision Monitor Not Detected
Why Is My Lenovo Not Detecting My Monitor?
If your Lenovo is not detecting your monitor, try these steps: 1. Check the cables for loose connections. 2. Make sure the power cable is securely attached to the monitor. 3. Consider trying a different monitor or cable. 4. Connect the monitor to a different PC, if available.
5. Troubleshoot display or monitor issues using Lenovo support resources.
Why Are My Monitors Not Being Detected?
Ensure cables are secure and plugged in correctly. Try different cables or monitors as a troubleshooting step. Connect the monitor to another PC if available. Check that the monitor is connected to the appropriate ports on your PC.
How Do I Factory Reset My Lenovo Thinkvision Monitor?
To factory reset your Lenovo ThinkVision monitor, follow these steps: 1. Turn off the monitor. 2. Press and hold the Menu button on the monitor. 3. While holding the Menu button, turn on the monitor. 4. Keep holding the Menu button until the OSD (On-Screen Display) menu appears.
5. Release the Menu button and use the arrow keys to navigate to the “Factory Reset” option. 6. Press the Menu button to select the option and confirm the factory reset. 7. The monitor will reset to its default settings.
Note: Performing a factory reset will erase all customized settings on the monitor.
How Do I Fix My Lenovo Thinkvision Monitor?
To fix your Lenovo ThinkVision monitor, follow these steps: 1. Check that all cables are securely connected. 2. Try using a different monitor or cable. 3. Force detect the monitor manually in Windows settings. 4. Ensure the monitor is not connected to the USB-C port, as it may cause flickering.
5. Make sure you are using the correct cables and connections. 6. Consider connecting the monitor to a different PC for troubleshooting. For more detailed troubleshooting, visit Lenovo Support or watch their helpful YouTube videos.
Conclusion
If your Thinkvision monitor is not being detected, there are several troubleshooting steps you can take to resolve the issue. First, check that all cables are securely connected. If possible, try using a different monitor or cable to isolate the problem.
You can also force detect the monitor manually in Windows settings. If you’re experiencing issues with a USB-C connection, there may be specific fixes available. Remember to check the appropriate ports and connections on your PC. By following these steps, you can address the problem and get your Thinkvision monitor working again.