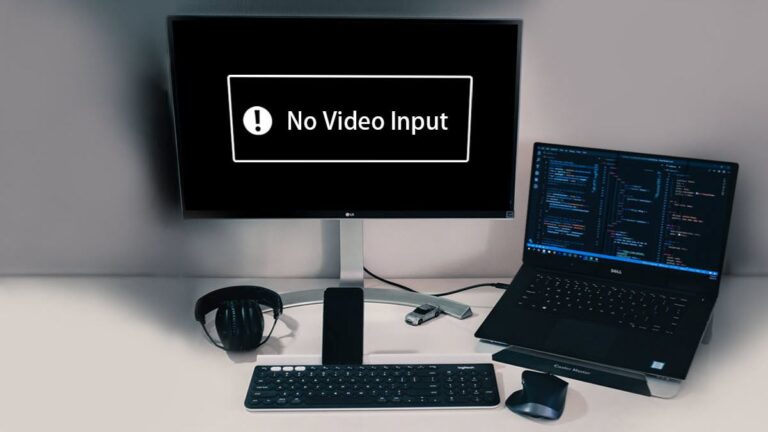
Second Monitor Not Detected Windows 11: Troubleshoot and Fix easily
If your second monitor is not being detected on Windows 11, try these troubleshooting steps: 1) Ensure that the monitor is properly plugged into a power source. 2) Check if the display is turned on.
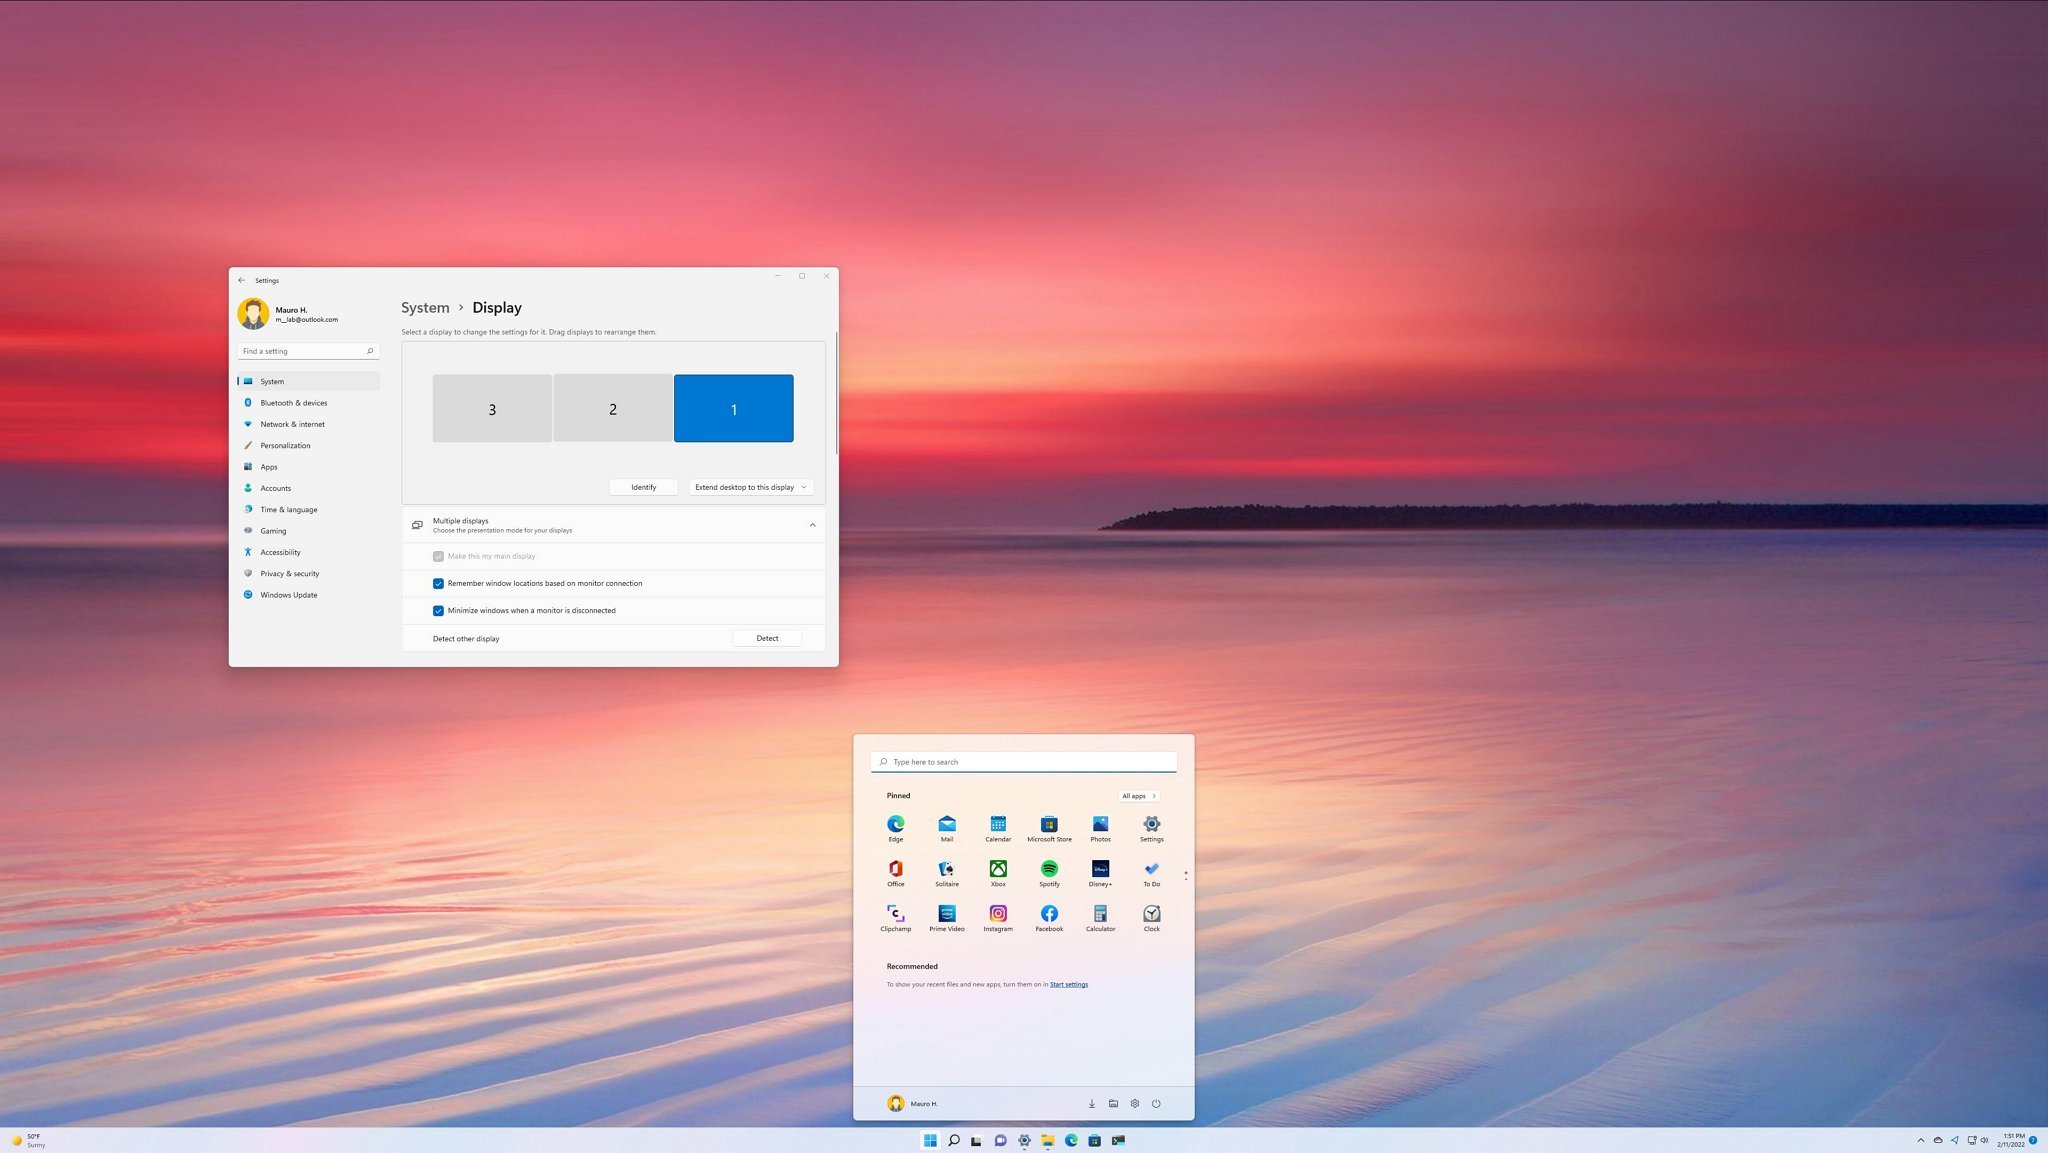
3) Power off your computer and restart it. If the issue persists, go to Start > Settings > System > Display on your PC and select Multiple displays, then Detect to see if your monitors appear. Setting up dual monitors can be done using the instructions provided by Microsoft Support.
Second Monitor Troubles In Windows 11
Having trouble with your second monitor not being detected in Windows 11? Don’t worry, we’ve got you covered. Follow these troubleshooting steps: check if the monitor is plugged in and turned on, power off and restart your computer, and go to Settings > System > Display to detect the monitors.
Set up dual monitors easily with our step-by-step guide.
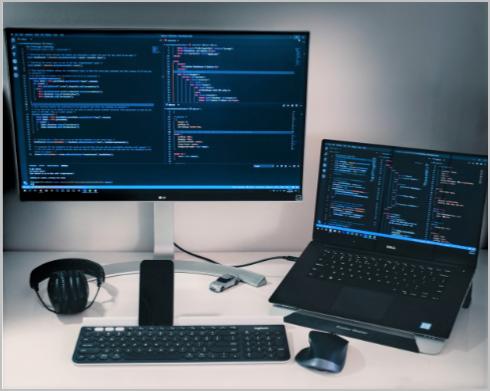
Importance Of Dual Monitors For Productivity
Having dual monitors can significantly enhance productivity in various tasks, whether you’re a professional, a student, or simply someone who multitasks frequently. The ability to extend your desktop across multiple screens provides you with more screen real estate and allows for better organization and multitasking. With dual monitors, you can have different applications and documents open on each screen, making it easier to reference information, compare data, and work efficiently.
Typical Scenarios When A Second Monitor Is Not Detected
If you’re using Windows 11 and experiencing difficulties with your second monitor not being detected, several common scenarios may be causing the issue. By understanding these scenarios, you can troubleshoot and resolve the problem effectively:
- Connection Issues: Check whether your second monitor is properly connected to your computer. Ensure that the cables are securely plugged in, and try disconnecting and reconnecting them to rule out any loose connections.
- Display Port or HDMI Issues: Some users may encounter problems when using specific display ports or HDMI cables. Try using different ports or cables to see if the issue is resolved.
- Incompatible Graphics Drivers: Outdated or incompatible graphics drivers can also lead to issues with detecting a second monitor. Ensure that your graphics drivers are up to date by visiting the manufacturer’s website or using a reputable driver update tool.
- Power and Display Settings: Make sure that both your computer and the second monitor are powered on. Additionally, verify that the display settings in Windows 11 are configured correctly. Go to the Settings menu, select Display, and check whether the second monitor is set up and detected. If not, you can try the “Detect” option under “Multiple displays” to prompt Windows to search for connected monitors.
By troubleshooting these typical scenarios, you can increase the chances of resolving the issue of your second monitor not being detected in Windows 11. Remember to exhaust all possible solutions and contact technical support if needed.
Initial Checks For Connection Issues
Having a second monitor can greatly enhance your productivity and provide a better multitasking experience. However, if your second monitor is not being detected in Windows 11, it can be quite frustrating. Before jumping to more complex troubleshooting steps, it’s important to perform some initial checks to ensure that the connection issues are properly addressed.
Ensuring Proper Cable Connections Between Monitors
The first thing you need to check is the cable connections between your computer and the second monitor. Often, loose or incorrectly connected cables can prevent the monitor from being detected. Make sure that the cables are securely plugged into their respective ports on both your computer and the second monitor. Additionally, check for any visible damage or bent pins on the cables that could disrupt the connection.
Verifying Power Supply To The Second Monitor
Another potential issue could be the power supply to the second monitor. Ensure that the monitor is properly plugged into a power source and turned on. Sometimes, a faulty power outlet or a loose power cable can cause the monitor to not power up or be detected by your computer.
Checking Monitor Display Settings In Windows 11
If the cable connections and power supply are all confirmed to be in order, the next step is to check the display settings in Windows 11. Here’s how:
- Select the Start button in the Windows taskbar, then open Settings.
- Under the System category, select Display.
- Your PC should automatically detect your monitors and show your desktop. If you don’t see the monitors, select Multiple displays, then Detect.
This simple action triggers a scan for any connected monitors and prompts Windows 11 to detect and display them properly. If your second monitor still isn’t detected, there may be further underlying issues that require more advanced troubleshooting methods.
By following these initial checks, you can swiftly address common connection issues and potentially resolve the problem of your second monitor not being detected in Windows 11. Remember, it’s always crucial to ensure the proper cable connections, verify the power supply, and check the display settings before diving into more complex solutions.
Graphics Drivers And Windows 11
If you’re facing the issue of your second monitor not being detected in Windows 11, there are a few troubleshooting steps you can try. Make sure the monitor is plugged in and turned on, power off your computer and restart it, and check the display settings in the Windows 11 control panel.
For more detailed instructions, you can refer to Microsoft’s support page on setting up dual monitors in Windows.
Updating Graphics Drivers To Combat Compatibility Issues
One of the common reasons for a second monitor not being detected in Windows 11 is outdated or incompatible graphics drivers. Graphics drivers act as a bridge between your computer’s hardware and the operating system, allowing it to communicate effectively with your second monitor.
To resolve this issue, it is crucial to update your graphics drivers regularly. By keeping your drivers up to date, you ensure compatibility with the latest Windows 11 updates and patches, minimizing potential compatibility issues.
Here’s a step-by-step guide on how to update your graphics drivers:
- Open the Start menu, and click on the Settings icon.
- In the Settings window, select the System option.
- Scroll down and click on the Display tab.
- Under the Display tab, click on Advanced display settings.
- Next, click on the Display adapter properties link.
- In the Properties window, go to the Driver tab.
- Click on the Update Driver button and follow the on-screen instructions to search online for the latest driver update.
- If an update is available, click on Install to begin the installation process.
- Once the installation is complete, restart your computer for the changes to take effect.
Revisiting Driver Installation Process
When updating or reinstalling graphics drivers, it is essential to pay attention to the installation process to ensure a successful outcome. Incorrect installation can lead to further compatibility issues and potential display problems on your Windows 11 system.
Here are some key points to remember when installing your graphics drivers:
- Download the driver from a reliable source, such as the manufacturer’s official website.
- Make sure to choose the correct driver for your specific graphics card model and Windows 11 version.
- Before installing, uninstall any previous versions of the graphics driver to avoid conflicts.
- During the installation process, follow the on-screen instructions carefully.
- Restart your computer after the installation completes.
By revisiting the driver installation process, you can ensure a smooth and successful update for your graphics drivers on Windows 11, eliminating any potential compatibility issues that may cause the second monitor not to be detected.
Windows 11 Settings For Monitor Detection
Are you facing issues with your second monitor not being detected on Windows 11? Don’t worry, we’ve got you covered! In this guide, we’ll explore the Windows 11 settings for monitor detection and provide you with step-by-step instructions to troubleshoot and resolve this issue.
Step-by-step Guide To Adjust Display Settings
Follow these simple steps to adjust your display settings on Windows 11 and ensure that your second monitor is detected:
- Click on the Start menu and open Settings.
- Under the System section, select Display.
- Windows 11 should automatically detect your monitors and show your desktop. However, if you don’t see the monitors, select Multiple displays and then click on Detect.
- If the second monitor is still not detected, try unplugging and plugging it back in to ensure a secure connection.
- Additionally, check if the monitor is plugged into a power source and turned on.
- If you have multiple graphics cards or adapters, make sure the appropriate one is selected for your second monitor.
- Once your second monitor is successfully detected, you can adjust its position, resolution, and other display settings according to your preferences.
‘second Monitor Not Detected Windows 11’: Exploring The ‘detect’ Button
One of the key troubleshooting options available in the Windows 11 display settings is the ‘Detect’ button. This button allows you to manually trigger a search for connected monitors and refresh the display configuration. Here’s how you can make use of it:
- Open the Display settings on Windows 11.
- Click on the Multiple displays option.
- Locate and click on the Detect button.
- This will prompt Windows 11 to search for any connected monitors and attempt to detect the unrecognized second monitor.
- If the second monitor is successfully detected, it will be displayed alongside your primary monitor in the display settings.
- Remember to save your changes once you have successfully detected the second monitor.
Troubleshooting With Advanced Display Settings
If you’re still experiencing issues with your second monitor not being detected on Windows 11, you can try troubleshooting using the advanced display settings. Follow these steps:
- Open the Display settings on Windows 11.
- Scroll down and click on the Advanced display settings option.
- Here, you can adjust properties such as resolution, orientation, and refresh rate for each connected monitor.
- Click on the Monitor tab and ensure that the correct monitor is selected as the primary display.
- Furthermore, you can update or reinstall the graphics driver to ensure compatibility and proper functioning of your second monitor.
Alternative Fixes For Persistent Issues
Having a second monitor can greatly enhance your productivity and multitasking capabilities. However, sometimes Windows 11 may fail to detect your second monitor, causing frustration and hindering your workflow. If you’re facing persistent issues with your second monitor not being detected, don’t worry! There are several alternative fixes you can try to resolve the problem.
Hardware Troubleshooting: Cables And Ports
One common cause of second monitor detection issues is faulty cables or ports. To troubleshoot this, follow these steps:
- Check all the cables connecting your second monitor to your computer. Make sure they are securely plugged in.
- Inspect the cables for any signs of damage, such as frayed wires or bent connectors. If you find any issues, consider replacing the cables.
- Try connecting your second monitor using a different cable or port. This will help determine if the issue is with the cable or the port on your computer.
- If you have an adapter or converter for your display connection, ensure that it is functioning properly by testing it with another device if possible.
By ensuring that your cables and ports are in good condition, you can eliminate any potential hardware issues that may be causing the second monitor detection problem.
Software Solutions: Rolling Back Updates Or Restoring Windows
In some cases, software updates or configuration settings might be the culprit behind the second monitor detection issue. To address this, you can try the following solutions:
- Roll back recent Windows updates: Sometimes, updates can introduce compatibility issues that affect the detection of your second monitor. In such cases, you can roll back the recent updates to see if it resolves the problem. To do this, go to the Windows Update settings and select “View update history.” From there, choose “Uninstall updates” and select the problematic update to remove it.
- Restore Windows to a previous point: If rolling back updates doesn’t solve the issue, you can try restoring your Windows system to a previous restore point. This will revert your computer’s settings to a state when the second monitor was working correctly. To do this, search for “System Restore” in the Windows search bar and follow the on-screen instructions.
These software-based solutions can potentially fix any conflicts or configuration problems that may be preventing Windows 11 from detecting your second monitor.
When To Seek Professional Support For Monitor Detection Issues
If you’ve tried the hardware and software fixes mentioned above and your second monitor is still not being detected by Windows 11, it may be time to seek professional support. Professional technicians have the expertise and tools to diagnose and resolve complex monitor detection problems.
Remember, identifying and resolving these issues requires a deep understanding of computer hardware and software. Professional support can ensure that the root cause of the problem is identified and fixed, saving you time and frustration.
By following these alternative fixes and seeking professional help when necessary, you can overcome persistent second monitor detection issues on Windows 11 and enjoy the benefits of an extended display setup.
Credit: www.windowscentral.com
Frequently Asked Questions On Second Monitor Not Detected Windows 11
Why Is My Second Monitor Not Working On Windows 11?
Make sure the second monitor is plugged in and turned on. Restart your computer and go to Settings > Display to detect the monitor. If you still can’t see it, select Multiple displays > Detect.
Why Is Windows 11 Not Detecting External Monitors?
To troubleshoot Windows 11 not detecting external monitors, ensure the monitor is powered on and connected properly. Restart the computer and go to Settings > System > Display. Select “Detect” under Multiple displays to automatically detect and set up your dual monitors.
Why Is My 2nd Monitor Not Being Detected?
If your second monitor is not being detected, make sure it is plugged into a power source and turned on. Restart your computer and check if it detects the monitor. If not, go to Settings > Display and select Multiple displays > Detect to set up your dual monitors.
How Do I Activate A Second Monitor In Windows 11?
To activate a second monitor in Windows 11, follow these steps: 1. Go to Start and open Settings. 2. Under System, select Display. 3. Your PC should automatically detect your monitors and show your desktop. 4. If you don’t see the monitors, select Multiple displays, then Detect.
5. Set up dual monitors on Windows 11 and enjoy the expanded display.
Conclusion
To resolve the issue of your second monitor not being detected on Windows 11, there are a few troubleshooting steps you can try. First, ensure that the monitor is properly connected and powered on. You can also power off your computer and restart it to see if that helps.
If the problem persists, you can follow the step-by-step instructions provided by Microsoft Support to set up dual monitors. By following these guidelines, you should be able to resolve the issue and enjoy the benefits of a dual monitor setup.