Not Detecting All Monitors: Troubleshooting Tips
Not detecting all monitors can be resolved by updating, reinstalling, or downgrading the graphics driver. You can update the graphics card driver by going to the System settings, clicking on Display, scrolling down to Multiple screens, and clicking Detect.
Additionally, ensure that both monitors are enabled in the Nvidia panel’s resolution settings menu. Check for any damaged or bent pins on the video cable, and securely reconnect it to the monitor and docking station. If the issue persists, it may be due to faulty video cables, incorrect settings on the monitor or in Windows, outdated video drivers, or damaged or loosely connected cables.
Initial Checks On Monitor And Connections
If your computer is not detecting all monitors, there are several steps you can take to troubleshoot the issue. Start by updating or reinstalling the graphics driver, then check the Nvidia panel to ensure both monitors are enabled. Disconnect and reconnect the docking station or video cable, and make sure your display drivers are up to date.
Other potential causes include faulty cables, incorrect monitor settings, or outdated video drivers. By following these steps, you can resolve the issue and get all your monitors detected.
When you’re facing the issue of not detecting all monitors, the first step is to perform initial checks on your monitor and connections. Ensuring that everything is in order can help identify and resolve any potential issues. Here are some crucial initial checks to carry out:
1. Ensure All Monitors Are Powered On
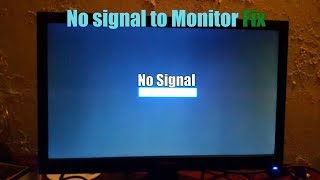
One of the most common reasons for a monitor not being detected is simply because it’s not powered on. It may sound obvious, but it’s essential to check that all monitors connected to your PC are turned on and receiving power. Double-check the power cords and buttons on each monitor to confirm that they are properly switched on.
2. Verify Connections Between Pc And Monitors
Another crucial step is to verify the connections between your PC and the monitors. Check that all cables are securely plugged into the correct ports on both ends. Sometimes, a loose connection can prevent a monitor from being detected. Ensure that each cable is firmly connected, and if necessary, gently reseat the cables to ensure a proper connection.
3. Inspect For Damaged Cables Or Ports
Physical damage to cables or ports can also cause issues with monitor detection. Carefully inspect all cables for any signs of wear, fraying, or bending. Additionally, inspect the ports on both the PC and the monitors for any damage or debris that may be obstructing a proper connection. If any damage is present, consider replacing the cable or seeking professional assistance to repair the port.
4. Cross-check With Alternative Cables If Possible
If you have alternative cables available, it’s worth cross-checking the connections with those cables. Sometimes, a faulty cable can be the culprit behind a monitor not being detected. By using alternative cables, you can rule out any issues with the original cables. Connect the alternative cables securely and see if the monitor detection issue persists. If the issue is resolved, it indicates that the original cables may need replacement.
By performing these initial checks on your monitor and connections, you can identify possible causes for the not detecting all monitors issue. Remember to power on all monitors, verify connections, inspect for damage, and cross-check with alternative cables if possible. These checks can help resolve any minor issues and ensure a seamless multi-monitor experience.
Graphics Card Driver Verification
In order for your computer to detect all monitors correctly, it is essential to ensure that your graphics card driver is up to date and functioning properly. An outdated or corrupt graphics card driver can cause various issues, including Windows not detecting a second or third monitor. Therefore, it is crucial to regularly check the status of your graphics card driver and perform necessary updates or troubleshooting.
H2check Graphics Card Driver Status/h2
The first step in resolving the issue of your computer not detecting all monitors is to verify the status of your graphics card driver. Follow these steps to check the driver status:
- Press the Windows key + R on your keyboard to open the Run dialog box.
- Type “devmgmt.msc” and press Enter to open the Device Manager.
- Expand the “Display adapters” category to view the installed graphics card driver. It should mention the manufacturer and model of the graphics card.
- If there is a yellow exclamation mark next to the driver, it indicates that there is an issue with the driver. In this case, right-click on the driver and select “Update driver” to proceed with updating the driver.
H2update Drivers If Outdated/h2
If your graphics card driver is outdated, it can lead to compatibility issues and prevent your computer from detecting all monitors correctly. Follow these steps to update your graphics card driver:
- Visit the website of your graphics card manufacturer (such as NVIDIA, AMD, or Intel) and navigate to the drivers section.
- Search for the latest driver version compatible with your graphics card model and operating system.
- Download the driver installation file and run it.
- Follow the on-screen prompts to install the updated driver.
- Once the installation is complete, restart your computer.
H2reinstall Or Rollback Drivers If Needed/h2
In some cases, updating the graphics card driver may not resolve the issue of your computer not detecting all monitors. In such scenarios, reinstalling or rolling back the driver might be necessary. Use the following steps to reinstall or rollback the graphics card driver:
- Open the Device Manager by pressing the Windows key + R, typing “devmgmt.msc,” and pressing Enter.
- Expand the “Display adapters” category.
- Right-click on the graphics card driver and select “Uninstall device” to remove the driver from your computer.
- After the driver is uninstalled, restart your computer.
- Once the computer restarts, the default graphics driver will be automatically installed.
- If the issue persists, you can try rolling back to the previous driver version by right-clicking on the graphics card driver in the Device Manager, selecting “Properties,” and navigating to the “Driver” tab. From there, click on “Roll Back Driver” and follow the on-screen instructions.
H2utilize Device Manager For Driver Management/h2
The Device Manager is a built-in Windows tool that allows you to manage and troubleshoot drivers on your computer. Utilizing the Device Manager can help you ensure that your graphics card driver is functioning properly and ensure the detection of all monitors. Here are some additional tips for driver management using the Device Manager:
- To access the Device Manager, press the Windows key + R, type “devmgmt.msc,” and press Enter.
- Use the Device Manager to uninstall, update, or rollback drivers as necessary.
- If you encounter any issues, you can also use the Device Manager to scan for hardware changes, which may help in detecting any missing or faulty drivers.
By following these steps and utilizing the Device Manager, you can effectively troubleshoot and resolve issues related to your graphics card driver and ensure that all monitors are detected correctly on your computer.
System And Software Settings Adjustment
When it comes to setting up multiple monitors, it can be frustrating when your computer fails to detect all of them. Luckily, there are a few adjustments you can make in your system and software settings to resolve this issue. In this article, we will explore three methods to help you troubleshoot and fix the problem: tweaking display settings in Windows or macOS, using the Detect Display feature, and checking for correct input sources on monitors.
Tweaking Display Settings In Windows Or Macos
If you find that your computer is not detecting all of your monitors, one possible solution is to adjust the display settings in your operating system. Here’s how you can do it:
- In Windows, simply press the Windows key + i to open the Settings menu. Then, click on “System” and select “Display”.
- Scroll down and look for the “Multiple screens” section. Here, you can click on the “Detect” button to prompt your computer to search for connected monitors.
- In macOS, navigate to the Apple menu and click on “System Preferences”. Then, click on “Displays”.
- In the Displays settings, make sure to click on the “Detect Displays” button to let your Mac search for connected monitors.
Using Detect Display Feature
If tweaking the display settings doesn’t solve the issue, you can try utilizing the “Detect Display” feature. This feature instructs your computer to actively search for any connected monitors. Here’s how you can use it:
- In Windows, open the Settings menu by pressing the Windows key + i. Then, click on “System” and select “Display”.
- Under the “Multiple displays” section, click the “Detect” button to initiate the detection process.
- In macOS, navigate to the Apple menu and click on “System Preferences”. Then, select “Displays”.
- In the Displays settings, click on the “Detect Displays” button to prompt your Mac to search for connected monitors.
Checking For Correct Input Sources On Monitors
In some cases, your computer may fail to detect monitors due to incorrect input sources. To ensure that this is not the issue, follow these steps:
- On each monitor, use the buttons or menu options available to select the correct input source. This could be HDMI, DisplayPort, VGA, or any other available input.
- Once you have verified that the correct input sources are selected, reconnect the monitors to your computer.
By making these adjustments to your system and software settings, you can increase the likelihood of your computer detecting all of your monitors. If you continue to experience issues, it may be helpful to update your graphics drivers or seek further technical assistance.
Dealing With Docking Stations And Adapters
Having trouble with your docking station and adapters not detecting all monitors? Try updating or reinstalling the graphics driver, checking the Nvidia panel settings, and ensuring proper cable connections. Troubleshooting hardware and graphics card issues can also help resolve the problem.
Troubleshoot Docking Station Connections
If you are experiencing issues with your docking station not detecting all monitors, it’s important to first troubleshoot the connections. Follow these steps:
- Disconnect and reconnect the docking station to the laptop.
- Inspect the video cable for any physical damages or bent pins, and ensure it is securely connected to both the monitor and docking station.
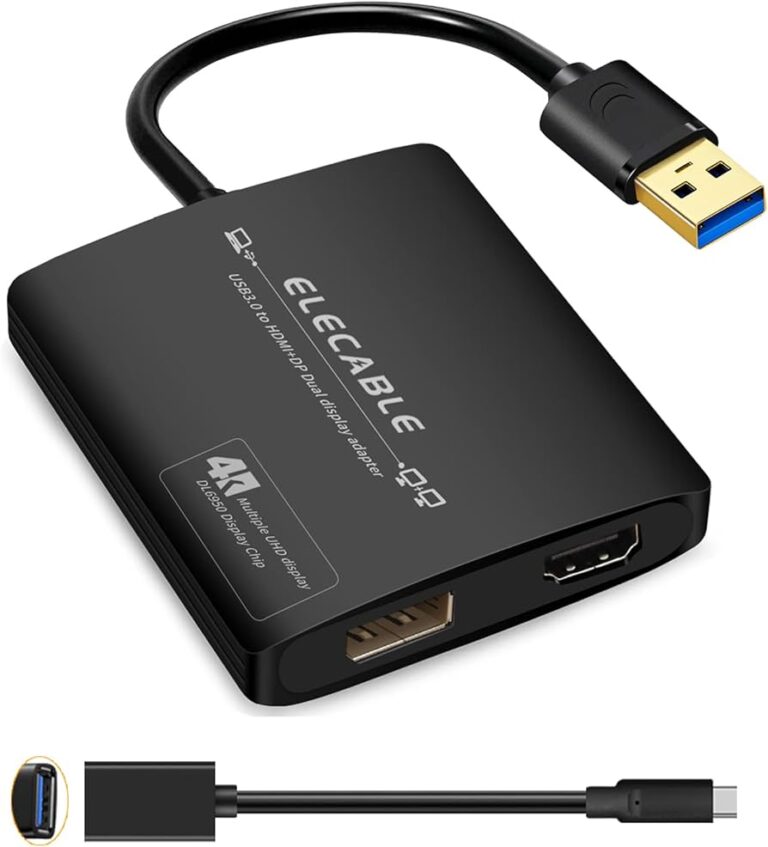
- Check the compatibility of the video cable (HDMI, DisplayPort) with your monitor and docking station to ensure it is properly connected.
Examine Compatibility Of Docking Station
The compatibility of your docking station with your laptop and monitors can also play a role in the detection issues. Here’s what you can do:
- Ensure that your docking station is compatible with your laptop model and operating system.
- Check for any firmware updates for your docking station and install them if available.
- Refer to the manufacturer’s documentation or support website for information on compatibility and troubleshooting specific to your docking station model.
Test Different Docking Station Ports
If you’re still encountering detection problems, it might be worth testing out different ports on the docking station:
- Connect your monitor to different ports available on your docking station and see if it gets detected.
- Check your laptop’s display settings to ensure that the correct display output is selected for the connected monitor.
Look At Potential Issues With Display Adapters
Display adapters can also be the culprit behind monitor detection problems. Here are some steps to consider:
- Update your graphics card driver to the latest version to ensure compatibility and proper functioning.
- Check the device manager for any errors related to display adapters and try reinstalling or updating the drivers.
- If you’re using multiple display adapters, verify that they are enabled and configured correctly in the graphics control panel.
Advanced Troubleshooting Techniques
Having trouble with your computer not detecting all monitors? Update, reinstall, or downgrade the graphics driver to fix the issue. You can also try forcing the detection of displays or checking that everything is properly connected. Troubleshooting steps include disconnecting accessories, checking video cables for damage, and ensuring your graphics card driver is up to date.
Using Windows Display Troubleshooter
If you’re experiencing issues with your monitors not being detected on your Windows computer, one of the first troubleshooting techniques you can try is using the Windows display troubleshooter. This built-in tool can help diagnose and fix common display-related problems.
To use the Windows display troubleshooter, follow these steps:
- Press the Windows key + I to open the Settings menu.
- Click on “System”.
- Scroll down and click on “Display”.
- Under the “Multiple displays” section, click on “Detect”.
This will prompt your computer to search for any connected monitors and attempt to detect them. If there are any issues, the troubleshooter will attempt to resolve them automatically.
Resetting Bios Or Uefi Settings
In some cases, the issue of not detecting all monitors may be related to the BIOS or UEFI settings on your computer. Resetting these settings to their default values can sometimes resolve the problem.
To reset your BIOS or UEFI settings, you can follow the instructions provided by your computer’s manufacturer. Generally, the steps involve restarting your computer and accessing the BIOS or UEFI settings by pressing a specific key (such as F2 or Del) during the boot process. Once in the settings, look for an option to reset to defaults or load optimized defaults.
Checking For System Updates
Outdated system files or drivers can also contribute to problems with detecting all monitors. Therefore, it is essential to ensure that your computer’s operating system and drivers are up to date.
To check for system updates on a Windows computer, you can follow these steps:
- Press the Windows key + I to open the Settings menu.
- Click on “Update & Security”.
- Click on “Windows Update”.
- Click on “Check for updates” and wait for the process to complete.
- If any updates are available, click on “Download and install” to install them.
Considering Monitor-specific Issues Via Manufacturer Website
If none of the previous troubleshooting techniques yield results, it may be worth considering any monitor-specific issues that could be contributing to the problem. Manufacturers often provide resources and support on their websites to help troubleshoot issues with their monitors.
To investigate possible monitor-specific issues, visit the website of your monitor’s manufacturer and look for support or troubleshooting sections. These sections can provide valuable information on known issues, firmware updates, and other solutions specific to your monitor model.
Frequently Asked Questions Of Not Detecting All Monitors
Why Are Multiple Monitors Not Detected?
Multiple monitors may not be detected due to various causes such as outdated graphics drivers, faulty video cables, incorrect monitor settings, or incorrect settings in Windows. To fix this issue, update, reinstall, or downgrade the graphics driver, check the video cables for any damage, ensure the correct monitor settings, and disconnect and reconnect the docking station or video cable.
Additionally, make sure the graphics card driver is up to date and check for any loose or damaged cables.
Why Won’t My Docking Station Detect My Monitors?
If your docking station is not detecting your monitors, try these solutions: 1. Update, reinstall, or downgrade the driver. 2. Check if both monitors are enabled in the Nvidia panel. 3. Disconnect and reconnect the docking station and video cable. 4.
Ensure the video cable is properly connected to both the monitor and docking station. 5. Check for damaged or bent pins on the video cable. If the issue persists, it could be due to faulty cables, incorrect settings, outdated drivers, or hardware problems.
Why Won T My 3rd Monitor Detect?
To fix the issue of your 3rd monitor not detecting, try updating or reinstalling the graphics driver. Check if both monitors are enabled in the Nvidia panel. Ensure both monitors are connected properly and powered on. If the problem persists, disconnect and reconnect the docking station and video cables.
Also, make sure your graphics card driver is up to date.
Why Is My Computer Not Showing A Monitor?
If your computer is not showing a monitor, there could be several reasons. Check if the cables are damaged or not properly connected. Ensure the display settings are correct and update your graphics card driver. Faulty hardware components or incorrect BIOS configurations may also cause the issue.
Conclusion
To resolve the issue of not detecting all monitors, there are several troubleshooting steps you can take. Updating, reinstalling, or downgrading the graphics driver is an easy method to fix this problem. Additionally, checking the Nvidia panel to ensure both monitors are enabled and properly connected is crucial.
It is important to verify that all video cables are securely connected and undamaged. Also, checking for any outdated or corrupt graphics card drivers is recommended. By following these steps, you can effectively troubleshoot and resolve the issue of not detecting all monitors on your PC.