Monitor Not Compatible With PC? Here’s How to Fix It!
If your monitor is not compatible with your PC, check the monitor’s settings and make sure the refresh rate and resolution settings are supported. You can also try using a different cable, such as HDMI, instead of VGA or DVI.
Are you having trouble with your monitor not working with your PC? This guide will provide you with simple solutions to fix compatibility issues. First, check your monitor’s settings to ensure the refresh rate and resolution settings are supported. If that doesn’t work, try using a different cable, like HDMI, instead of VGA or DVI.
By following these steps, you can resolve any compatibility problems and get your monitor working seamlessly with your PC.
Initial Checks For Monitor Compatibility
To check the compatibility between your monitor and PC, start by accessing the monitor’s settings and ensuring that the refresh rate and resolution settings are supported. Also, consider trying a different cable, such as an HDMI cable, if you’re currently using a VGA or DVI cable.
Before we delve into the details of why your monitor might not be compatible with your PC, it’s important to conduct some initial checks. These checks can help you troubleshoot the issue and potentially find a simple solution. Let’s take a look at the initial checks you can perform:
Ensure Cable Connections Are Secure
One of the first things you should do when troubleshooting monitor compatibility is to ensure that all cable connections are secure. Loose connections could result in a lack of signal transmission, leading to a monitor that doesn’t display anything. Here’s what you can do to secure cable connections:
- Turn off your PC and monitor.
- Check the cable that connects your monitor to your PC, whether it’s an HDMI, VGA, or DVI cable.
- Ensure that the cable is firmly plugged into both the monitor’s port and the corresponding port on your PC.
- Give the cables a gentle wiggle to ensure they are tightly secured.
- Turn on your PC and monitor to see if the issue is resolved.
Examine Cable Condition And Types
The condition and type of cable can also impact monitor compatibility. A damaged or faulty cable may result in display issues or no signal at all. Here are some steps you can take to examine cable condition and types:
- Inspect the cable for any visible signs of damage, such as frayed ends or bent pins.
- Try using a different cable, such as an HDMI cable, if you are currently using a VGA or DVI cable.
- Ensure that the cable you are using is appropriate for your monitor and PC’s port types.
- If possible, test the monitor with a different cable to see if the issue is resolved.
Review Monitor And Pc Port Types
Another aspect to consider when checking for monitor compatibility is the compatibility of the monitor and PC port types. Mismatched port types can prevent the monitor from being compatible with your PC. Here’s what you can do to review monitor and PC port types:
| Monitor Port | PC Port |
|---|---|
| HDMI | HDMI |
| VGA | VGA |
| DVI | DVI |
| HDMI | DVI (with appropriate adapter) |
By reviewing the port types, you can ensure that they match between your monitor and PC, allowing for seamless compatibility.
By conducting these initial checks for monitor compatibility, you can troubleshoot and potentially resolve any issues you may be experiencing. Following these steps can help you ensure that your monitor is compatible with your PC, allowing you to enjoy optimal performance and a seamless user experience.
Monitor Not Compatible With Pc? Troubleshooting Steps
Having trouble with your monitor not being compatible with your PC? Try troubleshooting steps such as checking the monitor’s settings and trying a different cable to ensure compatibility.
Validate And Adjust Display Settings
To troubleshoot the issue of a monitor not being compatible with your PC, the first step is to validate and adjust your display settings. This can be done by accessing the menu on your monitor and checking the settings. Ensure that the refresh rate and resolution settings are supported by your monitor. If they are not, try adjusting them to the recommended settings. It is important to note that each monitor may have different menu navigation options, so refer to your monitor’s user manual or manufacturer’s website for specific instructions.Update Or Reinstall Graphics Drivers
Another step you can take to resolve the compatibility issue is to update or reinstall your graphics drivers. Outdated or corrupt graphics drivers can often cause compatibility issues between your monitor and PC. To do this, follow these steps:- Visit the manufacturer’s website of your graphics card or PC to download the latest graphics drivers.
- Once downloaded, run the driver installer and follow the on-screen instructions to update or reinstall the graphics drivers.
- After the installation is complete, restart your PC to apply the changes.
Check Compatibility Modes And Overrides
If your monitor is still not compatible with your PC after adjusting display settings and updating graphics drivers, you can try checking compatibility modes and overrides. Some monitors and graphics cards have compatibility modes that can be enabled to enhance compatibility between the two. Follow these steps to check for compatibility modes:- Right-click on your desktop and select “Display settings” or “Screen resolution.”
- In the display settings window, click on the “Advanced display settings” or “Advanced settings” link.
- Look for an option that mentions “Compatibility” or “Compatibility modes.” If available, enable the compatibility mode or override.
- Apply the changes and restart your PC for the settings to take effect.
Perform Monitor Self-test Feature If Available
If the above troubleshooting steps do not resolve the compatibility issue, you can try performing a monitor self-test feature (if available). This self-test can help identify any internal issues with your monitor that may be causing the compatibility problem. To perform a monitor self-test, follow these steps:- Refer to your monitor’s user manual or manufacturer’s website to locate the self-test feature and the corresponding button combination or menu option.
- Press the necessary buttons or access the self-test option in the menu to initiate the self-test.
- Follow the on-screen instructions or observe any test patterns displayed on your monitor.
- If any issues are detected during the self-test, refer to the user manual or contact the manufacturer for further assistance.
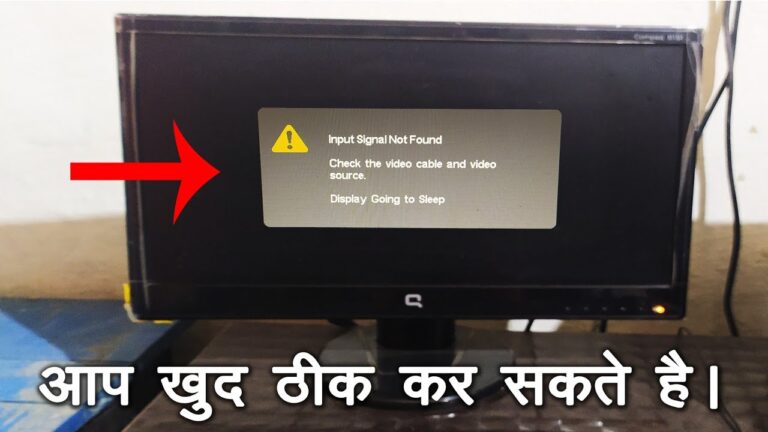
Resolving Input Not Supported Errors
To resolve the “input not supported” error on your monitor when it’s not compatible with your PC, check your monitor’s settings and make sure the refresh rate and resolution settings are supported. You can also try using a different cable, such as an HDMI cable, instead of VGA or DVI.
Additionally, ensure that the cable connecting your PC to the external monitor is secure and try using the external monitor with a different system if the issue persists. Remember that not every monitor will work with every PC, so make sure the input ports on your monitor match the output ports on your PC.
If you’re encountering an “Input Not Supported” error on your monitor when connecting it to your PC, don’t worry – there are a few steps you can take to resolve this issue. In this blog post, we’ll explore two common solutions that can help you get your monitor working seamlessly with your PC: adjusting the resolution and refresh rate, and exploring alternative video outputs on your PC.
Adjust Resolution And Refresh Rate
One of the main reasons for an “Input Not Supported” error message is an incompatible resolution or refresh rate between your PC and monitor. Here’s how you can adjust these settings to resolve the issue:
- Access the menu on your monitor by pressing the buttons located on the device.
- Check the resolution and refresh rate settings in the menu.
- Make sure that the settings are supported by your monitor. Refer to your monitor’s user manual or specifications for the supported resolutions and refresh rates.
- If the current settings are not compatible, adjust them to match the supported values provided by your monitor.
By ensuring that the resolution and refresh rate settings are aligned, you can eliminate the “Input Not Supported” error and enjoy a compatible connection between your PC and monitor.
Explore Alternative Video Outputs On Your Pc
If adjusting the resolution and refresh rate doesn’t resolve the “Input Not Supported” error, it’s worth exploring alternative video outputs on your PC. Here’s what you can do:
- Check the available video output ports on your PC, such as HDMI, VGA, or DVI.
- Verify the ports available on your monitor as well.
- Ensure that the video output port on your PC matches one of the input ports on your monitor.
- If the ports don’t match, you may need to use adapters or converters to bridge the gap between your PC and monitor.
- Consider purchasing the appropriate adapter or converter to connect your PC and monitor successfully.
With the right adapters or converters, you can overcome any compatibility issues and establish a compatible video output connection between your PC and monitor, eliminating the “Input Not Supported” error.
In conclusion, resolving “Input Not Supported” errors when connecting your monitor to a PC doesn’t have to be a complicated process. By adjusting the resolution and refresh rate settings or exploring alternative video outputs on your PC, you can ensure a compatible connection and enjoy a seamless viewing experience.
Fine-tuning Your Configuration
Troubleshooting a monitor that is not compatible with your PC can be done by checking the monitor’s settings and trying a different cable. Make sure the refresh rate and resolution settings are supported, and consider using an HDMI cable instead of VGA or DVI.
Additionally, make sure the cable connecting your PC to the external monitor is secure and try using the external monitor with a different system if needed.
Fine-Tuning Your Configuration When it comes to using a monitor with your PC, compatibility is key. But what happens when you find that your monitor is not compatible with your PC? Don’t worry, there are solutions to fine-tune your configuration and get your monitor up and running smoothly. In this article, we will guide you through three methods to fine-tune your monitor settings, customize settings in your PC’s operating system, and use third-party software for advanced tweaks.Fine-tune Monitor Settings Via On-screen Controls
One of the first steps to take when your monitor is not compatible with your PC is to check and adjust the monitor settings. Most monitors come with on-screen controls that allow you to make necessary adjustments. To access these controls, simply press the buttons located on your monitor. Once in the menu, navigate to the settings section and pay attention to the refresh rate and resolution settings. Make sure they are supported by your particular monitor model.Customize Settings In Your Pc’s Operating System
In addition to adjusting monitor settings, you can also optimize your PC’s operating system settings to ensure compatibility. To do this, go to the display settings on your PC. In Windows, right-click on the desktop and select “Display settings.” From here, you can adjust the resolution and other display settings to match your monitor’s specifications. Be sure to select the appropriate resolution and refresh rate for optimal performance.Use Third-party Software For Advanced Tweaks
If adjusting monitor and PC settings doesn’t solve the compatibility issue, you can explore third-party software options for more advanced tweaks. There are various software programs available that can help you modify and optimize your monitor settings beyond what is offered in the on-screen controls or default operating system settings. These software options often provide additional features and customization options, allowing you to fine-tune your monitor’s performance to your exact preferences. In conclusion, when facing compatibility issues between your monitor and PC, it’s important to fine-tune your configuration. Start by adjusting the monitor settings via on-screen controls, ensuring that the refresh rate and resolution settings are supported. Next, customize the settings in your PC’s operating system to match your monitor’s specifications. And if needed, explore third-party software options for more advanced tweaks. By following these steps, you can enhance the compatibility between your monitor and PC, and enjoy a seamless visual experience.Tips For Future Monitor Purchases
When it comes to purchasing a new monitor for your PC, there are a few important factors to consider to ensure compatibility and optimize your viewing experience. By understanding different connection standards, matching monitor specifications with your PC capabilities, and being aware of monitor return policies and warranties, you can make an informed decision when purchasing your next monitor.
Understand Different Connection Standards (hdmi, Dvi, Vga)
One of the key considerations when purchasing a new monitor is understanding the different connection standards available. HDMI, DVI, and VGA are the most common connection types that you will come across. It’s important to ensure that your PC has a compatible output port and that the monitor you are considering has a corresponding input port. Here’s a breakdown of each connection standard:
| Connection Standard | Key Features |
|---|---|
| HDMI | – High-definition audio and video transmission – Supports high resolutions, including 4K – Compatible with most modern PCs and monitors |
| DVI | – Supports high resolutions – No audio transmission – Compatible with many PCs and monitors, but becoming less common |
| VGA | – Analog video transmission – Lower resolution support compared to HDMI and DVI – Older technology, but still found on some PCs and monitors |
Match Monitor Specifications With Pc Capabilities
Another important consideration when purchasing a new monitor is to match the monitor specifications with your PC’s capabilities. Here are a few key specifications to keep in mind:
- Resolution: Ensure that the monitor’s resolution is supported by your PC’s graphics card. Higher resolutions provide a more detailed and immersive viewing experience, but may require a more powerful graphics card.
- Refresh Rate: Check the monitor’s refresh rate, which determines how many times the screen refreshes per second. Higher refresh rates result in smoother visuals, especially during fast-paced gaming or video playback.
- Response Time: Consider the monitor’s response time, which measures how quickly pixels can change color. Lower response times reduce motion blur, making it crucial for gaming or watching fast-action content.
- Connectivity: Ensure that the monitor has the necessary ports to connect to your PC, as discussed in the previous section. It’s also worth checking if the monitor has additional ports such as USB for convenient peripheral connectivity.
Monitor Return Policies And Warranties
Lastly, before making a final purchase decision, it’s important to review the monitor’s return policies and warranties. Though you may have done your due diligence in researching and selecting a compatible monitor, unforeseen issues can still arise. Having a clear understanding of the return policies, including any restocking fees or return windows, can provide you with peace of mind. Additionally, checking the warranty coverage can ensure that you can get support or replacement in case of any manufacturing defects or malfunctions.
By keeping these tips in mind, you can confidently navigate the process of purchasing a new monitor that is compatible with your PC, maximizes your viewing experience, and provides you with peace of mind.

Credit: www.avg.com
Frequently Asked Questions Of Monitor Not Compatible With Pc
Are All Monitors Compatible With Any Pc?
Yes, any monitor should work with any PC as long as the input and output ports match. Common ports include HDMI, DisplayPort, DVI, and VGA. Simply connect the monitor to the PC using the appropriate cable, and it should be compatible.
Why Won’t My Monitor Work With My Pc?
To troubleshoot why your monitor isn’t working with your PC: 1. Check your monitor settings by accessing the menu and confirming the supported refresh rate and resolution settings. 2. Try using a different cable, such as HDMI, instead of VGA or DVI.
3. Ensure the cable connecting your PC to the monitor is secure. 4. If the issue persists, try using the monitor with a different system to identify any potential faults.
Can A Pc Connect To Any Monitor?
Yes, a PC can connect to any monitor as long as they have compatible input and output ports, such as HDMI, DisplayPort, DVI, or VGA. It is important to ensure that the PC and the monitor have the same type of ports for a successful connection.
Will An Older Monitor Work With A New Computer?
Yes, an older monitor can work with a new computer as long as it has the correct connection (VGA, DVI, or HDMI) for the new machine.
Conclusion
To ensure compatibility between your monitor and PC, it is important to check your monitor’s settings and make sure the refresh rate and resolution settings are supported. Additionally, try using a different cable, such as an HDMI cable, if you are currently using a VGA or DVI cable.
Remember, not every monitor will work with every PC, so make sure the inputs and outputs match. By following these steps, you can resolve any issues with your monitor not being compatible with your PC.