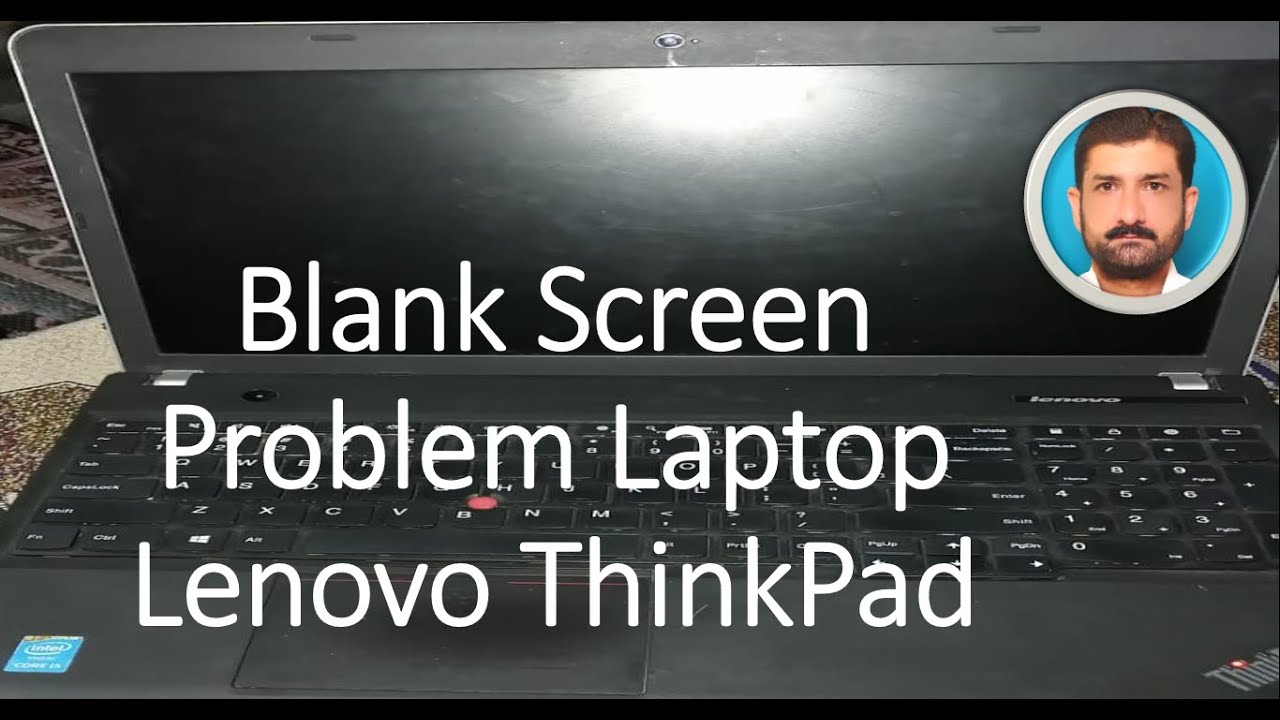
Lenovo Monitor Not Turning on : Troubleshooting Tips for a Blank Screen
Lenovo monitor not turning on indicates a potential power supply or connection issue. We will explore troubleshooting steps and solutions to resolve the problem and bring your Lenovo monitor back to life.
Welcome to our guide on troubleshooting a Lenovo monitor that won’t turn on. Your Lenovo monitor not powering up can be frustrating, but don’t worry, we are here to help. There could be several reasons behind this issue, such as a faulty power supply or loose connections.
We will discuss some effective troubleshooting steps to resolve the problem and get your Lenovo monitor working again. So, let’s dive into the solutions and get your monitor back up and running in no time.
Credit: www.avg.com
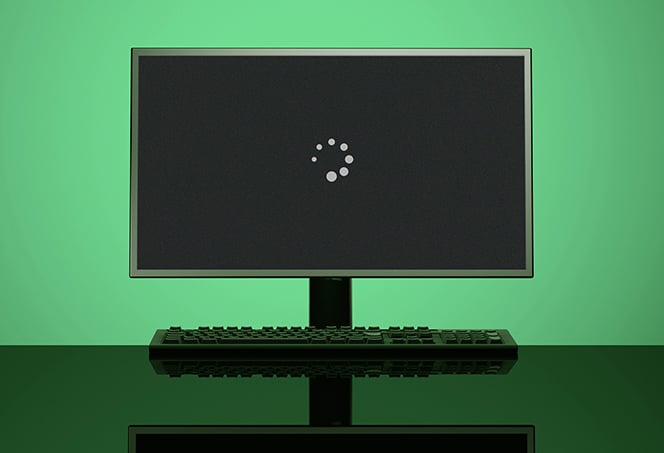
Initial Checks For A Blank Screen
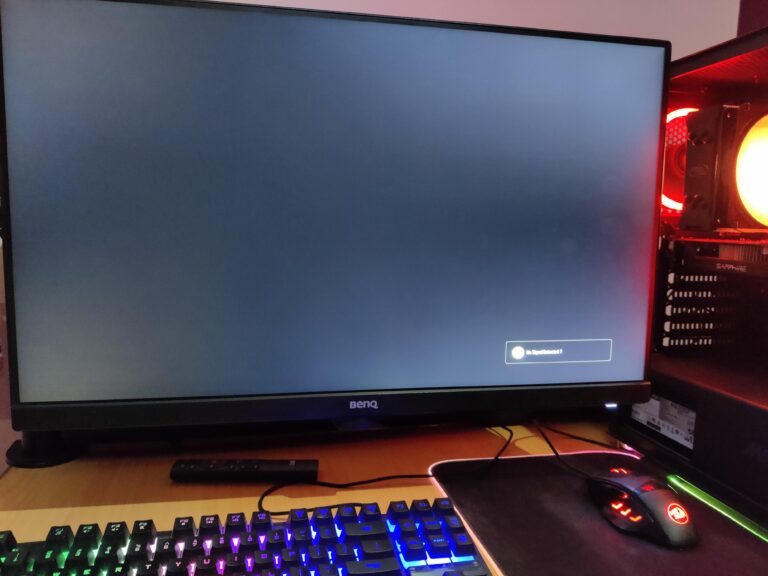
Encountering a blank screen on your Lenovo monitor can be a frustrating experience, but before you panic, there are a few initial checks you can perform. By following these simple steps, you can narrow down the potential causes and have your monitor up and running again in no time.
H3confirm Monitor Power Connection/h3
The first step is to confirm that your Lenovo monitor is properly connected to a power source. Check if the power cable is securely plugged into both the monitor and the wall socket. Sometimes, the cable may become loose due to accidental bumps or movements. Ensure that the cable is firmly inserted and provide the necessary power to the monitor.
H3inspect For Any Visible Damage/h3
Next, carefully examine your Lenovo monitor for any visible signs of damage. Look for cracks, dents, or other physical imperfections that could be interfering with the monitor’s functionality. Pay close attention to the screen itself, as any damages to it could result in a blank display. If you notice any issues, it may be necessary to seek professional assistance or contact Lenovo support for further guidance.
H3verify Cables Are Securely Connected/h3
In addition to the power connection, double-check that all cables are securely attached to the appropriate ports. This includes cables for video input, such as HDMI or DisplayPort. Loose or unplugged cables may prevent the signal from reaching the monitor, causing a blank screen. Take a moment to ensure that each connection is snugly in place, allowing for proper data transmission.
H3check If The Power Indicator Is Lit/h3
Lastly, take a look at the power indicator on your Lenovo monitor. This small LED light is usually located near the power button or on the front panel. If the power indicator is not lit, it could indicate a power supply or internal issue that is preventing the monitor from turning on. In such cases, it may be necessary to consult the user manual or reach out to Lenovo support for further troubleshooting steps.
By performing these initial checks, you can quickly identify and potentially resolve the issue causing your Lenovo monitor to display a blank screen. However, if the problem persists despite your best efforts, it is always recommended to seek professional assistance to ensure a thorough diagnosis and resolution.
Advanced Power Troubleshooting
When your Lenovo monitor fails to turn on, it can be a frustrating experience. However, before you start panicking, there are a few advanced power troubleshooting steps that you can take to identify and resolve the issue. In this guide, we will walk you through some effective troubleshooting techniques that can help you get your Lenovo monitor up and running again.
Testing With Another Power Outlet
If your Lenovo monitor is not turning on, the first thing you should try is testing it with another power outlet. Sometimes, a faulty outlet can be the culprit behind the issue. To do this, simply unplug the monitor from the current outlet and plug it into a different one. Make sure to use a known working outlet to rule out any electrical problems.
Using A Different Power Cable
If testing with another power outlet doesn’t solve the problem, the next step is to try using a different power cable. Sometimes, the issue can lie with the cable itself. Check if you have a spare power cable that is compatible with your Lenovo monitor. Replace the existing cable with the new one and see if the monitor turns on. If it does, then you know that the original power cable was the issue.
Bypassing Power Strips And Surge Protectors
If the previous steps didn’t yield any results, it’s worth considering the possibility that power strips or surge protectors might be interfering with the monitor’s power supply. These devices can occasionally cause conflicts and prevent the monitor from turning on. To troubleshoot this, unplug the monitor from the power strip or surge protector, and directly plug it into a wall outlet. Check if this resolves the issue. If it does, then you may need to replace or repair your power strip or surge protector.
Evaluating The Power Adapter (if Applicable)
In some cases, the power adapter that connects your Lenovo monitor to the power source can be the cause of the problem. Inspect the power adapter for any signs of damage, such as frayed wires or bent pins. If you notice any issues, you may need to replace the power adapter to resolve the problem. If the power adapter appears to be in good condition, you can try borrowing a compatible adapter from a friend or colleague to see if using a different power adapter solves the issue.
By following these troubleshooting steps, you can narrow down the cause of your Lenovo monitor not turning on. Remember to always prioritize your safety and consult a professional technician if you are unsure about any of the steps. With a little bit of patience and persistence, you’ll soon have your Lenovo monitor back in working order.
Ensuring Proper Video Signal
Lenovo monitors not turning on can be due to improper video signal. Make sure to check all connections, update drivers, and adjust display settings to ensure a proper video signal for your Lenovo monitor.
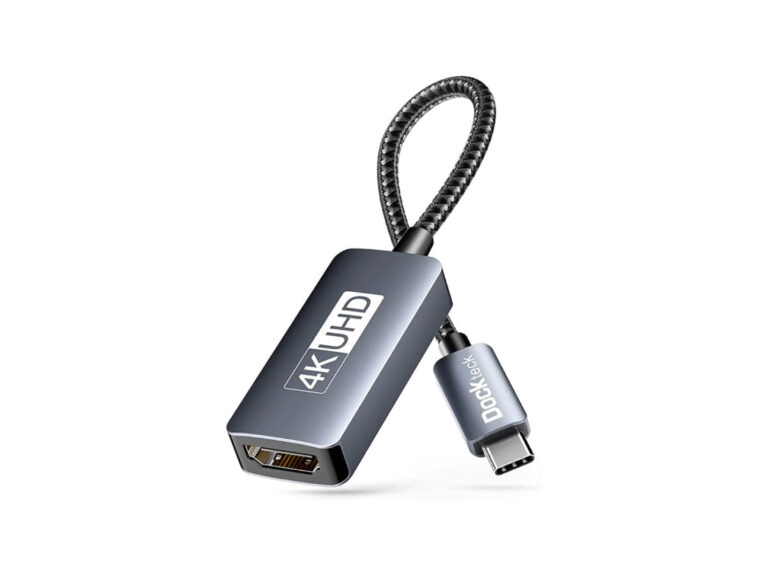
Switching Video Cables (hdmi, Vga, Displayport)
If your Lenovo monitor is not turning on, one of the potential causes could be an issue with the video cables. The video cables, such as HDMI, VGA, and DisplayPort, connect your computer or device to the monitor and transmit the video signal. A faulty or loose cable can disrupt the video signal and prevent the monitor from turning on.
To ensure that the video signal is properly transmitted, start by switching out the video cable. Disconnect the current cable from both the monitor and the device it is connected to.
Replace the cable with a known working one, making sure it is securely connected to both the monitor and the device. This simple step can often resolve any issues caused by a faulty or loose video cable.
Connecting To A Different Device
If switching video cables did not resolve the issue, try connecting your Lenovo monitor to a different device. This will help determine if the problem lies with the monitor itself or with the device you were originally using.
Connect your monitor to a laptop, gaming console, or any other compatible device using a known working video cable. Power on both the device and the monitor, and observe if the monitor turns on. If it does, then the problem may be with your original device instead of the monitor.
However, if the monitor still does not turn on, it is likely that the issue lies with the monitor itself and further troubleshooting steps are required.
Checking For Correct Input Source On The Monitor
In some cases, the Lenovo monitor may not turn on due to an incorrect input source selection. The input source selected on the monitor must match the type of cable being used to connect it with the device.
To check the input source, locate the control buttons on the monitor. Press the menu button and navigate to the input source settings. Ensure that the correct input source option is selected based on the type of cable you are using (HDMI, VGA, DisplayPort, etc.).
Double-check that the input source setting matches the type of cable connected to the monitor. If necessary, use the menu buttons to make the appropriate selection. This simple step can often resolve the issue of a Lenovo monitor not turning on.
Updating Or Rolling Back Graphics Drivers
In some cases, outdated or incompatible graphics drivers can prevent the Lenovo monitor from turning on. Graphics drivers are responsible for enabling the communication between the computer’s graphics card and the monitor.
To fix this issue, update the graphics drivers to the latest version. Visit the website of your graphics card manufacturer and download the latest drivers suitable for your operating system. Install the drivers and restart your computer.
If updating the drivers did not resolve the issue, you can try rolling back to a previous version of the drivers. In some cases, a recent driver update may have caused compatibility issues with the monitor.
To roll back the graphics drivers, go to the Device Manager on your computer. Locate the Display Adapters category, right-click on your graphics card, and select “Properties.” Go to the “Driver” tab, click on “Roll Back Driver,” and follow the on-screen instructions.
By taking these troubleshooting steps, you can effectively ensure a proper video signal and potentially resolve the issue of a Lenovo monitor not turning on.
Diagnosing Hardware Failures
When your Lenovo monitor refuses to turn on, it can be frustrating and can disrupt your workflow. One of the first steps to resolving this issue is to diagnose whether the problem lies with the hardware. In this section, we will explore some effective methods to diagnose hardware failures and get your monitor up and running again.
Testing With An Alternative Monitor
The first step in diagnosing a hardware failure with your Lenovo monitor is to test it with an alternative monitor. By connecting a different monitor to your computer, you can determine if the issue lies with your Lenovo monitor or with the computer itself.
Here’s how you can test your monitor with an alternative one:
- Disconnect your Lenovo monitor from your computer.
- Connect a different monitor to your computer using the same cables.
- Power on the computer and the alternative monitor.
- If the alternative monitor displays properly, it indicates that the issue is with your Lenovo monitor.
- If the alternative monitor does not display either, it suggests a problem with your computer or its connectivity.
Ensuring Compatibility Between Devices
An important aspect of diagnosing hardware failures is ensuring compatibility between your Lenovo monitor and other devices, such as your computer or graphics card. Incompatible devices can cause display issues or prevent the monitor from turning on altogether.
- Check the specifications of your Lenovo monitor and compare them with the requirements of your computer or graphics card.
- Verify that the connections between the devices are secure and properly inserted.
- Double-check if any additional software or drivers are required for your monitor to function correctly.
Inspecting Ports For Physical Issues
Physical issues with the ports on your Lenovo monitor can also prevent it from turning on. It’s essential to inspect the ports for any visible damage or debris that may be obstructing the connection.
- Power off your monitor and unplug it from the power source.
- Examine the ports on the monitor for bent pins, dirt, or other signs of damage.
- Clean any visible debris using a soft, dry cloth or compressed air.
- Ensure the cables fit securely into the ports without any loose connections.
Consulting The User Manual For Error Codes
If your Lenovo monitor is displaying error codes or indicators, consulting the user manual can provide valuable insights into the hardware failure. The user manual often contains a troubleshooting section with specific error codes and their corresponding solutions.
Here’s how to consult the user manual for error codes:
- Locate the user manual that came with your Lenovo monitor. If you don’t have a physical copy, it may be available for download on the manufacturer’s website.
- Refer to the troubleshooting section of the manual.
- Look for any error codes or indicators mentioned and follow the recommended steps to resolve the issue.
Monitor Reset And Firmware Solutions
If you are experiencing trouble with your Lenovo monitor not turning on, it’s essential to troubleshoot and explore various solutions to resolve the issue. In this section, we will explore two potential solutions: performing a monitor reset and checking for firmware updates. These steps will help you identify and fix any possible glitches that might be causing the problem.
Performing A Monitor Reset
Performing a monitor reset can often resolve minor issues and get your Lenovo monitor up and running again. Follow these steps to perform a monitor reset:
- First, turn off your monitor by using the power button located on the front or side of the device.
- Unplug the monitor’s power cable from the electrical outlet.
- Disconnect any other cables connected to the monitor, such as the HDMI or VGA cables.
- Wait for approximately 30 seconds to allow the monitor to fully power down.
- After 30 seconds, reconnect the power cable and any other cables to the monitor.
- Finally, press the power button to turn on the monitor and check if it is functioning properly.
If the monitor still does not turn on after performing a reset, try the next solution mentioned below.
Clearing Cmos (for Connected Pcs)
If your Lenovo monitor is connected to a PC and you are experiencing power-related issues, clearing the CMOS (Complementary Metal-Oxide-Semiconductor) might help. The CMOS stores basic configuration information for the computer system, and clearing it can sometimes fix unexpected power-related issues.
Please refer to your computer’s motherboard manual or the manufacturer’s website for specific instructions on clearing CMOS, as the steps can vary depending on the motherboard model. Remember to follow safety precautions, such as disconnecting the power cable and wearing an anti-static wristband, before working on your PC’s internals.
Checking For Firmware Updates
Firmware updates can often address bugs or compatibility issues that may cause your Lenovo monitor not to turn on. To check for firmware updates, follow these simple steps:
- Visit the official Lenovo support website.
- Search for your specific monitor model using the provided search function.
- Once you find your monitor model, navigate to the “Downloads” or “Support” section.
- Look for any available firmware updates for your monitor model.
- If a firmware update is available, download the update file.
- Follow the instructions provided by Lenovo to install the firmware update on your monitor.
Keep in mind that firmware updates should be approached with caution, as incorrect installation or interruption during the update process can cause further issues. Make sure to follow the instructions provided by Lenovo carefully when installing firmware updates.
By performing a monitor reset, clearing CMOS for connected PCs, and checking for firmware updates, you are giving yourself a better chance of getting your Lenovo monitor back in working order. If the issue still persists after following these steps, it may be best to reach out to Lenovo’s customer support for further assistance.
Engaging With Lenovo Support
Experiencing issues with your Lenovo monitor not turning on can be frustrating, but there is no need to worry. Lenovo provides a range of support options to help you get your monitor up and running again. In this section, we’ll explore how you can effectively engage with Lenovo support to troubleshoot and resolve the issue.
Utilizing Lenovo’s Online Troubleshooting Resources
Lenovo understands the importance of providing comprehensive support to its customers. They have a wealth of online troubleshooting resources that can help you diagnose and fix common issues with your Lenovo monitor. To access these resources, follow the steps below:
- Start by visiting the Lenovo support website at support.lenovo.com.
- Click on the “Support” tab located at the top of the page.
- Next, enter your product’s serial number or choose your product from the list provided. If you’re uncertain about where to find this information, refer to your monitor’s user manual or check the product labeling.
- Once you’ve identified your monitor, you’ll be presented with a range of troubleshooting options. Explore the relevant articles, guides, and FAQs to find a solution that matches your specific issue.
- If you are unable to find a solution, don’t worry. Lenovo offers additional support options to ensure your issue gets resolved.
Contacting Customer Service
If your efforts to resolve the issue through online resources were unsuccessful, reaching out to Lenovo’s customer service is the next step. Lenovo’s friendly and knowledgeable representatives are available to assist you in finding a solution. To contact customer service, follow the steps below:
- Once again, visit the Lenovo support website at support.lenovo.com.
- Click on the “Support” tab and navigate to the “Contact Us” section.
- Here, you will find the customer service phone number relevant to your region. Pick up your phone and dial the number to directly connect with a Lenovo representative who will guide you through the resolution process.
- Ensure you have your monitor’s serial number, purchase details, and any relevant troubleshooting steps you have already taken ready to provide to the customer service agent. This will help expedite the troubleshooting process.
Finding Authorized Repair Services
If your Lenovo monitor requires hardware repairs, Lenovo provides authorized repair services to ensure the highest quality of service and genuine replacement parts. To find the nearest authorized repair center, follow these steps:
- Visit the Lenovo support website at support.lenovo.com.
- Click on the “Support” tab and select “Repair Status” from the drop-down menu.
- Enter your monitor’s serial number or select your product from the list provided.
- Lenovo’s system will then display the closest authorized repair center to your location.
- Make an appointment with the authorized repair center and bring your monitor in for repair, ensuring professional technicians address the issue.
Engaging with Lenovo Support through their online troubleshooting resources, contacting customer service, or finding authorized repair services ensures that you receive the necessary assistance to resolve your Lenovo monitor not turning on issue effectively.
Frequently Asked Questions On Lenovo Monitor Not Turning On
Why Isn’t My Lenovo Monitor Turning On?
There could be several reasons why your Lenovo monitor is not turning on. It could be due to a loose cable connection, a faulty power source, or a display setting issue. Try checking the cables, making sure they are securely connected.
Also, double-check the power source and adjust the display settings if necessary.
What Should I Do If My Lenovo Monitor Won’t Power Up?
If your Lenovo monitor won’t power up, try these troubleshooting steps. First, check if the power cable is securely connected to both the monitor and the power outlet. Next, test the power outlet by plugging in a different device. If the outlet works, try using a different power cable for the monitor.
If none of these steps resolve the issue, consider contacting Lenovo customer support for further assistance.
How Can I Fix A Black Screen On My Lenovo Monitor?
If you are experiencing a black screen on your Lenovo monitor, first check the power connection and make sure the monitor is receiving power. If the power is not the issue, try adjusting the brightness and contrast settings on the monitor.
You can also try connecting the monitor to a different device to see if the problem persists. If these steps don’t work, consider contacting Lenovo support for further guidance.
Why Is My Lenovo Monitor Only Showing A Blank Screen?
If your Lenovo monitor is only showing a blank screen, there are a few possible causes. First, check if the monitor is properly connected to the device. Ensure that the cables are securely plugged in and that the correct input source is selected on the monitor.
If this doesn’t solve the issue, try updating your graphics card drivers or contacting Lenovo support for further assistance.
Conclusion
If your Lenovo monitor is not turning on, there are several troubleshooting steps you can take. Start by checking the power source and cables, ensuring they are properly connected. If the issue persists, try updating the graphics driver or resetting the monitor settings.
If none of these solutions work, it may be time to consult a professional technician for further assistance. Remember, addressing the problem promptly will help you get back to enjoying your monitor’s crisp display and vibrant visuals.