Full Screen Not Showing on Monitor: Troubleshooting Tips
To fix the issue of full screen not showing on the monitor, adjust the settings of the target application or dedicated graphics card controller to enable full screen mode. If you are using a TV as your monitor, make sure to turn off the Overscan feature.
Desktop won’t go full screen on the second monitor in Microsoft Power BI Community can be solved by making the second screen the main display in the display settings. To fix full screen problems, check the settings in your application, adjust the display settings in your computer settings, or update your system.
The issue of the monitor not displaying full screen or having a blurry display may be due to resolution settings not matching. Adjust the display resolution to solve this problem.
Hardware Connectivity Check
If your full screen is not showing on your monitor, it may be due to disabling or overriding full-screen mode. To fix this issue, go to the settings of the target application or dedicated graphics card controller and turn on full-screen mode.
If you are using a TV as your monitor, you may also need to turn off Overscan.
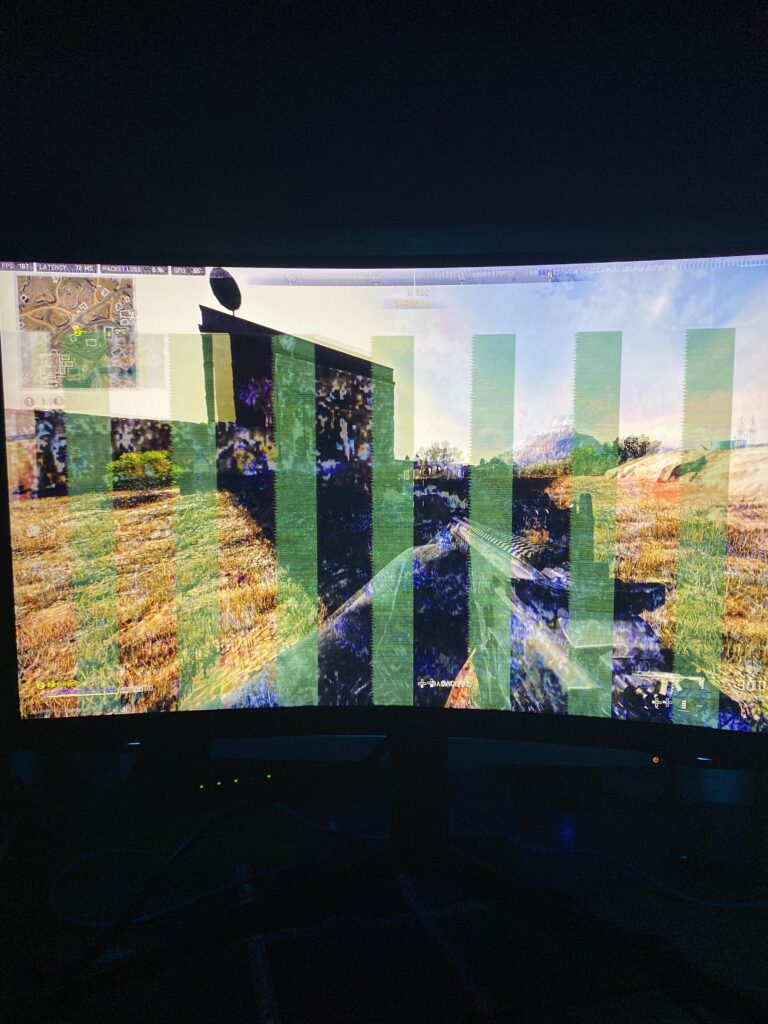
When encountering the issue of the full screen not showing on your monitor, it’s important to perform a thorough hardware connectivity check to identify any potential issues. This check involves examining the cable connection integrity and evaluating the monitor’s physical buttons.
Examine Cable Connection Integrity
To start, ensure that all cables connecting your computer and monitor are securely and properly connected. A loose or faulty cable connection can result in display issues and prevent the full screen from showing.
Here’s a step-by-step guide to examining cable connection integrity:
- Power off your computer and monitor.
- Inspect the cable connections at both ends, ensuring they are fully inserted into their respective ports.
- Check for any bent or damaged pins on the cable connectors. If any are found, replace the cable with a new one.
- Gently wiggle the cables to verify that they are securely fastened and not loose.
- Power on your computer and monitor, and check if the full screen is now displaying correctly.
Evaluate Monitor’s Physical Buttons
In addition to cable connections, it’s crucial to evaluate the functionality of your monitor’s physical buttons. These buttons control various settings, including display mode and screen resolution, which can affect the full screen display.
Here’s a simple checklist to help you evaluate the monitor’s physical buttons:
- Locate the physical buttons on your monitor, usually located on the front or side.
- Press the “Menu” button to access the on-screen display (OSD) menu.
- Navigate through the OSD menu using the directional arrows.
- Look for options related to display mode, screen resolution, or full screen settings.
- Ensure that the appropriate settings are selected for full screen mode.
- Save any changes made and exit the OSD menu.
- Check if the full screen is now appearing correctly on your monitor.
By following these steps and conducting a thorough hardware connectivity check, you can troubleshoot and resolve the issue of the full screen not showing on your monitor. Remember to double-check the cable connections and evaluate the monitor’s physical buttons to ensure optimal display performance.
Compatibility And Settings Audit
If you are experiencing issues with full screen not showing on your monitor, it could be due to compatibility and settings related problems. Conducting a compatibility and settings audit can help you identify and resolve any issues that may be hindering the full screen display.
Review Application-specific Full Screen Settings
The first step in the compatibility and settings audit is to review the application-specific full screen settings. Different applications have their own settings that control how they are displayed in full screen mode. To do this:
- Open the application for which you are experiencing the full screen issue.
- Look for the settings or preferences menu within the application.
- Find the option related to full screen mode or display.
- Ensure that the full screen mode is enabled or turned on.
Adjusting the application-specific full screen settings can often rectify the issue and allow the application to be displayed in full screen mode successfully.
Verify Display Configuration In System Preferences
The next step in the compatibility and settings audit is to verify the display configuration in the system preferences of your computer. This will help ensure that the display settings are properly configured for full screen mode. Follow these steps:
- Right-click on your desktop and select “Display settings” from the menu.
- A new window will appear with display settings.
- Check the resolution settings and ensure they match the recommended settings for your monitor.
- Make sure that the display scaling settings are set to the desired size.
Adjusting the display configuration in the system preferences can often resolve issues related to full screen not showing on your monitor.
By conducting a compatibility and settings audit, reviewing application-specific full screen settings, and verifying the display configuration in system preferences, you can troubleshoot and resolve the issue of full screen not showing on your monitor. Remember to save any changes made to the settings and restart your computer for the changes to take effect.
Graphics Driver Update Process
Updating your graphics driver is an important step in resolving the issue of full screen not showing on your monitor. The graphics driver serves as a bridge between your computer’s hardware and software, enabling them to communicate effectively. Outdated or incompatible graphics drivers can prevent your monitor from displaying in full screen mode. To ensure a smooth and hassle-free update process, follow the steps mentioned below.
Guide To Accessing The Device Manager
Before updating your graphics driver, you need to access the device manager on your computer. The device manager provides a detailed overview of all the hardware components connected to your system, including the graphics card. Here’s how you can access it:
- Press the Windows key on your keyboard and type “Device Manager“.
- Click on the “Device Manager” option that appears in the search results.
- The device manager window will open, displaying a list of all the hardware components on your computer.
Steps For Updating The Graphics Driver
Once you have accessed the device manager, you can proceed with updating the graphics driver. Follow these steps:
- Locate the “Display Adapters” category in the device manager window and click on the arrow to expand it.
- Right-click on the graphics card listed under the “Display Adapters” category.
- Select “Update Driver” from the context menu that appears.
- A new window will appear with two options: “Search automatically for updated driver software” and “Browse my computer for driver software“.
- If you have an active internet connection, choose the first option to let Windows search for the latest driver online.
- If you have downloaded the latest graphics driver from the manufacturer’s website, choose the second option and browse for the driver file on your computer.
- Follow the on-screen instructions to complete the driver update process.
- Once the update is finished, restart your computer to apply the changes.
Updating your graphics driver can significantly improve the performance of your monitor and resolve any issues related to full screen mode. Make sure to periodically check for updates to ensure your graphics driver is up to date.
Resolution And Scaling Solutions
When it comes to troubleshooting issues with full screen not showing on your monitor, one common culprit could be incorrect resolution and scaling settings. Fortunately, there are a few simple steps you can take to adjust these settings and ensure your screen is displaying at its optimal size.
Navigating To Screen Resolution Settings
To start, you’ll want to navigate to your screen resolution settings. Here’s how:
- Right-click anywhere on your desktop to open the context menu.
- Scroll down and select “Display settings.”
This will open a new window where you can modify various display settings for your monitor.
Modifying The Scaling Options
Once you’re in the display settings menu, it’s time to modify the scaling options. Follow these steps:
- Scroll down to the “Scale and layout” section.
- Drag the slider to adjust the screen size to your preferred scale.
- Alternatively, you can click on the “Recommended” button to set the screen size to the optimal settings for your monitor.
By adjusting the scaling options, you can ensure that your screen fills the display area properly and that the full screen mode is working as intended.
In addition to these steps, it’s also worth checking for any updates to your graphics card driver. Outdated or incompatible drivers can sometimes cause display issues. To update your graphics card driver, visit the manufacturer’s website and download the latest driver version.
Remember, each monitor and system setup may have different settings and options, so it’s important to explore your display settings and experiment with different scaling options until you find the one that works best for your needs.
Monitor And Adapter Compatibility
When it comes to troubleshooting issues with full-screen not showing on your monitor, one of the factors to consider is the compatibility between your monitor and adapter. Inspecting compatibility between hardware components is essential in ensuring that the signals are transmitted correctly and that you can enjoy a seamless full-screen experience.
Inspect Compatibility Between Hardware
To determine if there is compatibility between your monitor and adapter, you need to check if they are properly connected and if the specifications of both devices are aligned. Here’s how you can assess their compatibility:
- Check the ports: Verify that the ports on your monitor and adapter match. For example, if your monitor has an HDMI port, make sure your adapter also has an HDMI output.
- Review the resolution: Ensure that the maximum resolution supported by your monitor matches the output capabilities of your adapter. Mismatched resolutions can lead to display issues.
- Consider refresh rate: Check if the refresh rate supported by your monitor aligns with the output capabilities of your adapter. A disparity in refresh rates can result in screen flickering or lag.
- Verify compatibility with operating system: Confirm that both your monitor and adapter are compatible with your operating system. Some adapters may require specific drivers to be installed for optimal performance.
Assess The Need For An Adapter Or Converter
In certain cases, you may need an adapter or converter to connect your monitor to your device. Here are a few scenarios where you might require an adapter:
- Port compatibility: If your device has a different port than your monitor, such as a USB-C port on your laptop and only HDMI or VGA input on your monitor, you will need an adapter to convert the signal.
- Signal conversion: When dealing with older monitors or devices, signal conversion may be necessary. For example, if your monitor only supports analog VGA input, but your device outputs a digital HDMI signal, an adapter with signal conversion capabilities will be needed.
- Multiple monitor setup: If you are using a setup with multiple monitors and your device has limited video outputs, you might need an adapter to expand the connectivity options.
Always ensure that the adapter or converter you choose is compatible with both your monitor and your device. It’s recommended to consult the manufacturer’s specifications or seek professional advice if you are unsure about compatibility.
Full Screen Functionality Restoration
To resolve the issue of full-screen not showing on your monitor, try enabling full-screen mode in the settings of the target application or dedicated graphics card controller. If you’re using a TV as your monitor, make sure to turn off the Overscan feature.
Utilize Built-in Windows Troubleshooting Tools
If you’re experiencing issues with full screen not showing on your monitor, it’s worth utilizing the built-in Windows troubleshooting tools to help restore the functionality. These tools are designed to diagnose and fix common display-related problems, ensuring that you can enjoy full screen mode on your monitor.
Here’s a step-by-step guide on how to use the built-in Windows troubleshooting tools:
- Right-click on your desktop and select “Display settings” from the drop-down menu.
- In the Display settings window, scroll down and click on the “Advanced display settings” link.
- In the Advanced display settings window, click on the “Troubleshoot” tab.
- Click on the “Run the troubleshooter” button.
- Follow the on-screen instructions to diagnose and fix any issues related to full screen not showing on your monitor.
By utilizing these built-in Windows troubleshooting tools, you can easily resolve any problems that may be preventing your monitor from displaying full screen.
Explore Third-party Software Options
If the built-in Windows troubleshooting tools fail to restore the full screen functionality on your monitor, you can consider exploring third-party software options. These software solutions are specifically designed to address display-related issues and offer advanced features to enhance the full screen experience on your monitor.
Here are some popular third-party software options to consider:
| Software | Description |
|---|---|
| DisplayFusion | DisplayFusion is a powerful multi-monitor management software that allows you to customize and control various aspects of your display settings, including full screen mode. |
| UltraMon | UltraMon is another feature-rich software that provides advanced multi-monitor support and enables you to optimize full screen functionality on your monitor. |
| Actual Multiple Monitors | Actual Multiple Monitors enhances the Windows taskbar and provides additional window management features, making it easier to navigate and utilize full screen mode on multiple monitors. |
By exploring these third-party software options, you can find a solution that best suits your needs and fully restores the full screen functionality on your monitor.
Regular System Updates And Checks
If your full screen is not showing on your monitor, it may be due to disabling or overriding full-screen mode. To fix this issue, go to the settings of the target application or graphics card controller and enable full-screen mode.
Additionally, if you’re using a TV as your monitor, try turning off the Overscan option.
Establishing A Routine For System Updates
Regular system updates and checks are essential for maintaining the optimal performance of your computer and ensuring that the full-screen mode is not compromised. By establishing a routine for updating your system, you can stay ahead of any potential issues that may arise. To begin, make it a habit to regularly check for system updates provided by your operating system (e.g., Windows, macOS). These updates often include important security patches, bug fixes, and optimizations that can address various issues, including problems with full-screen display on your monitor. Additionally, keep your applications up to date by checking for updates provided by the software developers. Many applications release updates to enhance performance and compatibility, which can help resolve any conflicts that may affect the full-screen mode.Using Diagnostic Tools For Preventative Care
In addition to regular system updates, utilizing diagnostic tools can help prevent full-screen display issues on your monitor. These tools allow you to analyze and identify any potential problems before they become major obstacles. One such tool is the graphics card controller, such as the NVADIA Control Panel for NVADIA graphics cards. By accessing the settings of the target application or the dedicated graphics card controller, you can ensure that the full-screen mode is enabled and functioning correctly. This simple adjustment can often resolve issues with full-screen display on your monitor. For those using a TV as their monitor, another potential solution is to turn off the Overscan feature. This option can be found in the settings of the target application or your TV’s display settings. Disabling Overscan can help ensure that the full-screen mode is not compromised and that your monitor displays the content properly. In conclusion, establishing a routine for system updates and utilizing diagnostic tools are crucial steps in maintaining a full-screen display on your monitor. By staying proactive and regularly checking for updates, you can address any potential issues and enjoy an optimized viewing experience in full-screen mode.Full Screen Not Showing On Monitor: Final Tips
If you’re experiencing issues with your monitor not displaying full screen, we’ve got some final tips that can help you resolve the problem. Follow these suggestions to ensure a seamless full-screen experience on your monitor.
Summarize Key Points
- Check application and graphics card settings: Disabling or overriding full-screen mode may be the cause of the issue. Go to the settings of the target application or dedicated graphics card controller (e.g., NVADIA Control Panel) and make sure the full-screen mode is enabled.
- Disable Overscan for TV monitors: If you’re using a TV as your monitor, turning off the Overscan feature may solve the problem. Check the settings of your TV to disable Overscan.
- Adjust display settings in your computer settings: Head to the display settings in your computer settings and make sure the full-screen settings are properly adjusted.
- Update your application: Sometimes, updating the application you’re trying to use in full-screen mode can fix compatibility issues and ensure a smooth full-screen experience.
- Adjust display resolution: In some cases, the resolution settings may not match, causing the full-screen issue. Adjust the display resolution in your operating system settings to match the requirements of your monitor.
Additional Resources
For further assistance on fixing the full-screen not showing on monitor issue, you can refer to the following resources:
- Microsoft Support: Change your screen resolution in Windows
- Indeed.com: How to Fix Your Computer Screen Size and When You Might Need To
- Geeks on Site: How to Get Computer Screen Back to Normal Size Window
- Lifewire: How to Activate Full-Screen Mode in Google Chrome
By following these final tips and utilizing the additional resources provided, you can troubleshoot the full-screen not showing on your monitor effectively. Regular maintenance and check-ups are important to ensure optimal performance and a seamless full-screen experience.

Credit: www.reddit.com
Frequently Asked Questions For Full Screen Not Showing On Monitor
How Do I Fix My Monitor Is Not Showing Full Screen?
To fix your monitor not showing full screen, follow these steps: 1. Go to the settings of the target application or your graphics card controller. 2. Enable full screen mode in the settings. 3. If you’re using a TV as your monitor, turn off Overscan.
4. Adjust the display resolution in the display settings. 5. Access the display settings menu, right-click on your desktop, and select “Display settings. ” 6. Scroll down to “Scale and layout” and drag the slider to your preferred size. 7.
Alternatively, click on “Recommended” for optimal screen size. 8. To enable full screen view, activate full-screen mode in your browser settings. Note: Make sure your resolution settings match and update your application or computer settings if necessary.
How Do I Make My Screen Full Size On My Monitor?
To make your screen full size on your monitor, go to the settings of the application or graphics card controller and enable full-screen mode. Also, check for overscan settings if you are using a TV as your monitor. Adjusting display resolution or updating your computer settings can also help.
How Do I Get My Full Screen Back To Normal?
To get your full screen back to normal, access the display settings by right-clicking on your desktop and selecting “Display settings. ” In the “Scale and layout” section, adjust the slider to your preferred size or click on “Recommended” for optimal settings.
How Do I Enable Full Screen View?
To enable full screen view, go to the settings of the application or graphics card controller and turn on full screen mode. If using a TV as your monitor, disable overscan. Adjust display resolution in Windows and Linux if necessary.
You can also access display settings by right-clicking on your desktop and selecting “Display settings,” then adjust the slider or click “Recommended” for optimal screen size. Another option is to activate full-screen mode in Google Chrome. Ensure second monitor settings and connections are properly configured.
Conclusion
To ensure your monitor displays in full screen, you may need to adjust some settings. First, check the settings of the target application or graphics card controller and make sure full screen mode is enabled. If you are using a TV as your monitor, consider turning off the Overscan feature.
Additionally, if the resolution settings do not match, you can adjust the display resolution in your computer settings. By following these steps, you can troubleshoot and fix issues related to full screen display on your monitor.