Dvr Not Showing on Monitor : Troubleshooting Tips to Fix the Issue
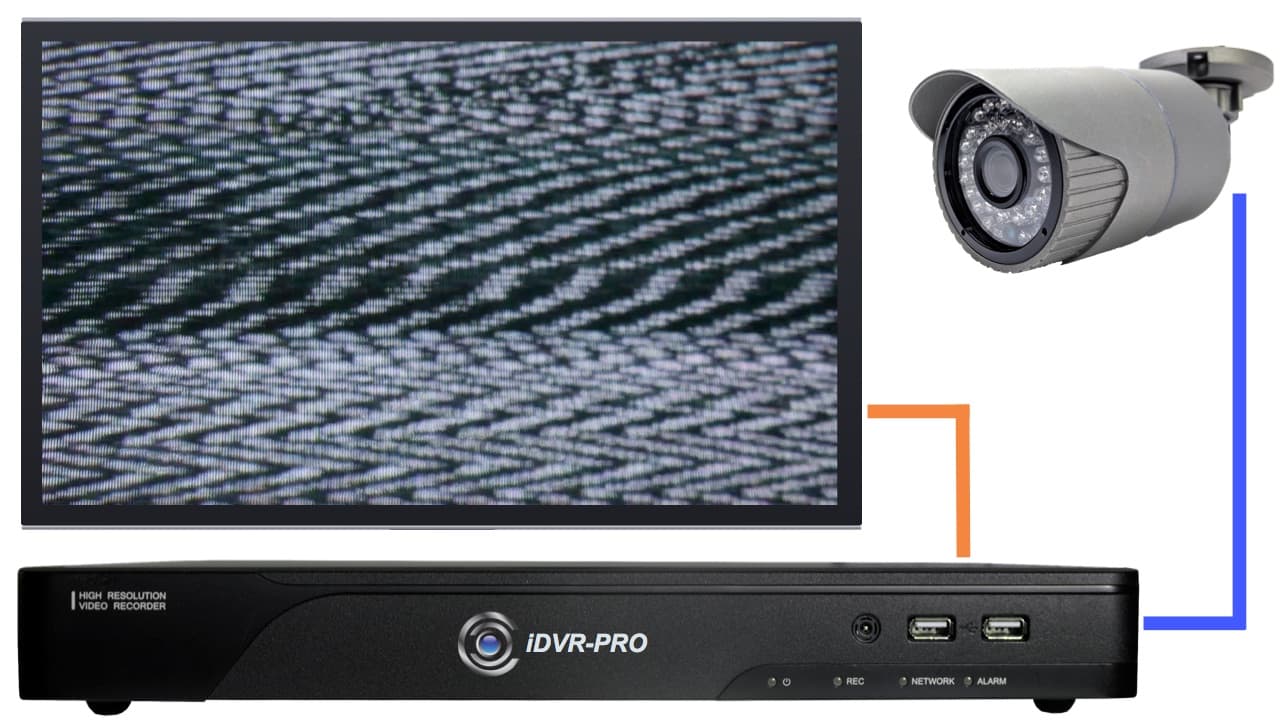
If your DVR is not showing on the monitor, it could be due to a faulty connection or incorrect settings. In order to troubleshoot the issue, you can check the cables and ensure a secure connection between the DVR and the monitor.
Additionally, make sure that the correct input source is selected on the monitor. If the problem persists, you may need to consult the user manual or contact technical support for further assistance.
Dvr Not Showing On Monitor: Initial Checks
Are you experiencing the frustration of your DVR not showing on your monitor? Don’t worry, we’re here to help. In this section, we will walk you through a series of initial checks to identify and potentially resolve the issue. By following these simple steps, you can troubleshoot the problem and get your DVR functioning properly in no time.
Ensure Power Supply Is Intact
First and foremost, it’s essential to check if the power supply to your DVR is intact. A loose or faulty power connection can prevent your DVR from displaying on the monitor. To verify this, follow these steps:
- Locate the power cable connected to your DVR.
- Ensure the power cable is securely plugged into both the DVR and the power outlet.
- Check if there are any signs of damage or wear on the power cable. If found, consider replacing it with a new one.
- Verify that the power outlet you are using is providing electricity by connecting a different device to it.
By ensuring the power supply is intact, you can eliminate any potential issues related to power loss and proceed with further troubleshooting.
Check Status Of Indicator Lights
Indicator lights on your DVR can provide valuable insights into its status and help identify connectivity issues. Here’s how to check the status of the indicator lights:
- Locate the indicator lights on your DVR. It is usually located on the front panel.
- Observe the behavior of the indicator lights. A solid green light indicates a successful connection, while a blinking or no light may indicate a problem.
- Refer to the user manual provided with your DVR for specific information about the indicator light statuses and what they indicate.
Verifying the status of the indicator lights can provide valuable clues and help narrow down the possible causes of your DVR not showing on the monitor.
Verify Cable Connections To Monitor
Loose or faulty cable connections can often cause your DVR not to display on the monitor. To ensure the cable connections are secure and properly functioning, follow these steps:
- Identify the cable that connects your DVR to the monitor. It is usually an HDMI or VGA cable.
- Check both ends of the cable for any signs of damage or bent pins.
- Disconnect the cable and reconnect it firmly on both ends.
- If available, try using a different cable to rule out the possibility of a faulty cable.
By verifying the cable connections to the monitor, you can address any potential issues related to faulty or loose connections, ensuring a seamless display of your DVR on the monitor.
Inspect For Any Visible Damage
In some cases, physical damage to your DVR or monitor can cause disruptions in the display. To identify any visible damage, follow these steps:
- Carefully examine both your DVR and monitor for any visible signs of damage such as cracks, dents, or loose connections.
- If you notice any damage, consider consulting a professional for repair or replacement.
Inspecting for visible damage can help you identify any hardware-related issues contributing to your DVR not showing on the monitor.
By following these initial checks, you can troubleshoot and potentially resolve the issue of your DVR not showing on your monitor. However, if the problem persists, it may be necessary to seek professional assistance to further diagnose and fix the underlying cause. Stay tuned for our upcoming section on advanced troubleshooting techniques.
Troubleshooting Tips To Fix The Issue
If you’re facing the frustrating problem of your DVR not showing on your monitor, don’t worry – we’ve got you covered! In this section, we’ll provide you with a few troubleshooting tips that can help you resolve this issue. Let’s dive in and get your DVR up and running!
Reboot The Dvr System
If your DVR is not showing on the monitor, the first step you should take is to reboot the system. This simple action can often fix various technical glitches and restore the connection between your DVR and the monitor. To reboot the DVR system, follow these steps:
- Turn off the DVR by pressing the power button or by disconnecting the power supply.
- Wait for about 30 seconds to ensure a complete power cycle.
- Afterward, plug the DVR back in or press the power button to turn it on.
- Wait for the system to start up fully and check if the DVR is now displaying on the monitor.
If the problem persists, there are a few more troubleshooting tips to try.
Try A Different Monitor Or Tv
If the DVR is still not showing on the monitor after rebooting, it’s worth considering if the issue lies with the monitor itself. To rule out any problems with the monitor, try connecting the DVR to a different monitor or even to a TV if available. This will help determine if the issue is specific to the original monitor or if it’s a problem with the DVR system.
Connect the DVR to a different monitor or TV using the appropriate cables or connectors and check if the display shows up. If it does, then it’s likely that the original monitor is causing the problem. Alternatively, if you still don’t see any display, you can move on to the next troubleshooting step.
Use A Different Cable Or Input Source
If trying a different monitor or TV didn’t resolve the issue, it’s time to check the cables and input sources. A faulty or disconnected cable can lead to a no display situation. Follow these steps to troubleshoot:
- Inspect the cables connecting the DVR to the monitor. Ensure they are securely plugged in at both ends and not damaged in any way.
- If possible, try using a different cable to connect the DVR to the monitor.
- Additionally, check the input source on the monitor or TV to ensure it is set to the correct input where the DVR is connected.
By trying a different cable or input source, you can eliminate these potential causes of the problem.
With these troubleshooting tips, you should be well-equipped to tackle the issue of your DVR not showing on the monitor. Remember to start with the simple solution of rebooting the system, then proceed to try a different monitor or TV if necessary, and finally, check the cables and input sources. Hopefully, one of these steps will solve the problem and get your DVR back in action!
Configuring Display Settings Correctly
When setting up your DVR system, it is essential to configure the display settings correctly to ensure that the content is visible on the monitor. Improper display settings can lead to frustrations and difficulties in monitoring your premises. In this section, we will guide you through the process of accessing the DVR’s display settings, selecting the appropriate video output mode, and adjusting the resolution and screen positioning.
Accessing Dvr’s Display Settings
To start configuring the display settings, you must first access the DVR’s menu. Follow these steps:
- Power on your DVR system and connect your monitor to the DVR using an HDMI or VGA cable, depending on the available ports.
- Using the physical buttons on the DVR or the provided remote control, navigate to the main menu.
- Once in the main menu, look for the “Display Settings” or a similar option. Select it to access the display settings menu.
By accessing the DVR’s display settings, you are now ready to configure the necessary parameters to ensure proper video output.
Selecting Appropriate Video Output Mode
The video output mode determines how the DVR sends the video signal to the monitor. Depending on the capabilities of your monitor and the available options on your DVR, you may have several video output modes to choose from. Here are the common options:
| Video Output Mode | Description |
|---|---|
| HDMI | This mode allows for high-definition video output. If your monitor supports HDMI, it is recommended to choose this option for the best video quality. |
| VGA | VGA is an analog video output mode. If your monitor lacks an HDMI port, you can use VGA, although the video quality may be slightly lower. |
| Composite | If you are using an older monitor or TV without HDMI or VGA inputs, the composite output mode can be used. This mode combines the video and audio signals into a single cable, usually the yellow RCA connector. |
Select the video output mode that is compatible with your monitor and proceed to adjust other display settings if required.
Adjusting Resolution And Screen Positioning
Now that you have selected the appropriate video output mode, it’s time to adjust the resolution and screen positioning to ensure the content is displayed correctly on the monitor. Follow these steps:
- In the display settings menu, find the “Resolution” option. Select it to choose the desired resolution.
- If your DVR supports multiple resolutions, refer to your monitor’s specifications to determine the optimal resolution and select it.
- Next, locate the “Screen Position” or “Screen Size” option. This setting allows you to adjust the positioning and size of the video content on the screen.
- Use the directional keys or knobs to move and resize the video content until it fits perfectly within the monitor’s visible area.
Make sure to save the changes and exit the display settings menu to apply the new configuration. By correctly adjusting the resolution and screen positioning, you can ensure optimal visibility of your DVR’s video feed on the connected monitor.
Resolving Common Compatibility Issues
When you encounter issues with your DVR not showing on the monitor, it can be frustrating and hinder your ability to view and manage your security footage effectively. Fortunately, there are several common compatibility issues that can be resolved to get your DVR up and running seamlessly. In this section, we will explore three crucial steps to troubleshoot and overcome these issues.
Checking For Dvr Firmware Updates
One of the most common reasons for a DVR not showing on the monitor is outdated firmware. Firmware is the software that controls the functionality of your DVR, and updating it can often resolve compatibility issues. To check for firmware updates:
- Access the DVR’s user interface through a web browser or dedicated software.
- Navigate to the settings or system tab, where the firmware update option is typically located.
- Click on the firmware update option to check for available updates.
- If updates are available, follow the on-screen instructions to download and install them.
- After the update is complete, restart your DVR and check if it now successfully displays on the monitor.
Upgrading Monitor Drivers If Necessary
The compatibility between your DVR and monitor relies on the proper functioning of the monitor drivers. Monitor drivers are software files that allow your operating system to communicate with the monitor effectively. If your DVR is not showing on the monitor, it might be due to outdated or incompatible monitor drivers. To upgrade your monitor drivers:
- Determine the make and model of your monitor by checking the manufacturer’s label on the back or front.
- Visit the manufacturer’s website and go to the support or drivers section.
- Search for the appropriate monitor driver based on your make and model.
- Download the latest version of the driver that is compatible with your operating system.
- Once the driver is downloaded, follow the installation instructions provided by the manufacturer.
- Restart your computer and see if the DVR now appears on the monitor.
Ensuring Hdcp Compliance For Content Protection
HDCP (High-bandwidth Digital Content Protection) is an essential requirement for securing high-definition content transmission between your DVR and monitor. If your DVR is not HDCP compliant, it may prevent the display from appearing on the monitor. Here’s how to ensure HDCP compliance:
- Check the specifications or user manual of your DVR to determine its HDCP compatibility.
- If your DVR is not HDCP compliant, you may need to consider purchasing a new DVR that supports HDCP.
- If your DVR is HDCP compliant, ensure that your monitor also supports HDCP. Refer to its manual or specifications to confirm.
- If your monitor is not HDCP compliant, you may need to connect your DVR to a monitor with HDCP support or use an HDMI splitter with HDCP bypass functionality.
By following these three essential steps, you can effectively troubleshoot and overcome common compatibility issues that may prevent your DVR from showing on the monitor. Remember to regularly check for firmware updates, upgrade monitor drivers if necessary, and ensure HDCP compliance for a seamless and uninterrupted viewing experience.
Alternative Solutions For Persistent Problems
Having trouble with your DVR not showing on the monitor can be frustrating, but there are alternative solutions you can try to resolve this persistent problem. In this section, we will explore the factory reset of the DVR, monitor factory reset considerations, and when to seek professional help or repairs.
Factory Reset Of The Dvr
If you have tried everything else and your DVR still fails to show on the monitor, performing a factory reset might help. This process will restore the DVR to its original settings, potentially resolving any software or configuration issues that could be causing the problem.
Before proceeding with a factory reset, it is important to note that this action will erase all data and settings on the DVR. It is crucial to back up any important recordings or configurations before proceeding.
Monitor Factory Reset Considerations
In certain cases, the issue might not lie with the DVR but rather with the monitor itself. In such situations, performing a factory reset on the monitor could help resolve the problem. However, it is essential to consider the following factors before proceeding with this step:
- Refer to the monitor’s user manual: Different monitors have varying methods of performing a factory reset. Consulting the user manual will provide you with the specific instructions for your monitor.
- Check for any physical issues: Before resetting the monitor, make sure there are no loose cables or connections that could be causing the problem. Sometimes, a simple adjustment or reconnection might eliminate the need for a factory reset.
- Backup monitor settings: If your monitor has customizable settings, such as color calibration or display preferences, consider backing up those settings before performing a factory reset. This way, you can easily restore them later.
When To Seek Professional Help Or Repairs
If despite trying the alternative solutions mentioned above, your DVR still doesn’t show on the monitor, it might be time to seek professional help. Professional technicians have the expertise to diagnose and fix more complex issues that might be beyond the scope of home troubleshooting.
Here are some signs that indicate it’s time to seek professional assistance:
- Repeated factory resets do not solve the problem
- The monitor shows no signs of life or fails to turn on
- Unusual noises or burning smells coming from the DVR or monitor
- Visible physical damage to the DVR or monitor
By reaching out to professionals, you ensure that your DVR and monitor receive the necessary expertise and repairs to rectify the issue.
Credit: reolink.com
Frequently Asked Questions On Dvr Not Showing On Monitor
Why Is My Dvr Not Showing On The Monitor?
If your DVR is not displaying on the monitor, it could be due to loose cable connections, incorrect input settings, or a faulty monitor. Check all cable connections, make sure the input source is correctly selected, and try connecting the DVR to a different monitor to troubleshoot the issue.
How Can I Fix The Issue Of Dvr Not Showing On The Monitor?
To fix the issue of DVR not showing on the monitor, ensure that the cables are securely connected, power cycle the DVR and monitor, check the input source settings on the monitor, and make sure the DVR is powered on.
If the problem persists, consult the user manual or contact the DVR manufacturer for further assistance.
What Should I Do If My Dvr Is Not Connecting To The Monitor?
If your DVR is not connecting to the monitor, start by checking the cable connections and ensuring they are securely plugged in. Try using a different cable or port on the monitor. Additionally, verify that the monitor is compatible with the DVR’s output resolution.
If the issue persists, consider contacting technical support or seeking professional assistance.
Conclusion
To sum up, if you’re experiencing the frustration of your DVR not showing on your monitor, there are several potential solutions you can try. From checking the cables and connections to adjusting monitor settings or even contacting technical support, troubleshooting this issue can save you from potential headaches.
Remember to take a step-by-step approach and be patient throughout the process. With determination and a systematic approach, you’ll likely find a resolution and get your DVR up and running again in no time. So, don’t give up, follow these tips, and get back to enjoying your surveillance system hassle-free.