Why Monitor is Not Displaying: Troubleshooting Guide
If your monitor is not displaying, it could be due to a loose or improper connection between the CPU, motherboard, RAM, power supply, or graphics card. Reseat all of these components to ensure they are properly connected.
Alternatively, you can try using them in another computer to see if they are working correctly. Troubleshooting steps such as checking if the monitor is turned on, ensuring proper cable connections, and adjusting the screen resolution could also help resolve the issue.
If these steps do not work, it may indicate a problem with the GPU or other hardware components.
Initial Checks For Power And Connectivity
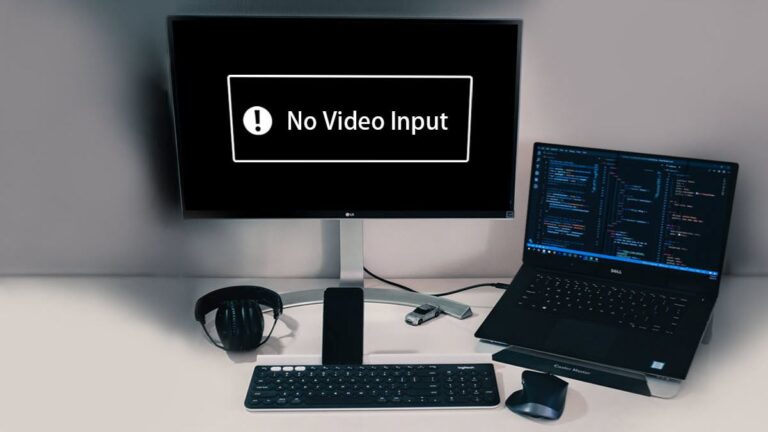
If your monitor is not displaying anything, the issue could be related to power and connectivity. Before diving into complex troubleshooting steps, it is important to perform some initial checks to ensure that these basic elements are functioning properly. In this section, we will discuss three important aspects that you should verify: ensuring the monitor is powered on, verifying cable connections, and checking for signal from the computer.
Ensure Monitor Is Powered On
The first step is to make sure that your monitor is powered on. It may seem obvious, but sometimes a simple oversight can cause unnecessary panic. Check if the power button on the monitor itself is pressed or if there is an LED light indicating that it is switched on. If you are using an external power adapter, make sure it is securely connected to a power source and the monitor.
Verify Cable Connections
Loose or improper cable connections can also result in a non-functional display. Carefully inspect the cables connecting your monitor to the computer. Ensure that they are securely plugged in at both ends. If you are using VGA or DVI cables, check for bent or damaged pins. In case you are using HDMI or DisplayPort cables, verify that they are not frayed or damaged. Sometimes, simply unplugging and re-plugging the cables can help establish a stronger connection.
Check For Signal From Computer
Another possible reason for your monitor not displaying anything is the lack of signal from the computer. Ensure that your computer is turned on and not in sleep mode. Look for any indicator lights on your computer tower or laptop that suggest it is powered on. If you have multiple display ports on your computer (such as integrated graphics or dedicated graphics card), ensure that the monitor is connected to the correct port. Additionally, you can try connecting your monitor to a different computer or using a different monitor on your current computer to determine if the issue lies with the monitor itself or the computer.
Investigating Graphics Card Issues
If your monitor is not displaying anything, one of the potential culprits could be your graphics card. The graphics card, also known as the video card, is responsible for generating the images that appear on your screen. If there is an issue with your graphics card, it can result in a blank or distorted display.
Identify Signs Of A Failing Graphics Card
Before delving deeper into troubleshooting your graphics card, it’s important to identify any signs that indicate it may be failing. Here are a few common signs to look out for:
- Random artifacts or graphical glitches on your screen
- Flickering or flashing display
- Screen freezing or crashing during intensive tasks
- Unusual fan noises or overheating
- Inability to detect or connect to multiple monitors
If you notice any of these signs, it’s highly likely that your graphics card is experiencing issues. In such cases, it’s important to investigate further and determine the underlying cause.
Test With An Alternative Output Source
One way to investigate graphics card issues is by testing your monitor with an alternative output source. This involves connecting your monitor to another device, such as a different computer or a gaming console, to see if it displays properly.
- Disconnect your monitor from the current computer.
- Connect the monitor to another device using a different cable or connector.
- Power on the alternative device and check if the monitor displays properly.
If the monitor works fine with the alternative output source, it indicates that the problem lies with your graphics card or the connection between the graphics card and the monitor. In this case, further troubleshooting is required.
However, if the monitor still does not display anything even with the alternative output source, the issue may lie with the monitor itself or other components in your system. It’s recommended to continue investigating other potential causes such as loose connections, faulty cables, or issues with the power supply.
By systematically investigating graphics card issues and testing the monitor with an alternative output source, you can determine whether the graphics card is indeed the cause of your monitor not displaying anything. This knowledge will help you take the necessary steps to resolve the issue and get your monitor up and running again.
Assessing Motherboard And Cpu Factors
If your monitor is not displaying anything, it could be due to a problem with your CPU or motherboard. Check that all connections are properly seated and try using them in another computer to ensure they are working correctly. Additionally, troubleshooting steps such as resetting the UEFI/BIOS or checking for damaged or loosely connected cables may help resolve the issue.
Monitor Responses During Post
During the Power-On Self-Test (POST), the monitor provides important feedback on the overall status of your system. Paying close attention to the monitor responses during this process can help identify potential issues with your motherboard and CPU. When you power on your computer, the monitor should display relevant messages, such as the brand logo or a prompt to enter the BIOS settings. If your monitor remains blank, it could indicate a problem with the motherboard or CPU.Inspect Motherboard For Visible Damage
One crucial step in assessing motherboard and CPU factors is to inspect the motherboard for any visible damage. A damaged motherboard can cause your monitor to not display any visuals. Carefully examine the motherboard for physical signs of damage, such as burnt components, swollen capacitors, or discolored areas. If you notice any visible damage, it is essential to address the issue promptly. In some cases, damaged components can be repaired or replaced, while in severe cases, it might be necessary to replace the entire motherboard.Ensure Each H3 Heading Adheres To Html Syntax
It is important that each H3 heading in your blog post adheres to HTML syntax. This will not only make your content structured and easily readable but also ensure compatibility with content management systems like WordPress. To use the proper HTML syntax for H3 headings, you can simply enclose the heading within the opening and closing tags. For example: “`htmlMonitor Responses During Post
“` By following HTML syntax, you can make your headings more visually appealing and optimize your blog post for search engines. Remember to apply this syntax to all H3 headings in your content.Exploring Cable And Adapter Failures
Is your monitor not displaying anything? This could be due to loose or improper connections, a faulty graphics card, or an issue with the CPU or motherboard. Try reseating all the components and using a different cable to troubleshoot the problem.
Differentiate Between Cable Types And Possible Issues
When troubleshooting a monitor that is not displaying, it is essential to understand the different types of cables and the potential issues they may present. Here are some common cable types and their associated problems:
| Cable Type | Possible Issues |
|---|---|
| HDMI | Loose connection, faulty cable, incompatible version |
| VGA | Loose connection, bent pins, damaged cable |
| DisplayPort | Loose connection, damaged cable, incompatible version |
By understanding the potential issues associated with each cable type, you can effectively diagnose and resolve problems related to display connectivity.
Testing With Known Functional Cables
One important step in troubleshooting a monitor that is not displaying is to test the monitor with known functional cables. By using cables that you know are working properly, you can determine if the issue lies with the original cable or with other components in the system.
To test with known functional cables, follow these steps:
- Disconnect the current cable from both the monitor and the computer.
- Obtain a known functional cable that is compatible with your monitor (e.g., HDMI, VGA, DisplayPort).
- Connect the known functional cable to the monitor and the computer.
- Power on the monitor and the computer.
- Check if the monitor displays properly with the new cable.
If the monitor displays correctly with the known functional cable, it indicates that the original cable was the source of the problem. However, if the issue persists even with the new cable, further troubleshooting may be required.
Adjusting On-screen Display Settings
If you are experiencing issues with your monitor not displaying correctly, adjusting the on-screen display settings can often help resolve the problem. Here are two common troubleshooting steps to consider:
Access Monitor Menus For Default Settings
To ensure that your monitor is set to its default settings, you may need to access the monitor’s menus. Follow these steps:
- Press the menu button on your monitor.
- Navigate through the menu options using the arrow buttons.
- Look for a “Reset” or “Restore Factory Defaults” option.
- Select this option to reset the monitor to its default settings.
By resetting the monitor to its default settings, you can eliminate any custom configurations that may be causing the display issue.
Troubleshoot Resolution And Refresh Rate Conflicts
Another common cause for a monitor not displaying correctly is resolution and refresh rate conflicts. To troubleshoot this issue, follow these steps:
- Right-click on your desktop and select “Display settings” or “Screen resolution”.
- Make sure that the resolution is set to the recommended or native resolution for your monitor.
- Click on “Advanced display settings”.
- Under the “Monitor” tab, check the refresh rate setting and ensure it matches the supported refresh rate of your monitor.
- If the resolution or refresh rate settings are incorrect, adjust them accordingly.
By ensuring that the resolution and refresh rate settings are compatible with your monitor, you can eliminate any conflicts that may be causing the display issue.
By following these steps to adjust the on-screen display settings, you can troubleshoot and potentially resolve issues with your monitor not displaying correctly. If the problem persists, it may be necessary to consult the manufacturer’s documentation or seek professional assistance.
Rebooting And Component Swapping
If you’re facing the frustrating issue of your monitor not displaying anything, there are a few effective troubleshooting techniques you can try. Rebooting and component swapping can help you identify and resolve the underlying problem. These methods involve performing a power cycle on the monitor and PC, as well as swapping components for process of elimination troubleshooting.
Perform A Power Cycle On The Monitor And Pc
Performing a power cycle on both your monitor and PC can often resolve display-related issues. This process helps to reset any temporary glitches or conflicts that may be preventing the monitor from displaying properly. Follow these simple steps to perform a power cycle:
- Turn off your monitor by pressing the power button.
- Unplug the power cord from the back of the monitor.
- Shut down your computer properly.
- Turn off the power supply by unplugging it from the wall outlet.
- Wait for about 30 seconds.
- Plug the power cord back into the monitor.
- Turn on the monitor.
- Plug the power supply back into the wall outlet.
- Turn on your computer.
Once you’ve completed these steps, check if the monitor is now displaying properly. If not, don’t worry. There’s another troubleshooting technique you can try.
Swap Components For Process Of Elimination Troubleshooting
Sometimes, the issue with your monitor not displaying could be due to faulty components such as the CPU, motherboard, RAM, power supply, or graphics card. Swapping these components can help identify the root cause of the problem by a process of elimination. Follow these steps to swap components:
- Make sure to turn off and unplug your computer from the power source.
- Open the computer case and locate the components mentioned above.
- Disconnect the cables and connectors attached to these components.
- Carefully remove the components from their respective slots.
- Swap the suspect component with a known working one from another computer or a spare part.
- Reconnect all the cables and connectors securely.
- Close the computer case.
- Plug in and turn on your computer.
After swapping the components, check if the monitor is now displaying properly. If it is, it indicates that the swapped component was the culprit. However, if the issue still persists, it’s likely that the problem lies elsewhere and further troubleshooting may be required.
By following these rebooting and component swapping techniques, you can effectively troubleshoot and resolve the issue of your monitor not displaying. Remember to perform a power cycle on both the monitor and PC, and swap components for process of elimination troubleshooting. These simple steps can help you identify the root cause of the problem and get your display back up and running again.

Credit: www.enerspect.com
Frequently Asked Questions On Why Monitor Is Not Displaying
Why Is My Monitor On But Not Displaying?
If your monitor is on but not displaying anything, it could be due to loose or improper connections, a faulty graphics card, or incorrect screen resolution settings. Try reseating all connections, using a different cable, or troubleshooting hardware components.
How Do I Get My Monitor To Work Again?
To get your monitor working again, check the connections of your CPU, motherboard, RAM, power supply, and graphics card. Make sure they are properly connected. You can also try using them in another computer to see if they are functioning correctly.
Why Is My Laptop On But No Display?
If your laptop is on but there is no display, it could be due to improper connections of the CPU, motherboard, RAM, power supply, or graphics card. Try reconnecting them properly or test them in another computer. Additionally, check for loose or improper connections and try using a different cable.
Why Is My Monitor Not Displaying Anything?
There could be several reasons why your monitor is not displaying anything. It could be a loose or improper connection, a faulty cable, or an issue with the screen resolution setting. Try checking the connections, using a different cable, and adjusting the screen resolution to see if that resolves the problem.
Conclusion
If your monitor is not displaying anything, it could be due to several reasons such as loose or improper connections, faulty cables, incorrect display settings, or even a damaged GPU. To troubleshoot the issue, try reseating the cables, using a different cable, adjusting the screen resolution, or even testing the monitor on another computer.
If these steps fail, it may be necessary to seek professional help to diagnose and fix the problem.