Why is My Monitor Not Working With My Laptop? Troubleshooting Tips!
If your monitor is not working with your laptop, check the video port on both the computer and the monitor for damage or bent pins. Reconnect the monitor to the computer or try using a new video cable if necessary.
It’s important to ensure that the connection is secure and the resources on the external monitor match the using connector/cable. If the issue persists, it could be caused by a faulty CPU, motherboard, RAM, power supply, or graphics card, which should be reseated for proper connection.
Troubleshooting guidebooks and online forums can provide more specific instructions based on the brand and model of your laptop and monitor.
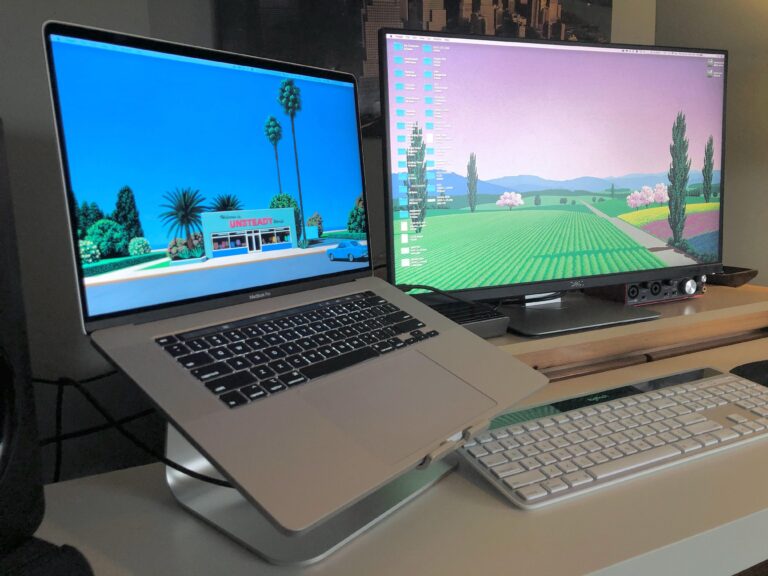
Monitor And Laptop Compatibility
If your monitor is not working with your laptop, there are a few things you can check. First, inspect the video port and cable for any damage or bent pins. If everything looks fine, try reconnecting the monitor to the computer or using a different video cable.
Verify Monitor Supports Laptop’s Graphics Output
If you’re experiencing issues with your laptop not working with your monitor, one of the first things you should check is the compatibility between your monitor and your laptop’s graphics output. Not all monitors are compatible with all laptops, particularly when it comes to the graphics output options. Some laptops may only have HDMI ports, while others may have VGA or even DisplayPort options. To verify the compatibility between your monitor and laptop, check the specifications of both devices. Look for the graphics output options of your laptop and make sure that your monitor supports those options. For example, if your laptop has an HDMI port, ensure that your monitor has an HDMI input. This will help you determine if the issue lies in compatibility between the two devices.Confirm Cable Compatibility (hdmi, Vga, Displayport)
Once you have confirmed that your monitor and laptop’s graphics output options are compatible, the next step is to check the cable compatibility. Different cable types are used to connect monitors to laptops, such as HDMI, VGA, and DisplayPort. The cable you use should match the graphics output options of your laptop and the input options of your monitor. To confirm cable compatibility, check the ports on your laptop and monitor and identify which cable type they support. If you’re using an HDMI cable, make sure that both your laptop and monitor have HDMI ports. If you’re using a VGA cable, ensure that your laptop has a VGA output and your monitor has a VGA input. Similarly, for DisplayPort, check for compatibility between the two devices.Check For Necessary Adapters Or Docks
In some cases, you may need additional adapters or docks to connect your monitor to your laptop. For example, if your laptop only has a USB-C port and your monitor doesn’t have a USB-C input, you will need a USB-C to HDMI adapter or dock to make the connection. These adapters and docks help bridge the compatibility gap between different port types. To check for necessary adapters or docks, identify the ports available on your laptop and monitor, and compare them. If you find that you need an adapter or dock to connect the two devices, make sure to purchase the correct one that is compatible with both your laptop and monitor. By ensuring monitor and laptop compatibility, confirming cable compatibility, and checking for necessary adapters or docks, you can troubleshoot and resolve monitor connection issues with your laptop effectively and efficiently.Confirming Monitor Power Status
If your monitor is not working with your laptop, check the video port and cable for any damage or bent pins. Reconnect the monitor and if possible, try using a different video cable. Additionally, ensure that the cable connecting your PC to the external monitor is secure and try changing the cable if needed.
Test Power Cable And Outlet
To confirm the power status of your monitor, start by testing the power cable and outlet. Ensure that the power cable is securely connected to both your monitor and the power outlet. Check for any visible damage to the power cable, such as frayed wires or broken connectors. If you suspect that the power outlet may be the issue, try plugging in another device to see if it powers on properly. If the power cable or outlet is faulty, you may need to replace them to resolve the issue.
Monitor Power Button And Indicator Lights
Another factor to consider when confirming the power status of your monitor is the power button and indicator lights. Make sure that the power button is in the “on” position and that the indicator lights are lit or blinking, indicating that the monitor is receiving power. If the power button is not responding or the indicator lights are not illuminated, try pressing the power button again or unplugging and re-plugging the monitor to see if it powers on. If the power button or indicator lights are not functioning properly, it may indicate a hardware issue that needs to be addressed.
Electrical Surge Or Power Outage Consideration
In some cases, a monitor may not work due to an electrical surge or a power outage. These events can cause temporary disruptions to the power supply, affecting the functionality of your monitor. To rule out this possibility, check if other electronic devices in your vicinity are also experiencing power issues. If so, wait for the power to be restored before attempting to use your monitor again. Additionally, consider using surge protectors or uninterruptible power supply (UPS) devices to safeguard your monitor and other electronic equipment from potential power-related problems.
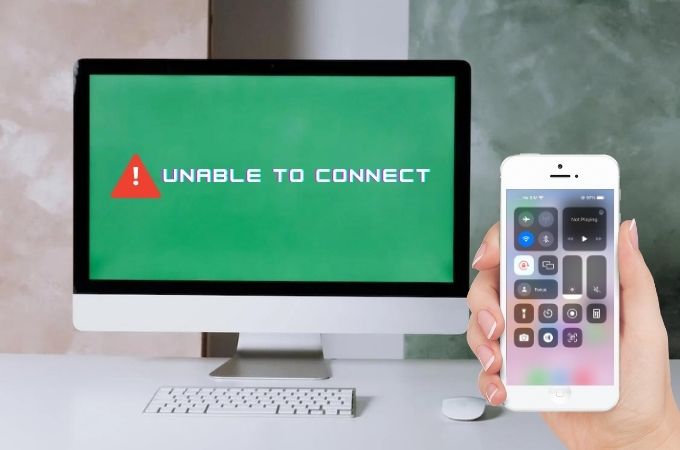
“why Is My Monitor Not Working With My Laptop?” – Core Issues
When your monitor fails to work with your laptop, it can be a frustrating experience. However, understanding the core issues that may be causing this problem can help you troubleshoot and resolve the issue efficiently. This section will discuss three key areas to focus on when tackling the “Why is My Monitor Not Working With My Laptop?” dilemma.
Ensuring Correct Input Source Selected On Monitor
One of the first things you should check is if the correct input source is selected on your monitor. Sometimes, the monitor might be set to a different input mode, causing it not to display any output from your laptop. To fix this, follow these steps:
- On your monitor, locate the input/source button or menu.
- Press the input/source button to cycle through the available input sources until you find the one connected to your laptop. Common options include HDMI, VGA, and DisplayPort.
- Once you’ve selected the correct input source, check if your laptop screen is now displaying on the monitor. If not, proceed to the next troubleshooting step.
Test With Alternate Monitor Or Laptop To Isolate Issue
If your monitor still doesn’t work with your laptop after ensuring the correct input source is selected, it’s time to determine whether the issue lies with the monitor or the laptop. To do this:
- Connect your laptop to an alternate monitor that you know is functioning properly.
- If the alternate monitor displays your laptop’s screen, it indicates that the issue lies with your original monitor. Consider checking the video cable for any damage or bent pins, or try using a different cable altogether.
- However, if the alternate monitor doesn’t work with your laptop either, it suggests that the problem stems from your laptop. Proceed to the next troubleshooting step to address the laptop-related issues.
Examine Laptop’s Display Settings And Graphics Drivers
When your laptop fails to connect to a monitor, it could be due to incorrect display settings or outdated graphics drivers. Follow these steps to examine and fix these potential issues:
- Right-click on your computer desktop and select “Display settings” from the menu that appears.
- In the Display settings window, ensure that the correct monitor is selected as the main display. If not, select the desired monitor and click “Apply.”
- If the display settings appear to be correct, it’s crucial to update your graphics drivers. Visit the manufacturer’s website, locate the latest drivers for your graphics card, and install them accordingly.
- After updating the drivers, restart your laptop and check if it recognizes and displays on the monitor.
By following these troubleshooting steps, you can address the core issues behind why your monitor is not working with your laptop. Remember to double-check the input source on your monitor, test with an alternate monitor or laptop to isolate the problem, and examine the display settings and graphics drivers on your laptop. With these measures in place, you should be able to resolve the issue and enjoy a functioning dual-screen setup once again.
Assessing Physical Connection Integrity
When your monitor is not working with your laptop, one of the first troubleshooting steps you need to take is to assess the physical connection integrity. This involves examining various components such as the video port, cables, and connection points for any issues that may be hindering the proper transmission of video signals between the two devices. By carefully inspecting these elements, you can identify and resolve any physical connection problems that may be causing the monitor to not work with your laptop.
Inspect For Bent Pins Or Damaged Ports
One common issue that can prevent your monitor from working with your laptop is bent pins or damaged ports. These can occur due to accidental mishandling or excessive force during the initial connection or while disconnecting the cable. To inspect for bent pins, carefully examine both the video port on your laptop and the corresponding port on the monitor. Look for any pins that may appear out of alignment or visibly bent. If you notice any issues, try to gently straighten the pins using a thin, non-metallic object such as a toothpick or a small screwdriver.
Cable Quality And Condition Check
The quality and condition of the video cable connecting your monitor and laptop can have a significant impact on the overall functionality of the setup. Inspect the cable for any visible signs of damage such as frayed insulation, kinks, or exposed wires. If you notice any issues, it’s recommended to replace the cable with a new one that is in good condition. Additionally, ensure that you are using the appropriate video cable for the connection type supported by both your monitor and laptop (e.g., HDMI, VGA, DisplayPort).
Secure Connection Verification
Another crucial step in assessing physical connection integrity is verifying that the connection between the monitor and laptop is secure. Sometimes, the cable may not be fully inserted or may have become loose over time, leading to an intermittent or non-existent signal. To ensure a secure connection, follow these steps:
- Power off both your laptop and monitor.
- Disconnect the video cable from both ends (laptop and monitor).
- Inspect the connectors for any debris or dirt, and clean them if necessary.
- Insert the video cable firmly into the video ports on both the laptop and monitor.
- Power on your laptop and monitor.
- Check if the monitor is now functioning properly.
By carefully assessing the physical connection integrity and addressing any issues that you may find, you can increase the chances of resolving the problem and getting your monitor to work seamlessly with your laptop once again.
Exploring Software And Hardware Fixes
If you’re experiencing issues with your monitor not working with your laptop, there could be several software and hardware fixes to explore. By identifying and resolving these issues, you can restore the functionality of your monitor and ensure a seamless display experience.
Updating Or Reinstalling Graphics Drivers
One of the common reasons for a monitor not working with a laptop is outdated or incompatible graphics drivers. Graphics drivers facilitate the communication between your laptop’s operating system and the graphics card, which is responsible for displaying images on your monitor. To resolve this issue, you can update or reinstall the graphics drivers.
To update the graphics drivers, follow these steps:
- Open the “Device Manager” by right-clicking on the “Start” menu and selecting it from the list.
- Expand the “Display adapters” category.
- Right-click on your graphics card and select “Update driver.”
- Choose the option to search automatically for updated driver software.
- Follow the on-screen instructions to complete the driver update.
If updating the graphics drivers doesn’t resolve the issue, you can try reinstalling them. To reinstall the graphics drivers, follow these steps:
- Open the “Device Manager” and expand the “Display adapters” category.
- Right-click on your graphics card and select “Uninstall device.”
- Restart your laptop.
- After the restart, the graphics drivers will be automatically reinstalled.
Laptop Function Keys For Display Toggling
Another potential fix for a monitor not working with a laptop is to use the laptop’s function keys to toggle the display. Many laptops have dedicated function keys that allow you to switch between different display modes, such as duplicating the screen, extending the screen, or using only the external monitor.
To use the laptop function keys for display toggling, follow these steps:
- Locate the function key with the display icon (usually labeled as “Fn” or with a picture of a monitor).
- Press and hold the “Fn” key while pressing the designated display function key.
- Cycle through the available display modes until the external monitor is recognized.
Bios/uefi Settings And Firmware Updates
In some cases, the issue with a monitor not working with a laptop could be related to the BIOS/UEFI settings or outdated firmware. The BIOS/UEFI is responsible for initializing the hardware components of your laptop, including the display. Outdated firmware can also cause compatibility issues with the monitor.
To access the BIOS/UEFI settings and update the firmware:
- Restart your laptop and press the designated key to enter the BIOS/UEFI setup (usually F2, F10, or Del).
- Navigate to the “Display” or “Video” section of the BIOS/UEFI settings.
- Ensure that the display settings are correctly configured and that the external monitor is recognized.
- If a firmware update is available, download it from the manufacturer’s website and follow the instructions to install it.
By exploring these software and hardware fixes, you can troubleshoot and resolve issues with your monitor not working with your laptop. Remember to try each fix step by step and test if the issue is resolved after each attempt.
Frequently Asked Questions For Why Is My Monitor Not Working With My Laptop
How Do I Get My Laptop To Recognize My Monitors?
To get your laptop to recognize your monitors, follow these steps: 1. Check the video port, cable, and monitor for any damage or bent pins. 2. Reconnect the monitor to the computer. 3. Try using a different video cable. 4. Change the cable connecting the external monitor.
5. Make sure the input resource on the external monitor matches the connector/cable you are using. If these steps don’t work, consider checking your display’s connection to the CPU, motherboard, RAM, power supply, or graphics card. Reseating them or trying them in another computer may help resolve the issue.
Why Is My Laptop Not Displaying On External Monitor?
To fix the issue of your laptop not displaying on an external monitor, check the video port, cable, and pins for any damage or bending. Reconnect the monitor to the computer and try using a different video cable. Ensure the input resource on the external monitor matches your connector/cable.
Why Is My Monitor Not Displaying?
If your monitor is not displaying, check for any damage to the video port, cable, or bent pins. Reconnect the monitor to your computer or try using a new video cable. Ensure the cable is securely connected to both the PC and the monitor.
Update your display drivers or try using the external monitor with another computer to troubleshoot the issue.
Why Is My Monitor Not Working When I Plug It Into My Computer?
If your monitor is not working when plugged into your computer, check for any damage on the video port, cable, or bent pins. Reconnecting the monitor or trying a different video cable might also help. Ensure that the input resource on the external monitor matches your connector.
Make sure the CPU, motherboard, RAM, power supply, and graphics card are properly connected.
Conclusion
If you’re experiencing issues with your monitor not working with your laptop, there are a few steps you can take to troubleshoot the problem. First, check the video ports on both the computer and the monitor for any damage or bent pins.
If there is no damage, try reconnecting the monitor to the computer or using a different video cable. Additionally, make sure the cable connecting your PC to the external monitor is secure. It’s also worth checking the input resource on the external monitor to ensure it matches the connector/cable you’re using.
By following these steps, you can hopefully resolve the issue and get your monitor working properly again.