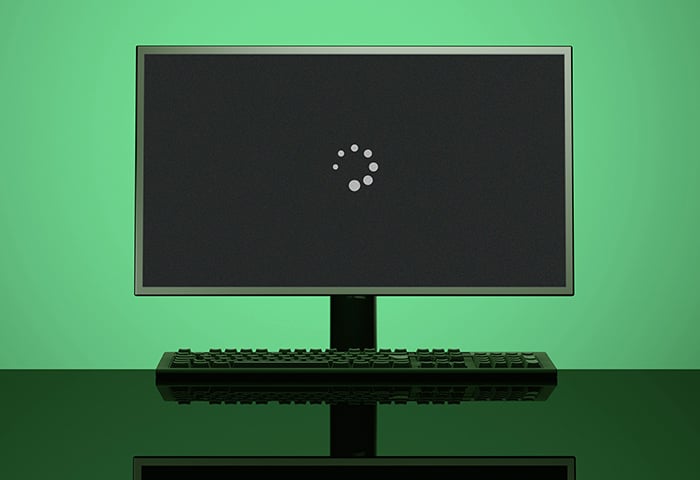
is My Monitor Not Turning on When I Turn on My Pc: Troubleshooting Solutions
The primary reason your monitor is not turning on when you turn on your PC could be damaged or loosely connected cables. Other possible reasons include incorrect display configuration, faulty or problematic GPU or RAM, incorrect BIOS configuration, faulty peripherals, or a damaged PSU (Power Supply Unit).
Confirm Cable Integrity And Connection
To troubleshoot why your monitor isn’t turning on when you start your computer, make sure all cables, such as VGA and HDMI, are connected properly. Check that the cables are connected to the graphics card and not the motherboard. Also, verify the power cord and supply unit of the monitor.
Verify Monitor Power Cord And Outlet Functionality
One of the first things to check when your monitor is not turning on is the power cord. Make sure that it is securely plugged into both the monitor and the power outlet. If it is connected properly, try connecting another device to the same power outlet to ensure that it is functioning correctly. If the power outlet is working but the monitor still does not turn on, try using a different power cord.
Ensure Proper Connection Of Vga, Hdmi, Or Displayport Cables
If your monitor is still not turning on, the next step is to check the connection of your VGA, HDMI, or DisplayPort cables. Make sure that the cables are securely plugged into both the monitor and the graphics card. It is important to note that if you have a dedicated graphics card, the cables should be connected to the graphics card itself and not to the motherboard. If you are using multiple monitors, verify that the cables are connected correctly to the corresponding ports.
Inspect For Physical Damage On Cables And Ports
Physical damage to the cables or ports can also prevent the monitor from turning on. Take a close look at the cables and ports for any signs of damage. Check for bent pins, frayed wires, or debris that may be obstructing the connection. If you find any damage, try replacing the cables or using a different port on the graphics card. Remember to handle the cables and ports with care to avoid causing further damage.
Additionally, it is a good idea to clean the ports with compressed air to remove any dust or debris that may be affecting the connection. Use a soft brush or cloth to gently clean the cables without applying excessive force.
Check Connections To Dedicated Graphics Card, Not Motherboard
If you have a dedicated graphics card installed in your computer, it is important to ensure that the monitor is connected to the graphics card and not to the motherboard. The graphics card is responsible for rendering the images and sending them to the monitor. Connecting the monitor to the motherboard instead of the graphics card can result in a blank or non-responsive screen.
To check the connection, locate the graphics card on the back of your computer and verify that the cables are securely plugged into the corresponding ports. If you are unsure which ports to use, consult the documentation that came with your graphics card or refer to the manufacturer’s website for guidance.
In Conclusion
Confirming cable integrity and connection is crucial when troubleshooting why your monitor is not turning on. By checking the power cord, ensuring proper cable connection, inspecting for physical damage, and verifying the connection to the graphics card, you can effectively identify and resolve any issues that may be preventing your monitor from turning on.
Power And Indicator Light Assessment
When your monitor fails to turn on after powering up your PC, it can be frustrating and worrisome. However, before jumping to conclusions or assuming the worst, it’s essential to perform a power and indicator light assessment. This step-by-step process will help you identify and resolve common issues that could be causing the problem.
Observe Monitor Power Button And Indicator Lights
The first step in the power and indicator light assessment is to carefully observe your monitor’s power button and indicator lights. These lights can provide valuable information about its current status and any potential issues. Here’s what to look for:
- Check if the power button is lit up or not. If it’s not illuminated, it may indicate a power supply problem.
- Examine the indicator lights on the monitor. They may blink in a specific pattern or display a different color, indicating an error code. Consult your monitor’s manual to interpret these codes.
Cross-check With Monitor Manual For Error Indicators
Once you’ve noted any unusual patterns or colors in the power button or indicator lights, it’s vital to refer to your monitor’s manual. The manual will provide detailed information specifically tailored to your monitor model. Look for a troubleshooting section that includes a list of error codes and their corresponding explanations.
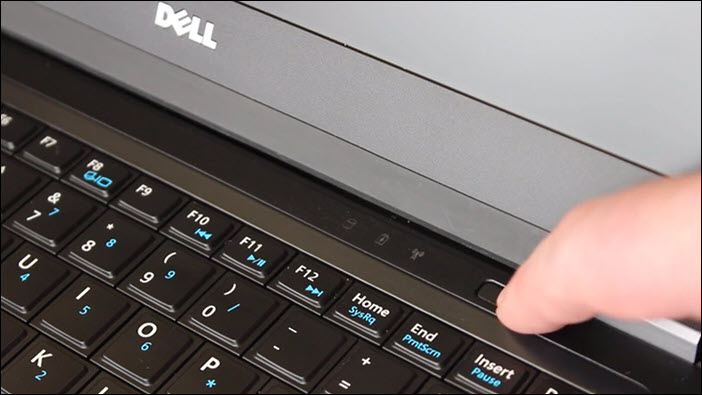
Perform A Power Reset By Unplugging The Monitor
If you haven’t found any error codes or indicators, the next step is performing a power reset. This involves unplugging the monitor from its power source and waiting for approximately 30 seconds before plugging it back in.
By doing a power reset, you allow the monitor’s internal components to discharge any residual electricity and reset themselves to their default state. This can often resolve minor issues that prevent the monitor from turning on.
Test With An Alternative Power Source Or Cable
If the previous steps didn’t resolve the issue, it’s time to test the monitor with an alternative power source or cable. This will help determine whether the problem lies with the monitor itself or with the power source or cable being used.
Start by trying a different power outlet or surge protector to ensure that the current power source is not the culprit. If the monitor still fails to turn on, try using a different power cable or swapping out the existing cable with a known working one. This will help isolate whether the issue lies with a faulty cable.
By following these power and indicator light assessment steps, you can narrow down the potential causes for your monitor not turning on when you turn on your PC. Remember to stay calm and patient throughout the process, as troubleshooting can often be a trial-and-error journey.
Verify Monitor Functionality
If your monitor is not turning on when you start your computer, it could be due to damaged or loosely connected cables, incorrect display configuration, or faulty GPU or RAM. Make sure all cables are connected properly and consider checking your display settings or troubleshooting your hardware components if the issue persists.
If you’re experiencing the frustrating issue of your monitor not turning on when you start up your PC, it’s time to verify the functionality of your monitor. There are a few steps you can take to determine whether the problem lies with the monitor itself or with other components.
Use A Known Working Monitor To Test Pc Output
The first step is to test whether your PC is outputting any display at all. Grab a known working monitor and connect it to your PC using the appropriate cables, such as VGA or HDMI. Ensure that the cables are securely connected to both the monitor and the graphics card, rather than the motherboard. This will help rule out any issues with the PC’s output.
Connect The Suspect Monitor To A Different Pc
If the known working monitor displays output from your PC without any issues, it’s time to focus on the suspect monitor itself. Connect the suspect monitor to a different PC using the same cables, but make sure to power off both the PC and the monitor before making any connections. Power on the PC and monitor to see if the suspect monitor is able to display the output. If it does, the issue may be specific to your original PC setup.
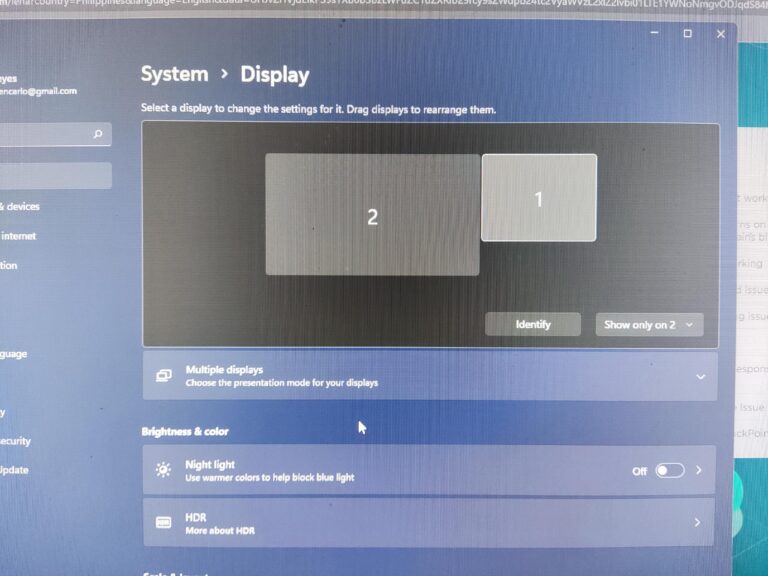
Check For Compatibility Issues Between The Pc And Monitor
In some cases, compatibility issues between your PC and monitor can prevent the display from turning on. Check the specifications of your monitor and ensure that it is compatible with your PC. Pay attention to factors such as resolution, refresh rate, and connection type. If there are any mismatches or compatibility issues, you may need to adjust the settings on your PC or consider using a different monitor.
By following these steps to verify the functionality of your monitor, you can narrow down the possible causes of your monitor not turning on when you start up your PC. Remember to test with a known working monitor, connect the suspect monitor to a different PC, and check for compatibility issues between your PC and monitor to troubleshoot the issue effectively.
Graphics Card And Driver Considerations
When your computer boots up, but your monitor remains unresponsive, there might be issues related to your graphics card and drivers. These components play a crucial role in displaying visuals on your screen. Here are some troubleshooting steps to consider:
Inspect The Graphics Card Seating And Cleanliness
First, check the seating and cleanliness of your graphics card. Ensure that it is properly inserted into the PCI slot on the motherboard. Over time, the card may become loose due to vibrations or accidental bumps. If this is the case, gently push the card back into place to establish a secure connection. Additionally, make sure to remove any dust or debris that might have accumulated in the PCI slot or on the graphics card using compressed air or a soft brush.
Update, Rollback, Or Reinstall Video Drivers
Outdated or incompatible video drivers can cause communication issues between your graphics card and monitor, resulting in a black screen or no display. To resolve this, consider updating, rolling back, or reinstalling your video drivers.
- To update video drivers, visit the manufacturer’s website of your graphics card and download the latest drivers compatible with your operating system. Install them and restart your computer.
- If updating the drivers doesn’t solve the issue, try rolling back the drivers to a previously installed version. To do this, go to “Device Manager” in your Windows computer, locate your graphics card under the “Display adapters” section, right-click on it, and select “Properties.” In the “Driver” tab, click on “Roll Back Driver” and follow the on-screen instructions.
- If the above steps fail, you can uninstall the video drivers completely and then reinstall them. Again, go to “Device Manager,” right-click on your graphics card, select “Uninstall device,” and follow the prompts. After uninstalling, restart your computer and reinstall the drivers from the manufacturer’s website.
Check For Proper Recognition Of The Monitor In Device Manager
Another potential issue could be the improper recognition of your monitor by the device manager, which may prevent it from displaying anything. To check this:
- Press the Windows key + R to open the “Run” dialog box.
- Type “devmgmt.msc” and hit Enter to open the Device Manager.
- Expand the “Monitors” section.
- If you see a yellow exclamation mark or a “Generic PnP Monitor” entry, right-click on it and select “Update driver.” Follow the on-screen instructions to update the driver.
By inspecting the graphics card seating, updating or reinstalling video drivers, and checking for proper recognition in the device manager, you can resolve many issues related to your monitor not turning on when you turn on your PC. Remember to take necessary precautions while handling hardware components and ensure compatibility of drivers with your operating system for optimal results.
Internal Component Inspection
If your monitor is not turning on when you start your computer, the primary reason could be damaged or loosely connected cables. Other potential causes include incorrect display configuration, a faulty GPU or RAM, or incorrect BIOS configuration. Make sure to check all of these components to troubleshoot the issue.
Ensure Proper Ram Installation And Functionality
One of the possible reasons why your monitor may not be turning on when you turn on your PC is due to issues with the RAM (Random Access Memory) installation or functionality. Improperly installed or faulty RAM can prevent your computer from properly booting up and displaying anything on the monitor. To troubleshoot this issue, you can follow these steps:- Ensure that the RAM modules are securely and properly installed in their respective slots on the motherboard. If you’re unsure of how to install RAM, refer to your motherboard’s manual for guidance.
- If you have multiple RAM modules installed, try removing all but one module and see if the monitor turns on. If it does, then one of the removed modules may be faulty.
- If you have spare RAM modules available, try replacing the currently installed modules with the spare ones to determine if the issue lies with the RAM itself.
- If you’ve made any changes to the BIOS settings, try resetting the BIOS to its default settings. Faulty or incompatible BIOS settings can also cause display issues.
Check The Motherboard’s Diagnostic Leds Or Beep Codes
Another troubleshooting step you can take to identify the cause of your monitor not turning on is to check the diagnostic LEDs or beep codes provided by your motherboard. Many motherboards have diagnostic LEDs or integrated speakers that can indicate any hardware issues during the boot process. These indicators can provide valuable insight into the specific component causing the problem. To check the diagnostic LEDs or beep codes:- Refer to your motherboard’s manual to identify the location and meaning of the diagnostic LEDs or beep codes.
- Turn on your PC and observe the diagnostic LEDs or listen for any beeping sounds.
- Match the observed LEDs or beep codes with the information in the manual to determine the potential hardware issue.
Test The Power Supply Unit (psu) And Confirm Voltages
A faulty power supply unit (PSU) can also be the reason why your monitor is not turning on when you turn on your PC. The PSU provides the necessary power to all the components in your computer, including the graphics card and motherboard. To test the PSU and confirm its voltages:- Before starting, ensure that your PC and PSU are unplugged from the power source.
- Remove the side panel of your computer case to access the internal components.
- Locate the main power connector from the PSU to the motherboard. It usually consists of a 24-pin or 20+4-pin connector.
- Use a multimeter to measure the voltage levels of the different pins on the main power connector.
- Refer to your PSU’s manufacturer specifications to determine the expected voltage levels for each pin.
- If any of the measured voltages are significantly different from the expected levels, it may indicate a faulty PSU that needs to be replaced.
Bios And Firmware Checks
When your monitor fails to turn on along with your PC, it may be due to issues with the BIOS (Basic Input/Output System) or firmware. These checks involve resetting the BIOS/UEFI to default settings and cross-referencing the user manual for specific BIOS error responses. Conducting these checks can help identify and resolve any underlying issues, ensuring that your monitor functions properly.
Reset The Bios/uefi To Default Settings
One troubleshooting step to consider is resetting the BIOS/UEFI to its default settings, as incorrect configurations can prevent the monitor from turning on. Here’s how you can proceed:
- Restart your PC and access the BIOS/UEFI settings by pressing the designated key during the boot sequence (common keys include F2, DEL, or F12).
- Once inside the BIOS/UEFI interface, navigate to the “Reset” or “Restore Defaults” option. This option might be located under different tabs or menus, depending on your motherboard manufacturer.
- Select the “Reset” or “Restore Defaults” option and confirm your selection.
- Save the changes and exit the BIOS/UEFI settings. Your PC will then restart.
Cross-reference The User Manual For Specific Bios Error Responses
If resetting the BIOS/UEFI did not resolve the issue, it may be beneficial to consult the user manual that came with your motherboard. The manual provides valuable information regarding specific error codes or messages displayed by the BIOS. Here’s how you can cross-reference the manual:
- Locate the user manual that came with your motherboard. If you no longer have the physical manual, you can typically find a digital version on the manufacturer’s website.
- Search for the section that discusses BIOS error codes or messages.
- Identify the error code or message displayed on your monitor and refer to the corresponding information in the manual. This can help you understand the underlying issue causing the monitor not to turn on.
- Based on the information provided in the manual, follow the recommended troubleshooting steps to resolve the error.
By resetting the BIOS/UEFI to default settings and cross-referencing the user manual for specific BIOS error responses, you can effectively troubleshoot the issue of your monitor not turning on when you turn on your PC. These checks ensure that your system configuration is correct and can help identify any potential hardware or firmware-related issues.
Explore Safe Mode And Recovery Options
When your monitor fails to turn on even when your PC is powered on, it can be frustrating and concerning. However, there are troubleshooting steps you can take to diagnose the issue and get your monitor up and running again. One effective approach is to explore safe mode and recovery options, which can help you pinpoint the underlying problem.
Boot Into Safe Mode To Diagnose Software Conflicts
Safe Mode is a diagnostic mode that allows your computer to start with only essential drivers and services. By booting into Safe Mode, you can determine if the lack of display is caused by a software conflict. To enter Safe Mode in Windows:
- Start by shutting down your computer completely.
- Press the power button to turn it on, and as soon as you see the manufacturer’s logo appear, start pressing the F8 key.
- A menu will appear on your screen. Use the arrow keys to navigate to the “Safe Mode” option and press Enter.
- Your computer will then boot into Safe Mode, and you can observe if the monitor is working.
If your monitor turns on in Safe Mode, this indicates that a software conflict is likely causing the issue. You can then troubleshoot by uninstalling recently installed programs, updating drivers, or performing a system restore to a previous point in time.
Use Windows Recovery Or Repair Options If The Pc Starts But Monitor Remains Blank
If your PC starts up normally but the monitor remains blank, you can utilize Windows Recovery or repair options to address the problem. These options are designed to fix issues with the operating system or system files that may be causing the lack of display.
- Start by shutting down your computer completely.
- Turn it back on and immediately press the F8 key repeatedly until you see the Advanced Boot Options menu.
- Use the arrow keys to navigate to the “Repair Your Computer” option and press Enter.
- Next, select the appropriate language and keyboard input method, then click “Next”.
- Login to your account, if prompted, and then choose the “Startup Repair” option or any other repair option that seems relevant.
Windows will then attempt to diagnose and repair the issue automatically. Follow the on-screen instructions and wait for the process to complete. Once finished, restart your computer and check if the monitor is now functioning properly.
Exploring safe mode and recovery options can be highly effective in troubleshooting monitor issues when your PC is powered on. By following these steps, you can identify and resolve software conflicts or system errors that may be preventing your monitor from turning on.
Resolve System Overclocking And Heat Issues
If your monitor is not turning on when you start your PC, the issue could be due to damaged or loosely connected cables. Other possible reasons include incorrect display configuration, faulty GPU or RAM, or incorrect power supply settings. Make sure to check and ensure all cables are properly connected and the display settings are correctly configured.
If the issue persists, it may be necessary to seek further troubleshooting or professional assistance.
One common reason for a monitor not turning on when you turn on your PC is system overclocking and heat issues. Overclocking refers to running your computer hardware, such as the CPU or GPU, at higher speeds than the manufacturer’s recommended settings. While overclocking can provide a performance boost, it can also lead to stability problems and overheating.
Revert Any Recent Cpu Or Gpu Overclocking
If you have recently overclocked your CPU or GPU, it is worth reverting those changes to see if it resolves the monitor issue. Overclocking can put an additional strain on your hardware, causing instability and potential failure. To revert the overclocking, follow these steps:
- Restart your PC and enter the BIOS settings by pressing the designated key during startup (usually Del, F2, or F10).
- Navigate to the CPU or GPU settings section.
- Look for any options related to overclocking, such as “CPU multiplier” or “GPU clock speed”.
- Set the values back to their default settings or turn off any overclocking features.
- Save the changes and exit the BIOS settings.
- Restart your PC and check if the monitor turns on.
Confirm Proper Cooling And Remove Dust Buildup
Overheating can also prevent your monitor from turning on when you start your PC. High temperatures can cause your hardware to malfunction and trigger protective measures that prevent the display from activating. To address cooling and dust issues, follow these steps:
- Ensure that your PC has an adequate cooling system, including fans and heat sinks.
- Check if the fans are spinning properly and that there are no obstructions blocking airflow.
- If you notice a significant amount of dust buildup inside your PC, power it off and unplug it from the electrical outlet.
- Open the PC case and use compressed air or a soft brush to carefully remove the dust from the components, especially the fans and heat sinks.
- Make sure to clean both the intake and exhaust areas of the fans.
- After cleaning, close the PC case and reconnect all cables.
- Power on your PC and check if the monitor turns on.
By reverting any recent CPU or GPU overclocking and addressing cooling and dust buildup, you can potentially resolve system overclocking and heat issues that may be preventing your monitor from turning on when you start your PC. This troubleshooting approach can help ensure the proper functioning of your hardware and a reliable display experience.
Seek Professional Tech Support
If you’ve exhausted all your DIY troubleshooting solutions and your monitor still refuses to turn on when you turn on your PC, it’s time to seek professional tech support. Here are a few options to consider:
When Diy Solutions Fail, Contact Manufacturer Support
If your monitor is still under warranty, reaching out to the manufacturer support team is a wise move. They have the expertise to diagnose and troubleshoot any technical issues specific to your monitor model. To contact their support, visit their website or call their customer service hotline.
Consider Taking The Pc And Monitor To A Certified Repair Shop
If your monitor is no longer under warranty or you prefer to have a professional handle the repair process, you can take your PC and monitor to a certified repair shop. These shops employ experienced technicians who can diagnose the problem accurately and provide appropriate solutions. They may have access to specialized tools and replacement parts that can fix the issue efficiently.
When choosing a repair shop, make sure they have a good reputation and positive customer reviews. Ask about their certifications and inquire about their repair process and turnaround time. Additionally, consider comparing quotes from different repair shops to ensure you’re getting a fair price for the service.
Remember, seeking professional tech support can save you time, effort, and potentially prevent further damage to your monitor. Don’t hesitate to reach out to experts who can resolve the issue and get your monitor up and running again.
Consideration Of Peripheral Interactions
To troubleshoot why your monitor isn’t turning on when you start your computer, start by ensuring that all cables, such as the VGA and HDMI cables, are properly connected and working. Make sure they are connected to the graphics card and not the motherboard.
Additionally, check the monitor’s power cord and power supply unit. If the issue persists, try rebooting and clearing the CMOS.
When troubleshooting why your monitor is not turning on when you turn on your PC, it is important to consider the interactions of your peripherals. Issues with non-essential peripherals can sometimes affect the display. By disconnecting these peripherals, you can narrow down the possible causes and find a solution faster.
Disconnect All Non-essential Peripherals
The first step is to disconnect all non-essential peripherals from your computer. This includes devices such as external hard drives, printers, scanners, and USB devices. Sometimes, a conflict or compatibility issue with these peripherals can prevent the monitor from turning on.
- Shut down your computer.
- Safely unplug and remove all non-essential peripherals from your computer.
After disconnecting the peripherals, try turning on your PC again and check if the monitor turns on. If it does, one of the disconnected peripherals may be causing the issue. You can then reconnect them one by one to identify the problematic device.
Test For Display Issues With Minimal Hardware Setup
If disconnecting non-essential peripherals does not solve the problem, the next step is to test for display issues with a minimal hardware setup. This helps to determine if there is any hardware component causing the monitor not to turn on.
- Shut down your computer.
- Disconnect all peripherals except for the essential components, such as the power cable, monitor cable, mouse, and keyboard.
Once the minimal hardware setup is complete, turn on your PC and check if the monitor turns on. If it does, then gradually reconnect each peripheral to identify the faulty component.
By considering the interactions of your peripherals and following these troubleshooting steps, you can effectively diagnose and resolve the issue of your monitor not turning on when you turn on your PC.
Frequently Asked Questions Of Why Is My Monitor Not Turning On When I Turn On My Pc
Why Is My Monitor Not Turning On When I Start My Computer?
There could be several reasons why your monitor is not turning on when you start your computer. Some possible causes include: damaged or loosely connected cables, incorrect display configuration, faulty or problematic GPU or RAM, incorrect BIOS configuration, faulty peripheral devices, or a damaged Power Supply Unit (PSU).
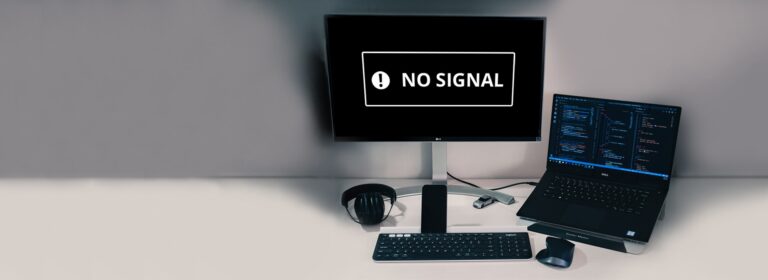
Why Is There No Signal To My Monitor When My Pc Turns On?
No signal to the monitor when PC turns on? Check cable connections, like VGA and HDMI, ensuring they’re connected to graphics card. Verify monitor’s power cord and supply unit. Troubleshoot by force waking monitor using Win+P or Ctrl+Alt+Del shortcut. Consider rolling back or uninstalling display driver.
Test monitor and power supply switch.
Why Does My Monitor Go Black When I Turn On My Pc?
When your monitor goes black when you turn on your PC, it could be due to damaged or loosely connected cables, incorrect display configuration, faulty GPU or RAM, incorrect BIOS configuration, faulty peripheral devices, or damaged PSU. Ensure all cables are connected properly and check for any hardware issues.
Why Won’t My Pc Go Onto My Monitor?
If your PC won’t connect to your monitor, first check that all cables, like VGA and HDMI, are properly connected to the graphics card, not the motherboard. Also, verify that the monitor’s power cord and power supply unit are functioning.
You can use keyboard shortcuts like Win+P or Ctrl+Alt+Del to wake up the monitor if it’s asleep. Additionally, consider checking and reinstalling display drivers if necessary.
Conclusion
Onitor not turn on when PC is turned on? There can be several reasons why your monitor is not turning on when you turn on your PC. First, check if all cables are properly connected and working. Ensure that the cables are connected to the graphics card and not the motherboard.
Additionally, verify the monitor’s power cord and power supply unit. If these steps don’t resolve the issue, consider checking for faulty display drivers, incorrect display configuration, or damaged hardware components such as the GPU or RAM.