Why is My Monitor Not Getting Signal from PC: Troubleshooting Guide
There are several reasons why your monitor may not be receiving a signal from your PC, including a loose or defective cable. To fix this issue, check that the cable connecting your computer to your monitor is securely plugged in.
Wrong Connection Port Selected
One of the most common reasons for a monitor not receiving a signal from a PC is due to the wrong connection port being selected. This can happen if the cable is not properly connected or if the input source on the monitor is incorrectly set. In this section, we will explore how to troubleshoot and fix this issue.
Verify Monitor Input Source
First, you need to make sure that the input source on your monitor is correctly selected. Many monitors have multiple input ports, such as HDMI, VGA, or DisplayPort. If you are using the wrong input source, your monitor will not receive a signal from your PC.
To verify and change the input source on your monitor, follow these steps:
- Locate the input/source button on your monitor. This button is usually located on the front or side of the monitor.
- Press the input/source button to access the input/source menu.
- Using the navigation buttons on your monitor, select the correct input port that is connected to your PC. For example, if you are using an HDMI cable, select the HDMI input option.
- Once you have selected the correct input source, press the input/source button again to confirm the selection.
Check Pc’s Output Port
In addition to verifying the input source on your monitor, you also need to check the output port on your PC. Make sure that the cable from your PC is securely connected to the correct output port.
Depending on your PC, you may have different output ports, such as HDMI, VGA, or DVI. Here are the steps to ensure the correct connection:
- Locate the output port on your PC. This is where you connect the cable that goes to your monitor.
- Ensure that the cable is firmly inserted into the output port. Sometimes, a loose connection can result in a “no signal” error.
- If you are unsure which output port to use, consult your PC’s manual or check the specifications online.
By verifying the monitor’s input source and checking the PC’s output port, you can troubleshoot and resolve the issue of a monitor not receiving a signal from your PC. Make sure all connections are secure and that the correct input source is selected, allowing your monitor to display the output from your PC.
Cable Inspection & Management
One of the most common reasons why your monitor is not getting a signal from your PC is due to issues with the cable connection. It is essential to inspect and manage your cables properly to ensure a stable and reliable connection. By following a few simple steps, you can troubleshoot and resolve this issue effectively.
H3 Secure And Reseat Cable Connections /h3
The first step is to securely connect and reseat all cable connections. Sometimes, loose connections can result in a “no signal” problem. To do this:
- Turn off your computer and monitor.
- Check the cable connections at both ends, ensuring they are firmly inserted.
- If the cables feel loose, gently remove and reinsert them, making sure they are properly seated.
- Ensure that the cables are securely fastened to prevent any accidental disconnection.
H3 Cable Damage Assessment /h3
In some cases, the cable itself may be damaged, resulting in a loss of signal. To assess cable damage:
- Inspect the cable for any visible signs of physical damage, such as cuts, fraying, or bent connectors.
- If you notice any signs of damage, replace the cable with a new one.
- Ensure that the new cable is compatible with your computer and monitor connectivity ports.
H3 Alternatives: Hdmi, Dvi, Vga, Dp /h3
If the issue persists, you can try using alternative cable options depending on the available ports on your computer and monitor. Some common options include:
| Option | Description |
|---|---|
| HDMI | A widely-used digital connection that supports high-definition video and audio signals. |
| DVI | Another digital connection that provides a high-quality video signal but does not support audio. |
| VGA | An analog connection commonly found on older computer systems, providing lower-quality video signals. |
| DP (DisplayPort) | A digital connection similar to HDMI that supports high-definition video and audio signals. |
Try using a different cable option that is compatible with your computer and monitor ports. This can help determine if the issue lies with the cable or the specific connection.
By thoroughly inspecting and managing your cables, you can troubleshoot why your monitor is not receiving a signal from your PC. Whether it’s securing and reseating cable connections, assessing cable damage, or exploring alternative options, following these steps will help you resolve the “no signal” issue effectively.
Signal Troubles With Gpu And Motherboard
Signal troubles with the GPU and motherboard can be a frustrating experience when your monitor is not getting a signal from your PC. This issue can prevent you from accessing your computer and can greatly hinder your productivity. To help you troubleshoot and resolve this problem, we have identified a few potential causes and solutions.
Testing Integrated Graphics
Firstly, it is important to determine whether the issue lies with the GPU or the motherboard’s integrated graphics. To do this, follow these steps:
- Power off your computer and disconnect the power cable.
- Remove the GPU from the motherboard.
- Plug your monitor directly into the motherboard’s video output.
- Power on your computer and check if the monitor receives a signal.
If the monitor receives a signal when connected to the motherboard’s video output, it indicates that the issue lies with the GPU. In this case, reseating or replacing the GPU may be necessary.
Ensuring Proper Gpu Seating
If the issue is indeed with the GPU, it is crucial to ensure that it is properly seated in the motherboard. Follow these steps to check and reseat the GPU:
- Power off your computer and disconnect the power cable.
- Remove the GPU from the motherboard.
- Carefully reinsert the GPU into the appropriate PCI-E slot on the motherboard.
- Make sure the GPU is securely and firmly seated.
- Connect your monitor to the GPU’s video output.
- Power on your computer and check if the monitor receives a signal.
External Graphics Card Consideration
If the previously mentioned steps do not resolve the issue and you have access to an external graphics card, you can try using it to determine if the problem lies with your current GPU. Follow these steps:
- Power off your computer and disconnect the power cable.
- Remove your current GPU from the motherboard.
- Install the external graphics card into the appropriate PCI-E slot on the motherboard.
- Connect your monitor to the external graphics card’s video output.
- Power on your computer and check if the monitor receives a signal.
If the monitor receives a signal when connected to the external graphics card, it suggests that your previous GPU may be faulty and needs to be replaced.
By following these troubleshooting steps and determining whether the issue lies with the GPU or the motherboard’s integrated graphics, you can effectively resolve signal troubles and ensure that your monitor receives a signal from your PC.

Credit: www.avg.com
Power Supply And Hardware Checks
When your monitor is not getting a signal from your PC, there could be various reasons behind it. One crucial aspect to consider is the power supply and hardware checks. These checks will help you identify any issues related to power supply or hardware components that might be causing the problem. Let’s dive deeper into the specific areas that you need to focus on:
Confirm Power To Monitor And Pc
First and foremost, you need to ensure that both your monitor and PC are receiving power. It might sound obvious, but sometimes simple things can go unnoticed. Check if the power cords of both the monitor and PC are securely plugged into the wall outlets. If they are connected to a power strip, verify if the power strip is turned on.
Inspect Psu And Power Connections
The power supply unit (PSU) plays a crucial role in delivering power to your PC’s components. If the PSU is faulty or the power connections are loose, it can result in a no signal issue. Start by inspecting the PSU. Look for any visible signs of damage, such as burnt components or bulging capacitors. If everything seems fine, check the power connections inside your PC. Ensure that the power cables from the PSU are securely connected to the motherboard, GPU, and other components.
Hardware Diagnostic Tests
Performing hardware diagnostic tests can help you identify if any specific component is causing the no signal problem. Start by disconnecting all unnecessary hardware peripherals from your PC, such as printers or external drives. Leave only the essentials connected, including the monitor, keyboard, and mouse.
Once you have minimized the setup, power on your PC and observe if the monitor receives a signal. If it does, gradually reconnect each disconnected peripheral one by one to identify if any particular hardware is causing the issue. If the problem persists even with minimal hardware connected, it may indicate a faulty component within your PC, such as the motherboard or GPU.
Obstructive Software And Drivers
One of the common reasons why your monitor may not be receiving a signal from your PC is due to obstructive software and drivers. These issues can cause interruptions in the communication between your computer and monitor, resulting in a ‘no signal’ message. In this section, we will explore two potential causes under this category: update and reinstall drivers, and BIOS/UEFI settings and updates.
Update And Reinstall Drivers
Outdated or corrupted drivers can often lead to connectivity issues between your PC and monitor. To resolve this problem, you can update or reinstall the drivers for your graphics card or monitor. Follow these steps:
- Identify the manufacturer and model of your graphics card or monitor. You can usually find this information in the device manager or by checking the documentation that came with your hardware.
- Visit the manufacturer’s website and navigate to the support or downloads section.
- Search for the latest drivers for your specific hardware model.
- Download the appropriate drivers and save them to a location on your computer.
- Open the downloaded file and follow the on-screen instructions to install the drivers.
- Once the installation is complete, restart your computer and check if the ‘no signal’ issue has been resolved.
Bios/uefi Settings And Updates
The BIOS (Basic Input/Output System) or UEFI (Unified Extensible Firmware Interface) settings control the initialization and communication between various hardware components, including the graphics card and monitor. Incorrect or outdated BIOS/UEFI settings can result in the monitor not receiving a signal. To update or configure these settings, you can follow these steps:
- Restart your computer and repeatedly press the key indicated during the boot process to access the BIOS/UEFI settings (common keys include F2, Del, or Esc).
- Navigate to the graphics or display settings.
- Ensure that the primary display option is set to your desired output (e.g., PCI-E or dedicated graphics card).
- Save the changes and exit the BIOS/UEFI settings.
- Restart your computer and check if the monitor receives a signal.
Additionally, it is recommended to periodically update your BIOS/UEFI firmware to the latest version provided by the manufacturer. This can help resolve any compatibility issues that may be causing the ‘no signal’ problem.
By updating and reinstalling drivers, as well as configuring the BIOS/UEFI settings, you can often resolve the issue of your monitor not receiving a signal from your PC. If the problem persists, you may want to consider contacting technical support or seeking professional assistance to further diagnose and resolve the issue.
Display And Resolution Conflicts
If you’re wondering why your monitor is not getting a signal from your PC, it could be due to a loose or defective cable connection. Double-check that the cable is securely plugged into both your computer and monitor to ensure a proper connection.
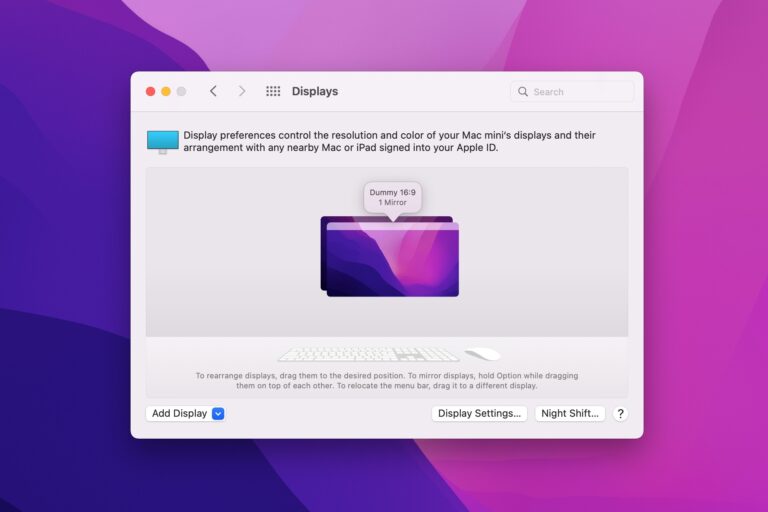
Adjust Pc’s Display Settings
If you’re experiencing a “no signal” issue on your monitor, it could be due to display settings conflicts on your PC. Incorrect display settings can prevent your monitor from receiving the signal from your computer. To resolve this, you need to adjust your PC’s display settings.
Follow these steps to adjust your PC’s display settings:
- Right-click on your desktop and select “Display settings” from the context menu.
- In the Display settings window, you can change the resolution, orientation, and scale of your display. Make sure the resolution is set to the recommended or native resolution of your monitor.
- Click on the “Apply” button to save the changes.
- If you’re using multiple monitors, make sure the “Extend” or “Duplicate” option is selected correctly.
Monitor’s Native Resolution Setup
Your monitor has a native resolution that displays the optimal image quality. If the resolution is set too high or too low, it can result in a “no signal” error. To fix this, you need to set your monitor’s native resolution correctly.
Here’s how you can set your monitor’s native resolution:
- Refer to your monitor’s user manual or visit the manufacturer’s website to find the native resolution.
- Right-click on your desktop and select “Display settings” from the context menu.
- In the Display settings window, scroll down to the “Resolution” section.
- Select the native resolution recommended by your monitor manufacturer.
- Click on the “Apply” button to save the changes.
Safe Mode Troubleshooting
If adjusting the display settings and setting the native resolution didn’t resolve the “no signal” issue, you can try troubleshooting in safe mode. Safe mode starts your PC with minimal drivers and services, allowing you to diagnose and fix display-related problems.
Follow these steps to troubleshoot in safe mode:
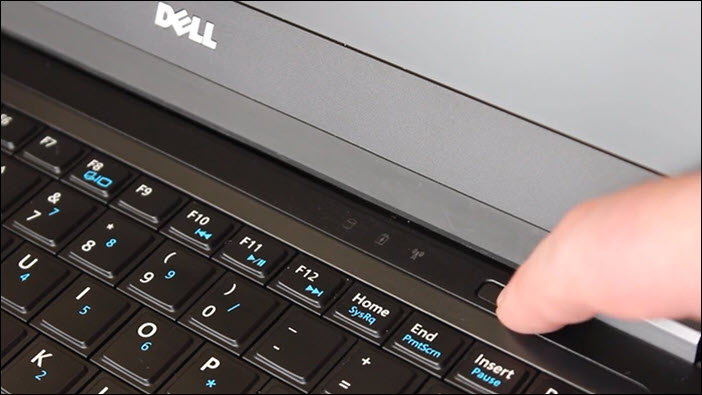
- Restart your computer and continuously press the F8 key before the Windows logo appears.
- In the Advanced Boot Options menu, use the arrow keys to select “Safe Mode” and press Enter.
- Once your computer starts in safe mode, go to the display settings and adjust the resolution to the recommended or native resolution of your monitor.
- Restart your computer normally and check if the “no signal” error persists.
By adjusting your PC’s display settings, setting the monitor’s native resolution, and troubleshooting in safe mode, you can resolve display and resolution conflicts that may be causing your monitor to not receive a signal from your PC.
Advanced Solutions And Tools
An issue with your monitor not getting a signal from your PC can be frustrating, but don’t worry! There are advanced solutions and tools that you can utilize to troubleshoot and resolve this problem.
Clear Cmos Memory
One possible solution is to clear the CMOS memory on your motherboard. This can help reset any incorrect settings or configurations that may be causing the monitor signal issue. Here’s how you can do it:
- Shut down your computer and unplug the power cord.
- Find the CMOS battery on your motherboard. It is usually a small circular battery.
- Remove the CMOS battery carefully.
- Wait for a few minutes and then reinsert the battery.
- Plug in the power cord and turn on your computer.
This process will reset the CMOS memory and hopefully resolve any signal problems.
Utilizing Built-in Monitor Diagnostics
Another helpful tool is the built-in monitor diagnostics. Many monitors have diagnostics features that can help you identify and fix signal issues. Here’s how you can access them:
- Press the menu or settings button on your monitor.
- Navigate to the diagnostics or troubleshooting section.
- Run the monitor diagnostics and follow any prompts or instructions provided.
By using these built-in diagnostics, you can identify any specific problems with your monitor and potentially fix them without additional tools or components.
Replacement Strategy For Faulty Components
If the above solutions don’t work, it may be necessary to consider replacing faulty components. Here’s a step-by-step strategy you can follow:
- Check the cables: Ensure that all cables connecting your PC and monitor are securely plugged in and not damaged. Replace any faulty cables.
- Test with a different monitor: Connect your PC to a different monitor to determine if the issue lies with your current monitor.
- Test with a different PC: Connect your current monitor to a different PC to see if it receives a signal. This will help determine if the issue is with your PC.
- Replace graphics card: If the previous tests indicate that the graphics card is at fault, consider replacing it with a new one.
- Consult a professional: If all else fails, it may be best to consult a professional technician who can diagnose and fix the issue.
By following this step-by-step replacement strategy, you can systematically identify and address the root cause of the “no signal” problem with your monitor and PC.
Frequently Asked Questions Of Why Is My Monitor Not Getting Signal From Pc
Why Is My Computer Connected To A Monitor But No Signal?
If your computer is connected to a monitor but there is no signal, it could be due to a loose or faulty cable connection. Make sure the cable is firmly plugged into both the computer and the monitor. Also, check if the monitor’s input/source is set correctly.
If you can access the BIOS during booting, it might be a resolution issue. Try using a different cable or port to troubleshoot the problem.
Why Is My Pc On But Not Connecting To My Monitor?
If your PC is on but not connecting to your monitor, there may be a loose or faulty cable connection. Check if the cable is securely plugged into both the computer and the monitor. You can also try using a different cable or port to see if that resolves the issue.
Additionally, make sure your graphics card drivers are up to date.
Why Is My Monitor Not Detected?
There are a few possible reasons why your monitor is not being detected: 1. Loose or incorrectly placed cable: Make sure the cable connecting your computer to the monitor is firmly connected and properly placed. 2. Defective or malfunctioning cable: Check if the cable is damaged or faulty.
3. Incorrect input/source on monitor: Make sure the input/source on your monitor is set correctly. 4. Malfunctioning graphics card: Test with a different monitor or display to see if the issue lies with the graphics card. 5. Outdated or corrupted graphics drivers: Update or reinstall the graphics drivers through Device Manager or Safe Mode.
Remember to check these factors to troubleshoot the issue with your monitor not being detected.
Why Is My Graphics Card Not Sending Signal To My Monitor?
There could be a few reasons why your graphics card is not sending a signal to your monitor. First, check the cable connections to ensure they are secure. You can also try using a different monitor or display to see if the issue persists.
Additionally, re-seat the graphics card and inspect it for any damage. Lastly, try updating or reinstalling the graphics drivers on your computer.
Conclusion
To troubleshoot the issue of your monitor not getting a signal from your PC, start by checking the cable connections. A loose or improperly placed cable could be causing the problem. Additionally, ensure that the cable is firmly connected to both your PC and monitor.
If the issue persists, try using a different cable or testing the monitor with another device to isolate the problem. Updating or reinstalling graphics drivers may also help resolve the issue. By following these steps, you can hopefully identify and fix the “no signal” problem with your monitor.