Why is My Monitor Not Displaying: Troubleshooting Tips
If your monitor is not displaying, it could be due to a loose connection or an issue with the CPU, motherboard, RAM, power supply, or graphics card. Try reseating these components and using them in another computer to check for proper functionality.
Initial Checks For Display Issues
If you’re experiencing issues with your monitor not displaying anything, there are a few initial checks you can perform to troubleshoot the problem. By following these steps, you can ensure that the issue is not related to power, connection integrity, or cable condition.
Confirm Monitor Power
One of the first things you should check is whether your monitor is receiving power. Ensure that the power cable is securely plugged into both the back of the monitor and a working power outlet. Additionally, check if the power button on the monitor is turned on. Sometimes, a monitor may appear to be not displaying anything simply because it is not receiving power.
Check Connection Integrity
In some cases, improper connections can cause display issues. Make sure that both ends of the video cable are securely connected to the monitor and the computer. If you are using a desktop computer, ensure that the video cable is firmly attached to the graphics card or the video port on the motherboard. For laptops, confirm that the video cable is properly connected to any external monitor or docking station.
Assess Cable Condition
The condition of the video cable itself can also impact display performance. Inspect the cable for any visible signs of damage such as frayed wires or bent connectors. If you notice any issues, try using a different video cable to connect your monitor. This will help determine if the problem lies with the cable itself.
Hardware Checkup
If your monitor is not displaying anything, it could be due to loose connections or issues with the CPU, motherboard, RAM, power supply, or graphics card. Try reseating the components and check if they are working properly in another computer.
<!– The hardware checkup is an essential step in troubleshooting why your monitor is not displaying. It involves examining the status of your graphics card, ensuring proper seating of RAM, and checking CPU and motherboard connections. By going through this detailed hardware checkup, you can identify any potential issues and resolve them to get your monitor back up and running. Examine Graphics Card Status To start your hardware checkup, examine the status of your graphics card. Ensure the card is properly seated in its slot on the motherboard. If it’s a standalone card, make sure it has power and any necessary PCIe power connectors are securely attached. Additionally, check for any physical damage or loose connections on the card. Ensure RAM Seating Next, focus on the RAM seating. Improperly seated RAM can cause display issues. Remove and reinsert each RAM module, making sure they are firmly secured in their slots. Check that the locking mechanisms are properly engaged to ensure a tight connection. CPU and Motherboard Connections Lastly, inspect the connections between your CPU and motherboard. Ensure that all cables and connectors are securely attached to their respective ports. Pay close attention to the display cable, such as HDMI or DisplayPort, as a loose connection here can result in a blank screen. In addition, check for any bent pins on the CPU socket or damage on the motherboard. By conducting a thorough hardware checkup, you can effectively troubleshoot and resolve any issues causing your monitor not to display. Whether it’s a loose connection, faulty graphics card, or improperly seated RAM, identifying the root cause will enable you to take the necessary steps to fix the problem and restore functionality to your monitor. Remember, if you’re unsure about any step mentioned or encounter any difficulties, it’s always recommended to seek professional assistance from a technician experienced in hardware troubleshooting. They can provide the expertise needed to diagnose and repair any hardware-related issues preventing your monitor from displaying.Troubleshooting Tips You Can Try
If your monitor is not displaying, it could be due to loose or improper connections with the CPU, motherboard, RAM, power supply, or graphics card. Try reseating all of these components and using them in another computer to check if they’re working properly.
If your monitor is not displaying anything, there could be several reasons behind it. Before contacting technical support, try these troubleshooting tips to identify and possibly resolve the issue:
Swap Input Sources
If you’re experiencing a black screen or no display on your monitor, it’s worth checking the input source. Sometimes, the problem can be as simple as using the wrong input. Follow these steps to swap input sources:
- Check the cable connecting your monitor to the computer. Ensure it is securely plugged in at both ends.
- If you are using HDMI, DVI, or DisplayPort cables, make sure they are not damaged or frayed.
- Try using a different cable or switch to a different input port on your monitor.
- If you have multiple input sources, such as a laptop and a desktop, toggle between them using the monitor’s input selection menu.
By swapping input sources, you can determine if the issue lies with the cable, the input port, or the computer itself.
Test With Alternative Monitor
Another way to troubleshoot a monitor not displaying is by testing it with an alternative monitor. This will help you determine if the problem lies with the monitor or the computer. Follow these steps:
- Connect the alternative monitor to your computer using a known working cable.
- Power on both the computer and the alternative monitor.
- If the alternative monitor displays properly, it indicates that your original monitor may be faulty.
- If the alternative monitor also fails to display, the issue may lie with the computer’s hardware or software.
Testing with an alternative monitor can narrow down the source of the problem and guide you towards the appropriate solution.
Reset And Update Bios/uefi Settings
In some cases, incorrect BIOS or UEFI settings can cause a monitor to not display anything. Follow these steps to reset and update your BIOS/UEFI settings:
- Restart your computer and enter the BIOS/UEFI setup by pressing the designated key (such as F2 or Del) during the boot process.
- Locate the option to reset the BIOS/UEFI settings to their default values. This is typically found under the “Exit” or “Reset” tab.
- Confirm the reset and save the changes.
- If available, update your BIOS/UEFI version to the latest release. Refer to your motherboard manufacturer’s website for instructions on how to update.
By resetting and updating your BIOS/UEFI settings, you can resolve any potential configuration issues that may be causing the monitor to not display.
Remember, troubleshooting a monitor not displaying requires a systematic approach. Start with the basics, such as checking cables and swapping input sources, before moving on to more advanced steps like testing with an alternative monitor or resetting your BIOS/UEFI settings. Hopefully, these troubleshooting tips will help you identify and resolve the issue.
Signal Issues And Resolutions
Experiencing a monitor not displaying anything can be frustrating, especially when you’re in the middle of something important. However, signal issues are a common culprit that can easily be resolved. In this section, we’ll explore some common signal issues and their solutions to help you get your monitor back up and running.
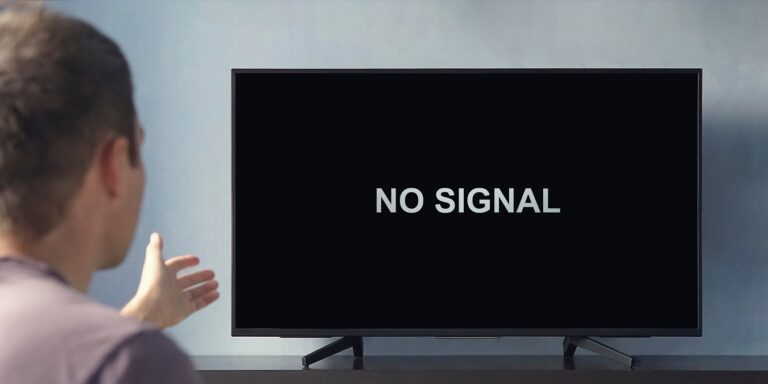
Understanding No Signal Message
One of the most common signal issues you may encounter is the “No Signal” message on your monitor. This message typically appears when your monitor fails to receive a video signal from your computer or other connected device. There are a few potential reasons for this:
- Loose or improper connections: Check that all cables connecting your monitor to your computer or device are securely plugged in.
- Incorrect input source: Ensure that your monitor is set to the correct input source. Use the buttons or menu options on your monitor to navigate and select the appropriate input.
- Faulty cables: Try using a different cable to connect your monitor to your computer or device. Sometimes, a faulty cable can prevent a stable video signal from reaching the monitor.
Adjusting Monitor Settings
Another potential cause of display issues is incorrect monitor settings. If your monitor is turned on and receiving a video signal, but the display appears distorted or not aligned properly, you may need to adjust your monitor settings. Here are a few settings to check:
- Brightness and contrast: Use the monitor’s built-in menu or buttons to adjust the brightness and contrast settings. Sometimes, these settings can affect the overall display quality.
- Resolution: Ensure that your computer’s display resolution matches your monitor’s native resolution. Mismatched resolutions can lead to distorted or blurry images.
- Refresh rate: If you’re experiencing flickering or screen tearing, try adjusting the refresh rate. Higher refresh rates can result in smoother motion on the screen.
Gpu Integrated Vs. Dedicated Swap
In some cases, the issue may be related to your graphics processing unit (GPU). If you have a dedicated GPU installed, you can try swapping to the integrated graphics on your CPU to see if the display works. Here’s how:
- Power off your computer completely.
- Disconnect the power cable and any other peripherals from your computer.
- If you have a dedicated GPU, remove it from the motherboard.
- Connect your monitor to the video output on your motherboard, which utilizes the integrated graphics.
- Power on your computer to see if the display works with the integrated graphics.
If the display works with the integrated graphics, it may indicate an issue with your dedicated GPU. Consider seeking further assistance or replacing the GPU if necessary.
By understanding common signal issues and their resolutions, you can troubleshoot and resolve monitor display problems more effectively. Whether it’s adjusting monitor settings or swapping between integrated and dedicated graphics, these steps can help you get your monitor back to displaying content seamlessly.
Advanced Troubleshooting Techniques
If you’re wondering, “Why is my monitor not displaying? ” It could be due to loose connections or issues with the CPU, motherboard, RAM, power supply, or graphics card. Try reseating these components or testing them in another computer to ensure they’re properly connected and functioning.
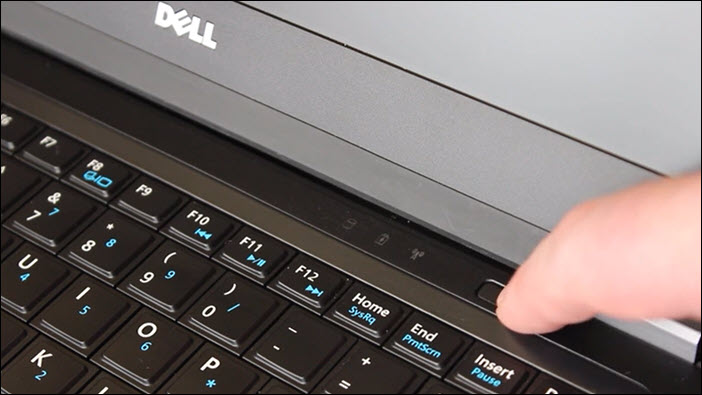
Conducting Safe Mode Boot
If you’re facing issues with your monitor not displaying anything, one of the first steps you can take is to conduct a safe mode boot. Safe mode allows your computer to start with only essential system processes and drivers, which can help identify if the issue is caused by a third-party software conflict.
To perform a safe mode boot, follow these steps:
- Restart your computer.
- When the computer starts, press and hold the F8 key.
- In the Advanced Boot Options menu, select Safe Mode using the arrow keys.
- Press Enter to start your computer in safe mode.
Once in safe mode, check if your monitor is displaying properly. If it does, it indicates that a software conflict might be causing the issue.
Assessing System Hardware Failures
When your monitor fails to display, it’s essential to assess for any hardware failures that might be the root cause. Hardware failures can occur in components such as the CPU, motherboard, RAM, power supply, or graphics card. Follow these steps to assess for hardware failures:
- Check all connections: Ensure that the CPU, motherboard, RAM, power supply, and graphics card are properly connected. Reseat them if necessary.
- Use the components in another computer: If possible, try using the components in another computer to verify if they are working properly.
By checking the connections and testing components in another computer, you can determine if any hardware failures are causing the monitor display issue.
Systematic Component Testing
If your monitor is still not displaying after conducting safe mode boot and assessing hardware failures, you can perform systematic component testing to pinpoint the exact cause of the issue. Here’s how you can do it:
- Start with the power supply: Ensure that the power supply is functioning correctly. Test it using a power supply tester or by replacing it with a known working power supply.
- Proceed to the motherboard: Check if the motherboard is receiving power and if all connections are secure. Test it using diagnostic tools or by replacing it with a known working motherboard.
- Move on to the RAM: Test each RAM module individually to determine if any of them are faulty. Replace or reseat any problematic RAM modules.
- Continue with the graphics card: Test the graphics card using diagnostic tools or by replacing it with a known working graphics card.
By systematically testing each component, you can identify and resolve any issues that might be causing the monitor not to display.

Credit: www.amazon.com
Frequently Asked Questions On Why Is My Monitor Not Displaying
Why Is My Monitor On But No Display?
There could be several reasons why your monitor is on but not displaying. Check for damaged or loosely connected cables, incorrect display configuration, faulty GPU or RAM, incorrect BIOS configuration, faulty peripheral devices, or a damaged power supply unit (PSU).
How Do I Fix My Computer Display Not Displaying?
If your computer display is not working, here are some steps to fix it: 1) Check if all connections (CPU, motherboard, RAM, power supply, graphics card) are properly connected. 2) Try using these components in another computer to check if they work.
3) Make sure the monitor is turned on and the computer is not in sleep mode. 4) Check for loose or improper connections and try using a different cable.
How Do I Get My Monitor To Work Again?
To get your monitor working again, check if the CPU, motherboard, RAM, power supply, or graphics card are properly connected. Reseat them and try using them in another computer to ensure they’re working. Also, check the connections and try a different cable.
Why Is My Laptop On But No Display?
If your laptop is on but there is no display, it may be due to damaged or loose cables, incorrect display settings, faulty GPU or RAM, incorrect BIOS configuration, damaged peripheral devices, or a faulty power supply unit. Check all connections, try a different cable, and ensure your GPU and RAM are working properly.
Conclusion
If you’re experiencing the frustrating issue of your monitor not displaying, there could be several reasons behind it. One possibility is that the CPU, motherboard, RAM, power supply, or graphics card may not be properly connected. You can try reseating these components or using them in another computer to check if they’re working properly.
Additionally, loose or improper connections and incorrect display configurations can also cause a black screen. It’s always helpful to troubleshoot and test different solutions to resolve this problem and get your display back up and running.