Why Does My Monitor Not Turn on : Troubleshooting Guide
If your monitor is not turning on, the issue could be a loose or damaged cable connection between your monitor and computer. Make sure all connectors are firmly attached and replace any worn or damaged cables.
Monitor Troubleshooting Essentials
If your monitor is not turning on, the issue may be a loose or damaged cable connection between your monitor and computer. Check all connectors and replace any worn or damaged cables. Also, ensure that your monitor is switched on and receiving power.
Are you experiencing issues with your monitor not turning on? Don’t worry, we’ve got you covered. In this section, we will discuss the essential steps you can take to troubleshoot and fix this problem. From checking the power supply to verifying cable integrity and connections, as well as recognizing signs of hardware malfunctions, we’ll guide you through the process of getting your monitor back up and running. Let’s dive in!
Importance Of Correct Power Supply
One of the first things you should check when your monitor refuses to turn on is the power supply. Make sure that the power cable is securely connected to both the monitor and the power outlet. Additionally, check if the power outlet is functioning properly by plugging in another device. A faulty power outlet could be the culprit behind your monitor not receiving the necessary power to turn on.
Verifying Cable Integrity And Connections
Loose or damaged cable connections can also prevent your monitor from turning on. Carefully inspect the cables connecting your monitor to the computer. Ensure that they are securely plugged in and not visibly worn or damaged. If you find any issues, it is recommended to replace the cables with new ones. Sometimes, a simple cable replacement can resolve the problem and restore your monitor’s functionality.
Recognizing Signs Of Hardware Malfunctions
In some cases, hardware malfunctions can be behind the failure of your monitor to turn on. Look for any signs of physical damage, such as bent pins or cracks, on the monitor’s ports or cables. Additionally, listen for any unusual noises coming from the monitor, as they could indicate internal faults. If you suspect a hardware issue, it is advisable to consult a professional technician for further diagnosis and repair.
Identify Power Issues
A monitor that doesn’t turn on can be frustrating and inconvenient. Before diving into complex troubleshooting methods, it’s important to start with the basics. In this section, we will focus on identifying power-related issues that may be causing your monitor not to turn on. By checking the power cord and outlet functionality and utilizing the power cycle method for monitor troubleshooting, you can quickly determine if power issues are the cause of your problem.
Checking The Power Cord And Outlet Functionality
One of the first things you should do when your monitor doesn’t turn on is to ensure that the power cord is securely connected to both the monitor and the power outlet. A loose or damaged cable connection can prevent power from reaching your monitor, causing it to remain unresponsive. Carefully inspect the connectors for any signs of wear or damage, and replace the cables if necessary. If the power cord appears to be working properly, you should also check the functionality of the power outlet. Plug in a different device to confirm if the outlet is providing power. If the outlet is not functioning, you may need to use a different power source or contact an electrician for assistance.
Power Cycle Method For Monitor Troubleshooting
If checking the power cord and outlet doesn’t solve the issue, you can try the power cycle method to reset your monitor and potentially resolve any power-related problems. To perform a power cycle, follow these steps:
- Turn off your computer and monitor.
- Unplug the power cord from the monitor.
- Wait for at least 30 seconds to ensure that all residual power is discharged.
- Plug the power cord back into the monitor.
- Turn on your monitor and computer.
A power cycle can help in refreshing the power supply to your monitor and clearing any temporary glitches that might be causing it to not turn on. If the monitor still doesn’t turn on after performing a power cycle, there may be other underlying issues that require further investigation.
Investigating Video Connections
If you’re wondering why your monitor won’t turn on, one possible reason could be a loose or damaged cable connection between your monitor and computer. Take the time to carefully check all connectors and switch out any worn or damaged cables for new ones to ensure a solid connection.
Role Of Hdmi, Dvi, And Displayport Cables
If your monitor is not turning on, one of the possible culprits could be the video connection cables. The role of cables such as HDMI, DVI, and DisplayPort cannot be understated in delivering video signals from your computer to the monitor. Each cable type has its advantages and disadvantages, and understanding the differences can help you troubleshoot potential cable-related problems.
Troubleshooting Cable-related Problems
When it comes to cable-related issues, there are a few steps you can take to pinpoint and resolve the problem:
- Step 1: Check the cable connections: Make sure that all video cables are firmly attached to both the monitor and the computer. Sometimes, loose connections can prevent the monitor from turning on.
- Step 2: Inspect the cables: Carefully examine the cables for any visible signs of wear or damage. If you find any, it is recommended to switch them out for new cables to ensure a proper connection.
In addition to these steps, it’s important to remember that different cables have different maximum resolutions and refresh rates. If the cable you are using does not support the required specifications, it could result in a blank or distorted display.
To troubleshoot cable-related problems effectively, consider the following:
- DVI: Digital Visual Interface (DVI) cables are commonly used to connect a computer to a monitor. They support both digital and analog signals and offer high-quality video output. However, they do not carry audio signals.
- HDMI: High-Definition Multimedia Interface (HDMI) cables are widely used due to their ability to transmit both high-quality video and audio signals. HDMI cables are commonly found on modern computers and monitors and are backward compatible with DVI outputs.
- DisplayPort: DisplayPort cables provide high-resolution video and audio transmission. They offer features such as daisy-chaining multiple monitors and support for higher refresh rates. DisplayPort cables are most commonly found on high-end monitors and graphics cards.
Why Does My Monitor Not Turn On: Signals And Diagnosis
If your monitor is not turning on, check all the cable connections between your monitor and computer to ensure they are secure and not damaged. Replace any worn or damaged cables with new ones to resolve the issue.
Understanding Monitor Status Light Indicators
When troubleshooting a monitor that won’t turn on, one of the first things to look out for are the status light indicators on the monitor itself. These indicators provide important clues about the state of your monitor and can help in diagnosing the issue.
Typically, monitors have different colored status lights, such as green, blue, yellow, or even red. Each color represents a different status or problem. Here’s what each color might indicate:
| Status Light Color | Meaning |
|---|---|
| Green | The monitor is receiving power and is functioning correctly. |
| Blue | The monitor is in standby mode or sleep mode. |
| Yellow | There might be an issue with the monitor’s power supply or video signal. |
| Red | There is an error or issue with the monitor, such as a hardware problem. |
If the status light on your monitor is not turning on or is displaying a non-green color, it’s worth further investigation to determine the cause of the issue.
Interpreting ‘no Signal’ Messages And Beeps
Another common problem when a monitor refuses to turn on is the appearance of ‘no signal’ messages or beeps. These alerts indicate that the monitor is not receiving a video signal from the computer.
When you encounter a ‘no signal’ message, it’s essential to consider the following:
- Check that all video connections between your computer and monitor are securely plugged in. Ensure that cables are not loose or damaged.
- If using multiple video inputs on your monitor, switch to the correct input source using the monitor’s menu or buttons.
- Try using a different video cable, such as DVI, HDMI, or DisplayPort, to rule out any issues with the current cable.
- Make sure the computer itself is powered on and in working condition. Check for any error messages or unusual behavior.
If none of these steps resolve the issue and your monitor still does not turn on, further diagnosis or professional assistance may be necessary.
Resolve Monitor Display Challenges
If you’re wondering why your monitor won’t turn on, the problem could be a loose or damaged cable connection between your monitor and computer. Check all connectors and switch out any worn or damaged cables for new ones to fix the issue.
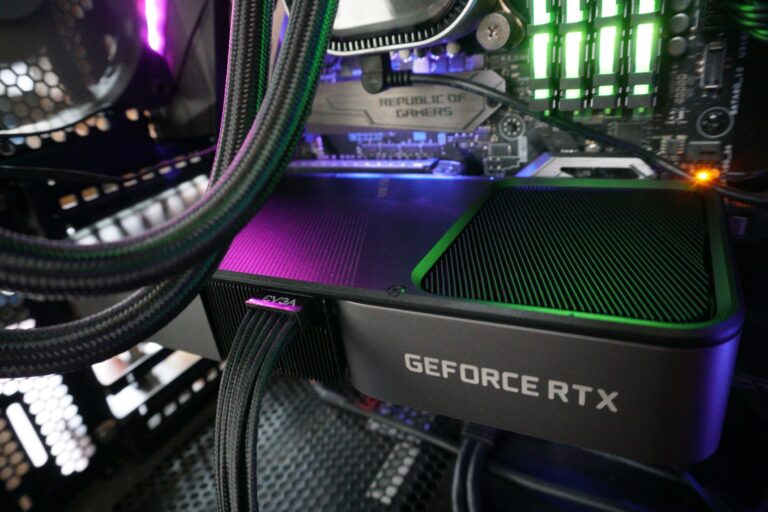
Steps For Graphics Card And Driver Verification
If you have checked your monitor and connections but it still won’t turn on, the issue may lie with your graphics card or drivers. Here are some steps to verify and troubleshoot these components:- First, ensure that your graphics card is properly seated in its slot on the motherboard. Sometimes, due to vibrations or movement, the card can become slightly loose, causing display issues. Make sure it is firmly pushed into place.
- If reseating the graphics card doesn’t solve the problem, check if the drivers are up to date. Outdated or incompatible drivers can lead to display problems. You can verify and update your drivers by following these simple steps:
| 1. | Open the Device Manager by right-clicking on the Start button and selecting “Device Manager” from the dropdown menu. |
|---|---|
| 2. | In the Device Manager window, expand the category for “Display adapters.” This should show your graphics card. |
| 3. | Right-click on your graphics card and select “Update driver” from the context menu. |
| 4. | Choose the option to automatically search for updated drivers. Windows will then search online and install any available updates. |
| 5. | Once the driver installation is complete, restart your computer to apply the changes. |
Tips For Resetting And Updating Display Configurations
If verifying the graphics card and drivers didn’t resolve the issue, you can try resetting and updating your display configurations. This can help reset any incorrect settings or conflicts that may be causing the monitor not to turn on. Here are some tips to follow:- Start by accessing the display settings on your computer. You can do this by right-clicking on the desktop and selecting “Display settings” from the dropdown menu.
- Check the display resolution settings. Make sure they are set to the recommended resolution for your monitor. If the resolution is too high or too low, it can cause display issues.
- Next, check the refresh rate settings. Ensure that the refresh rate matches the specifications of your monitor. Setting a refresh rate that is not supported by your monitor can result in a black screen.
- If you have recently installed any new software or drivers, try uninstalling them to see if they are causing the issue. Sometimes, incompatible software can interfere with the display configurations.
- Consider performing a system restore to revert your computer’s settings to a previous point when the monitor was working fine. System restore can help undo any recent changes that may have triggered the display problem.

Credit: support.onepeloton.com
Advanced Troubleshooting Techniques
If your monitor is not turning on, one possible reason could be a loose or damaged cable connection between your monitor and computer. Make sure all connectors are securely attached and consider replacing any worn or damaged cables. Additionally, check that your power supply is properly plugged in and functioning.
# Advanced Troubleshooting Techniques ### Dealing with potential motherboard and PSU issues If you’ve checked all the cables and connections and your monitor still refuses to turn on, it’s time to consider more advanced troubleshooting techniques. One potential issue could be with your motherboard or power supply unit (PSU). An issue with the motherboard can prevent your monitor from turning on, as it controls the flow of power throughout your computer system. To check if the motherboard is the culprit, follow these steps: 1. Check the power supply: Ensure that your PSU is functioning properly by listening for the fans and hard drive spinning or checking the power lights on your computer case. A faulty PSU could be the reason why your monitor isn’t receiving power. 2. Inspect for physical damage: Examine your motherboard for any signs of physical damage, such as blown capacitors or burn marks. These issues can cause a disruption in power delivery to your monitor and should be addressed by a professional technician. 3. Reset BIOS settings: Sometimes, incorrect BIOS settings can prevent your monitor from turning on. To fix this, restart your computer and enter the BIOS settings. Look for options related to the display and ensure they are set correctly. In some cases, resetting the BIOS to its default settings can help resolve the issue. ### Navigating through BIOS settings for display The BIOS (Basic Input/Output System) is a firmware that helps your computer system communicate with the hardware components. Incorrect BIOS settings can sometimes cause display issues. Here’s how you can navigate through the BIOS settings to troubleshoot your monitor: 1. Restart your computer: Begin by restarting your computer if you haven’t already. 2. Access the BIOS settings: During the boot-up process, there is usually a key prompt displayed on the screen to access the BIOS settings. It is commonly the Delete or F2 key. Press the appropriate key repeatedly until the BIOS settings menu appears. 3. Navigate to the display settings: Look for options related to the display, such as “Video” or “Display”. Use the arrow keys on your keyboard to navigate through the different menu options. 4. Check the display settings: Within the display settings menu, ensure that the correct display device is selected. It should match the output connection on your computer (e.g., HDMI, DVI, VGA, etc.). Adjust the settings as needed. 5. Reset to default: If you suspect that the current settings are causing the issue, you can usually find an option to reset the BIOS settings to default. Select this option and save the changes before exiting the BIOS. By following these troubleshooting techniques, you can address potential motherboard or PSU issues and navigate through the BIOS settings to resolve monitor display problems. If the issue persists, it may be necessary to seek professional assistance to diagnose and repair the problem.When Professional Help Is Needed
If your monitor is not turning on, it could be due to a loose or damaged cable connection between your monitor and computer. Check all connectors and replace any worn or damaged cables to fix the issue.
If you’ve tried troubleshooting your monitor and it still won’t turn on, it might be time to consult a technician. While some issues can be resolved with basic troubleshooting, there are certain signs that indicate a more complex problem. Here are a few signs that you need professional help:- No power or signal: If your monitor is completely unresponsive and shows no signs of power or signal, it could indicate a hardware malfunction that requires technical expertise.
- Physical damage: If your monitor has suffered physical damage, such as a cracked screen or water damage, it’s important to seek professional help. Attempting to fix it yourself may further damage the monitor and void any warranties.
- Strange noises or smells: If you notice any unusual noises or smells coming from your monitor, it could indicate a problem with the internal components. It’s important to have a professional assess and repair the issue to avoid any further damage or potential hazards.
- Repeated issues: If your monitor consistently fails to turn on or experiences recurring problems, it’s a clear indication that there’s an underlying issue that needs professional attention. A technician can diagnose the root cause of the problem and provide a comprehensive solution.
- Limited technical knowledge: If you’re not familiar with computer hardware or troubleshooting techniques, it’s best to seek professional help to avoid any potential mistakes or further damage to your monitor.
Safeguarding Your Monitor’s Warranty During Fixes
When seeking professional help for your monitor, it’s important to ensure that any repairs or fixes adhere to the manufacturer’s guidelines to safeguard your warranty. Here are a few tips to keep in mind:- Consult authorized service centers: Look for authorized service centers recommended by your monitor’s manufacturer. These centers have technicians trained specifically for your monitor’s brand and are equipped with genuine parts.
- Keep documentation: Keep a record of any receipts, service agreements, or warranty information related to your monitor. This will help protect your rights and ensure that any repairs are covered under warranty.
- Avoid DIY fixes: While it may be tempting to try and fix the issue yourself, it’s best to leave it to professionals to avoid voiding your warranty. DIY fixes can often lead to more damage and result in costly repairs.
- Follow maintenance guidelines: To prevent future issues, follow the maintenance guidelines provided by your monitor’s manufacturer. Regularly clean your monitor and perform any recommended maintenance tasks to keep it in optimal condition.
Final Steps For Monitor Recovery
After troubleshooting and attempting to turn on your monitor, there are a few final steps you can take to recover its functionality. These steps will help you retest and confirm operation post-troubleshooting, as well as implement preventative practices for ongoing monitor health.
Retest And Confirm Operation Post-troubleshooting
Once you have gone through the troubleshooting process and attempted to fix any loose or damaged cable connections, it’s important to retest your monitor to confirm if the issue has been resolved. Follow these steps:
- Ensure all cable connections between your monitor and computer are secure and properly inserted.
- Double-check that the power cable is securely plugged into both your monitor and a working power outlet.
- Power on your monitor and observe if it successfully turns on.
- Check for any error messages or unusual behavior on your monitor’s display.
If the monitor still does not turn on or if you encounter any further issues, it may be necessary to seek professional assistance or consider replacing the monitor.
Preventative Practices For Ongoing Monitor Health
To ensure the ongoing health and functionality of your monitor, it’s important to implement preventative practices. By following these practices, you can minimize the risk of encountering similar issues in the future:
- Regularly inspect your monitor’s cables for signs of wear, damage, or looseness. Replace any worn-out or damaged cables with new ones.
- Avoid placing heavy objects on or near your monitor, as this can cause damage to the screen or other components.
- Keep your monitor in a well-ventilated area to prevent overheating. Ensure that its vents are clear of dust and debris.
- Adjust the brightness and contrast settings of your monitor to suitable levels, as excessively high settings can lead to strain on the monitor’s components.
- Consider using a surge protector to protect your monitor from power surges and fluctuations.
By following these preventative practices, you can prolong the lifespan of your monitor and minimize the likelihood of encountering technical issues.
Remember, if you continue to experience problems with your monitor or if the troubleshooting steps do not resolve the issue, it is recommended to consult a professional technician or consider replacing the monitor altogether. Maintaining a well-functioning monitor is essential for an optimized computing experience.
Frequently Asked Questions Of Why Does My Monitor Not Turn On
How Do You Fix A Monitor That Won’t Turn On?
To fix a monitor that won’t turn on, first, check all cable connections between the monitor and computer to ensure they are secure and undamaged. If any cables look worn or damaged, replace them with new ones. If that doesn’t work, try turning the display off and then on again to see if it recognizes the video feed.
Why Is My Pc Turning On But Not My Monitor?
If your PC is turning on but not your monitor, the issue may be with the cable connection. Check that all connectors are securely attached and replace any worn or damaged cables. Other possible causes include incorrect display configuration, faulty GPU or RAM, incorrect BIOS settings, faulty peripheral devices, or a damaged power supply.
Why Is My Monitor Connected But Not Displaying?
If your monitor is connected but not displaying, check all video connections for loose or damaged cables. Make sure connectors are firmly attached and switch out any worn or damaged cables. Restart the display or turn it off and on again to help recognize the video feed and display correctly.
Verify power lights and listen for fans and hard drive spinning to ensure the computer is powered up and running. Faulty cables, incorrect display configuration, or other hardware issues may be causing the problem.
Why Is There No Signal To My Monitor When My Pc Turns On?
The monitor may not turn on if there is a loose or damaged cable connection between the monitor and computer. Check that all connectors are firmly attached and replace any worn or damaged cables.
Conclusion
To troubleshoot why your monitor may not be turning on, start by checking all the video connections. Ensure that all connectors are securely attached and replace any worn or damaged cables. If your monitor is receiving power but not displaying an image, try using a different data cable.
Additionally, make sure the display is turned on and check for any loose cables. By following these steps, you can resolve common issues that prevent your monitor from turning on.