What to Do If Monitor is Not Displaying: Troubleshooting Tips
If your monitor is not displaying, try disconnecting and connecting it to another computer to check if the issue is with the monitor or the video card. If the monitor works on another computer, the video card may be faulty.
You can also try troubleshooting steps like resetting the UEFI/BIOS, checking the cables for any loose connections, and testing the monitor on a different source input. Damaged or loosely connected cables, incorrect display configuration, faulty GPU or RAM, incorrect BIOS configuration, faulty peripherals, or a damaged PSU can also cause no display issues.
Quick Checks For No Display Issues
If your monitor is not displaying anything, it can be frustrating and worrisome. However, before jumping to conclusions and assuming there is a major problem with your monitor or computer, there are some quick checks you can perform to troubleshoot the issue. By following these simple steps, you can potentially identify and resolve the no display problem yourself, saving time and money.
Confirm Monitor Power Connection And Switch On
The first step in troubleshooting a no display issue is to ensure that your monitor is properly connected to power and switched on. Here’s what you need to do:
- Check the power cable connection at both ends – the back of your monitor and the power outlet. Ensure that the cable is securely plugged in.
- Confirm that the power switch on the monitor is turned on. It is usually located at the bottom or side of the monitor.
- Check for any indicators or lights on the monitor to see if it is receiving power. If there are no lights or indicators, try plugging the monitor into a different power outlet.
Verify Cable Integrity And Secure Connection
The next step is to verify the integrity of the cables connecting your monitor to the computer. A loose or faulty cable can often cause display issues. Follow these steps:
- Inspect the cables for any visible damage or fraying. If you spot any issues, replace the cables with new ones.
- Make sure that the cables are securely connected to both the monitor and the computer. Disconnect and reconnect them to ensure a tight connection.
- If you’re using an HDMI or DisplayPort cable, try using a different cable to rule out a faulty cable as the cause of the no display problem.
Ensure Correct Input Source Is Selected On The Monitor
Sometimes, the monitor may not display anything if the incorrect input source is selected. To check and select the correct input source, follow these instructions:
- Press the buttons or use the menu options on your monitor to access the input source settings.
- Scroll through the available input sources and select the one that corresponds to the cable connection you are using (e.g., HDMI, DisplayPort, VGA).
- Save the changes and wait for a few seconds to see if the correct input source produces a display on the monitor.
By following these quick checks, you can eliminate common causes of no display issues and potentially resolve the problem without the need for professional assistance. However, if the problem persists after performing these checks, it may indicate a more complex underlying issue that requires further troubleshooting or technical support.
Deeper Dive Into Troubleshooting Tips
When your monitor is not displaying, it can be frustrating and hinder your productivity. In this section, we will provide some helpful troubleshooting tips to help you get to the root of the problem and get your monitor up and running again. Let’s dive deeper into the following troubleshooting methods:
Inspect For Video Card Issues
A faulty video card can often be the cause of a monitor not displaying anything. To rule out any video card issues, follow these steps:
- Check the connections: Ensure that the video card is properly connected to the motherboard. Disconnect and reconnect the cables, making sure they are securely plugged in.
- Check for physical damage: Inspect the video card for any visible damage or loose components. Replace the video card if necessary.
- Update drivers: Outdated or incompatible drivers can also cause display issues. Visit the manufacturer’s website to download and install the latest drivers for your video card.
Test With An Alternative Monitor
If your monitor is not displaying, it’s essential to determine whether the issue lies with the monitor itself. To do this, follow these steps:
- Disconnect the current monitor from your computer.
- Connect an alternative monitor to your computer using the same cables.
- If the alternative monitor displays correctly, it indicates that the problem lies with your original monitor. Consider replacing or contacting the manufacturer for further assistance.
- If the alternative monitor also fails to display, it suggests that the issue may lie with your computer’s hardware or settings. In this case, proceed to the next troubleshooting step.
Examine For Motherboard/video Output Conflicts
In some cases, conflicts between the motherboard and video output settings can prevent your monitor from displaying anything. Here’s what you can do:
- Access your computer’s BIOS: Restart your computer and press the designated key (usually Del, F2, or F10) to enter the BIOS setup.
- Navigate to the display settings: Look for an option related to video output or graphics settings.
- Ensure the correct display output is selected: If your computer has multiple video output options (such as integrated and dedicated graphics), make sure the correct one is chosen.
- Save changes and exit: If you made any modifications to the settings, save the changes and exit the BIOS setup.
- Restart your computer and check if the monitor displays correctly.
By following these troubleshooting tips, you can diagnose and resolve the issue when your monitor is not displaying. Remember to check for video card issues, test with an alternative monitor, and examine for any motherboard or video output conflicts. However, if the problem persists, it may be necessary to consult a professional technician for further assistance.
What To Do If Monitor Is Not Displaying
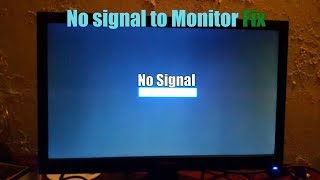
If you’re facing the frustrating situation of a monitor not displaying anything, don’t panic. There are several possible issues that can cause this problem, but the good news is that most of them have simple solutions. In this article, we’ll address the common scenarios of ‘No Signal’ errors, black screens, and frequency out of range errors, and provide solutions to get your monitor up and running again.
Addressing ‘no Signal’ Errors
If your monitor is showing a ‘No Signal’ error, it could be due to loose or faulty cables, incorrect display configuration, or problems with the GPU, RAM, or PSU. Here’s what you can do:
- Check all cable connections: Ensure that the cables connecting your monitor to the computer are securely plugged in. If they appear loose, disconnect them and reconnect them firmly.
- Verify display configuration: Make sure your computer’s display settings are correctly configured. To do this, right-click on the desktop and select “Display settings.” Adjust the resolution, refresh rate, and primary display if needed.
- Test the GPU and RAM: Ensure that your graphics card and RAM are seated properly in their respective slots. If you suspect any issues, try reseating them or replace them if necessary.
- Check the PSU: A faulty Power Supply Unit (PSU) can also cause ‘No Signal’ errors. Test your PSU or consider replacing it if it’s no longer functioning correctly.
Solutions For Monitor Displaying Black Screen
If your monitor is displaying a black screen, it could be due to issues with the graphics card, driver problems, or a faulty monitor itself. Try the following troubleshooting steps to resolve this issue:
- Check the graphics card: Ensure that your graphics card is properly seated in its slot. If you have multiple graphics cards, try using a different one to see if the issue persists.
- Update drivers: Outdated or incompatible graphics card drivers can cause black screen issues. Visit the manufacturer’s website to download and install the latest drivers for your graphics card.
- Try a different monitor: Connect a different monitor to your computer to see if the black screen issue is specific to your original monitor. If the second monitor works fine, it may be time to replace your original monitor.
Fixing Frequency Out Of Range Errors
If you encounter a ‘Frequency Out of Range’ error on your monitor, it means that the display settings on your computer are set beyond the supported range of the monitor. Follow these steps to fix the issue:
- Boot your computer into Safe Mode: Restart your computer and continuously press the F8 key before the Windows logo appears. Select “Safe Mode” from the options menu.
- Adjust the display settings: Once in Safe Mode, right-click on the desktop and select “Display settings.” Lower the resolution and refresh rate to a value within the supported range of your monitor.
- Restart your computer: After making the necessary changes, restart your computer in normal mode. The ‘Frequency Out of Range’ error should now be resolved.
By following these troubleshooting steps, you should be able to resolve most common issues related to a monitor not displaying. If the problem persists, it may be necessary to seek professional assistance or consider replacing the faulty components. Remember to always double-check your connections and ensure your settings are configured correctly before seeking further help. Good luck!
Hardware Components And Display
If your monitor is not displaying anything, try connecting it to another computer to check if the issue lies with the video card. Troubleshoot by checking cables, restarting the computer, and ensuring correct power supply settings. Loose connections, faulty cables, and incorrect display configurations could also be possible causes.
Assessing And Reseating Ram Modules
If your monitor is not displaying anything, one of the potential hardware components that might be causing the issue is the RAM (Random Access Memory). Faulty or improperly seated RAM modules can prevent your computer from booting up properly and displaying an image on the monitor. Here are some steps you can take to assess and reseat your RAM modules: 1. Power off your computer: Before you begin working on your computer’s hardware, it’s crucial to power it off and unplug it from the power source. This will ensure your safety and prevent any damage to the components. 2. Access the RAM modules: Locate the RAM modules on your computer’s motherboard. They are usually slotted vertically and can be easily identified by their pins or connectors. 3. Assess the RAM modules: Carefully inspect each RAM module for any physical damage, such as bent pins or visible signs of wear. If any damage is found, you may need to replace the module. 4. Reseat the RAM modules: Gently remove each RAM module from its slot by pushing on the retaining clips or levers on the sides. Once removed, reinsert the modules back into their slots, ensuring they are properly seated and secured. 5. Test the computer: After reseating the RAM modules, connect your monitor and power on your computer. Check if the monitor is now displaying a picture. If not, proceed to the next troubleshooting step. Reassessing and reseating RAM modules is a simple and effective troubleshooting step that can help resolve display issues. However, if the issue persists, it might be necessary to further investigate other potential hardware components that could be causing the problem.Checking For A Faulty Graphics Card
If your monitor is still not displaying anything after reseating the RAM modules, another possible culprit could be a faulty graphics card. The graphics card is responsible for rendering images and transmitting them to your monitor. Here’s what you can do to check for a faulty graphics card: 1. Power off your computer: As with any hardware troubleshooting, ensure your computer is powered off and disconnected from the power source. 2. Access the graphics card: Locate the graphics card on your computer’s motherboard. It is typically inserted into a PCI-E slot and may have additional power connectors. 3. Inspect the graphics card: Check the graphics card for any physical damage or loose connections. Look for any signs of overheating, such as burn marks or a strong odor. 4. Re-seat the graphics card: If there are no visible signs of damage, gently remove the graphics card from its slot by releasing any retaining clips. Then, firmly reinsert the card back into the slot, making sure it is securely seated. 5. Test the computer: Connect your monitor and power on your computer. If the monitor now displays an image, the issue may have been a loose or improperly seated graphics card. However, if the problem persists, you may need to consider additional troubleshooting steps. Checking for a faulty graphics card is another essential step in diagnosing display issues. If reseating the graphics card does not solve the problem, it may be necessary to seek professional assistance or consider replacing the graphics card altogether.Troubleshooting Potential Bios/uefi Issues
If your monitor is still not displaying anything after assessing and reseating the RAM modules and checking for a faulty graphics card, the issue could be related to the computer’s BIOS (Basic Input/Output System) or UEFI (Unified Extensible Firmware Interface) settings. Here’s how you can troubleshoot potential BIOS/UEFI issues: 1. Restart your computer: Make sure your computer is powered on and enter the BIOS/UEFI settings by pressing the designated key during the startup process. The key varies depending on the manufacturer but is commonly Del, F2, or F10. 2. Reset BIOS/UEFI settings: Locate the option to reset the BIOS/UEFI settings to their default values. This option is often labeled “Load Default Settings” or “Reset to Defaults.” Select this option and save the changes. 3. Test the computer: Power on your computer and check if the monitor now displays an image. If the issue persists, proceed to the next step. 4. Update BIOS/UEFI firmware: Visit the manufacturer’s website to check for any available firmware updates for your computer’s BIOS/UEFI. Download the latest firmware version and follow the instructions provided by the manufacturer to update it. 5. Test the computer again: After updating the BIOS/UEFI firmware, power on your computer and see if the monitor now displays an image. If not, it may be necessary to seek further assistance or consider alternative solutions. Troubleshooting potential BIOS/UEFI issues can help resolve display problems caused by incorrect settings or outdated firmware. However, if none of these steps resolve the issue, it is advisable to consult a professional or contact the manufacturer for further assistance.System And Driver Updates For Display
If your monitor is not displaying anything, there are a few steps you can take to troubleshoot the issue. First, try disconnecting and connecting the monitor to another computer to see if it works. If it does, the video card on your computer may be the problem.
Additionally, check for loose or faulty cables and ensure that the power supply voltage switch is set correctly.
If you are facing the frustrating issue of your monitor not displaying anything, there are several troubleshooting steps you can follow to resolve the problem. One of the primary areas to focus on is system and driver updates for display. Outdated or incompatible graphics drivers and operating systems can often cause display issues. By updating these components, you can potentially fix the problem and get your monitor to start displaying again.
Updating Graphics Drivers And Operating System
One of the first steps you should take when encountering display issues is to update your graphics drivers and operating system. Outdated graphics drivers can prevent your monitor from displaying properly, as they are responsible for enabling the communication between your computer’s hardware and the monitor. Similarly, an outdated operating system may have compatibility issues with your display hardware.
To update your graphics drivers, follow these steps:
- Go to the website of your graphics card manufacturer.
- Search for the latest drivers for your specific graphics card model.
- Download the compatible drivers and install them on your computer.
- For Windows users, click on the Windows start button and search for “Windows Update.”
- Select “Check for updates” and let Windows download and install any available updates.
- For Mac users, click on the Apple menu, go to “System Preferences,” and select “Software Update.”
- Follow the on-screen instructions to install any available updates.
Configuring Display Settings In The Os
In addition to updating drivers and the operating system, configuring the display settings in your operating system can also help resolve display issues. Incorrect display settings may prevent your monitor from showing a proper image.
- For Windows users, right-click on the desktop and select “Display settings.”
- Adjust the display resolution, orientation, and other settings according to your monitor’s specifications.
- For Mac users, click on the Apple menu, go to “System Preferences,” and select “Displays.”
- Adjust the display settings to match your monitor’s requirements.
Resetting/recovering Bios/uefi To Default Settings
In some cases, incorrect BIOS (Basic Input/Output System) or UEFI (Unified Extensible Firmware Interface) configurations can be responsible for display issues. Resetting or recovering the BIOS/UEFI to default settings can help resolve these issues.
- Restart your computer and repeatedly press the appropriate key (usually Del, F2, or F10) to enter the BIOS/UEFI setup.
- Navigate to the “Reset to default” or “Load default settings” option.
- Select the option to reset the settings and save changes.
- Exit the BIOS/UEFI setup and let your computer reboot.

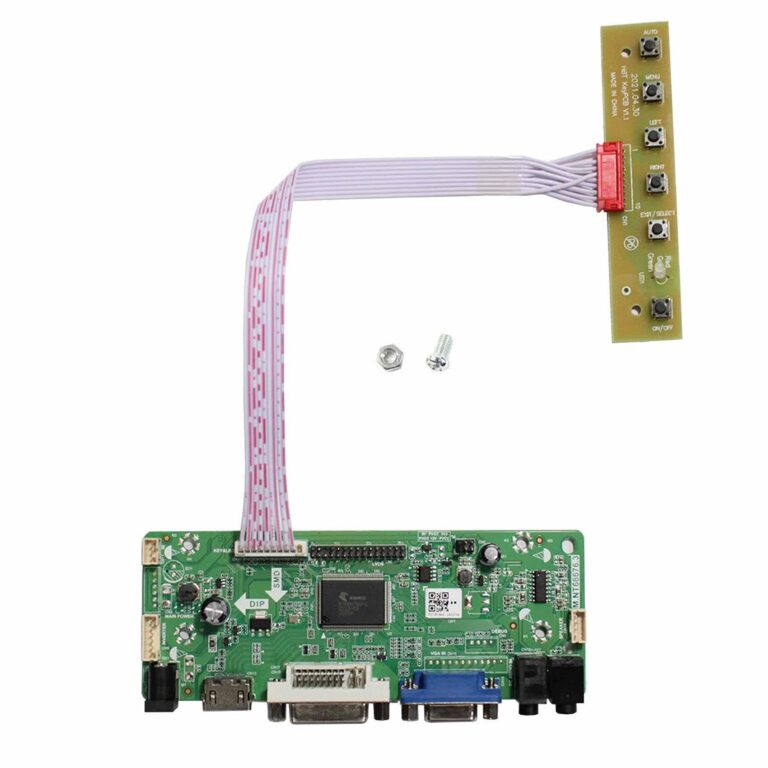
Credit: www.amazon.com
Frequently Asked Questions On What To Do If Monitor Is Not Displaying
Why Is My Monitor On But Not Displaying?
If your monitor is on but not displaying, check for damaged or loose cables. Ensure correct display configuration, check GPU and RAM for issues, and verify BIOS settings. Faulty peripheral devices or a damaged PSU may also be causing the problem.
Try connecting the monitor to another computer to eliminate potential issues.
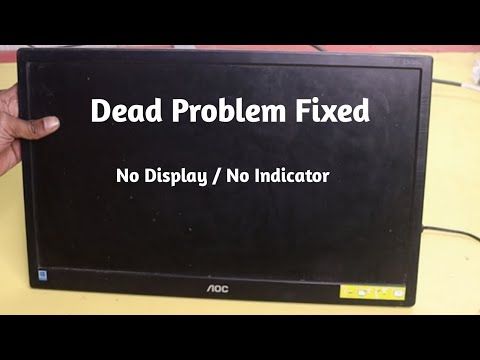
How Do I Fix A Black Screen On My Monitor?
To fix a black screen on your monitor, follow these steps: 1. Disconnect and reconnect the monitor to another computer to check if it works. 2. If the monitor works on another computer, the video card may be faulty. Try removing and reseating it.
3. Check for loose or faulty cables connecting the monitor. 4. Ensure that the power supply voltage switch is set correctly. 5. Restart your computer and test the monitor again. If the issue persists, it may be due to incorrect display configuration, faulty GPU or RAM, BIOS configuration, peripheral devices, or a damaged PSU.
What To Do If Your Monitor Is Not Turning On?
If your monitor is not turning on, try the following steps: 1. Check the cables: Make sure all cables are securely connected to both the monitor and the computer. 2. Check the power source: Ensure that the monitor is plugged into a working power outlet.
3. Test the monitor: Connect the monitor to another computer to see if it works. 4. Restart the computer: Sometimes a simple restart can resolve display issues. 5. Contact support: If none of the above steps work, reach out to the manufacturer or a professional for further assistance.
How Do I Get My Monitor To Work Again?
To get your monitor working again, try these troubleshooting steps: 1. Check cables: Ensure that all cables are properly connected to your computer and monitor. 2. Test with another computer: Connect your monitor to another computer to see if it works.
3. Check power supply: Verify that the power supply voltage switch is set correctly. 4. Restart your computer: Sometimes a simple restart can fix display issues. 5. Verify display settings: Make sure your display settings are correct in your computer’s system settings.
If these steps do not solve the problem, consider seeking professional assistance.
Conclusion
If your monitor is not displaying, there are several troubleshooting steps you can take to resolve the issue. First, try disconnecting the monitor and connecting it to another computer to determine if the problem lies with the monitor or the video card.
If the monitor works on another computer, the video card may be the culprit. You can also try resetting the UEFI/BIOS or connecting a different monitor to see if it displays anything. Loose or faulty cables are common causes of no display, so make sure to check those as well.
By following these steps, you can diagnose and fix the issue with your monitor.