Webcam Not Working When Plugged into Monitor: Troubleshooting Guide
To fix the issue of a webcam not working when plugged into a monitor, make sure the cabling from the monitor to the computer or docking station is correctly plugged in and ensure that the webcam is in the popped-up position. If the problem persists, try connecting the webcam directly to a different USB port on the computer or try plugging it into another computer to confirm if there is an issue with the connection.
If other computers also fail to recognize the webcam, you may need to update the webcam’s driver or check if the connection is working properly. Troubleshooting steps can vary depending on the specific devices and operating system being used.
Diagnosing The Webcam Issue
If you are facing issues with your webcam not working when plugged into your monitor, don’t worry. There are a few troubleshooting steps you can follow to diagnose and resolve the issue. In this section, we will walk you through each step to help you identify the root cause of the problem and get your webcam up and running.
Check The Physical Connection
The first step in diagnosing the webcam issue is to ensure that the physical connection between your monitor and the computer or docking station is properly plugged in. Make sure that the USB, HDMI, or DP cables are securely connected at both ends. Sometimes, loose connections can cause the webcam to not work.
Verify Compatibility And Drivers
Compatibility and drivers play a significant role in webcam functionality. If your webcam is not working, it could be due to compatibility issues between your monitor and the computer. Check if your monitor supports carrying the digital signal from the webcam USB connection. In some cases, only monitors with USB-C ports can carry both the monitor signal and the webcam signal simultaneously.
To fix compatibility issues, ensure that you have the latest drivers installed for your webcam. If you have a webcam-enabled monitor with a USB “B” port on the back, connect the webcam to the monitor using a USB cable and install the appropriate webcam driver. Updating drivers can often resolve issues and improve webcam performance.
Confirm Webcam Pop-up Position
Another possible reason for your webcam not working when plugged into the monitor is the position of the webcam itself. Some webcams need to be in the popped-up position to function correctly. Ensure that your webcam is properly positioned and in the correct position for optimal performance. It is also advisable to consult your webcam’s user manual for specific instructions on proper positioning.
By following these steps and checking the physical connection, verifying compatibility and drivers, and confirming the webcam pop-up position, you can effectively diagnose and resolve webcam issues when plugged into a monitor. Remember to troubleshoot each step thoroughly to identify the root cause and apply the necessary solutions. Once your webcam is working properly, you can enjoy video calls, online meetings, and other activities without any disruption.
Uncover Hidden Device Conflicts
If you are facing the issue of your webcam not working when plugged into the monitor, there may be hidden device conflicts causing this problem. Device conflicts can occur when there are issues with the hardware configuration on your computer. By using the Device Manager and exploring hidden devices, you can detect and resolve any hardware conflicts that may be affecting the functionality of your webcam.
Use Device Manager To Detect Hardware Issues
The Device Manager is a built-in Windows utility that allows you to view and manage the hardware devices connected to your computer. It can help you identify any issues with the webcam or other devices that may be causing conflicts. Follow these steps to open Device Manager:
- Press the Windows key + X on your keyboard to open the Power User menu.
- Click on Device Manager to launch the utility.
Explore Hidden Devices
In some cases, device conflicts may involve hidden devices that are not visible in the regular Device Manager view. By exploring hidden devices, you can uncover any additional hardware conflicts that may be causing the webcam issue. Follow these steps to explore hidden devices:
- In Device Manager, click on the View menu at the top.
- Select Show hidden devices from the dropdown list.
- Now, you will be able to see any hidden devices that may be causing conflicts.
By following these steps and utilizing the Device Manager, you can effectively identify and resolve hidden device conflicts that are preventing your webcam from working when plugged into the monitor. This will help restore the functionality of your webcam and ensure a smooth video conferencing or streaming experience.
Optimize Usb Connectivity
If you’re experiencing issues with your webcam not working when plugged into your monitor, one possible solution is to optimize the USB connectivity. Here are some steps you can take to troubleshoot and resolve the issue:
Check Monitor Usb Hub Functionality
Firstly, ensure that the USB hub on your monitor is functioning correctly. Sometimes, the USB ports on the monitor may not be providing enough power to properly support the webcam. To check the functionality of the USB hub:
- Disconnect all USB devices from the monitor.
- Connect a known working USB device to the USB port on the monitor to see if it gets recognized by the computer.
- If the USB device is detected and functions properly, the USB hub on the monitor is likely working fine.
- If the USB device is not recognized or doesn’t function correctly, there may be an issue with the USB hub on the monitor. In this case, you may need to contact the manufacturer for support or consider using an alternative USB hub.
Swap Usb Cables And Ports
Another possible cause of the webcam not working could be a faulty USB cable or port. To eliminate this possibility, try swapping the USB cable and ports:
- Disconnect the USB cable from both the monitor and the computer.
- Inspect the USB cable for any visible damage or defects. If you notice any issues, replace the cable with a known working one.
- Connect the USB cable to a different USB port on the monitor.
- Connect the USB cable to a different USB port on the computer.
- Test the webcam to see if it now works when plugged into the monitor.
By checking the monitor USB hub functionality and swapping USB cables and ports, you can optimize the USB connectivity and potentially resolve the issue of your webcam not working when plugged into your monitor.
If you continue to experience problems, it’s recommended to consult the manufacturer’s documentation or contact their support for further assistance.
Update And Reinstall Drivers
If your webcam is not working when plugged into the monitor, try the following steps to resolve the issue: ensure the cabling from the monitor to the computer or docking station is correctly plugged in, make sure the webcam is in the popped-up position, and check if there are any optional USB Type-A to USB Type-C, HDMI, or DP cables required for the connection.
Navigate To Device Manager For Driver Updates
If you’re facing the frustrating issue of your webcam not working when plugged into the monitor, one potential solution is to update and reinstall your drivers. Outdated or corrupted drivers can often cause compatibility issues and hinder the functionality of your webcam. Thankfully, Windows provides a useful tool called Device Manager that allows you to easily manage your device drivers.
To access Device Manager, follow these simple steps:
- Press the Windows key + X on your keyboard to open the Start menu.
- Select “Device Manager” from the list.
Device Manager will open, displaying a list of all the devices installed on your computer. Look for your webcam in the list, usually under the “Imaging devices” or “Cameras” category. If you see a yellow exclamation mark next to the webcam, it indicates a driver issue.
Guide On Uninstalling And Reinstalling Drivers
Once you’ve located your webcam in Device Manager, it’s time to uninstall and reinstall the drivers. This process helps to ensure that you have the latest and most compatible driver version installed. Follow these steps:
- Right-click on your webcam and select “Uninstall device”.
- A confirmation dialog will appear. Check the box that says “Delete the driver software for this device” and click “Uninstall”.
- Once the drivers are uninstalled, restart your computer.
- After your computer restarts, it will automatically attempt to reinstall the webcam drivers.
- If the automatic installation fails, you can manually install the drivers. Visit the manufacturer’s website and download the latest driver for your specific webcam model.
- Once downloaded, run the driver installer and follow the on-screen instructions to complete the installation.
By updating and reinstalling the drivers for your webcam, you’re giving it the best chance to work properly when plugged into your monitor. This simple troubleshooting step often resolves common issues and restores the functionality of the webcam.
Adjusting The System Settings
If you’re experiencing issues with your webcam not working when plugged into your monitor, adjusting the system settings might help resolve the problem. Follow these steps to access the privacy settings for your camera:
Access Privacy Settings For Camera
- Click on the Start menu and select “Settings”.
- In the Settings window, click on “Privacy”.
- From the left-hand menu, select “Camera”.
- Make sure that the toggle switch under “Allow apps to access your camera” is turned on.
- Scroll down to the “Choose which Microsoft Store apps can access your camera” section and make sure that the toggle switches for the apps you want to use with the webcam are turned on.
- Exit the Settings window and try using your webcam again.
If adjusting the privacy settings didn’t solve the issue, you can try enabling the monitor webcam in the system configuration. Here’s how:
Enable Monitor Webcam In System Configuration
- Right-click on the Start button and select “Device Manager”.
- In the Device Manager window, expand the “Cameras” or “Imaging devices” category.
- Right-click on the monitor webcam and select “Enable device”.
- If the webcam is already enabled, try disabling it and then enabling it again.
- Close the Device Manager and restart your computer.
- Once your computer has restarted, try using the webcam again.
By adjusting the system settings and enabling the monitor webcam in the system configuration, you can troubleshoot and fix issues with your webcam not working when plugged into your monitor. Make sure to check the cabling between your monitor and computer or docking station as well, as incorrectly plugged-in cables can also cause problems with the webcam. Good luck troubleshooting!
Webcam Not Working: Monitor-specific Fixes
If you are experiencing issues with your webcam when it is plugged into your monitor, there are a few troubleshooting solutions that you can try to fix the problem. In this section, we will explore some monitor-specific fixes that can help you resolve the webcam not working issue.
Identify Monitor Model Troubleshooting Tips
If you are unsure about the model of your monitor, it is essential to identify it first. Knowing the exact model can help you find specific troubleshooting tips and solutions that are tailored to your monitor. Here are some steps to help you identify your monitor model:
- Check the manufacturer’s label on the back or the bottom of the monitor. It usually displays vital information, including the model number.
- If you cannot find the label or it is unreadable, you can also check the monitor’s user manual. The user manual typically includes detailed information about the monitor, including the model number.
- In case you no longer have the physical copy of the user manual, you can visit the manufacturer’s website and search for support or product documentation related to your monitor model. Most manufacturers provide online manuals that you can access and download.
Firmware Updates For The Monitor
Updating the firmware of your monitor can sometimes fix compatibility issues and resolve problems with the webcam not working. Firmware updates typically include improvements and bug fixes that can enhance the performance of both the monitor and the peripherals connected to it. To update the firmware of your monitor, follow these steps:
- Visit the manufacturer’s official website and go to their support or downloads section.
- Search for your monitor model using the provided search bar or navigate to the support page specifically dedicated to your monitor model.
- Look for firmware updates or drivers for your monitor. Make sure to download the latest version available.
- Once downloaded, follow the manufacturer’s instructions to install the firmware update on your monitor. This process may vary depending on the brand and model of your monitor.
- After installing the firmware update, restart your computer and reconnect your webcam to the monitor to see if the issue is resolved.
By following these monitor-specific fixes, you can increase the chances of resolving the webcam not working issue when plugged into your monitor. Remember to always refer to the manufacturer’s documentation and support resources for accurate troubleshooting steps and solutions that are specific to your monitor model.
Alternative Solutions And Workarounds
If you’re facing the issue of your webcam not working when plugged into the monitor, don’t worry! There are alternative solutions and workarounds that you can try to resolve this problem. Here are a few suggestions:
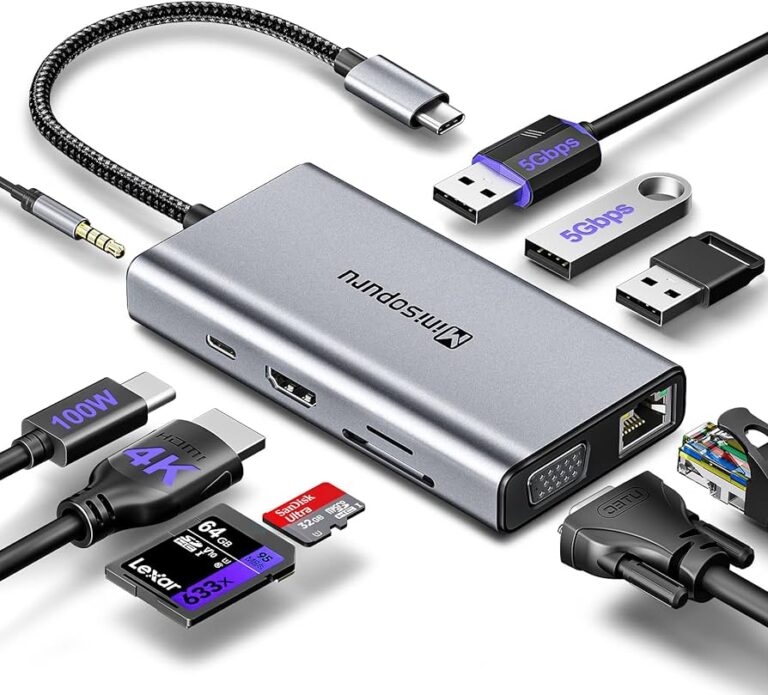
Recommend Usb-c Adapters Or Docks
If your monitor supports USB-C and carries the digital signal from the webcam, you can try using a USB-C adapter or dock to connect your webcam. These adapters or docks allow you to connect your webcam and monitor seamlessly, ensuring that the webcam functions properly. Make sure to select a reliable USB-C adapter or dock that is compatible with your webcam and monitor.
Suggest Using Alternative Video Input Methods
If you don’t have a monitor with USB-C or the USB-C adapter/dock solution doesn’t work for you, consider using alternative video input methods. Some monitors have a USB “B” port on the back, which allows you to connect your webcam directly to the monitor using a USB cable. In this case, you will need to install the webcam driver to ensure it functions correctly. Alternatively, you can connect your webcam to your computer or docking station using the appropriate cables (such as USB Type-A to USB Type-C, HDMI, or DP cables) and bypass the monitor altogether.
By trying these alternative solutions and workarounds, you can troubleshoot the issue of your webcam not working when plugged into the monitor. Remember to ensure that all cables are correctly plugged in and that your webcam is in the popped-up position. If the problem persists, you may need to check if the webcam is detected in the device manager or try changing the cables that connect the camera to the monitor.
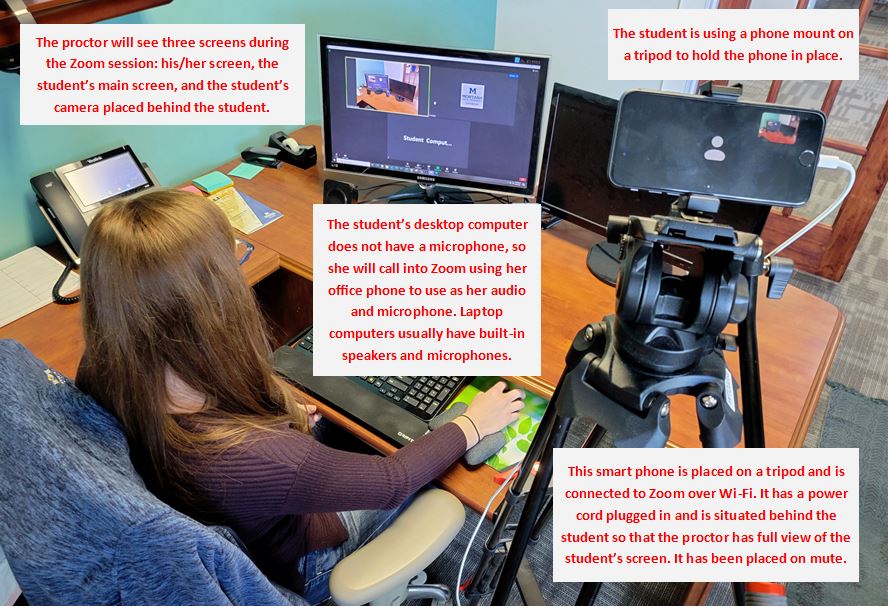
Credit: www.montana.edu
Frequently Asked Questions Of Webcam Not Working When Plugged Into Monitor
Can I Plug My Webcam Into My Monitor?
Yes, you can plug your webcam into your monitor. Ensure that the cables are correctly connected from the monitor to the computer or docking station. If your monitor has USB ports, you can connect the webcam using a USB cable.
If not, you may need to purchase additional cables. Make sure the webcam is in the correct position and try connecting it to a different USB port if it is not being recognized. Updating the webcam’s driver may also resolve the issue.
Why Is My Webcam Not Working When I Plug It In?
If your webcam is not working when plugged into your computer, try these steps: 1. Check if the USB cable is properly connected from the webcam to the computer or docking station. 2. Make sure the webcam is in the correct position.
3. Try plugging the webcam into a different USB port. 4. If possible, test the webcam on another computer to see if it is a connection or driver issue. Updating the webcam drivers may also help resolve the problem.
How Do I Get My Camera To Work On My Monitor?
To get your camera working on your monitor, follow these steps: 1. Make sure the cabling from the monitor to the computer is connected correctly. 2. Ensure that the webcam is in the popped-up position. 3. Check if the webcam is getting detected in the Device Manager.
4. Try connecting the webcam to a different USB port. 5. Update the webcam driver if necessary. Source: Windows Report
Why Isn’t My External Webcam Working?
If your external webcam isn’t working when plugged into your monitor, follow these steps to troubleshoot the issue: 1. Ensure that the cabling from the monitor to the computer or docking station is correctly plugged in. 2. Check if the webcam is in the popped-up position.
3. Try connecting the webcam to a different USB port. 4. Make sure the webcam is getting detected in Device Manager. 5. Update the webcam driver if necessary. These steps should help resolve the problem.
Conclusion
To fix the issue of your webcam not working when plugged into the monitor, follow these steps: Ensure that the cabling from the monitor to the computer or docking station is correctly plugged in, as USB Type-A to USB Type-C, HDMI, and DP cables are optional purchases and may not ship with the monitor.
Additionally, make sure that the webcam is in the popped-up position. If the problem persists, consider connecting the webcam directly to the computer using a USB cable and installing the appropriate driver.