Viewsonic Monitor: Troubleshooting Tips for Laptop Connection Issues
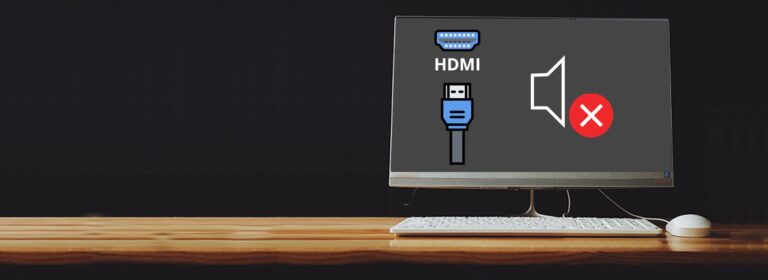
If your Viewsonic monitor is not connecting to your laptop, check if the monitor is turned on and if the video driver is updated.

Credit: www.reddit.com
Viewsonic Monitor Troubleshooting Simplified
Is your Viewsonic monitor not connecting to your laptop? Don’t worry, troubleshooting the issue is simplified with these effective steps. First, check the physical connection between the monitor and your laptop’s video port. Then, make sure to update the video driver.
Follow these steps to resolve the problem and get your monitor working seamlessly with your laptop.
If you’re facing connectivity issues with your Viewsonic monitor and laptop, don’t panic! We have simplified the troubleshooting process for you. In this guide, we will address common problems and provide step-by-step solutions to get your monitor up and running in no time.
Verify Monitor Power And Indicator Lights
The first thing you should check is if your monitor is powered on. Press the Power button and ensure that the LED indicator lights up. If it doesn’t, try connecting the monitor to a different power outlet. If the issue persists, it may be a hardware problem, and you should contact Viewsonic service center for assistance.
Double-check Input Source Selection
Another common issue is incorrectly selecting the input source on your monitor. Ensure that the correct input source is selected, such as VGA, DVI, HDMI, or DisplayPort. Use the monitor’s OSD (On-Screen Display) menu or the input source button to navigate through the options and select the appropriate input.
Ensure Proper Cable Condition And Connection
Cables can sometimes become loose or disconnected, causing connectivity problems between your laptop and the Viewsonic monitor. Check the condition of the cable for any signs of damage or fraying. Make sure it is securely connected to both the monitor and the laptop’s video port.
If you are using an adapter or converter to connect different video connector types, ensure that it is functioning correctly and securely connected.
If you are still experiencing issues, try using a different cable or adapter to rule out any cable-related problems. Remember to use high-quality, compatible cables for optimal performance.
By following these simplified troubleshooting steps, you can quickly resolve common Viewsonic monitor connectivity issues and get back to enjoying a seamless viewing experience.
Correct Cabling For Viewsonic Monitors
If you’re experiencing issues with your Viewsonic monitor not connecting to your laptop, there are a few steps you can take to troubleshoot the problem. Start by checking the physical connection between your monitor and laptop’s video port, and make sure that the monitor is turned on.
Additionally, updating the video driver on your laptop may help resolve any compatibility issues.
Differentiating Between Vga, Dvi, Hdmi, And Displayport
When it comes to connecting a Viewsonic monitor to your laptop, it’s crucial to understand the different types of video connectors available. Let’s take a look at the four most commonly used connectors:
| Connector Type | Description | Uses |
|---|---|---|
| VGA | VGA (Video Graphics Array) is an analog video connector that uses a 15-pin D-sub connector. | Commonly found on older computers, VGA is still used for connecting monitors and projectors. |
| DVI | DVI (Digital Visual Interface) is a digital video connector that comes in three different varieties: DVI-D (digital only), DVI-A (analog only), and DVI-I (both digital and analog). | Used to connect monitors, projectors, and televisions, DVI is still found on many devices. |
| HDMI | HDMI (High-Definition Multimedia Interface) is a digital video and audio connector that supports high-resolution displays and surround sound. | Commonly used for connecting modern monitors, televisions, and audio-video devices. |
| DisplayPort | DisplayPort is a digital video and audio connector that offers high bandwidth and flexibility. | Increasingly popular in modern displays and laptops, DisplayPort allows for multiple monitor setups and daisy-chaining. |
Tips To Secure Cable Connections Tightly
- Ensure that the cables are inserted firmly into both the monitor and laptop.
- Check for any bent or damaged pins on the connector and straighten them if necessary.
- Use cable ties or adhesive clips to secure the cables to prevent accidental disconnections.
- Avoid placing heavy objects on the cables, as this can put strain on the connectors.
Troubleshooting With An Alternate Cable
If your Viewsonic monitor is still not connecting to your laptop, it’s worth troubleshooting with an alternate cable to rule out any potential cable issues. Follow these steps:
- Obtain a different cable of the same connector type (e.g., VGA, DVI, HDMI, or DisplayPort).
- Disconnect the current cable from both the monitor and laptop.
- Connect the alternate cable firmly into both the monitor and laptop.
- Power on the monitor and laptop to see if the connection is established.
- If the monitor successfully connects with the alternate cable, it indicates that the previous cable might be faulty and needs to be replaced.
Laptop Video Driver Updates
One possible response could be: “Having trouble connecting your Viewsonic monitor to your laptop? Ensure that your video driver is up to date and check the physical connection between your monitor and laptop’s video port. “
Importance Of Updated Gpu Drivers
One of the common reasons why your Viewsonic monitor may not be connecting to your laptop is outdated GPU drivers. GPU drivers, also known as video drivers, act as a communication bridge between your laptop’s operating system and the monitor. These drivers ensure smooth and efficient transmission of visual data, allowing you to enjoy a seamless display experience.
Step-by-step Guide On Updating Video Drivers
- Identify your laptop’s GPU manufacturer (e.g., NVIDIA, AMD, Intel).
- Visit the official website of the GPU manufacturer.
- Search for the latest GPU driver available for your specific model.
- Download the driver onto your laptop.
- Double-click on the downloaded file to initiate the installation process.
- Follow the on-screen instructions to complete the installation.
- Restart your laptop to ensure the new driver is fully loaded.
Troubleshooting With Rollback Drivers For Compatibility
While updating GPU drivers can help resolve many monitor connection issues, there may be instances where the latest driver version is not compatible with your laptop’s hardware or operating system. In such cases, you can try rolling back to the previous driver version.
- Open the Device Manager on your laptop.
- Locate the Display Adapters category and expand it.
- Right-click on your GPU driver and select Properties.
- In the Driver tab, click on “Roll Back Driver” if the option is available.
- Follow the on-screen instructions to roll back to the previous driver version.
- Restart your laptop to apply the changes.
Input Source And Resolution Settings
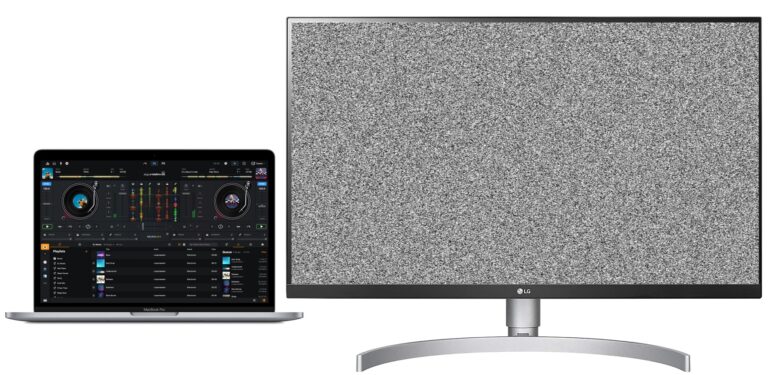
When connecting your ViewSonic monitor to your laptop, one of the common issues you may encounter is the monitor not connecting properly. This can be frustrating, but it is often caused by incorrect input source and resolution settings. In this section, we will guide you through the process of checking and adjusting these settings to ensure a successful connection.
Checking And Adjusting Laptop Display Settings
Before troubleshooting the connection issue, it is essential to check your laptop’s display settings. These settings determine how your laptop interacts with external displays. To do this, follow these steps:
- Open the “Display Settings” on your laptop. You can usually find this option in the Control Panel or by right-clicking on the desktop and selecting “Display settings.”
- Ensure that the “Multiple Displays” option is set to either “Duplicate” or “Extend,” depending on your desired display mode. Duplicate mode shows the same content on both screens, while Extend mode allows you to use the monitor as a second display.
- Adjust the resolution settings to match the capabilities of your monitor. You can find the recommended resolution in the monitor’s user manual or on the manufacturer’s website.
- Apply the changes and test if the monitor now connects successfully.
By checking and adjusting your laptop’s display settings, you can overcome compatibility issues and ensure a proper connection with your ViewSonic monitor.
Matching Monitor Resolution With Laptop’s Capability
A common cause of the monitor not connecting to the laptop is a mismatch between the monitor’s resolution and the laptop’s capability. To address this issue, follow these steps:
- Refer to your ViewSonic monitor’s user manual or the manufacturer’s website to find the recommended resolution.
- Open the “Display Settings” on your laptop, as mentioned in the previous section.
- Select the monitor from the display settings and click on “Advanced settings.”
- In the “Advanced settings” window, under the “Adapter” tab, click on the “List All Modes” button.
- Select the recommended resolution for your monitor from the list and click “Apply.”
- Proceed to test the connection and see if the monitor now connects successfully.
| Important Reminders: |
|---|
| Ensure that both the laptop and the monitor are powered on before attempting to connect. |
| Use high-quality cables to minimize connection issues. |
| Restarting both the laptop and the monitor can sometimes resolve connection problems. |
By matching the monitor’s resolution with the laptop’s capability, you can ensure a proper connection and eliminate the “not connecting” issue.
Instructions To Toggle Between Duplicate And Extended Modes
Another aspect to consider when troubleshooting the connection issue between your ViewSonic monitor and laptop is the display mode. Toggling between duplicate and extended modes can help in resolving the problem. Follow these steps:
- Press the “Windows key” + “P” key simultaneously to open the “Project” menu.
- Select either “Duplicate” or “Extend” mode, depending on your preference and requirements.
- Test the connection and check if the monitor now connects successfully.
By following these instructions, you can switch between duplicate and extended modes, which can potentially fix the connection issue and allow your ViewSonic monitor to connect to your laptop seamlessly.
Advanced Viewsonic Monitor Connection Fixes
Are you facing issues connecting your Viewsonic monitor to your laptop? Don’t worry, we have you covered with these advanced troubleshooting tips that will help you fix the signal detection problem and get your monitor up and running in no time.
Viewsonic Monitor: Troubleshooting Tips For Signal Detection
When your Viewsonic monitor fails to connect to your laptop, the first step is to ensure that all physical connections are intact. Check for any loose cables or disconnected ports between your monitor and laptop. Sometimes, cables can become detached, resulting in a loss of signal. Make sure everything is securely plugged in.
If the physical connection is secure and you’re still facing issues, it’s time to update your video driver. An outdated driver can cause compatibility issues and prevent your monitor from being detected by your laptop. Visit the ViewSonic website and download the latest video driver for your specific monitor model. Install the driver and restart your laptop to see if the issue is resolved.
Power Cycling Method For Connection Refreshment
The power cycling method is an effective way to refresh the connection between your Viewsonic monitor and laptop. Follow these steps:
- Turn off your monitor by pressing the power button.
- Unplug the power cable from both the monitor and the power outlet.
- Disconnect the video cable from your laptop.
- Wait for a few minutes, then reconnect all the cables and power on your monitor.
- Finally, reconnect the video cable to your laptop and check if the monitor is recognized.
The power cycling method helps reset the connection and can often resolve connectivity issues between your monitor and laptop.
Utilizing External Tools And Resources For Diagnosis
If the previous methods didn’t solve your problem, you can utilize external tools and resources to diagnose the issue further. There are several software applications available that can help in troubleshooting connection problems.
One such tool is the ViewSonic User Guide Database. It provides a comprehensive troubleshooting guide for various Viewsonic monitor issues. This guide can help you identify the specific problem with your monitor and provide solutions to fix it.
Additionally, you can seek support from the ViewSonic Customer Care center. They have a dedicated team to assist you with any technical difficulties you may encounter. Reach out to them for personalized troubleshooting and guidance.
By following these advanced fixes and utilizing external resources, you can overcome the connection issues between your Viewsonic monitor and laptop. Ensure that the physical connections are secure, update your video driver, try power cycling, and seek assistance from external tools and resources when needed. Get back to enjoying a seamless display experience with your Viewsonic monitor!
Frequently Asked Questions For Viewsonic Monitor Not Connecting To Laptop
Why Is My Viewsonic Monitor Showing No Signal?
If your ViewSonic monitor is showing no signal, check the physical connection between the monitor and your computer’s video port. Make sure the monitor is turned on and update the video driver. Sometimes, cables can become detached, so ensure they are properly connected.
If the issue persists, try connecting your computer to another monitor to identify if the problem is with your PC.
Why Is Viewsonic Not Showing My Computer Screen?
To troubleshoot why your ViewSonic monitor is not showing your computer screen, first ensure that the monitor is powered on and the power cable is properly connected. Check the LED indicator on the monitor to confirm it is lit. If not, try another power outlet.
If the issue persists, contact ViewSonic service center for assistance.
How Do I Reset My Viewsonic Monitor?
To reset your ViewSonic monitor, follow these steps: 1. Turn off the monitor by pressing the Power button. 2. Disconnect the power cord from the monitor. 3. Press and hold the power button for 10 seconds. 4. Reconnect the power cord and turn on the monitor.
Your ViewSonic monitor should now be reset and ready to use.
Q: Why Is My Viewsonic Monitor Not Connecting To My Laptop?
A: There could be multiple reasons for this issue. First, ensure that the monitor is powered on and the cables are properly connected. Also, update the video driver on your laptop to ensure compatibility with the monitor.
Conclusion
To troubleshoot the issue of the ViewSonic monitor not connecting to a laptop, there are several steps you can take. Firstly, ensure that the monitor is turned on by pressing the power button. Next, check the physical connection from the monitor to the laptop’s video port and make sure the cables are securely attached.
If the problem persists, consider updating the video driver. Sometimes, cables can become detached, so it’s worth double-checking the connection. If these steps don’t solve the issue, you might want to try connecting the laptop to another monitor to determine if the problem lies with the laptop or the monitor.
Remember to verify the input source and check the cables. Updating the GPU drivers could also be helpful. By following these troubleshooting steps, you should be able to resolve the issue of the ViewSonic monitor not connecting to your laptop.