TightVNC Without Monitor: Troubleshooting and Workarounds
TightVNC requires a physical monitor connection to work, and there is currently no known workaround. Without a monitor, TightVNC will display a black screen.
TightVNC is a popular remote desktop software that allows users to access and control a computer remotely. However, it relies on having a physical connection to a monitor in order to function properly. This means that if you try to use TightVNC without a monitor connected to the computer you are trying to access, you will only see a black screen when you connect.
Unfortunately, there is currently no easy solution or workaround to this issue. While some alternatives like RDP (Remote Desktop Protocol) may work without a monitor, TightVNC specifically requires a display connection.
Recognizing The Issue
To resolve the issue of TightVNC not working without a monitor, users have reported finding workarounds such as using RDP (remote desktop protocol) or disabling hardware acceleration settings within the VNC Viewer. It is also recommended to close the TightVNC Server and restart it if needed.
However, keep in mind that a display or monitor may be necessary for a stable VNC connection.
Symptoms Of Tightvnc Failure Without Monitor
Are you facing issues with TightVNC not working when your computer is without a monitor? This can be a frustrating problem, especially if you rely on TightVNC for remote access. Without a monitor connected, TightVNC may display a black screen or fail to establish a connection altogether. In this section, we will explore the common symptoms that indicate a failure of TightVNC without a monitor.
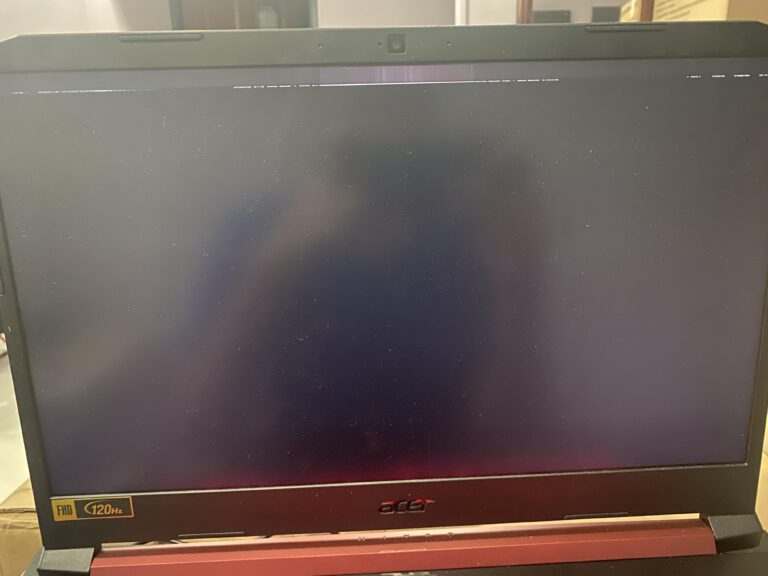
Black Screen When Connecting
One of the most common symptoms of TightVNC failure without a monitor is a black screen when attempting to connect. This can be disheartening, as it leaves you unable to see or interact with the remote desktop. If you are experiencing this issue, chances are TightVNC is not recognizing the absence of a monitor and is unable to display the desktop properly.
Failure To Establish A Connection
In some cases, TightVNC may fail to establish a connection altogether when there is no monitor connected. This can be a frustrating experience, especially if you rely on TightVNC for remote management or troubleshooting. Without a monitor, TightVNC may not detect the necessary display settings to initiate a successful connection, resulting in a failure to establish a remote desktop session.
If you are experiencing any of the above symptoms, it is essential to recognize the issue at hand. Now that we have identified the symptoms of TightVNC failure without a monitor, let’s explore some possible workarounds and solutions to address this problem.
Troubleshooting Basics
When it comes to using TightVNC without a monitor, you may encounter some challenges. This section will provide you with troubleshooting basics to help you resolve any issues you may be facing.
Verifying Tightvnc Service Status
If TightVNC is not working without a monitor, it is essential to start by verifying the service status. Follow these steps:
- Open the Windows Task Manager by pressing Ctrl + Alt + Delete.
- In the Task Manager, navigate to the “Services” tab.
- Locate the “WinVNC” service in the list. If it is not running, right-click on it and select “Start.”
- If the service is running but not showing the tray icon, choose “Process Manager,” find the “WinVNC.exe” process, and shut it down.
- Restart TightVNC and check if the issue persists.
Checking Network Connectivity
Another possible reason for TightVNC not working without a monitor is the network connectivity. To troubleshoot this issue, you can follow these steps:
- Ensure that both the client and server computer are connected to the same network.
- Check the firewall settings on both computers and ensure that TightVNC is allowed through the firewall.
- Verify the IP address of the server computer and ensure that the client computer has the correct IP address configured.
- Try pinging the server computer from the client computer to check if there is network connectivity.
- If the ping is successful, try connecting to TightVNC again.
Ensuring Correct Tightvnc Configuration
Incorrect configuration settings can also cause TightVNC to not work without a monitor. Follow these steps to ensure the correct configuration:
- Open the TightVNC Server dialog on the remote Windows computer.
- Select “Options” from the hamburger menu.
- On the “Expert” tab, filter the list for any display-related settings that may be causing the issue.
- Adjust the settings accordingly and save the changes.
- Restart TightVNC and check if the issue is resolved.
These troubleshooting basics should help you overcome any issues you may be facing with TightVNC not working without a monitor. By verifying the service status, checking network connectivity, and ensuring the correct configuration, you can improve your experience and successfully use TightVNC without a monitor.
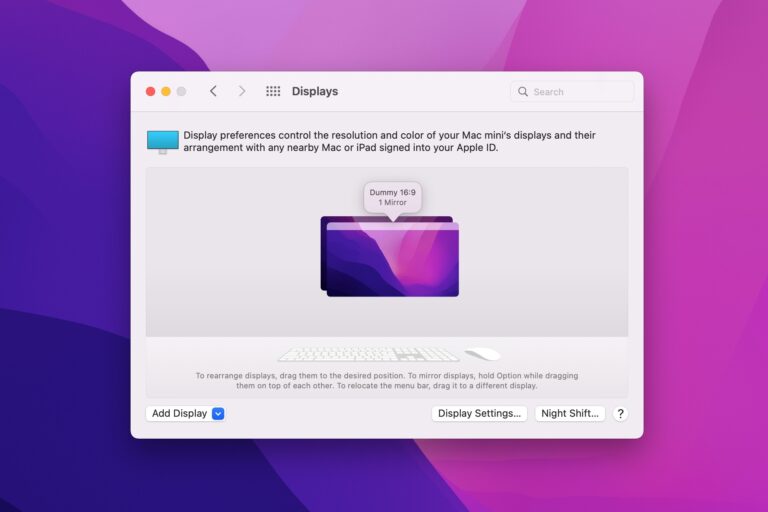
Emulating A Display Adapter
When using TightVNC without a physical monitor connected, you may encounter issues with a black screen or inability to establish a connection. However, there are workarounds available to overcome this problem. One such workaround involves emulating a display adapter, which allows TightVNC to function properly even without a monitor. In this section, we will discuss two methods to emulate a display adapter: using dummy plugs and configuring virtual display software.
Using Dummy Plugs
In order to simulate the presence of a monitor, you can use dummy plugs. Dummy plugs are small devices that mimic the behavior of a connected monitor, fooling the operating system into thinking that a monitor is attached. By using dummy plugs, you can trick TightVNC into working as expected without the need for an actual physical display.
Configuring Virtual Display Software
Another option to emulate a display adapter is to configure virtual display software. Virtual display software creates a virtual monitor that can be used by TightVNC, allowing it to establish a connection and display the remote desktop. This software simulates the behavior of a physical display and enables TightVNC to function without the need for a monitor.
By following either of these methods, you can bypass the limitation of TightVNC requiring a physical monitor and ensure that it works seamlessly even without one. Emulating a display adapter not only resolves the black screen issue but also allows for remote access and control of a headless system. Whether you choose to use dummy plugs or virtual display software, the solution you implement will depend on your specific requirements and setup.
Credit: www.cloudynights.com
Alternatives To Tightvnc
If you’re facing issues with TightVNC not working without a monitor, don’t worry! There are alternative solutions that you can explore. In this section, we will compare RDP (Remote Desktop Protocol) with alternative VNCs and assess third-party options.
Comparing Rdp And Alternative Vncs
RDP and VNC are both popular remote desktop protocols that allow you to access and control your computer from a remote location. Here’s a brief comparison between the two:
| Criteria | RDP | Alternative VNCs |
|---|---|---|
| Platform Compatibility | Primarily Windows, but also available for other operating systems | Available for various operating systems such as Windows, macOS, Linux, and more |
| Display Performance | Typically faster and smoother than VNC | May vary depending on the VNC implementation and network conditions |
| Feature Set | Often offers advanced features like file sharing, printer redirection, and remote audio playback | Varies based on the specific VNC software, but generally provides basic remote control functionality |
| Security | Offers built-in encryption and authentication options | Encryption and authentication mechanisms may vary depending on the VNC implementation |
Assessing Third-party Solutions
If you’re looking for alternatives to TightVNC, you can consider third-party VNC software that might better suit your requirements. Some notable options include:
- RealVNC: RealVNC offers a range of VNC solutions, including VNC Connect for secure remote access and control.
- UltraVNC: UltraVNC is an open-source VNC software that provides remote desktop control and file transfer capabilities.
- TigerVNC: TigerVNC is a high-performance, platform-neutral VNC implementation that supports various operating systems.
These third-party solutions often come with their own unique features, performance optimizations, and security enhancements. Make sure to assess them based on your specific needs and compatibility requirements.
By exploring these alternatives, you can overcome the limitations of TightVNC not working without a monitor. Remember to choose the solution that best fits your needs in terms of platform compatibility, performance, features, and security.
Editing Registry For Display
When it comes to using TightVNC without a monitor, you may encounter an issue where the screen turns black when you connect. However, there is a workaround that involves editing the Windows registry for display settings. By modifying the registry, you can ensure that TightVNC functions properly even without a physical monitor. In this section, we will discuss the steps to modify the Windows registry for display as well as potential risks and precautions involved.
Steps To Modify Windows Registry
To modify the Windows registry for display settings in order to make TightVNC work without a monitor, follow the steps below:
- First, open the Windows Registry Editor. You can do this by pressing the Windows key + R and then typing “regedit” in the Run dialog box. Press Enter to open the Registry Editor.
- In the Registry Editor, navigate to the following location: HKEY_LOCAL_MACHINE\SYSTEM\CurrentControlSet\Control\GraphicsDrivers\Configuration.
- Under the Configuration folder, you will find subfolders with long hexadecimal names. Each subfolder corresponds to a display adapter on your system.
- Identify the subfolder that corresponds to the display adapter you want to modify. You can check the AdapterDesc value to determine the correct subfolder.
- Once you have identified the correct subfolder, right-click on it and select New -> DWORD (32-bit) Value.
- Give the newly created value the name SHAPEFORMONITOR and set its value to 0 (zero).
- Close the Registry Editor and restart your computer to apply the changes.
- After restarting, you should be able to use TightVNC without a physical monitor.
Potential Risks And Precautions
It is important to note that modifying the Windows registry can have unintended consequences if not done correctly. Therefore, it is recommended to follow these precautions:
- Make sure to create a backup of the registry before making any changes. This will allow you to restore the previous state if anything goes wrong.
- Double-check the registry keys and values to ensure accuracy. Modifying the wrong keys or values can lead to system instability or other issues.
- Proceed with caution and only make changes if you are comfortable with editing the registry. If you are unsure, it is best to consult with a knowledgeable IT professional.
By following the steps to modify the Windows registry for display and taking proper precautions, you can overcome the issue of TightVNC not working without a monitor. This allows you to utilize TightVNC on headless systems or in situations where a physical monitor is not available.
Server-side Scripting Solutions
If you are facing issues with TightVNC not working without a monitor, there are server-side scripting solutions that can help you overcome this problem. By implementing startup scripts for TightVNC and custom solutions for persistent VNC sessions, you can ensure that your VNC connection remains active even without a physical monitor.
Implementing Startup Scripts For Tightvnc
To solve the issue of TightVNC not working without a monitor, you can implement startup scripts that automatically start TightVNC when the server boots up. These scripts can simulate the presence of a monitor and allow TightVNC to function properly. Here’s how you can do it:
- Create a startup script using a programming language of your choice, such as Python or Bash.
- In the script, include commands to start TightVNC server and configure it to use a virtual display or dummy display. This virtual display will act as a substitute for a physical monitor.
- Set the script to run at system startup by adding it to the appropriate startup folder or by configuring it as a service.
- Ensure that the script runs with the necessary permissions to interact with the operating system and start TightVNC successfully.
- Restart the server and verify that TightVNC is now working without a monitor.
Custom Solutions For Persistent Vnc Sessions
If you require persistent VNC sessions even when there is no monitor connected, you can consider implementing custom solutions. These solutions ensure that your VNC connection remains active even after system reboots or when the server starts up without a physical monitor. Here are a few options to explore:
| Option | Description |
|---|---|
| 1. Autostart VNC on system boot | Configure your system to automatically start the VNC server at boot, even if there is no monitor connected. This can be achieved by modifying system startup scripts or using system-specific configuration tools. |
| 2. Use a headless VNC server | Consider using a headless VNC server, which is designed to work without a physical display. Headless VNC servers emulate a display output, allowing you to connect remotely without the need for a monitor. |
| 3. Set up a virtual display | Create a virtual display using tools like Xvfb (X virtual framebuffer) or similar utilities. This virtual display can be used as a substitute for a physical monitor, enabling TightVNC to function properly. |
By implementing these server-side scripting solutions, you can ensure that TightVNC works seamlessly even without a monitor. Whether it’s configuring startup scripts or exploring custom solutions for persistent VNC sessions, these methods can help you overcome the limitation of TightVNC not working without a monitor.
Tightvnc Security Best Practices
When it comes to using TightVNC for remote connections, implementing strong security practices is essential. By following these TightVNC security best practices, you can ensure that your VNC connections remain secure and protected.
Setting Strong Passwords
One of the first and most important steps in securing your TightVNC connections is setting strong passwords. Weak passwords can easily be cracked by malicious attackers, giving them unauthorized access to your remote computer. To create a strong password, consider the following:
- Use a combination of uppercase and lowercase letters, numbers, and symbols
- Avoid using common dictionary words or easily guessable information, such as your name or birthdate
- Make your password at least 8 characters long
By setting a strong password, you significantly increase the security of your TightVNC connections.
Using Ssh Tunneling For Vnc Connections
Another effective security measure for TightVNC connections is using SSH tunneling. SSH tunneling provides an extra layer of encryption and ensures that your VNC traffic is secure from potential eavesdropping or interception.
To set up SSH tunneling for your VNC connections, follow these steps:
- Install an SSH client on your local computer
- Configure the SSH client to connect to the remote computer
- Enable SSH tunneling in the SSH client settings
- Connect to the remote computer using the SSH client
- Launch TightVNC Viewer on your local computer
- Configure TightVNC Viewer to connect to the localhost or loopback address (127.0.0.1)
By using SSH tunneling, you add an extra layer of protection to your TightVNC connections, ensuring that your data remains secure.
By following these TightVNC security best practices, you can enhance the security of your remote connections and protect your data from unauthorized access. Setting strong passwords and utilizing SSH tunneling are effective measures to safeguard your TightVNC connections against potential security threats.
Frequently Asked Questions Of Tightvnc Not Working Without Monitor
Does Vnc Work Without Monitor?
Yes, VNC does work without a monitor. Accessing a headless Raspberry Pi with VNC Connect allows you to control it even without a physical monitor. This is ideal for situations where the Pi is constantly in use but doesn’t require constant monitoring.
Why Is My Vnc Viewer Black Screen?
A black screen on your VNC viewer could be due to hardware acceleration settings. Try disabling hardware acceleration in the VNC viewer settings to see if it resolves the issue.
How Do I Use Tightvnc Over The Internet?
To use TightVNC over the Internet, follow these steps: 1. Open the TightVNC Server dialog on the remote Windows computer. 2. Select “Options” from the hamburger menu. 3. Filter the list on the Expert tab to find the desired settings. 4.
Close any running TightVNC Server processes if necessary. 5. Open the TightVNC Viewer and choose the server to connect to by entering the host name or IP address. 6. Click on “Connect” to establish the connection. Note: Make sure hardware acceleration settings are disabled to avoid a black screen issue in the VNC viewer.
How Do I Connect To A Tightvnc Display?
To connect to a TightVNC display, follow these steps: 1. Install TightVNC on your Windows machine. 2. Open the TightVNC Viewer. 3. Choose the server you want to connect to. 4. Enter the host name or IP address of the server.
5. Optionally, enter a display number. 6. Click “Connect” to establish the connection.
Conclusion
While TightVNC is a useful tool for remote access, it requires a physical monitor to work properly. The lack of a monitor can result in a black screen when connecting. Unfortunately, there is no easy workaround for this issue. However, users can explore alternatives such as using RDP (Remote Desktop Protocol) or disabling hardware acceleration settings to troubleshoot the problem.
It’s important to note that accessing a headless Raspberry Pi with VNC Connect is possible without a monitor.