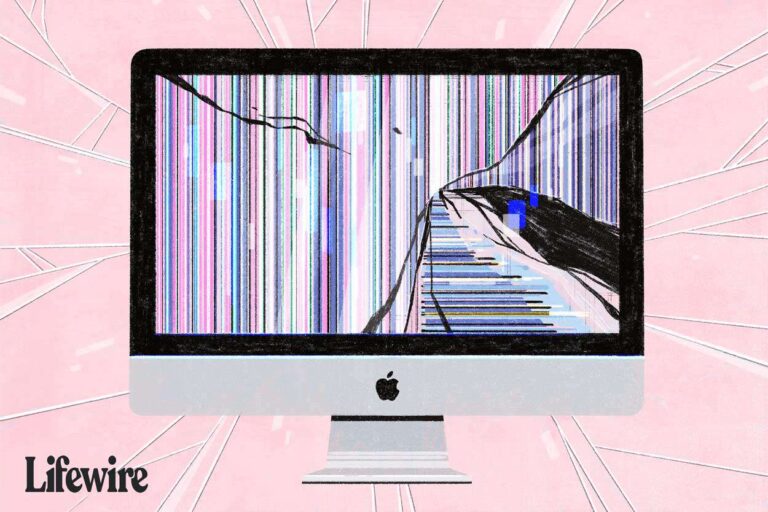
Thinkpad Monitor Not Working: Troubleshooting Tips
If your Thinkpad monitor is not working, it could be due to a loose cable, damaged port, power issue, driver problem, or a faulty monitor. To troubleshoot the issue, check the cable connections and power source, ensure the monitor is receiving power, and check the settings to make sure they are configured correctly.
You can also try connecting the monitor to a different PC to determine if the issue is with the monitor or the computer. Additionally, make sure the cables connecting your PC to the external monitor are secure and try using a different cable if necessary.
Initial Checks For Thinkpad Monitor Failures
If your Thinkpad monitor is not working, there are a few initial checks you can perform. Make sure the cables are securely connected, check the power source, and ensure that the monitor settings are configured correctly. If the issue persists, it could be due to a driver problem or a faulty monitor, in which case further troubleshooting may be required.
Initial Checks for Thinkpad Monitor Failures When your Thinkpad monitor stops working, it can disrupt your workflow and cause frustration. However, before reaching out for technical support, it’s worth performing some initial checks to troubleshoot the issue. In this section, we will discuss three important areas to focus on when encountering monitor failures: cable integrity and connections, power supply, and monitor/system power status. By following these steps, you may be able to identify and resolve the issue on your own, saving time and effort.Verify Cable Integrity And Connections
The first step in troubleshooting monitor failures is to check the cables connecting your Thinkpad laptop to the monitor. Ensure that both ends of the cable are securely plugged into the corresponding ports on the laptop and monitor. A loose cable connection can lead to a loss of signal and cause the monitor to stop working. Additionally, inspect the cable itself for any signs of damage or fraying. Damaged cables can prevent proper transmission of data and power, resulting in a non-functioning monitor.Assess The Power Supply
The next step is to assess the power supply for both the laptop and the monitor. Start by checking if the power cable is securely connected to the monitor and the power outlet. If the monitor has a separate power adapter, ensure it is properly plugged in and receiving power. Additionally, check if the laptop is receiving sufficient power by observing the battery status or connecting it to a power source. A low battery level or insufficient power supply can cause the monitor to malfunction or not turn on at all.Confirm Monitor And System Power Status
Another crucial aspect to consider is the power status of both the monitor and the system. On the monitor, check if the power indicator light is on. If it is not illuminated, try pressing the power button to turn it on. Additionally, make sure the correct input source is selected on the monitor. For the laptop, ensure that it is powered on and not in sleep or hibernate mode. Press the power button to wake it up if necessary. Sometimes, a simple power cycle can resolve monitor issues. In conclusion, when facing Thinkpad monitor failures, it is important to perform initial checks before seeking further assistance. Verify the cable integrity and connections, assess the power supply, and confirm the power status of both the monitor and the system. By following these steps, you can often identify and resolve common issues, saving time and possibly avoiding the need for professional help.The Role Of Drivers In Monitor Functionality
When it comes to the functionality of your Thinkpad monitor, drivers play a crucial role. The drivers serve as the communication bridge between the monitor and your computer, allowing them to work together seamlessly. However, issues with the drivers can result in monitor problems, such as the monitor not working or displaying properly. In this section, we will discuss how to identify driver-related monitor problems and the steps to update or reinstall video drivers to resolve these issues.
Identify Driver-related Monitor Problems
If you are experiencing issues with your Thinkpad monitor, it’s essential to determine if the problem is driver-related. To identify driver-related monitor problems, follow these steps:
- Check for error messages or notifications related to drivers.
- Verify if the monitor works properly when connected to another computer. This helps determine if the issue is specific to your computer or the monitor itself.
- Ensure that all cable connections between your computer and monitor are secure and not damaged.
Update Or Reinstall Video Drivers
If you have identified that the monitor problem is driver-related, updating or reinstalling the video drivers can often solve the issue. Follow these steps to update or reinstall video drivers:
- Visit the official Lenovo website and navigate to the support section.
- Search for the latest video driver for your specific Thinkpad model.
- Download the driver and save it to a location on your computer.
- Open the Device Manager on your computer by pressing the Windows key + X and selecting “Device Manager.”
- In the Device Manager, expand the “Display adapters” category.
- Right-click on your video card driver and select “Update driver.”
- Choose the option to manually install the driver and select the downloaded driver file.
- Follow the on-screen instructions to complete the installation process.
- If updating the driver doesn’t resolve the issue, you can try uninstalling the current driver and then reinstalling it. Right-click on the video card driver in the Device Manager and select “Uninstall device.” Once uninstalled, restart your computer, and Windows will automatically reinstall the driver.
Utilizing Windows Update or Lenovo System Update can also ensure that your video drivers are up to date. These tools automatically scan your system for driver updates and install them for you, saving you time and effort in manually searching for the correct driver.
By following the steps outlined above, you can effectively troubleshoot and resolve driver-related monitor problems on your Thinkpad. Remember to regularly update your drivers to prevent future issues and ensure optimal monitor functionality.
Power Management And Display Settings
Power management and display settings play a crucial role in the proper functionality of your Thinkpad monitor. Issues with these settings can often result in the monitor not working as expected. In this section, we will explore how to adjust power settings, configure display settings in Windows, and check and reset monitor-specific settings to ensure your Thinkpad monitor functions flawlessly.
H3adjust Power Settings To Ensure Proper Display Functionality
One of the possible reasons for your Thinkpad monitor not working could be incorrect power settings. To adjust the power settings:
- Go to the Start menu and open the Control Panel.
- Click on “Power Options” to access the power settings.
- Choose the power plan that suits your needs, such as “Balanced” or “High Performance”.
- Ensure that the power plan is not set to turn off the display after a short period.
- Save the changes and restart your computer.
H3configure Display Settings In Windows
Windows provides several display settings that can affect the functionality of your Thinkpad monitor. To configure these settings:
- Right-click on the desktop and select “Display settings”.
- Adjust the resolution to the recommended setting for your monitor.
- Check the orientation settings and make sure they are set correctly.
- Verify that the multiple display settings are set according to your preferences.
- Apply the changes and test your monitor.
H3check And Reset Monitor-specific Settings
Monitor-specific settings can sometimes interfere with the normal operation of your Thinkpad monitor. To check and reset these settings:
| Step | Instructions |
|---|---|
| 1 | Access the monitor menu by pressing the appropriate button on the monitor. |
| 2 | Look for any settings related to power saving or sleep mode and ensure they are disabled. |
| 3 | Check the input source settings and ensure they are correctly set to the connected device. |
| 4 | Reset the monitor to its factory defaults if necessary. |
| 5 | Save the changes and restart your computer. |
By following these steps, you can troubleshoot power management and display settings related issues that may be causing your Thinkpad monitor to not work properly. Remember, regular maintenance of these settings can help prevent future problems and ensure a smooth user experience.
Credit: www.reddit.com
Advanced Tips For Thinkpad Monitor Recovery
If you’re facing issues with your Thinkpad monitor not working, don’t panic. There are several advanced tips you can try to troubleshoot and recover your monitor. In this article, we’ll discuss three advanced techniques that can help you resolve the problem.
1. Employ Bios Or Uefi Access To Troubleshoot
If your Thinkpad monitor is not working, accessing the BIOS or UEFI settings can help you identify and resolve the issue. Here’s how you can do it:
- Restart your Thinkpad and press the required key (usually F2 or Delete) to enter the BIOS or UEFI settings.
- Navigate to the display settings and ensure they are correctly configured.
- Check for any options related to the monitor, such as output selection or display mode.
- Save any changes and exit the BIOS or UEFI settings.
By going through the BIOS or UEFI settings, you can ensure that your monitor settings are correctly configured, which may help in resolving the issue.
2. Execute Hardware Diagnostics And Safe Mode Utilization
Performing hardware diagnostics and utilizing the safe mode can help in identifying any hardware or driver-related issues causing the monitor problem. Follow these steps:
- Restart your Thinkpad and repeatedly press the F12 key to access the boot menu.
- Select the diagnostic option to run hardware diagnostics.
- Follow the on-screen instructions to perform a thorough diagnostic test on your hardware components.
- If the diagnostic test reveals any issues, address them accordingly.
- Restart your Thinkpad and repeatedly press the F8 key to access the advanced boot options menu.
- Select the safe mode option to boot into safe mode.
- In safe mode, uninstall any recently installed drivers or software that could be causing conflicts.
- Restart your Thinkpad and check if the monitor is functioning properly.
Executing hardware diagnostics and utilizing the safe mode can help you identify and resolve any underlying hardware or driver issues that might be causing the monitor problem.
3. Consider System Recovery Options
If the above techniques fail to recover your Thinkpad monitor, you can consider utilizing system recovery options to restore your system to a previous working state. Here’s how:
- Restart your Thinkpad and repeatedly press the F11 key to access the recovery options.
- Follow the on-screen instructions to initiate the system recovery process.
- Select a restore point from a date when your monitor was working correctly.
- Proceed with the system recovery process and wait for it to complete.
By utilizing system recovery options, you can revert your system back to a previous state where your Thinkpad monitor was functioning properly.
Remember, these advanced tips for Thinkpad monitor recovery should be followed with caution. If you’re not confident in performing these steps yourself, it’s always advisable to seek professional assistance or contact the manufacturer’s support for guidance.
Thinkpad Monitor Not Working: Troubleshooting Tips
If your Thinkpad monitor is not working, there are several troubleshooting tips you can try. Check the cable connections, ensure the power source is working, and make sure the monitor settings are correctly configured. Additionally, consider trying a different monitor or cable, and connecting the monitor to a different PC if possible.
Explore Common Thinkpad Monitor Problems And Solutions
If your Thinkpad monitor is not working, it can be frustrating and hinder your productivity. There can be multiple reasons why your monitor is not functioning properly, including a loose cable or damaged port, a power issue, a driver problem, or a faulty monitor. However, there’s no need to panic as there are troubleshooting tips that can help you resolve the issue.
Learn About Warranty Support And Professional Assistance
If you’ve tried troubleshooting the issue and your Thinkpad monitor is still not working, it’s important to know that you may have warranty support available. Lenovo offers warranty coverage for their products, including monitors. Check your warranty information to determine if the issue you’re experiencing is covered, and if so, contact Lenovo’s customer support for assistance. If your warranty has expired, don’t worry – there are still professional technicians who can help diagnose and fix the problem.
Access Lenovo’s Online Resources For Additional Guidance
In addition to warranty support and professional assistance, Lenovo provides a wealth of online resources to help you troubleshoot and resolve issues with your Thinkpad monitor. Their official website offers detailed troubleshooting guides, FAQs, and user forums where you can find answers to common problems. You can also access their support videos on platforms like YouTube, where you can visually follow step-by-step instructions to fix your monitor.
When it comes to fixing your Thinkpad monitor, it’s important to explore common problems and solutions. By checking cable connections, ensuring power supply, and adjusting settings correctly, you can often resolve the issue on your own. If that doesn’t work, don’t hesitate to reach out to Lenovo’s customer support for warranty assistance or seek professional help. Lenovo’s online resources, such as troubleshooting guides and support videos, can provide additional guidance to help you get your monitor back up and running in no time.
Frequently Asked Questions Of Thinkpad Monitor Not Working
Why Won’t My Thinkpad Detect My Monitor?
Ensure your ThinkPad and monitor are properly connected with a secure cable. Check the power source and make sure the monitor settings are correct. If the issue persists, try using a different monitor or cable, or connect the monitor to another PC.
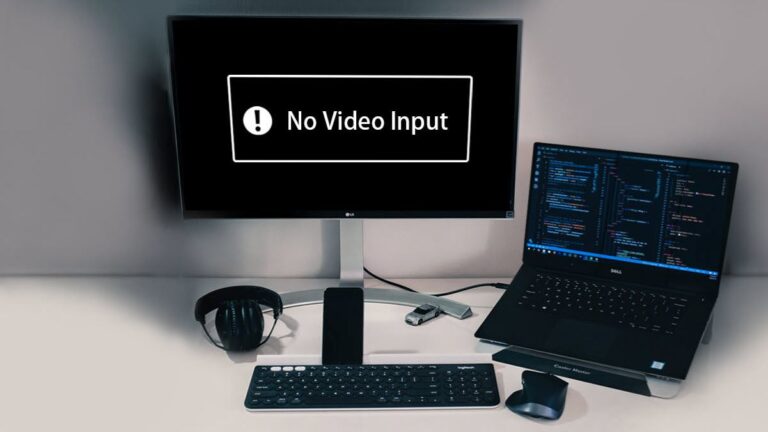
Why Is My Thinkpad On But The Screen Is Black?
If your ThinkPad is on but the screen is black, it may be due to a loose cable or damaged port, a power issue, a driver problem, or a faulty monitor. To troubleshoot the issue, check cable connections and the power source, ensure the monitor is receiving power, and configure settings correctly.
How Do I Get My Thinkpad To Display On My Monitor?
To get your ThinkPad to display on your monitor, follow these steps: 1. Check cable connections and ensure they are tight. 2. Verify that the monitor is receiving power and turned on. 3. Make sure the monitor settings are correctly configured.
4. Try connecting the monitor to a different port or using a different cable. 5. Restart your ThinkPad and monitor. If the issue persists, consider troubleshooting or contacting technical support for further assistance.
Why Are My Display Monitors Not Working?
There could be multiple reasons why your display monitors are not working. It could be due to a loose cable or damaged port, power issues, driver problems, or a faulty monitor. To troubleshoot, check cable connections and power source, ensure the monitor is receiving power, and configure settings correctly.
Conclusion
If your Thinkpad monitor is not working, there are several possible causes to consider. These include loose cables or damaged ports, power issues, driver problems, or a faulty monitor. To troubleshoot, check the cable connections and power source, ensure the monitor is receiving power and has the correct settings configured.
If the issue persists, consider trying a different monitor or cable, or connecting the monitor to a different PC if available. By following these steps, you can hopefully resolve the problem and get your monitor working again.