Second Monitor Plugged into Motherboard Not Working: Troubleshooting Tips
If your second monitor plugged into the motherboard is not working, make sure both monitors are plugged into the graphics card or the motherboard – not one in each. Connect the primary monitor to the HDMI port on the back of the video card, and the secondary monitor to the motherboard HDMI.
After making the connections, your PC should automatically detect both monitors. When using dual monitors, it can be frustrating to encounter issues with one of the monitors not working when connected to the motherboard. This issue arises when both monitors are not properly plugged into either the graphics card or the motherboard.
To ensure the second monitor functions correctly, it is crucial to connect the primary monitor to the HDMI port on the video card and the secondary monitor to the motherboard HDMI. By following these steps and allowing the PC to automatically detect the two monitors, you can easily resolve the problem and enjoy a seamless dual monitor setup.
Credit: www.reddit.com
Verify Physical Connections
When troubleshooting a second monitor that is not working when plugged into the motherboard, it is important to verify the physical connections. This step ensures that all cables are secure and undamaged, and that both the primary and secondary monitors are connected properly. By following these steps, you can easily identify and resolve any issues related to physical connections.
Check Monitor Cables For Any Signs Of Damage
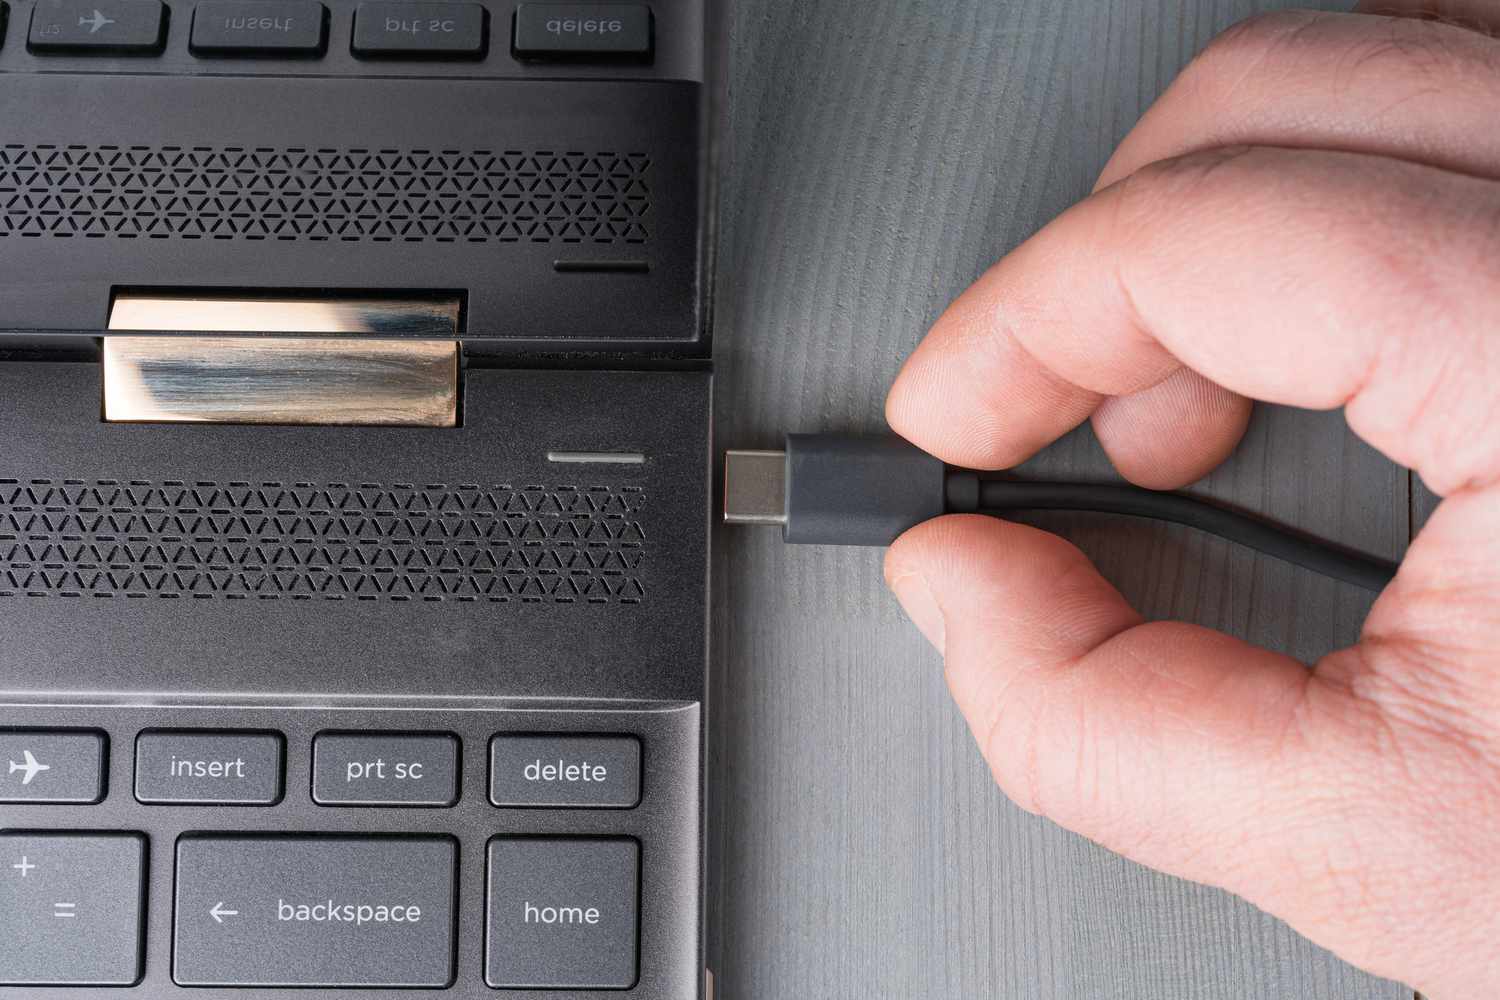
Start by examining the monitor cables for any signs of damage or wear. Look for frayed or bent pins, loose connections, or visible damage to the cable itself. If you notice any issues, replace the cable with a new one that is in good condition. A faulty or damaged cable can prevent the second monitor from functioning correctly.
Ensure That The Second Monitor Is Firmly Plugged Into The Motherboard
Next, make sure that the second monitor is firmly plugged into the motherboard. Ensure that the cable is securely inserted into both the monitor and the HDMI or VGA port on the motherboard. Sometimes, a loose connection can be the cause of the issue. Gently wiggle the cable to ensure a tight fit, but be careful not to damage any components.
Confirm That The Primary Monitor Is Connected Properly
In addition to checking the second monitor, it is essential to confirm that the primary monitor is connected properly. Ensure that the cable is securely plugged into both the monitor and the appropriate port on your graphics card. Sometimes, a misconfiguration or a loose connection with the primary monitor can affect the functionality of the second monitor.
Recognize Motherboard And Gpu Settings
To troubleshoot a second monitor not working when plugged into the motherboard, ensure that both monitors are plugged into either the motherboard or the graphics card, not one in each. Additionally, check if the motherboard HDMI port is working and try enabling it in the bios settings.
Explore Bios For Enabling Integrated Graphics Alongside Gpu
When facing the issue of a second monitor plugged into the motherboard not working, one possible solution is to explore the BIOS settings of your computer. The BIOS (Basic Input/Output System) is a firmware that controls hardware settings and allows you to make changes to your computer’s configuration.
To enable integrated graphics alongside a dedicated GPU (Graphics Processing Unit), follow these steps:
- Restart your computer and continuously press the designated key to access the BIOS setup (commonly Del or F2).
- Navigate to the “Advanced” or “Advanced Settings” section using the arrow keys on your keyboard.
- Look for an option related to graphics or GPU settings, such as “Graphics Configuration” or “Integrated Graphics Device.”
- Enable the integrated graphics option if it is disabled or set to “Auto.” This step may vary depending on your motherboard manufacturer and BIOS version, so refer to your motherboard’s manual or the manufacturer’s website for specific instructions.
- Save the changes and exit the BIOS setup.
- Restart your computer and check if the second monitor plugged into the motherboard is now working.
Note that enabling integrated graphics alongside a dedicated GPU may provide multi-display support, allowing you to use both the graphics card and the motherboard’s integrated graphics for separate monitors. However, the availability of this feature depends on your motherboard and GPU compatibility.
Investigate Graphics Driver Settings For Multi-display Support
If enabling integrated graphics in the BIOS did not resolve the issue, the next step is to investigate the graphics driver settings. The graphics driver is the software that enables communication between your computer’s operating system and the GPU.
Follow these steps to check the graphics driver settings:
- Right-click on the desktop and select “Graphics Options” or “Graphics Properties” from the context menu. This option may vary depending on the graphics driver installed on your computer.
- Look for a section related to multiple displays, such as “Display Settings” or “Multi-Monitor Configurations.”
- Ensure that the option to extend or duplicate displays is enabled.
- If necessary, adjust the display resolution, orientation, or other settings to optimize the use of multiple monitors.
- Click “Apply” or “OK” to save the changes.
Keep in mind that the available options and interface may differ depending on your graphics driver. If you are unsure, refer to the documentation provided by the GPU manufacturer or visit their website for specific instructions.
Adjust Display Settings In The Operating System
If the previous steps did not resolve the issue, you can try adjusting the display settings in your computer’s operating system. This step ensures that the operating system recognizes and properly configures the second monitor.
Follow these steps to adjust the display settings:
- Right-click on the desktop and select “Display Settings” or “Screen Resolution” from the context menu.
- Ensure that the second monitor is detected by the operating system. If not, click on the “Detect” button to search for connected displays.
- If the second monitor is detected but not active, click on the dropdown menu under “Multiple displays” and select “Extend desktop to this display.”
- Adjust the display resolution, orientation, or other settings if necessary.
- Click “Apply” or “OK” to save the changes.
These steps apply to different operating systems, including Windows, macOS, and Linux. However, the specific interface and options may vary depending on your operating system version.
By recognizing and exploring the motherboard and GPU settings, you can troubleshoot the issue of a second monitor not working when plugged into the motherboard. Whether it’s enabling integrated graphics in the BIOS, adjusting graphics driver settings, or configuring display settings in the operating system, these steps can help you resolve the problem and enjoy the benefits of a dual-monitor setup.
Detect The Second Monitor
If you’re facing issues with a second monitor plugged into your motherboard not working, the first step is to detect the monitor. There are a few troubleshooting steps you can take to resolve this problem. In this article, we will explore some effective methods to help you in the process.
Use The Operating System’s Display Detection Feature
One of the easiest ways to detect the second monitor is to use the operating system’s built-in display detection feature. This feature can automatically detect connected displays and configure them accordingly. Here’s how you can do it:
- Right-click on your desktop and select “Display settings” from the context menu.
- In the display settings window, scroll down to the “Multiple displays” section.
- Click on the “Detect” button, and the operating system will search for the second monitor.
- If the second monitor is detected, you can adjust the display settings according to your preference.
Review Potential Issues With Display Drivers
Another reason why your second monitor may not be working is due to issues with display drivers. Display drivers play a crucial role in enabling your operating system to communicate with the graphics hardware. Follow these steps to review and potentially resolve display driver issues:
- Open the Device Manager on your computer by right-clicking on the Start button and selecting “Device Manager.”
- Expand the “Display adapters” section.
- Right-click on the graphics card driver and select “Update driver.”
- Follow the on-screen instructions to update the driver.
Consider Updates Or Reinstallation Of Graphics Drivers
If updating the display driver doesn’t resolve the issue, you may need to consider updating or reinstalling the graphics drivers. This process can help to eliminate any corrupted or outdated files that may be causing the problem. Here’s how you can update or reinstall the graphics drivers:
- Visit the manufacturer’s website of your graphics card.
- Look for the latest drivers available for your specific graphics card model.
- Download and install the updated drivers by following the provided instructions.
- If you already have the latest drivers installed, you can try reinstalling them to make sure they are properly configured.
By following these steps, you should be able to detect and resolve issues with your second monitor plugged into the motherboard. Remember to check for hardware compatibility and ensure that your drivers are up to date to avoid any issues going forward. Enjoy your dual monitor setup!
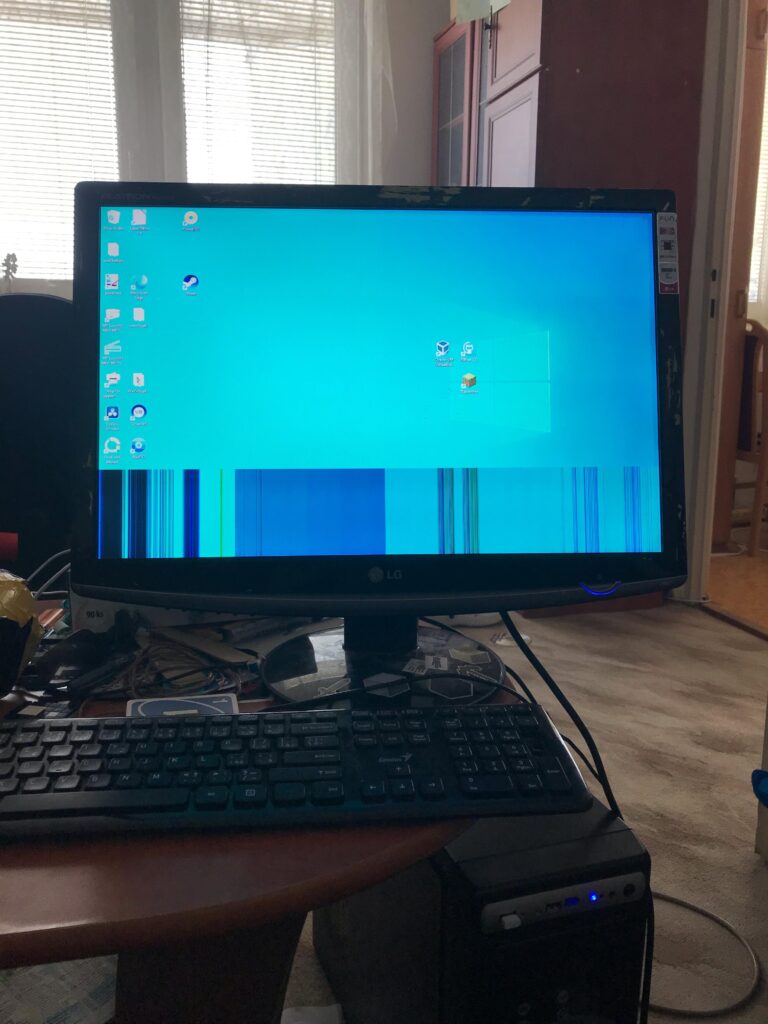
Second Monitor Plugged Into Motherboard Not Working
Many users encounter issues when trying to connect a second monitor to their computer’s motherboard. This can be frustrating, especially when you need the extra screen space for work or gaming. In this blog post, we will analyze common compatibility issues between motherboard ports and monitors, inspect for potential conflicts with discrete graphics cards, and troubleshoot with alternative cables and ports to resolve the problem.
Analyze Common Compatibility Issues Between Motherboard Ports And Monitors
One possible reason why the second monitor is not working when plugged into the motherboard is compatibility issues between the specific ports on the motherboard and the monitor. Different motherboards have different types of ports, such as HDMI, DisplayPort, or VGA. Similarly, monitors have different input options, so it’s important to ensure that the ports on the motherboard are compatible with the monitor’s input.
To determine the compatibility between the motherboard port and the monitor, refer to the user manuals of both devices. Look for the supported resolutions and refresh rates for each port and compare them with the capabilities of the monitor. If there is a mismatch, it may cause the second monitor to not work when connected to the motherboard.
Inspect For Potential Conflicts With Discrete Graphics Cards
In some cases, the presence of a discrete graphics card in the computer system can cause conflicts when trying to connect a second monitor to the motherboard. The discrete graphics card is designed to handle the graphics processing, and it may take priority over the integrated graphics on the motherboard.
To inspect for potential conflicts, you can access the computer’s BIOS settings. Restart the computer and enter the BIOS by pressing the designated key (usually Del or F2) during the startup process. Look for the settings related to the graphics card and check if there is an option to enable the integrated graphics on the motherboard. Enabling this option may allow the second monitor to work when connected to the motherboard.
Troubleshoot With Alternative Cables And Ports
If the above steps do not resolve the issue, it’s worth troubleshooting with alternative cables and ports. Sometimes, the problem lies with a faulty cable or a defective port. Try using a different cable to connect the second monitor to the motherboard, ensuring that it is compatible with both devices.
In addition, if your motherboard has multiple ports, try connecting the second monitor to a different port. This can help identify if the issue is specific to a particular port or if it is a more generalized problem with the motherboard.
To sum it up, when facing difficulties with a second monitor not working when connected to the motherboard, it’s essential to analyze common compatibility issues, inspect for conflicts with discrete graphics cards, and troubleshoot with alternative cables and ports. By following these steps, you can increase the chances of resolving the issue and enjoy the benefits of a dual monitor setup for enhanced productivity or immersive gaming experiences.
Advanced Troubleshooting Techniques
If you’re experiencing issues with your second monitor not working when connected to the motherboard, here’s a simple troubleshooting technique you can try. First, connect your primary monitor to the HDMI port on the video card and then connect the secondary monitor to the motherboard HDMI port.
Finally, make sure both monitors are properly connected and your PC should automatically detect them.
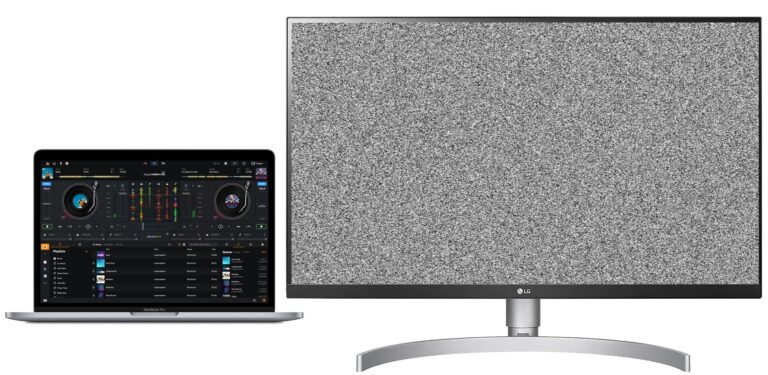
When your second monitor is plugged into the motherboard but is not working, it can be frustrating. However, there are advanced troubleshooting techniques that you can try to resolve the issue. By following these steps, you can effectively rule out hardware failure and explore other options.
Test The Monitor With Another System To Rule Out Hardware Failure
One of the first things you should do is test the monitor with another system to determine if the issue lies with the monitor or the computer. Connect the monitor to a different computer or laptop using the same cables and ports to see if it functions properly. If the monitor works well on another system, then the problem may be with your motherboard or graphics card.
Explore The Use Of Adapters Or Converters If Necessary
If your second monitor is not compatible with the ports available on your motherboard, you may need to use adapters or converters. These can help bridge the gap between different port types and ensure proper connectivity. Research the specifications of your monitor and motherboard to identify the compatible adapters or converters. Purchase the necessary equipment and connect your monitor using the adapted or converted cables. This can help resolve compatibility issues and get your second monitor up and running.
Seek Manufacturer’s Technical Support For Unresolved Issues
If you have exhausted all troubleshooting techniques and your second monitor still does not work when plugged into the motherboard, it may be time to seek the manufacturer’s technical support. Reach out to the manufacturer’s support team through their website or their designated support channels. Provide them with detailed information about your issue and the steps you have already taken to troubleshoot. They will be able to offer further guidance and potentially resolve the problem.
Frequently Asked Questions For Second Monitor Plugged Into Motherboard Not Working
How Do I Get My Second Monitor To Work On My Motherboard?
To get your second monitor to work on your motherboard, follow these steps: 1. Connect your primary monitor to the HDMI port on the back of your video card. 2. Connect your secondary monitor to the HDMI port on your motherboard.
3. Plug the other ends of the HDMI cables into the respective monitors. 4. Your computer will automatically detect the two monitors. Ensure that the signal cable is correctly connected, and check for any bent pins.
Why Is My Motherboard Not Detecting My Monitor?
If your motherboard is not detecting your monitor, check that the signal cable is properly connected to both the monitor and the display output of your computer’s graphics card. Make sure the cable pins are not bent and try re-plugging the cable.
Why Is My Pc Not Picking Up My 2nd Monitor?
To fix the issue of your PC not picking up your 2nd monitor, make sure both monitors are plugged into either the motherboard or the graphics card, not one in each. Check that the signal cable is correctly connected to the monitor and the display output of the computer.
Replug the display cable and ensure all pins are not bent. Your PC should automatically detect both monitors after making the connections.
Is It Bad To Plug Second Monitor Into Motherboard?
Plugging a second monitor into the motherboard may not work. Both monitors should be connected to either the motherboard or the graphics card, not one in each. Make sure to connect both monitors to the same source for them to function properly.
Conclusion
If you are experiencing issues with your second monitor not working when plugged into the motherboard, there are a few steps you can take to troubleshoot the problem. Make sure both monitors are connected to either the motherboard or the graphics card, check the cable connections, and ensure that the display settings are correctly configured.
It’s also a good idea to update your graphics card drivers and check the BIOS settings. By following these steps, you should be able to resolve the issue and enjoy dual monitor functionality without any problems.