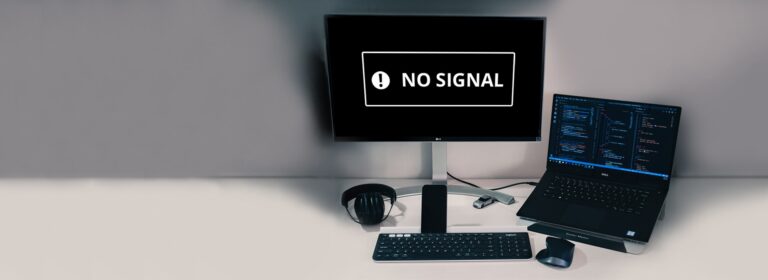
Pc Not Displaying on Monitor Hdmi: Troubleshooting Tips
To fix a PC not displaying on a monitor through HDMI, check that you have plugged the monitor into the correct HDMI or DisplayPort on your PC, ensuring it is not connected to the HDMI port on the motherboard. If you have a dedicated graphics card, try using the connections on the card instead.
Additionally, verify that your monitor is expecting input from the correct type of port (VGA, DVI, HDMI) in the monitor menu. If the issue persists, try using a different HDMI cable or testing the monitor with another system to determine if the cable or graphics card is faulty.
Confirm Hdmi Connection Integrity
When your PC fails to display on your monitor through the HDMI connection, it’s essential to confirm the HDMI connection integrity. A faulty HDMI connection can prevent the display signal from reaching the monitor, resulting in a blank screen. In this section, we will explore three crucial steps to ensure the HDMI connection is intact and troubleshooting the issue effectively.
Inspect Hdmi Cable For Physical Damage
One of the first steps to check when your PC is not displaying on your monitor is to inspect the HDMI cable for any physical damage. A damaged cable can lead to a poor or no connection, resulting in no signal on the monitor.
To inspect the HDMI cable effectively, follow these steps:
- Check for any visible signs of damage, such as frayed ends, bent pins, or loose connectors.
- If possible, try using the HDMI cable on another device to see if it functions correctly.
- If you identify any physical damage, replace the HDMI cable with a new one to ensure a secure connection between your PC and the monitor.
Ensure Tight Hdmi Cable Connection On Both Pc And Monitor
Another crucial aspect of confirming the HDMI connection integrity is to ensure a tight and secure connection between your PC and the monitor. A loose or inadequate connection can cause signal loss, resulting in a blank screen.
To ensure a tight HDMI cable connection, follow these steps:
- Check the HDMI cable connection on both the PC and the monitor by gently pushing them into their respective HDMI ports.
- Ensure that the HDMI cable is fully inserted into both the PC and the monitor, and the connectors are securely tightened.
- If needed, disconnect and reconnect the HDMI cable to establish a stronger and more secure connection.
Verify That Hdmi Is The Selected Input On The Monitor
Often, the issue of the PC not displaying on the monitor can be due to an incorrect input selection on the monitor. It’s crucial to verify that HDMI is the selected input on the monitor to ensure that it receives the signal from your PC.
To verify the selected input on the monitor, follow these steps:
- Access the monitor’s menu using the on-screen display (OSD) buttons located on the monitor’s front or side.
- Navigate through the OSD menu to find the input selection options.
- Select HDMI as the input option to ensure that the monitor recognizes the HDMI input signal.
By confirming the HDMI connection integrity through inspecting the HDMI cable for physical damage, ensuring a tight connection on both the PC and the monitor, and verifying the selected input on the monitor, you can troubleshoot and resolve the issue of your PC not displaying on the monitor through HDMI.
Software And Settings Verification
If your PC is not displaying on the monitor via HDMI, first check that you have plugged in the monitor to the correct HDMI or DisplayPort on your PC. Also, ensure that you haven’t accidentally connected it to the HDMI port on your motherboard instead of the dedicated graphics card.
Additionally, consider checking the cables and ports for any issues or try using a different HDMI cable.
When your PC fails to display on the monitor through HDMI, it is essential to review your software and settings to identify and resolve the issue. Follow these steps to perform software and settings verification:
Review Display Settings On Pc For Multiple Displays
To ensure your PC is set up correctly for multiple displays:
- Right-click on the desktop and select Display settings.
- Scroll down to the Multiple displays section.
- Verify that Extend these displays or Duplicate these displays is selected, depending on your preference.
- Click Apply and then OK to save the changes.
Check For Correct Input Source On Monitor Menu
In some cases, the monitor may not be detecting the correct input source. Follow these steps to verify and select the correct input source on the monitor menu:
- Press the menu button on your monitor to access the settings menu.
- Navigate to the Input or Source section.
- Ensure that the input source corresponds to the HDMI port connected to your PC.
- Select the correct input source and exit the menu.
Update Or Reinstall Display Drivers On Pc
Outdated or corrupt display drivers can often cause issues with HDMI connectivity. Follow these steps to update or reinstall the display drivers:
- Open the Device Manager on your PC.
- Expand the Display adapters section.
- Right-click on your display adapter and select Update driver or Uninstall device.
- If updating, choose the option to search for updated drivers automatically.
- If uninstalling, follow the prompts to uninstall the driver and then restart your PC.
- After the restart, the driver will reinstall automatically. If not, you can manually install the latest driver by visiting the manufacturer’s website.
By reviewing your display settings, checking the monitor’s input source, and updating or reinstalling the display drivers, you can resolve the issue of your PC not displaying on the monitor through HDMI. Try each step in order and test your connection after each one to determine the solution that works for you.
Test Alternative Display Outputs
If your PC is not displaying on your monitor through HDMI, there are a few troubleshooting steps you can take. First, check that you’ve plugged the monitor into the correct HDMI or DisplayPort on your PC. If you have a dedicated graphics card, use the connections on that instead.
Additionally, try using a different HDMI cable to see if that solves the problem.
Test Alternative Display Outputs Switch to a different HDMI port on the monitor or PC If your PC is not displaying on the monitor through HDMI, one possible solution is to switch to a different HDMI port on either the monitor or the PC. Sometimes, certain HDMI ports may not be functioning properly, so trying a different port can help resolve the issue. To do this: 1. On the back of your monitor, locate the HDMI ports. 2. Unplug the HDMI cable from the current port. 3. Plug the HDMI cable into a different port. 4. On your PC, ensure that the other end of the HDMI cable is securely connected to the HDMI port. Using a different HDMI port can help determine if the original port is faulty or if there are compatibility issues between the PC and monitor. Use an alternate cable or display interface (e.g., DisplayPort) If switching HDMI ports doesn’t solve the problem, you can try using an alternate cable or display interface. Sometimes, the issue may lie with the cable itself or the compatibility between the PC and HDMI. To do this: 1. Disconnect the HDMI cable from both the PC and the monitor. 2. Obtain an alternative cable or display interface, such as a DisplayPort cable. 3. Connect one end of the alternative cable or display interface to the PC. 4. Connect the other end of the cable or interface to the monitor. 5. Ensure that the connections are secure. Using an alternate cable or display interface can help determine whether the problem lies with the HDMI cable or the HDMI port on the PC or monitor. Connect to a different monitor to isolate the issue If you’ve tried the previous steps and the PC is still not displaying on the monitor, it’s worth testing the PC with a different monitor to isolate the issue. This will help determine whether the problem lies with the PC or the monitor itself. To do this: 1. Disconnect the current monitor from the PC. 2. Obtain a different monitor to use for testing purposes. 3. Connect the different monitor to the PC using the same HDMI cable or alternate cable/interface. 4. Ensure that the connections are secure. If the PC displays properly on the different monitor, then the issue likely lies with the original monitor. However, if the problem persists with the different monitor, then there may be an issue with the PC’s hardware or settings that needs further troubleshooting. Testing alternative display outputs such as switching HDMI ports, using alternate cables or display interfaces, and connecting to a different monitor can help identify and resolve issues with a PC not displaying on a monitor through HDMI. It’s important to check each of these options to pinpoint the root cause of the problem and find an appropriate solution.Evaluate Pc’s Hardware Components
If your PC is not displaying on the monitor through HDMI, there are a few steps you can take to troubleshoot the issue. First, check that you’ve plugged the HDMI cable into the correct port on your PC, whether it’s the dedicated graphics card or the motherboard.
You can also try switching to a different HDMI cable to see if that resolves the problem.
Evaluate PC’s Hardware Components Assess graphics card seating and power connections To troubleshoot the issue of your PC not displaying on the monitor HDMI, the first step is to assess the seating and power connections of your graphics card. Here’s how you can do it: 1. Turn off your PC and unplug it from the power source. 2. Open your PC tower or case to access the internal components. 3. Locate the graphics card and ensure it is securely seated in the PCI-e slot on the motherboard. If it feels loose, gently push it down to ensure proper connection. 4. Check the power connections to the graphics card. There should be one or two power cables connected to the card, depending on the model. Make sure these cables are firmly plugged in. By evaluating the seating and power connections of your graphics card, you can resolve any potential issues related to loose connections that might be causing the HDMI display problem. Run hardware diagnostics for the video card and motherboard In addition to checking the seating and power connections, running hardware diagnostics for the video card and motherboard can help identify any underlying issues. Follow these steps: 1. Restart your PC and access the BIOS or UEFI settings by pressing the designated key during boot-up (usually Del or F2). 2. Navigate to the hardware diagnostics section. The exact location and terminology may vary depending on your motherboard manufacturer. 3. Run the diagnostics for both the video card and the motherboard. This process may take a few minutes. 4. Take note of any error codes or error messages that are displayed during the diagnostics. These can provide valuable insights into the cause of the display issue. By running hardware diagnostics, you can pinpoint any hardware-related problems with your video card or motherboard that may be preventing the HDMI display from working correctly. This will help you determine the appropriate course of action to resolve the issue. Consider temporary disconnection of non-essential peripherals If the previous steps haven’t resolved the problem, you can try temporarily disconnecting non-essential peripherals to eliminate any potential conflicts. Follow these steps: 1. Power off your PC and unplug it from the power source. 2. Start by disconnecting any external devices connected to your PC, such as USB devices, external hard drives, printers, etc. 3. Remove any expansion cards or adapters that are not essential for basic PC functionality. 4. Leave only the essential peripherals connected, such as the monitor, keyboard, and mouse. By temporarily disconnecting non-essential peripherals, you can determine if any of these devices are causing conflicts with the HDMI display. If the issue persists, you can rule out these peripherals as the root cause of the problem. By evaluating your PC’s hardware components, including graphics card seating and power connections, running hardware diagnostics for the video card and motherboard, and considering the temporary disconnection of non-essential peripherals, you can effectively troubleshoot and resolve the issue of your PC not displaying on the monitor HDMI.Inspect For Hardware Conflicts
To troubleshoot a PC not displaying on a monitor through HDMI, check the cables and ports. Ensure that the monitor is plugged into the correct HDMI or DisplayPort on the PC, avoiding the motherboard port if a dedicated graphics card is present.
Verify the cable connections and try a different cable if necessary.
Check Device Manager For Display Adapter Conflicts
If your PC is not displaying on the monitor through HDMI, one potential cause could be conflicts with the display adapter in Device Manager. To check and fix this issue:
- Press the Windows key + X on your keyboard and select Device Manager from the menu.
- In the Device Manager window, expand the Display adapters category by clicking on the arrow next to it.
- If you see any yellow exclamation marks or error icons next to the display adapter, there might be a conflict.
- Right-click on the troubled display adapter and select Update driver.
- Choose the option to search automatically for updated driver software.
- Follow the on-screen instructions to install the latest driver.
- Restart your PC and check if the monitor displays correctly through HDMI.
Disable Onboard Graphics When Using A Dedicated Gpu
Another possible reason for your PC not displaying on the monitor via HDMI is if you have both an onboard graphics card and a dedicated GPU. To resolve this issue:
- Enter the BIOS settings of your PC by restarting it and pressing the appropriate key (usually F2, Del, or Esc) during startup.
- Look for an option related to graphics or display settings in the BIOS menu.
- Ensure that the primary display output is set to the dedicated GPU and not the onboard graphics.
- Save the changes and exit the BIOS.
- Restart your PC and check if the monitor now displays correctly through HDMI.
Ensure Bios Settings Are Configured For The Primary Display Output
In some cases, the PC may not display on the monitor via HDMI due to incorrect BIOS settings regarding the primary display output. To rectify this:
- Restart your PC and access the BIOS settings by pressing the appropriate key (usually F2, Del, or Esc) during startup.
- Navigate to the section in the BIOS menu where you can configure display settings.
- Check that the primary display output is set to the correct option, which should be HDMI.
- Save the changes and exit the BIOS.
- Restart your PC and check if the monitor now displays properly through HDMI.
By inspecting for hardware conflicts in Device Manager, disabling onboard graphics when using a dedicated GPU, and ensuring the BIOS settings are configured correctly, you can troubleshoot and resolve the issue of your PC not displaying on the monitor through HDMI.
Credit: www.zdnet.com
Assure Compatibility And Signal Sync
To resolve the issue of a PC not displaying on a monitor with HDMI, check your cables and ports. Ensure that the monitor is connected to the correct HDMI or DisplayPort on the back of your PC, avoiding the HDMI port on the motherboard if you have a dedicated graphics card.
Troubleshoot steps may include checking the monitor menu for the correct input type, examining the condition of the cables and connectors, and trying different HDMI cables if necessary.
Confirm Monitor’s Resolution And Refresh Rate Compatibility
One of the common reasons why your PC might not be displaying on the monitor through HDMI is compatibility issues. To resolve this, you need to confirm that your monitor’s resolution and refresh rate are compatible with your PC.
Test Monitor With Other Devices To Ensure It’s Functioning
To rule out any hardware issues with your monitor, it’s recommended to test it with other devices. Connect the monitor to a different PC or laptop using the same HDMI cable and check if it displays properly. If the monitor works with the other device, then the problem lies with your PC.
Reset The Monitor To Factory Settings
If your monitor is not displaying on your PC, it could be due to incorrect settings. To troubleshoot this, reset your monitor to its factory settings. This will ensure that any misconfigured settings are reverted back to their default state.
By following these troubleshooting steps to assure compatibility and signal sync, you can resolve the issue of your PC not displaying on the monitor through HDMI. Confirming the monitor’s resolution and refresh rate compatibility, testing the monitor with other devices, and resetting the monitor to factory settings can help identify and resolve any underlying problems. Remember to double-check the cable connections and ensure that all settings are properly configured.
Implement Potential Fixes And Resolutions
If you are facing the issue of your PC not displaying on the monitor HDMI, there are several potential fixes and resolutions that you can try. Below, we have outlined some of the most effective methods to address this problem. Implement these solutions one by one until you find the one that solves your issue.
Perform A Power Cycle On Both Pc And Monitor
The first step in troubleshooting your PC’s HDMI display issue is to perform a power cycle on both your PC and monitor. This process helps to refresh the system and clear any temporary glitches that may be causing the problem.
- Turn off your PC and your monitor.
- Unplug the power cables from both the PC and the monitor.
- Wait for approximately 30 seconds.
- Reconnect the power cables to both the PC and the monitor.
- Turn on the PC and the monitor.
Performing a power cycle can often resolve connectivity issues and restore the display on your monitor.
Examine Possible Interference From Other Devices
Interference from other devices can sometimes disrupt the HDMI connection between your PC and the monitor. To rule out this possibility, follow these steps:
- Disconnect all other devices connected to your PC or monitor (such as gaming consoles, DVD players, or additional monitors).
- Restart your PC and monitor.
- Check if the display appears on your monitor.
If the display reappears after disconnecting other devices, it indicates that there was interference causing the issue. You can then reconnect the devices one by one, checking the display each time, to identify the specific device causing the problem.
Look Into Firmware Updates For The Monitor Or Bios Updates For The Pc
Outdated firmware on the monitor or outdated BIOS on your PC can sometimes result in display issues. Follow the steps below to check for updates:
- Visit the manufacturer’s website for your monitor and search for firmware updates.
- If an update is available, download and install it following the provided instructions.
- Visit the manufacturer’s website for your PC’s motherboard and search for BIOS updates.
- If an update is available, download and install it following the provided instructions.
- Restart your PC and check if the display on your monitor is now functioning properly.
Updating the firmware and BIOS can often resolve compatibility issues and improve the HDMI connection between your PC and the monitor.
By implementing these potential fixes and resolutions, you can increase the chances of resolving the issue of your PC not displaying on the monitor HDMI. Start with the power cycle, check for interference, and update firmware and BIOS if necessary. Remember to test the display after each step to determine if the issue has been resolved.
Frequently Asked Questions On Pc Not Displaying On Monitor Hdmi
Why Is My Monitor Not Displaying Hdmi?
Your monitor may not be displaying HDMI due to several reasons. Firstly, check if you have connected your monitor to the correct HDMI or DisplayPort on your PC. Avoid plugging it into the HDMI port on your motherboard if you have a dedicated graphics card.
Also, ensure that your cables and ports are in good condition. If the issue persists, try using a different HDMI cable.
Why Won’t My Monitor Detect My Pc?
If your monitor won’t detect your PC, check your cable connections and make sure they are properly plugged in. Double-check that you’ve connected the monitor to the correct HDMI or DisplayPort. If you have a dedicated graphics card, use the connections on it instead of the motherboard.
You can also try using a different cable or connecting the monitor to another system to troubleshoot the issue.
Why Is My Pc Turning On But No Display?
If your PC is turning on but not displaying anything, the issue could be with the cables and ports. Make sure you have connected the monitor to the correct HDMI or DisplayPort on your PC. Check if you have plugged it into the motherboard’s HDMI port instead of the dedicated graphics card.
Additionally, try using different cables and ports to see if that resolves the problem.
Why Is My Graphics Card Not Sending Signal To My Monitor?
Check monitor input settings and ensure it’s set to the correct output (HDMI). Replace a faulty HDMI cable. Reconnect and secure cable connections. Check if the graphics card, motherboard, RAM, and power supply are properly connected. Try using the graphics card on a different computer to see if it works.
Conclusion
If your PC is not displaying on your monitor through HDMI, there are a few troubleshooting steps you can take. First, ensure that your cables are properly connected to the correct HDMI or DisplayPort on your PC. Check for any loose connections or cable damage.
Additionally, verify that your monitor is expecting input from the correct port. If these steps do not solve the issue, you may need to try using a different cable or monitor, or reseat your graphics card. Remember to always check for any damaged cables, as they can be a common culprit for display issues.