Not Displaying on Monitor: Troubleshooting Solutions
If your computer is not displaying on the monitor, check the cable connections between the computer and the monitor. Make sure the cables are properly connected and not damaged.
Try using a different cable or a different port on the computer to see if that resolves the issue. Loose or faulty cables are often the cause of no signal on the monitor. Additionally, if your monitor has multiple source inputs, ensure that the correct input source is selected.
By checking and troubleshooting these cable connections, you can address the issue of your computer not displaying on the monitor.
Preliminary Checks For Display Issues
If your monitor is not displaying anything, there are a few preliminary checks you can perform. Firstly, check the cable connections between your computer and monitor, as a loose or damaged cable could be the cause. Additionally, try using a different cable or USB port to see if the issue persists.
Ensure Monitor Power Supply
Before diving into complex troubleshooting steps, it’s essential to perform some preliminary checks to identify and resolve display issues. One of the first checks to make is to ensure that your monitor is receiving proper power supply. A lack of power can lead to a black screen or no display at all, leaving you puzzled about the cause of the issue.
Assessing Monitor’s Power Status
To check the power status of your monitor, follow these steps:
- Inspect the power cable connection between your monitor and the power outlet. Make sure the connection is secure and the cable is not damaged.
- If the power cable is connected securely, check if the power indicator light on the monitor is illuminated. If it is not lit up, try connecting the monitor to a different power outlet to rule out any issues with the power source.
- Ensure that the power switch on the monitor is turned on. Sometimes, due to accidental switches or power surges, the monitor can be turned off without your knowledge.
Confirming Computer Boot-up
In some instances, the issue may not lie with the monitor itself but rather with the computer’s boot-up process. To confirm if your computer is booting up correctly, follow these steps:
- Check if the computer’s power indicator lights are on. If they are not, ensure that the power cable is securely connected to the computer and the power outlet.
- If the power indicator lights are on, but the monitor is still not displaying anything, try connecting the monitor to a different computer or laptop to determine if the issue lies with the monitor or the computer itself.
- If the monitor displays content when connected to another device, the problem likely lies with your computer’s graphics card or driver. Updating drivers or seeking professional assistance may be necessary in this case.

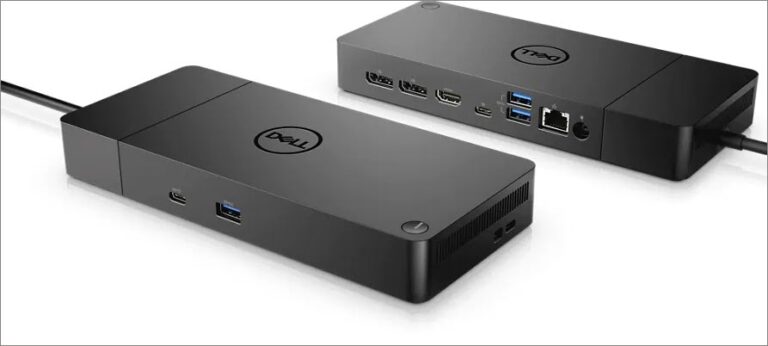
Credit: www.cashify.in
Identifying Connectivity Problems
If your computer is not displaying on the monitor, the issue could be with the cable connections. Check for loose or damaged cables and try using a different cable or USB port. Another common culprit could be faulty or improperly connected cables.
Inspecting Cable Integrity
A common cause of not displaying on a monitor is faulty or damaged cables. Inspecting the integrity of the cables connecting your computer to the monitor is crucial in troubleshooting the issue. Here are some steps you can take:
- Check if the cables are securely plugged into both the computer and the monitor.
- Inspect the cables for any visible signs of damage, such as frayed wires or bent connectors.
- If possible, try using a different cable to connect your computer to the monitor to see if the issue is resolved.
Testing Alternate Cables
If you suspect that the cable you’ve been using is the culprit for the display issue, testing alternate cables can help in identifying the problem. Follow these steps:
- Gather any extra cables you may have that are compatible with your monitor and computer.
- Disconnect the current cable from both the computer and the monitor.
- Connect one of the alternate cables securely between the computer and the monitor.
- Power on both the computer and the monitor and check if the display is now working.
Verifying Port Functionality
In some cases, the issue may be related to a malfunctioning port on either the computer or the monitor. Verifying port functionality can help in troubleshooting the problem effectively. Here’s what you can do:
- If your computer has multiple USB ports or HDMI ports, try connecting the monitor to a different port.
- If the monitor has multiple input ports, such as HDMI, VGA, or DVI, try connecting the computer to a different input port.
- Make sure to securely connect the cables to the ports and power on both the computer and the monitor.
- Check if the display now shows up on the monitor.
By inspecting cable integrity, testing alternate cables, and verifying port functionality, you can effectively identify and address connectivity problems that may be preventing your computer from displaying on the monitor. If the issue persists after these troubleshooting steps, it may be necessary to consult a professional or contact technical support for further assistance.
Configuring Display Settings
When it comes to troubleshooting display issues on your monitor, one of the first steps you should take is configuring the display settings. This involves adjusting the monitor input source, modifying system display configurations, and assessing multi-monitor arrangements. By following these steps, you can effectively resolve the issue of your monitor not displaying properly.
Adjusting Monitor Input Source
In some cases, the problem may lie with the input source selected on your monitor. To rectify this, you need to manually adjust the monitor input source. Here’s how you can do it:
- Check the cable connections between your computer and monitor to ensure they are securely plugged in.
- If you suspect a damaged cable, try using a different one to see if the issue persists.
- Additionally, make sure to test different USB ports on your computer in case of a malfunctioning port.
Modifying System Display Configurations
Incorrect display configurations can also prevent your monitor from displaying correctly. To modify the system display configurations, follow these steps:
- Access the display settings on your computer by right-clicking on the desktop and selecting “Display settings”.
- Ensure that the resolution and refresh rate settings are compatible with your monitor’s specifications.
- If needed, try adjusting these settings to find the optimal configuration for your monitor.
Assessing Multi-monitor Arrangements
If you are using multiple monitors, it’s essential to assess their arrangements to rule out any conflicts or compatibility issues. Here are the steps you can take:
- Access the display settings on your computer as previously mentioned.
- Verify that the multi-monitor arrangement is correctly set up.
- If necessary, rearrange the position of the monitors or adjust their primary/secondary designation to ensure proper functionality.
By going through these troubleshooting steps, you can effectively configure the display settings to resolve the issue of your monitor not displaying correctly. Be sure to perform each step carefully and thoroughly to achieve the desired result.
Advanced Troubleshooting Solutions
If your computer is not displaying on the monitor, there could be several possible solutions. First, check the cable connections to ensure they are secure and not damaged. If necessary, try using a different cable or port. Additionally, check for any loose or faulty cables that may be causing the issue.
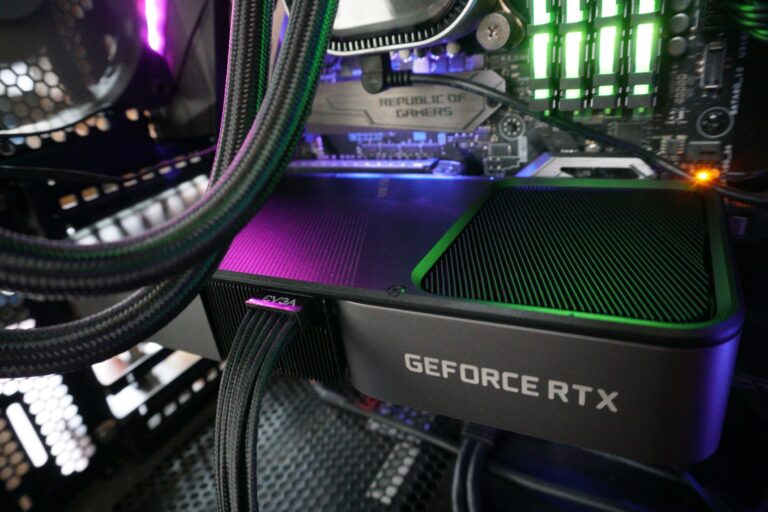
Evaluating Graphics Card And Drivers
One of the first steps in advanced troubleshooting when facing a monitor display issue is to evaluate the graphics card and drivers. A faulty or outdated graphics card driver can often be the culprit behind a blank screen. To ensure your graphics card and drivers are functioning properly, follow these steps:- Check if your graphics card is properly seated in the PCIe slot.
- If you have an external graphics card, disconnect and reconnect it to eliminate any connection issues.
- Update your graphics card driver to the latest version available. Visit the manufacturer’s website to download and install the appropriate driver for your specific model.
- If updating the driver doesn’t solve the problem, try rolling back to a previous version to see if that resolves the issue.
- Ensure that the graphics card is receiving sufficient power and that all power cables are securely attached.
Conducting A Bios/uefi Check
In some cases, a misconfigured BIOS/UEFI (Basic Input/Output System/Unified Extensible Firmware Interface) can prevent your computer from displaying on the monitor. To conduct a BIOS/UEFI check, follow these simple steps:- Restart your computer and continuously press the BIOS/UEFI access key (such as Delete, F2, or F10) during the startup process until you enter the BIOS/UEFI setup.
- Verify that the primary display output is set to the appropriate option (e.g., PCIe, integrated graphics).
- Check if the BIOS/UEFI version is up to date. If not, visit the manufacturer’s website and download the latest BIOS/UEFI update for your system.
- Reset the BIOS/UEFI settings to their default values, as a misconfiguration can sometimes cause display issues.
- Save the changes and exit the BIOS/UEFI setup.
Performing A Safe Mode Boot
If your computer is still not displaying on the monitor, performing a safe mode boot can help troubleshoot software-related problems that may be preventing the display from working correctly. Follow these steps to boot your computer into safe mode:- Shut down your computer completely.
- Turn on your computer and immediately start tapping the F8 key or the key designated for your specific operating system.
- Select the “Safe Mode” option from the Advanced Boot Options menu that appears.
- Once booted into safe mode, check if the monitor displays correctly. If it does, it indicates that a software issue or incompatible driver may be causing the problem.
- Try updating or uninstalling any recently installed drivers or software that could be causing conflicts. You can do this through the Device Manager in Windows or the Software Center in macOS.
- Restart your computer normally to see if the problem is resolved.
In Conclusion
When faced with a monitor that is not displaying, advanced troubleshooting solutions such as evaluating the graphics card and drivers, conducting a BIOS/UEFI check, and performing a safe mode boot can help identify and resolve the issue. By following these steps, you can ensure that your monitor is properly connected and that any software or hardware-related problems are addressed and fixed efficiently.Hardware Component Inspection
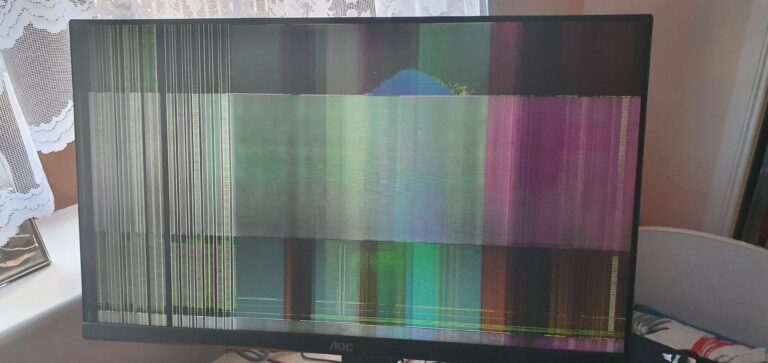
When your computer screen fails to show any picture, it can be a frustrating experience. However, before jumping to conclusions and assuming the worst, there are several hardware components you should inspect first. By carefully examining these components, you may be able to identify the source of the problem and find a solution. In this section, we will explore three primary areas that require your attention: testing the monitor with another system, swapping out the graphics card, and checking internal connections.
Testing Monitor With Another System
If your computer monitor is not displaying anything, it is essential to determine whether the issue lies with the monitor itself or the computer system. One effective method is to test the monitor with another system. This diagnostic step helps you gauge whether the problem lies with the monitor or other hardware components. To perform this test, follow these steps:
- Use an extra cable to connect your monitor to a different system.
- Power on the monitor and the alternate system.
- Observe if the monitor displays anything on the new system.
If the monitor shows a picture on the alternative system, it indicates that the issue lies with your computer rather than the monitor itself. However, if the monitor fails to display anything on the second system, it suggests a potential problem with the monitor’s internal components.
Swapping Out Graphics Card
The graphics card, also known as the video card or GPU, plays a crucial role in generating and displaying images on your monitor. If the monitor does not display any picture, the graphics card could be a likely culprit. To determine if this is the case, you can try swapping out the graphics card with a spare one or the integrated graphics (if available). Follow these steps:
- Locate the graphics card in your computer system.
- Carefully remove the current graphics card from its slot.
- If available, install a spare graphics card or enable integrated graphics from your motherboard.
- Power on your computer and observe if the monitor displays a picture.
If the monitor now shows a picture after swapping out the graphics card, it suggests that the original graphics card may have been faulty or incompatible with your system. This information can help guide your troubleshooting and potential solutions.
Checking Internal Connections
Faulty or loose connections inside your computer can also lead to a monitor not displaying anything. It’s essential to ensure that all internal connections are secure and properly seated. Follow these steps to check the internal connections:
- Power off your computer and unplug it from the power source.
- Open the computer case to access the internal components.
- Carefully inspect the connections between the graphics card, motherboard, and monitor cables.
- If any connections appear loose or improperly seated, reseat them firmly.
- Close the computer case and reconnect the power cable.
- Power on your computer and check if the monitor now displays a picture.
By performing a thorough inspection of your computer’s internal connections, you can eliminate any potential issues stemming from loose connections. This step ensures that all hardware components are properly communicating with each other, allowing the monitor to display the picture correctly.
Not Displaying On Monitor: Strategies To Resolve
Experiencing a blank screen or “no display” issue on your monitor can be frustrating. However, there are several strategies you can follow to identify and resolve the problem. By taking a systematic approach, understanding potential hardware and software conflicts, and knowing when to seek professional assistance, you can overcome this issue and get your monitor working again.
Systematic Approach For Hardware Issues
When faced with a blank screen on your monitor, it’s important to start by checking the hardware components. Begin by ensuring that the monitor is powered on and receiving electricity. If the monitor has a power indicator light, make sure it is illuminated. Additionally, examine the cable connections between the computer and the monitor. The issue could be as simple as a loose or damaged cable. Try using another cable to see if the problem persists. If your monitor is connected via USB, attempting a different USB port could also resolve the issue.
Software Conflicts And Resolution
In some cases, the problem may not lie with the hardware, but instead, it could be a software conflict causing the monitor to not display anything. Start by checking if the computer is in sleep mode. If so, try pressing a key or moving the mouse to wake it up. Additionally, ensure that all connections are secure and properly plugged in. If your monitor has multiple source inputs, make sure the correct input source is selected. It is also worth checking the display settings on your computer to verify that they are correctly configured.
When To Seek Professional Assistance
If you have followed the above-mentioned steps and your monitor still refuses to display anything, it may be time to seek professional assistance. While it can be tempting to try and troubleshoot the problem further, a skilled technician will have the expertise and tools necessary to diagnose and resolve more complex issues. Professional assistance can save you time and frustration, ensuring that your monitor issue is resolved efficiently.
Remember, when faced with a “not displaying on monitor” problem, following a systematic approach, addressing hardware and software conflicts, and knowing when to seek professional assistance can help you resolve the issue and get your monitor back up and running smoothly.
Frequently Asked Questions Of Not Displaying On Monitor
Why Is My Monitor Working But No Display?
If your monitor is working but not displaying anything, there could be a few reasons. Check the cable connections between your computer and monitor to ensure they are secure. Try using a different cable or port to rule out any issues with the current ones.
Faulty cables or connections are common causes of this problem.
Why Does My Laptop Turn On But No Display?
If your laptop is turning on but there’s no display, it could be due to cable connectivity issues or a malfunctioning GPU. Try checking the cable connections between your laptop and monitor, and consider using a different cable or port.
If the problem persists, it could indicate a damaged display or internal disk drive.
How Do I Get My Computer To Detect Monitor But Not Display?
If your computer detects the monitor but doesn’t display anything, check the cable connections. Try using a different cable or USB port to rule out any issues with the connection. Faulty or loose cables are often the cause of this problem.
Why Does My Computer Turn On But No Signal To Monitor?
If your computer turns on but there is no signal to the monitor, it could be due to cable connection issues or a malfunctioning USB port. Try using a different cable or USB port to see if the problem is resolved.
Faulty or loose cables are common culprits for a no signal error on the monitor.
Conclusion
When your computer is not displaying on the monitor, there are several potential reasons for this issue. It could be due to loose or faulty cable connections, malfunctioning USB ports, incorrect display configuration, damaged GPU or RAM, or even a corrupted internal disk drive.
To troubleshoot, try using different cables, ports, or even a new monitor. If the issue persists, it might be necessary to seek professional assistance. Remember to always check the simplest potential solutions first before assuming a more complex problem.