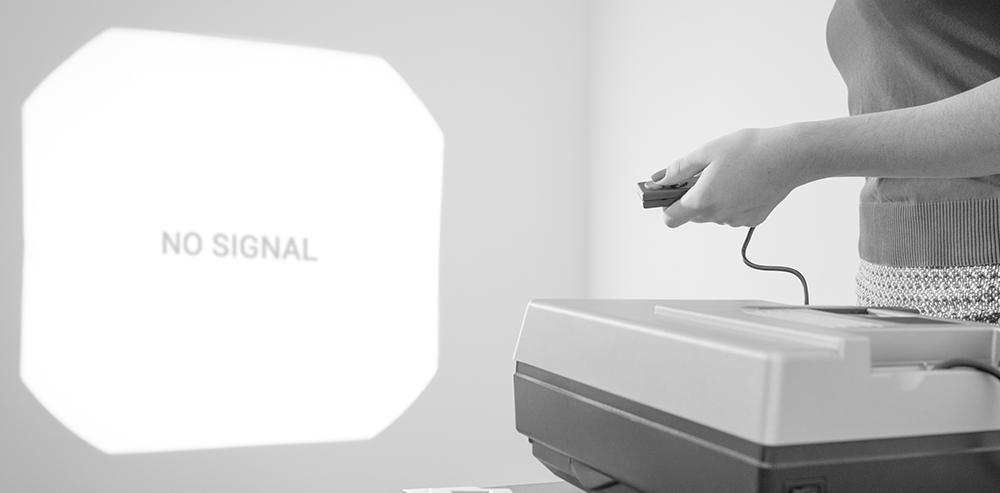
No Input Detected on Projector: Troubleshooting Tricks and Solutions
No input detected on projector indicates a possible issue with the connection or source device. In such cases, check the connection cables and ensure the source device is properly connected to the projector.
Projector Issues: No Input Detected
One of the most frustrating problems that can occur while using a projector is the “No Input Detected” issue. This error message typically shows up when the projector fails to recognize any input source, leaving you with a blank screen and no way to display your content. In this blog post, we will explore the common reasons behind input detection failure and the key signs of connectivity problems. We will also highlight the importance of checking projector compatibility to ensure a seamless experience.
Common Reasons For Input Detection Failure
When it comes to input detection failure on a projector, there are several common reasons that could be causing the issue. Understanding these reasons can help you troubleshoot the problem effectively. Some of the primary causes of this problem include:
- Loose cable connections: Insufficiently connected cables or loose connections can prevent the projector from receiving signals from the input source.
- Incorrect input selection: It is essential to ensure that the correct input source is selected on the projector. Often, users overlook this step and end up with a “No Input Detected” error.
- Incompatible resolution: Different input sources may have varying resolutions. If the input source resolution is not supported by the projector, it may fail to detect the input.
- Defective cables or equipment: Faulty cables or malfunctioning input devices can also lead to input detection failure.
Key Signs Of Connectivity Problems
Identifying the signs of connectivity problems can help you diagnose the “No Input Detected” issue more effectively. Look out for these key signs that indicate a connectivity problem:
- A black screen with no input message: If the projector displays a blank screen along with the “No Input Detected” error message, it indicates a connectivity issue.
- Intermittent input detection: If the projector intermittently detects the input source or experiences frequent signal loss, it suggests a problem with the connection.
- Distorted or flickering display: A distorted or flickering display can be a symptom of a weak or faulty connection between the projector and the input source.
- Unresponsive remote control: If the projector fails to respond to commands from the remote control, it may indicate a connectivity issue.
Importance Of Checking Projector Compatibility
Ensuring projector compatibility with the input sources you intend to use is vital in avoiding the “No Input Detected” problem. Compatibility issues arise when the projector and the input source do not support compatible resolutions, refresh rates, or connection types. Before connecting any input device to the projector, make sure to:
- Check the supported resolutions: Verify that the projector supports the resolution outputted by your device to avoid any compatibility issues.
- Confirm the connection type: Ensure that both the projector and the input source use the same connection type, such as HDMI, VGA, or DisplayPort.
- Consider refresh rate compatibility: Some projectors have specific refresh rate requirements. Verify that your input source’s refresh rate is within the projector’s supported range.
By taking these compatibility factors into account, you can eliminate the risk of encountering the “No Input Detected” error, creating a smooth and uninterrupted projection experience.
Initial Troubleshooting Steps
If you encounter a situation where your projector displays the message “No Input Detected”, don’t panic just yet. This blog post will guide you through some initial troubleshooting steps to help you get your projector back up and running.
Verifying Power Supply And Connection Integrity
Before moving on to more complex troubleshooting steps, it’s important to ensure that your projector is receiving power and that all connections are secure. Follow these steps:
- Check if the power cable is plugged into a working power outlet. If possible, try plugging it into another outlet to rule out a power supply issue.
- Inspect the power cable for any signs of damage, such as frayed wires or loose connections. If you find any damage, replace the cable with a new one.
- Verify that the cables connecting your video source device (such as a laptop or DVD player) to the projector are firmly plugged in on both ends.
- Examine the cables for any visible signs of damage, such as bent or broken pins. If you notice any damage, replace the cables with new ones.
Ensuring Correct Input Source Selection
Another common reason for the “No Input Detected” message on a projector is incorrect input source selection. Follow these steps to ensure you have selected the correct input source:
- On your projector’s remote control or control panel, locate the input/source button.
- Press the input/source button to cycle through the available input sources until you see the input source that matches the device you are trying to connect (e.g., HDMI, VGA, or DVI).
- Wait a few seconds after selecting the input source to allow the projector to establish a connection.
Checking For Standby Mode Or Similar Features
Some projectors have standby mode or similar features that can prevent them from displaying any input. Follow these steps to check if your projector has any standby mode or similar features:
- Refer to your projector’s user manual to identify if it has standby mode or any similar features.
- Check the projector’s control panel or remote control for any buttons or settings related to standby mode.
- If standby mode or a similar feature is enabled, disable it and try to connect your video source device again.
Cables And Connections Explained
When setting up a projector, one common issue that can occur is the “No Input Detected” message on the screen. This frustrating error usually stems from a problem with the projector’s cables or connections. Understanding the different types of projector cables, the importance of using the right cable for your setup, and knowing when and how to replace cables can help you troubleshoot the issue and get your projector up and running smoothly. In this article, we will delve into these aspects to ensure you have a clear understanding of cables and connections for projectors.
Different Types Of Projector Cables
There are various types of cables used to connect projectors to different devices. Let’s take a closer look at three commonly used cables:
| Cable Type | Connects | Advantages |
|---|---|---|
| HDMI Cable | DVD players, Blu-ray players, gaming consoles, laptops | – Transmits high-quality audio and video signals – Supports high-definition resolutions – Easy to use and widely available |
| VGA Cable | Computers, laptops | – Transmits analog video signals – Compatible with older devices – Long-established standard |
| DisplayPort Cable | Computers, laptops | – Supports high-definition audio and video signals – Can handle multiple monitors – Offers greater bandwidth compared to VGA |
These cables differ in terms of the devices they connect and the type of signal they transmit. It is essential to choose the right cable based on the equipment you are using to ensure a proper connection.
Importance Of Using The Right Cable For Your Setup
Using the right cable for your projector setup is crucial to achieve optimal performance. An incorrect cable can result in poor picture quality, audio dropouts, or even no signal at all. Here are a few reasons why it is important to choose the right cable:
- Compatibility: Each device has specific input/output capabilities. Using a cable that is not compatible with your equipment can lead to connectivity issues.
- Signal quality: Different cables have varying capabilities to transmit audio and video signals. Using the appropriate cable ensures you get the best signal quality possible.
- Resolution support: High-definition projectors require cables that can support the desired resolution. Using an incompatible cable may limit the maximum resolution you can achieve.
When And How To Replace Cables
Over time, cables can become worn out or damaged, leading to connectivity problems. Knowing when and how to replace your projector cables is crucial in maintaining a reliable setup. Here are some signs that indicate it may be time to replace your cables:
- Intermittent connectivity issues: If you experience sporadic loss of signal or visual disturbances, it could be a sign that your cable is faulty. Try replacing the cable to see if the problem resolves.
- Physical damage: Cables with frayed wires, bent connectors, or other visible damage should be replaced to prevent further issues.
- Obsolete technology: If you are using older cables that do not support newer resolutions or features, it might be beneficial to upgrade to modern, compatible cables for improved performance.
Replacing projector cables is a straightforward process. Simply unplug the old cable, connect the new one, and ensure it is securely fastened at both ends. Remember to power off the projector before making any cable changes.
By understanding the different types of projector cables, the importance of using the right cable for your setup, and knowing when and how to replace cables, you can troubleshoot the “No Input Detected” error effectively. A proper cable connection is the foundation of a reliable projection system and can significantly enhance your viewing experience.
Resolving Input Detection Via Cable Management
When it comes to using a projector, experiencing a “No Input Detected” error can be frustrating. This issue often stems from problems with cable connections. Fortunately, by implementing effective cable management practices, you can resolve input detection issues and enjoy a seamless projection experience.
Securely Connecting And Managing Cables
One of the key aspects of resolving input detection issues is ensuring that your cables are securely connected and properly managed. Loose or improperly connected cables can lead to signal interruptions and consequently trigger the “No Input Detected” error. Here are a few tips to help you secure and manage your cables:
- Ensure all cables are firmly plugged into their respective ports.
- Use cable ties or Velcro straps to keep cables organized and prevent tangling.
- Avoid creating sharp bends or twists in cables, as this can weaken the signal quality.
- Position the projector and connected devices in close proximity to minimize the length of cables required.
Cable Quality And Its Impact On Signal Transmission
Another crucial factor that affects input detection is the quality of the cables you are using. Low-quality or damaged cables may hinder the transmission of signals, resulting in the “No Input Detected” error. To ensure a reliable connection, it’s essential to invest in high-quality cables. Consider the following:
- Choose cables with gold-plated connectors, as they provide better conductivity and minimize signal loss.
- Opt for shielded cables that offer protection against electromagnetic interference.
- Regularly inspect your cables for any signs of damage, such as frayed wires or bent connectors. Replace damaged cables promptly to avoid signal transmission issues.
Tips For Organizing And Labeling For Easier Troubleshooting
Effective cable organization and labeling can be immensely helpful when it comes to troubleshooting input detection problems. When all your cables are neatly organized and labeled, you can quickly identify and resolve any issues that may arise. Consider the following tips:
- Use color-coded labels or cable ties to differentiate between different types of cables (e.g., HDMI, VGA) and their respective devices.
- Create a cable diagram or map that outlines the connections between devices. This can serve as a handy reference for troubleshooting.
- Label both ends of each cable to easily identify their origin and destination.
By adhering to these cable management best practices, you can effectively address input detection issues on your projector. Remember, secure connections, high-quality cables, and efficient organization are the keys to a smooth and trouble-free projection experience.
Advanced Troubleshooting Tricks
If you’re facing the frustrating issue of “No Input Detected” on your projector, don’t worry! There are several advanced troubleshooting tricks that you can try before seeking professional help. In this section, we’ll explore some effective solutions to help you get your projector up and running again. Let’s dive in!
Firmware And Software Updates For Your Projector
One common cause of the “No Input Detected” error on a projector is outdated firmware or software. Manufacturers frequently release updates to enhance performance and resolve compatibility issues. To rule out this possibility, it’s advisable to check for any available firmware or software updates for your projector.
Note: Check your projector’s user manual or visit the manufacturer’s website for specific instructions on how to update the firmware or software.
Resetting The Projector To Factory Settings
If updating the firmware or software doesn’t solve the issue, you can try resetting the projector to its factory settings. This procedure erases any customized settings and restores the projector to its original configuration. Here’s how you can perform a factory reset:
- Locate the “Reset” button on your projector. This button is typically found on the control panel or the remote control.
- Press and hold the “Reset” button for a few seconds until you see a confirmation message on the screen.
- Follow the on-screen prompts to complete the factory reset process.
Note: Keep in mind that performing a factory reset will erase all personalized settings, so make sure to take note of any important configurations before proceeding.
When To Consult The User Manual Or Professional Help
While the above troubleshooting tricks can often resolve the “No Input Detected” error on projectors, there may be instances where consulting the user manual or seeking professional help is necessary. Here are a few signs that indicate it’s time to turn to more specialized assistance:
- If you’ve exhausted all the troubleshooting steps and the problem persists.
- If you’re unsure about how to perform certain actions or settings on your projector.
- If you suspect there may be a hardware issue that requires professional diagnosis and repair.
Note: The user manual typically contains detailed information about specific error codes, troubleshooting steps, and contact information for technical support.
By following these advanced troubleshooting tricks, you’ll have a better chance of overcoming the “No Input Detected” issue and getting your projector back in working order. Remember, always stay up to date with firmware and software updates, and don’t hesitate to consult the user manual or seek professional help when necessary. Now, go ahead and enjoy your projector to the fullest!
Projector Troubleshooting Solutions Beyond Basics
Explore advanced projector troubleshooting solutions to tackle the common issue of “No Input Detected on Projector. ” Discover effective remedies beyond the basics to resolve this problem and enjoy uninterrupted projection. Expert advice and step-by-step instructions provided. Get your projector back on track effortlessly.
If you’ve ever encountered the frustrating ‘No Input Detected’ message on your projector, you’re not alone. It can interrupt presentations, movie nights, and other important events. While basic troubleshooting steps like checking cables and input sources are essential, some issues require more advanced solutions. In this blog post, we’ll explore long-term solutions for recurrent ‘No Input Detected’ issues, how to integrate external devices like signal amplifiers, and when it’s time to consider a repair or replacement. Let’s dive in!
Long-term Solutions For Recurrent ‘no Input Detected’ Issues
If you find yourself frequently facing the ‘No Input Detected’ problem with your projector, there are a few long-term solutions you can try. These methods go beyond the basic troubleshooting steps and offer a more comprehensive approach:
- Check for firmware updates: Manufacturers often release firmware updates that address known issues and improve overall system performance. Visit the official website of your projector’s manufacturer and search for firmware updates specifically designed to resolve ‘No Input Detected’ problems.
- Reset projector settings: Over time, customized settings and configurations may introduce glitches that can lead to input detection issues. Try resetting your projector to its default factory settings and see if the problem persists. Remember to take note of your personalized settings before performing the reset.
- Inspect and clean connectors: Dust and debris can accumulate on the HDMI or VGA connectors, affecting signal transmission. Carefully examine the projector’s input ports and gently clean them using a lint-free cloth or compressed air. Ensure there are no bent or damaged pins that may hinder proper connection.
- Reduce cable length: If you’re using lengthy HDMI or VGA cables, try using shorter ones. Signal degradation can occur over longer distances, resulting in the ‘No Input Detected’ message. Opt for high-quality cables that are certified for the required length to improve signal integrity.
Integrating External Devices Like Signal Amplifiers
In some cases, integrating external devices like signal amplifiers can effectively address ‘No Input Detected’ issues. Signal amplifiers, also known as repeaters, boost the strength of the incoming signal, enhancing its quality and reliability. Here’s how you can integrate a signal amplifier:
- Identify the weak signal source: Determine which input source is causing the ‘No Input Detected’ problem. It could be a particular HDMI port, VGA connection, or even certain resolutions or refresh rates.
- Select an appropriate signal amplifier: Once you’ve identified the weak signal source, choose a signal amplifier that matches the type of signal you’re dealing with (HDMI or VGA). Look for amplifiers that support the necessary resolutions and refresh rates.
- Connect and configure the signal amplifier: Follow the manufacturer’s instructions to connect the signal amplifier between the problematic input source and the projector. Adjust any settings or switches on the amplifier as required.
Deciding If It’s Time For A Repair Or Replacement
Despite your best efforts, there may come a time when troubleshooting and external devices no longer resolve the ‘No Input Detected’ issue. At this point, you need to consider whether it’s worth repairing the projector or replacing it altogether. Here are a few factors to help you make an informed decision:
- Age and availability of parts: If your projector is significantly old or if replacement parts are difficult to find, it might be more cost-effective to invest in a new projector.
- Frequency and impact of the issue: Assess how frequently the ‘No Input Detected’ issue occurs and how it affects your usage. If it significantly disrupts your activities or occurs frequently despite attempted solutions, a replacement may be necessary.
- Budget and future needs: Consider your budget and future requirements. If you can afford a new projector and anticipate needing advanced features, a replacement may be the ideal choice.
Remember, before making a final decision, consult a professional technician or customer support for expert advice tailored to your specific situation.
Optimizing Projector Performance
Enhance your projector performance by effectively troubleshooting the issue of no input detection. Ensure optimal functionality of your projector by following these essential tips.
Regular Maintenance To Prevent Input Detection Issues
Regular maintenance is key to ensuring optimal performance of your projector and preventing input detection issues. By implementing a few simple practices, you can minimize the chances of encountering any problems and enjoy a seamless projection experience. To keep your projector running smoothly, it is essential to regularly clean the projector lens and air vents. Dust and debris can accumulate over time, obstructing the lens and affecting the quality of the projected image. Use a soft cloth to gently wipe the lens, and a can of compressed air to remove any debris from the vents. In addition to cleaning, regularly checking and updating the firmware of your projector is highly recommended. Manufacturers often release firmware updates to fix bugs and improve the projector’s functionality, including input detection. These updates can be easily downloaded from the manufacturer’s website and installed onto your projector.Proper Projector Installation For Optimal Connectivity
Proper installation of your projector plays a crucial role in ensuring reliable connectivity and preventing input detection issues. When setting up your projector, consider the following factors to optimize its performance: 1. Placement: Position your projector in a way that minimizes interference from ambient light sources, such as windows or bright lamps. This will help improve the visibility of the projected image and reduce the chances of input detection problems. 2. Cable Management: Ensure that all cables connecting your projector to input devices are properly secured and not tangled or damaged. Loose cables or faulty connections can lead to intermittent input detection or signal loss. Consider using cable clips or zip ties to keep everything organized and prevent accidental disconnections. 3. Signal Quality: Use high-quality HDMI or VGA cables to connect your input devices to the projector. These cables transmit signals more reliably and are less prone to interference. Additionally, avoid using excessively long cables, as longer lengths can introduce signal degradation. 4. Adjusting Settings: Once your projector is installed, check and adjust the display settings to optimize the image quality and input detection. Make sure the input source is set correctly, whether it’s HDMI, VGA, or any other connection. Refer to the projector’s user manual for detailed instructions on accessing and adjusting these settings.Upgrading Your Setup To Prevent Future Input Problems
If you continue to experience input detection issues despite regular maintenance and proper installation, it may be time to consider upgrading your setup. Upgrading your projector or input devices can provide several benefits, including enhanced compatibility and improved connectivity. Consider investing in a projector with advanced input detection technology, such as automatic source detection or compatibility with newer input standards. This can significantly reduce the chances of encountering input problems and ensure seamless connectivity with a variety of devices. Likewise, upgrading your input devices, such as your laptop or media player, can also improve compatibility and reduce input detection issues. Look for devices that are known for their reliable connectivity and compatibility with projectors. By implementing these optimization techniques and considering possible upgrades, you can minimize input detection issues and enjoy a hassle-free projection experience. Regular maintenance, proper installation, and the right equipment can go a long way in ensuring optimal projector performance.
Credit: www.projectorscreen.com
Fine-tuning For Flawless Projection
When it comes to projecting content onto a screen or surface using a projector, a common issue that users may encounter is the message “No Input Detected.” This can be frustrating, especially when you have important presentations or entertainment events lined up. However, worry not, as there are steps you can take to fine-tune your projector and ensure flawless projection. In this blog post, we will explore various techniques to enhance input detection, such as calibration settings, utilizing projector accessories, and considering environmental factors that affect the projector’s input signal.
Calibration Settings To Enhance Input Detection
To achieve optimal input detection on your projector, adjusting the calibration settings is crucial. Here are a few tips to consider:
- Begin by accessing the projector’s menu options. For most models, this can be done by pressing the ‘Menu’ button on the remote or the projector itself.
- Navigate to the ‘Settings’ or ‘Calibration’ section.
- Adjust the input detection sensitivity or auto-detection mode to a suitable level. Experiment with different settings to find the one that works best for your specific environment and input sources.
- Ensure that the projector is set to the correct input source (HDMI, VGA, etc.).
- If available, activate any built-in input enhancement features like noise reduction or edge smoothing to improve input detection.
Utilizing Projector Accessories To Improve Performance
To enhance the overall performance of your projector and increase input detection, consider utilizing the following accessories:
- Use a high-quality HDMI cable for better signal transmission.
- If your projector has a USB port, connect a USB extender to provide a more stable connection for input devices like laptops or streaming devices.
- Invest in a wireless HDMI transmitter and receiver set to eliminate the need for physical cables altogether.
- Consider using a video processor or scaler to improve the quality of the input signal and increase compatibility with various sources.
Environmental Factors Affecting Projector Input Signal
Several environmental factors can impact the input signal of your projector. By taking these factors into account, you can ensure a better input detection experience. Here are some factors to consider:
| Factor | Impact |
|---|---|
| Ambient Light | Excessive ambient light can wash out the projected image, making input detection challenging. Dimming the lights or using curtains can help mitigate this issue. |
| Distance | The distance between the projector and the input device can affect the quality of the signal. Ensure that the input source is within the projector’s specified range for optimal performance. |
| Interference | Other electronic devices like Wi-Fi routers or Bluetooth speakers can cause interference, leading to input detection problems. Keep these devices away from the projector or switch to a less crowded frequency. |
| Projection Surface | The type and color of the surface where the projection is being displayed can impact input detection. A neutral-colored, low-gloss surface is ideal for clear input detection. |
By considering these environmental factors and making necessary adjustments, you can enhance the projector’s input signal and minimize the occurrence of “No Input Detected” messages.
Frequently Asked Questions For No Input Detected On Projector
Why Is My Projector Not Showing Any Picture?
If your projector is not showing any picture, it could be due to various reasons such as loose connections, wrong input selection, or a faulty lamp. Make sure all cables are securely connected, check the input source on the projector, and verify the status of the lamp.
If the issue persists, consult the user manual or contact the manufacturer for further troubleshooting steps.
What Should I Do If My Projector Displays A “no Input Detected” Message?
If your projector displays a “No Input Detected” message, ensure that the correct input source is selected on both the projector and the connected device. Check the cables for any loose connections. Additionally, try restarting both the projector and the device to see if that resolves the issue.
If the problem persists, refer to the user manual or contact customer support for assistance.
How Can I Troubleshoot A Projector With No Input Signal?
To troubleshoot a projector with no input signal, start by checking the cable connections between the projector and the input source, ensuring they are secure. Confirm that the correct input source is selected on the projector. If applicable, try using a different cable or input source to rule out any equipment issues.
Restarting the projector and the connected device can also help resolve the problem in some cases.
Why Does My Projector Show A Black Screen When Connected To A Device?
If your projector displays a black screen when connected to a device, check that the device’s display settings are compatible with the projector’s native resolution. Ensure that the correct input source is selected and that the cable connections are secured.
If using an HDMI connection, try a different HDMI cable or port. Adjusting the brightness and contrast settings on the projector can also help improve the image visibility.
Conclusion
To troubleshoot the issue of “No Input Detected on Projector,” follow the mentioned steps carefully. Check the connections, ensure the correct input source is selected, and verify the compatibility of the cables. If the problem persists, consult the user manual or contact the manufacturer for further assistance.
By carefully addressing these steps, you can effectively resolve the “No Input Detected” issue and enjoy uninterrupted presentations or entertainment.