New PC Not Connecting to Monitor: Quick Fixes and Troubleshooting Tips
If your new PC is not connecting to the monitor, first check if the monitor is plugged into the correct HDMI or DisplayPort on your PC. Make sure it’s not connected to the HDMI port on the motherboard if you have a dedicated graphics card.
Additionally, try using different cables and check for loose connections. If the issue persists, try connecting the monitor to another source to isolate the problem. If the monitor still doesn’t work, it could be a hardware issue with the CPU, motherboard, RAM, power supply, or graphics card.
Make sure they are properly connected and consider testing them in another computer.
Subtle Signs Before Troubleshooting
If your new PC is not connecting to your monitor, there are a few subtle signs to look out for. Check your cables and ports to ensure they are properly connected and in the correct HDMI or DisplayPort slots. If you’re using a dedicated graphics card, make sure to use the corresponding connections.
Observing Error Messages Or Led Indicators
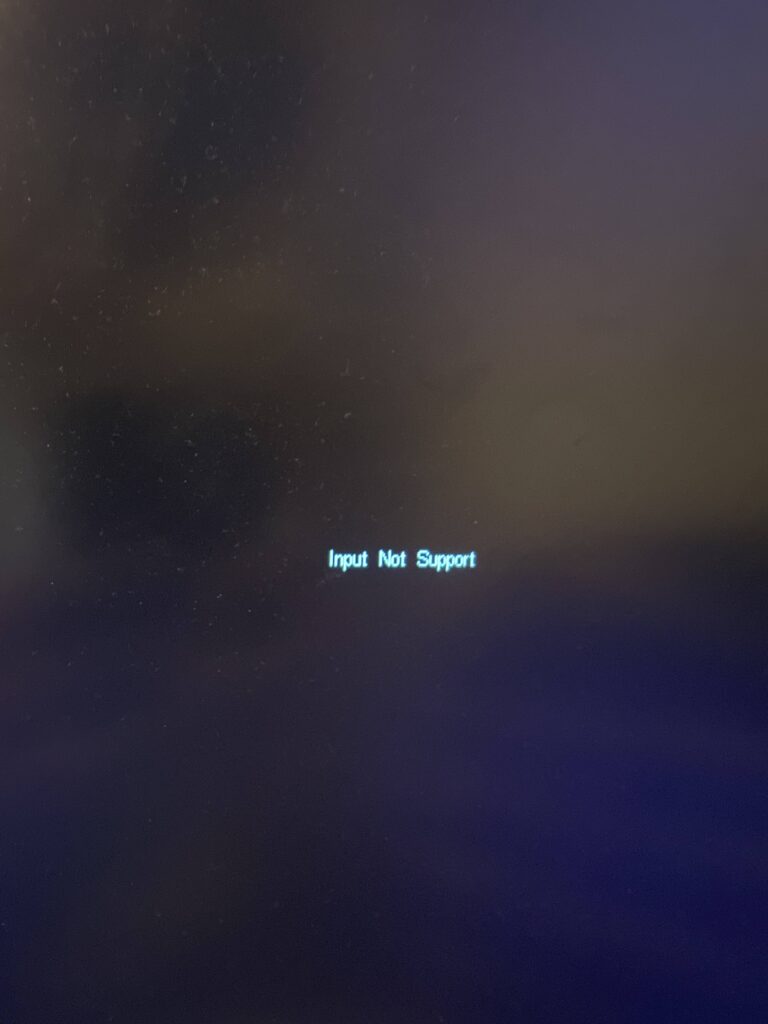
When faced with the frustrating issue of a new PC not connecting to the monitor, it’s important to pay attention to subtle signs before jumping into troubleshooting. One of these signs can be error messages or LED indicators. These messages or indicators provide valuable information about what could be causing the problem. If you see any error messages displayed on your monitor, take note of the specific wording or numbers mentioned. These messages often provide clues about the nature of the issue, such as a faulty cable connection or incompatible display settings. Additionally, many monitors have LED indicators that can help diagnose connectivity problems. Look for any blinking lights or abnormal patterns on the monitor’s front panel, as they can provide insights into the source of the problem.Listening For Beep Codes From The Motherboard
Another crucial sign to watch out for is beep codes emitted by the motherboard. When you power on your PC, the motherboard performs a series of tests to ensure that all hardware components are functioning properly. If it detects an issue, it will emit a series of beeps to alert you of the problem. Take note of the number and pattern of the beeps, as this information corresponds to a specific error code. By referencing the motherboard’s manual or doing a quick search online, you can determine the meaning behind the beep codes and narrow down the potential causes of the connection problem. So, listen carefully for these beep codes and make a note of them for troubleshooting purposes.Noting If Fans And Lights Turn On
In addition to error messages and beep codes, another subtle sign to consider is whether the fans and lights inside your PC turn on when you power it up. A lack of power to these components can indicate an issue with the power supply or motherboard connectivity. During the boot-up process, pay close attention to any fans spinning or lights illuminating inside the computer tower. If you notice that these components are not functioning as they should, it suggests that there might be a power-related problem preventing the PC from establishing a connection with the monitor. By observing these subtle signs, you can gather valuable information that will better equip you to troubleshoot the issue effectively. Whether it’s error messages, beep codes, or the behavior of fans and lights, paying attention to these details will help you identify potential causes and find the appropriate solutions. Remember, thorough observation is key to resolving the problem of a new PC not connecting to the monitor.New Pc Not Connecting To Monitor Essentials
Having trouble connecting your new PC to your monitor? Check your cables and ports to ensure they are plugged in correctly. If you’re using a dedicated graphics card, make sure to connect your monitor to the appropriate ports on it.
Troubleshoot the issue by trying a different HDMI or DisplayPort cable and checking for loose connections.
Verifying Monitor Power And Correct Input Selection
If your new PC is not connecting to the monitor, the first step is to verify the power status of the monitor and ensure that you have selected the correct input. Make sure that the monitor is turned on and receiving power. Check the power cable connection and make sure it is securely plugged into both the monitor and the power outlet.
Next, ensure that you have selected the correct input on your monitor. Many monitors have multiple input options such as HDMI, DisplayPort, or VGA. Double-check that you have selected the input corresponding to the cable you are using to connect your PC to the monitor.
Ensuring Compatibility And Correct Seating Of Hardware
Compatibility and correct seating of hardware are crucial factors to consider when troubleshooting a new PC not connecting to the monitor. Firstly, ensure that your PC’s hardware, including the graphics card, is compatible with the monitor. Some older monitors may not be compatible with the latest graphics cards.
Additionally, check if all hardware components are properly seated. Disconnect and reconnect the cables between your PC and monitor to ensure a secure and snug connection. If you are using a dedicated graphics card, make sure it is properly seated in the PCIe slot on your motherboard.
Recognizing Importance Of Selecting The Right Source
Another important aspect to consider when troubleshooting a new PC not connecting to the monitor is selecting the right source. Sometimes, the PC may not automatically detect the monitor as the primary display source. In such cases, manually selecting the correct source can resolve the issue.
On your monitor’s menu or settings, navigate to the input source options and choose the source corresponding to the cable connection from your PC. This could be HDMI, DisplayPort, VGA, or any other available option.
By following these essential steps, you can effectively troubleshoot and resolve the issue of a new PC not connecting to the monitor. Ensure that the monitor is powered on, the correct input source is selected, all hardware components are properly seated, and the right source is chosen on the monitor. With these considerations in mind, you will be able to enjoy a seamless connection between your new PC and monitor.
Cable And Port Checks
If your new PC is not connecting to the monitor, check your cables and ports. Make sure that the monitor is plugged into the correct HDMI or DisplayPort on your PC, and if you’re using a dedicated graphics card, use the corresponding connections on the back.
Also, check for loose cables and ensure a secure connection. Fixing this issue can help resolve the problem of the monitor not being detected by your PC.
Inspecting For Physical Damage On Cables
One of the first steps in troubleshooting a new PC that is not connecting to the monitor is to inspect the cables for physical damage. Sometimes, cables can get bent, twisted, or even frayed, which can affect the signal transmission between the PC and the monitor. By visually examining the cables, you can identify any visible damage and determine if it needs to be replaced. Look for any cuts, kinks, or exposed wires along the length of the cable. If any physical damage is found, it is recommended to replace the cable with a new one to ensure a proper connection between the PC and the monitor.Trying Different Cables And Checking Port Functionality
If there is no visible physical damage on the cables, the next step is to try different cables to check if the issue lies with the cable itself. In some cases, cables can be faulty or incompatible with the PC or monitor, resulting in a connection problem. By using another cable, preferably a known working one, you can determine if the cable is the culprit. Additionally, it is essential to check the functionality of the ports on both the PC and the monitor. Ensure that the ports are not damaged, loose, or obstructed. Sometimes, a loose connection can cause the PC to not detect the monitor. By examining the ports and reseating the cables, you can ensure a secure and reliable connection between the PC and the monitor.Making Sure To Connect To The Gpu Port, Not The Motherboard
Another critical step in troubleshooting a new PC not connecting to the monitor is to ensure that you are connecting the monitor to the correct port. For PCs with a dedicated graphics card, it is essential to connect the monitor to the GPU port instead of the motherboard port. Connecting to the motherboard port may result in no signal or limited functionality. The GPU port allows for better performance and graphics capabilities. To avoid confusion, refer to the PC’s manual or specifications to identify the correct port for connecting the monitor. By making sure to connect to the GPU port, you can ensure a proper connection and avoid any compatibility issues between the PC and the monitor.Power And Connectivity Concerns
Ensure that your new PC is properly connected to the monitor by checking the cables and ports. Make sure you have plugged the monitor into the correct HDMI or DisplayPort on your PC. If you are using a dedicated graphics card, use the connections on it instead of the motherboard.
Confirming Power Supply To Both Pc And Monitor
If your new PC is not connecting to your monitor, the first thing you need to do is to confirm the power supply to both the PC and the monitor. Follow these steps:
- Check if the power cables of both the PC tower and the monitor are securely plugged into the power outlets.
- Ensure that the power cables are not damaged or frayed.
- Try using different power outlets to eliminate the possibility of a faulty power source.
Double-checking Connection Tightness And The Use Of Correct Ports
Another common cause of a new PC not connecting to a monitor is improper connections and the use of incorrect ports. To resolve this issue, follow these steps:
- On the back of the PC tower, ensure that the monitor cable is securely connected to the correct port. If you have a dedicated graphics card, make sure to use the ports on the graphics card rather than the motherboard.
- If you are using an HDMI cable, double-check that you have connected it to the HDMI port and not the DisplayPort or any other port.
- Inspect the monitor cable for any signs of damage or bent pins. Replace the cable if necessary.
- Verify that the monitor cable is firmly connected to the monitor itself.
Re-seating Ram And Graphics Card If Necessary
If you have confirmed that the power supply and connections are not the issue, you may need to re-seat the RAM and graphics card. Follow these steps:
- Ensure that the PC is turned off and unplugged from the power source.
- Open the PC tower’s casing to access the internal components.
- Locate the RAM sticks and the graphics card.
- Carefully remove and then re-insert each RAM stick one at a time, ensuring they are securely seated in the motherboard slots.
- If you have a dedicated graphics card, remove it and then re-seat it firmly into the appropriate slot on the motherboard.
- Close the PC tower’s casing and plug it back into the power source.
- Power on the PC and check if the monitor now displays the output.
By confirming the power supply, double-checking connections, and re-seating the necessary components, you can troubleshoot power and connectivity concerns when your new PC is not connecting to the monitor. If the problem persists, it may be advisable to seek professional assistance.
Bios And Hardware Configuration Inspection
If your new PC is not connecting to the monitor and displaying a “no signal” message, there are a few things you can check. First, make sure you have plugged the monitor into the correct HDMI or DisplayPort port on the back of your PC.
If you have a dedicated graphics card, try using the connections on that instead. Additionally, check the cables and ensure they are securely connected. If the issue persists, try connecting the monitor to another source to see if the problem lies with the PC or the monitor itself.
Resetting The Bios Through Motherboard Jumpers Or Settings
One possible solution when encountering the issue of a new PC not connecting to the monitor is to reset the BIOS. The BIOS (Basic Input/Output System) is responsible for initializing and configuring hardware components during the computer’s startup process. Sometimes, incorrect BIOS settings or configuration can prevent the PC from connecting to the monitor.
To reset the BIOS through motherboard jumpers or settings, follow these steps:
- Identify the motherboard model of your PC.
- Refer to the motherboard’s manual or manufacturer’s website for specific instructions on resetting the BIOS.
- Locate the BIOS reset jumpers or switches on the motherboard. These are usually labeled as “CLR_CMOS” or “Reset BIOS.”
- With the PC turned off and unplugged from the power source, use a jumper cap or move the switch to the designated reset position. Alternatively, some motherboards may have a dedicated button or a BIOS reset option within the BIOS settings.
- Wait for a few seconds before returning the jumper cap or switch to its original position.
- Power on the PC again and check if the monitor now connects successfully.
Checking For Proper Hardware Recognition In Bios
In addition to resetting the BIOS, another important step in the BIOS and hardware configuration inspection is to ensure that the hardware components are recognized properly.
Follow these steps to check for proper hardware recognition in the BIOS:
- Restart your PC and enter the BIOS setup by pressing the designated key during the startup process (usually Del, F2, or F10).
- Navigate to the hardware section of the BIOS, which may be labeled as “Advanced,” “Hardware Configuration,” or similar.
- Inspect each hardware component listed, including the CPU, motherboard, RAM, power supply, and graphics card.
- Ensure that all hardware components are properly connected and recognized by the BIOS. If any component is not detected, reseat it to ensure proper connection.
- If the issue persists, try using the hardware components in another working computer to verify if they are functioning correctly.
- Make any necessary adjustments to the BIOS settings to ensure compatibility and proper configuration of the hardware.
Performing a thorough inspection of the BIOS and hardware configuration can help diagnose and resolve the issue of a new PC not connecting to the monitor. Resetting the BIOS and ensuring proper hardware recognition in the BIOS settings are crucial steps in troubleshooting this problem.
If the issue persists after these steps, it may be necessary to seek further assistance from a professional or contact the manufacturer for support.
Credit: www.avg.com
New Pc Not Connecting To Monitor: Beyond Basics
Having trouble connecting your new PC to the monitor? Double-check the cables and ports, ensuring they are properly plugged in. If you are using a dedicated graphics card, make sure to use the appropriate connections. Additionally, try connecting the monitor to another source to rule out any potential issues.
Understanding Driver Updates Or Installations
One of the potential reasons why your new PC is not connecting to the monitor could be related to driver updates or installations. Drivers are software that allows the operating system to communicate effectively with hardware devices, including the monitor. If your PC does not have the necessary drivers installed or the installed drivers are outdated, it can lead to connection issues.
In order to address this problem, you should ensure that you have the latest drivers installed for your graphics card. You can visit the manufacturer’s website or use driver update software to automatically download and install the correct drivers. It’s important to note that you may need to uninstall the previous drivers before installing the new ones.
Delving Into Potential Compatibility Issues With Components
Another aspect to consider when troubleshooting the connection issue between your new PC and the monitor is the possibility of compatibility issues with components. Sometimes, certain components may not work well together due to differences in specifications or technical requirements.
To determine if compatibility is the root cause of the problem, you need to check if the monitor is compatible with your PC’s graphics card and other related hardware components. Check the manufacturer’s specifications and ensure that the monitor supports the appropriate connections and resolutions that your PC is capable of providing.
If compatibility issues are discovered, you may need to invest in compatible components or seek guidance from the manufacturer’s support team. Additionally, it’s worth checking for any firmware updates for your monitor or graphics card that can improve compatibility.
By understanding driver updates or installations as well as potential compatibility issues with components, you can take the necessary steps to resolve the problem of your new PC not connecting to the monitor effectively.
Last Resort Steps And Professional Help
If your new PC is not connecting to the monitor, there are a few steps you can take. First, check the cables and ensure they are securely connected to the correct ports. If you’re using a dedicated graphics card, make sure you’re using the connections on the card itself.
If the issue persists, try using a different cable or connecting the monitor to another source to troubleshoot the problem.
Recommending When To Clear Cmos Or Update Motherboard Bios
If you’ve tried every troubleshooting step mentioned earlier and you’re still facing the issue of your new PC not connecting to the monitor, it might be time to consider some last resort steps. One of these steps involves clearing the CMOS or updating your motherboard BIOS.Clearing The Cmos
Clearing the CMOS can help resolve issues related to hardware configuration conflicts or incorrect settings. This process will reset your motherboard to its default settings, which can sometimes resolve compatibility issues between your PC and the monitor. To clear the CMOS, follow these steps:- Shut down your PC and unplug it from the power source.
- Locate the CMOS battery on your motherboard.
- Carefully remove the battery.
- Press and hold the power button on your PC for about 10 seconds to discharge any residual power.
- Wait for a few minutes before re-inserting the CMOS battery.
- Plug your PC back into the power source and turn it on.
Updating The Motherboard Bios
Updating the motherboard BIOS is recommended when your PC is not detecting the hardware properly, including the monitor. The BIOS contains firmware that controls the basic functions of your motherboard, and a outdated BIOS version could lead to compatibility issues. To update your motherboard BIOS, you’ll need to visit the manufacturer’s website and download the latest BIOS version for your specific motherboard model. Follow the instructions provided by the manufacturer to update the BIOS. Please note that updating the BIOS is a delicate process, and improper handling can lead to irreversible damage to your motherboard. If you’re not comfortable performing the update yourself, it’s best to seek professional technical support.Advising When To Seek Professional Technical Support
If you’ve exhausted all the troubleshooting steps mentioned above and you’re still unable to resolve the issue of your new PC not connecting to the monitor, it’s time to seek professional technical support. Professional technicians have the expertise and tools necessary to diagnose and resolve complex hardware issues. They can perform advanced troubleshooting steps and provide you with the necessary guidance to get your PC up and running. When seeking professional technical support, make sure to provide them with detailed information about the issue you’re facing, the steps you’ve already taken, and any error messages you’ve encountered. This will help them in assessing the problem more accurately and providing you with the most effective solution. Remember, seeking professional help is not a sign of defeat but rather a smart decision to ensure the proper functioning of your PC and to save you time and frustration.Frequently Asked Questions For New Pc Not Connecting To Monitor
Why Is My New Computer Not Showing Up On My Monitor?
If your new computer is not showing up on your monitor, first check the cables and ports. Ensure that the monitor is plugged into the correct HDMI or DisplayPort, especially if you have a dedicated graphics card. Also, make sure the cables are securely connected and not loose.
If the issue persists, try connecting the monitor to another source to see if it’s a problem with the monitor itself.
Why Won’t My New Pc Connect To My Monitor?
Make sure the cable connecting your new PC to the monitor is secure. Try using a different cable or connecting the monitor to another system. If the monitor works with another system, the cable or PC may be faulty. Check if all components are properly connected, such as CPU, motherboard, RAM, power supply, and graphics card.
Reseating them may solve the issue.
Why Does My Monitor Say No Signal On New Pc?
When your monitor says “no signal” on your new PC, check if the monitor is connected properly to the correct HDMI or DisplayPort on your PC. If you have a dedicated graphics card, use the connections on it instead. Make sure the cables are secure and try connecting the monitor to another source to troubleshoot the issue.
How Do I Connect My New Pc To A Monitor?
To connect your new PC to a monitor, make sure you’ve plugged in the monitor to the correct HDMI or DisplayPort on the back of your PC. If you’re using a dedicated graphics card, use the connections on the card instead of the motherboard.
Double-check your cables and ports to ensure everything is securely connected.
Conclusion
Troubleshooting a new PC not connecting to the monitor can be a frustrating experience. However, by following a few simple steps, you can quickly identify and resolve the issue. First, double-check your cables and ensure they are securely connected to the correct ports.
If you are using a dedicated graphics card, make sure to connect the cables to the corresponding ports. Additionally, try connecting the monitor to another source to determine if the problem lies with the PC or the monitor. If all else fails, consider seeking professional assistance to diagnose and fix the issue.