Monitor Plugged into Docking Station Not Working: Troubleshooting Tips
If your monitor is not working when plugged into a docking station, try disconnecting and reconnecting the docking station to your laptop. Make sure to check for any damaged or bent pins on both ends of the video cable, and securely reconnect the cable to both the monitor and docking station.
Also, ensure that the video cable (HDMI or DisplayPort) is connected properly to both the monitor and docking station. If the issue persists, it may be helpful to consult online resources or contact technical support for further troubleshooting steps.
Verify Power And Connections
One of the common issues that users may encounter when using a monitor plugged into a docking station is the monitor not working properly. This can be frustrating, especially if you rely on an external display for work or entertainment purposes. However, before you panic, it’s important to start troubleshooting by verifying the power and connections of your setup.
Ensure The Docking Station Is Powered On
The first step is to ensure that the docking station is powered on. Sometimes, a simple oversight like forgetting to turn on the docking station can lead to the monitor not working. Check if the power indicator light is on, indicating that the docking station is receiving power. If it’s not, make sure to connect the power cord securely and try turning it on again.
Confirm All Cables Are Securely Connected
Another potential cause of the monitor not working can be loose or improperly connected cables. Ensure that all the necessary cables, such as the video cable (HDMI or DisplayPort), are securely connected to both the docking station and the monitor. Sometimes, the cable connection can become loose over time, especially if you frequently plug and unplug your setup. Give the connections a gentle push to ensure a snug fit.
If you are using a video cable that connects from the docking station to the laptop, disconnect and reconnect it to ensure a proper connection. Check for any visible damage to the cable or bent pins that may be affecting the signal transmission. If you notice any issues, consider replacing the cable with a new one.
Check For Any Visible Damage To Cables Or Ports
In addition to checking the cables, it’s also important to inspect for any visible damage to the ports on both the docking station and the monitor. Look for bent or broken pins, as they can prevent a proper connection. If you notice any damage, it may be necessary to repair or replace the affected component.
By verifying the power and connections of your docking station setup, you can often resolve the issue of a monitor not working. However, if these steps do not solve the problem, there may be other factors at play, such as compatibility issues or software settings. In such cases, it may be helpful to consult the manufacturer’s documentation or seek further assistance from technical support.
Confirm Monitor And Dock Compatibility
When your monitor plugged into a docking station is not working, it can be frustrating and hinder your productivity. One of the possible reasons for this issue is the lack of compatibility between your monitor and docking station. In order to troubleshoot and resolve the problem, it’s important to clarify the specifications of both your docking station and monitor. Here are a few steps you can take to ensure their compatibility.
Clarify Docking Station And Monitor Specifications
Before delving into the details of compatibility, it’s essential to have a clear understanding of the specifications of both your docking station and monitor. This information can usually be found on the product labels or in the user manuals. Specifically, you should look for the model numbers, input and output ports, and supported resolutions and refresh rates.
Verify Supported Resolutions And Refresh Rates
The next step is to cross-check the supported resolutions and refresh rates of both your docking station and monitor. It’s important to ensure that the resolutions and refresh rates are compatible with each other. Mismatched resolutions and refresh rates can result in display issues or a complete lack of signal.
To verify the supported resolutions and refresh rates, refer to the user manuals or online specifications of both the docking station and monitor. Look for the maximum resolution and refresh rate that each device supports. Also, make sure that the resolutions and refresh rates you are trying to use fall within the specified range.
Cross-check Compatibility Of Video Outputs And Inputs
Another crucial aspect of compatibility is the video outputs of the docking station and the video inputs of the monitor. The docking station should have compatible video outputs, such as HDMI or DisplayPort, and the monitor should have the corresponding inputs.
To ensure compatibility, check the video output ports of your docking station and the video input ports of your monitor. Additionally, make sure that the cable you are using to connect the two devices supports the required video output and input standards. If necessary, you may need to use adapters or different cables to establish a successful connection.
By following these steps and confirming the compatibility of your monitor and docking station, you can troubleshoot and rectify the issue of a monitor not working when plugged into the docking station. Remember to always consult the user manuals or product specifications for accurate information about your specific devices.
Update Drivers And Firmware
If you’re experiencing issues with your monitor plugged into a docking station, one possible solution is to update the drivers and firmware. Outdated or incompatible drivers can cause problems with the recognition and functionality of your monitor. Additionally, firmware updates for your docking station can improve compatibility and ensure optimal performance.
Guide On Updating Drivers For Docking Stations
Updating drivers for your docking station is essential to ensure proper communication between the docking station and your computer. Here’s a step-by-step guide on how to update the drivers:
- Start by visiting the manufacturer’s website for your docking station.
- Locate the “Support” or “Downloads” section on the website.
- Enter the model number or name of your docking station to find the appropriate drivers.
- Download the latest version of the driver compatible with your operating system.
- Once downloaded, open the downloaded file and follow the on-screen instructions to install the driver.
- Restart your computer to apply the changes.
Importance Of Firmware Updates For Monitor Recognition
Firmware updates for your monitor and docking station can address compatibility issues and improve the detection of your monitor by the docking station. Updating the firmware ensures that your devices can communicate seamlessly and prevents any glitches or malfunctions.
How To Find And Install Necessary Updates
To find and install necessary firmware updates for your monitor and docking station, follow these steps:
- Visit the manufacturer’s website for your monitor and docking station.
- Look for the “Support” or “Downloads” section on the website.
- Enter the model number or name of your monitor and docking station to find the appropriate firmware updates.
- Download the latest firmware update files.
- Extract the downloaded files, if necessary, and locate the firmware update file.
- Follow the manufacturer’s instructions to update the firmware of your monitor and docking station.
- Restart your computer and reconnect your monitor to the docking station to ensure the updates take effect.
By updating both drivers and firmware, you can resolve issues related to a monitor plugged into a docking station. Ensure that you regularly check for updates to keep your devices functioning optimally and avoid any potential compatibility problems.
Monitor Settings Configuration
If you’re experiencing issues with your monitor not working when plugged into a docking station, it could be due to incorrect monitor settings configuration. This can be resolved by following a few simple steps to ensure that the input source is selected correctly on the monitor and that the display settings in the operating system are adjusted accordingly.
Instructions For Selecting Correct Input Source On The Monitor
To begin troubleshooting, it is essential to select the correct input source on the monitor. Here’s how you can do it:
- Check the monitor’s user manual or look for the input source button on the monitor itself.
- Press the input source button to bring up the options menu.
- Using the navigational buttons, select the appropriate input source for the connection (HDMI, DisplayPort, VGA, etc.).
- Once the correct input source is selected, press the input source button again or wait for the monitor to automatically detect the input signal.
Make sure to double-check that the video cable is securely connected to both the monitor and the docking station.
Adjusting Display Settings In The Operating System
After selecting the correct input source on the monitor, you may need to adjust the display settings in the operating system. Follow these instructions:
- Right-click on the desktop and select “Display settings” from the dropdown menu.
- In the display settings window, you will see options for multiple monitors if they are connected.
- Select the monitor that is not working from the list of connected displays.
- Make sure the “Extend” option is selected to use the monitor as an extended display.
- If the monitor is still not working, try clicking the “Identify” button to see if the operating system detects the monitor correctly.
Additionally, you may want to check and ensure that the monitor is set as the primary or secondary screen, depending on your preference and requirements.
By following these instructions for selecting the correct input source on the monitor and adjusting the display settings in the operating system, you should be able to resolve the issue of a monitor plugged into a docking station not working. Remember to securely connect all cables between the docking station, monitor, and computer, and restart your computer if necessary to resolve any temporary issues.
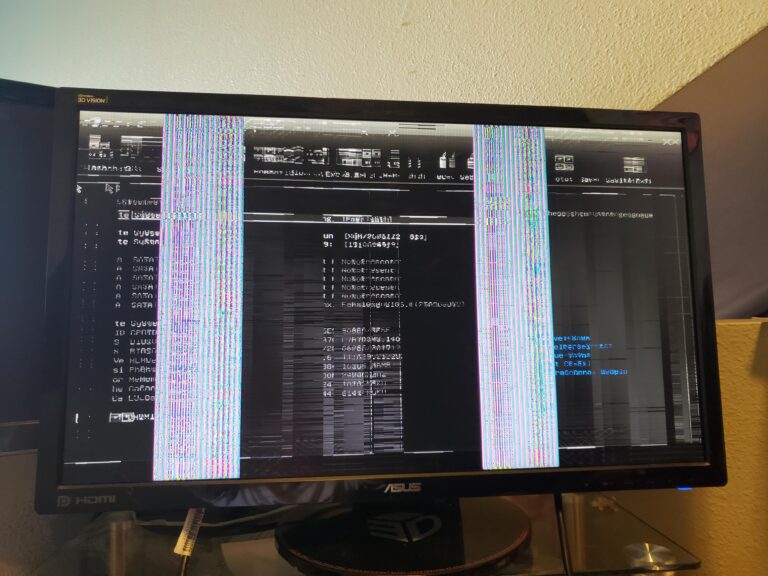
Monitor Plugged Into Docking Station Not Working
Are you experiencing the frustrating issue of your monitor not working when plugged into a docking station? Don’t worry, we’ve got you covered. In this article, we will provide you with step-by-step troubleshooting tips to help you resolve this problem. We will also highlight common pitfalls and mistakes to avoid. Let’s get started!
Step-by-step Troubleshooting Specific To The Primary Keyword
- Check physical connections: Start by disconnecting and reconnecting the docking station to your laptop. Then, inspect the video cable for any damaged or bent pins. Make sure to securely reconnect the cable to both the monitor and the docking station. Pay special attention to the proper connection of the video cable, whether it’s HDMI or DisplayPort.
- Verify power source: Ensure that the docking station is receiving sufficient power by checking the power cord. Unplug and replug the power cord, ensuring a secure connection. This step is crucial as insufficient power can lead to the monitor not working.
- Software updates: Check for any available software updates for your docking station and monitor. Outdated software can cause compatibility issues, resulting in the monitor not being detected. Update the software as necessary.
- Restart your devices: Sometimes, a simple restart can resolve temporary issues. Restart both your docking station and your laptop, and then check if the monitor starts working.
Special Attention To Common Pitfalls And Mistakes
While troubleshooting the issue of a monitor not working when plugged into a docking station, it’s important to be aware of common pitfalls and mistakes that can hinder the resolution process. Avoiding these pitfalls will save you time and frustration. Some common mistakes to keep in mind include:
- Unsecure connections: Ensure all cables between the docking station, monitor, and computer are securely connected. A loose connection can prevent the monitor from functioning properly.
- Inadequate power supply: Confirm that the docking station is receiving sufficient power by checking the power cord. If the docking station is not getting enough power, the monitor may not work. Reconnecting the power cord can help resolve this issue.
- Outdated software: Check for software updates for both the docking station and the monitor. Running outdated software can result in compatibility issues that prevent the monitor from being detected.
- Restarting your devices: Don’t forget to restart both your docking station and your laptop after making any changes. Sometimes, a restart can resolve temporary issues and get your monitor up and running.
By following these troubleshooting steps and avoiding common pitfalls, you should be able to resolve the issue of your monitor not working when plugged into a docking station. Remember to check physical connections, verify power sources, update software, and restart your devices. With these tips in mind, you’ll be well on your way to enjoying an optimized docking station setup. Happy troubleshooting!
Resolve Docking Station To Monitor Signal Failures
Resolve docking station to monitor signal failures by disconnecting and reconnecting the docking station and video cable. Check for any damaged or bent pins, securely reconnect the cable, and ensure proper connection between the monitor and docking station. Restart the computer and ensure all cables are securely connected to resolve temporary issues.
Additionally, make sure the latest BIOS and drivers are installed on the laptop for proper recognition of the docking station.
Tips For Signal Detection Issues Between Dock And Monitor
If you’re facing issues with your monitor not working when plugged into a docking station, you’re not alone. This frustrating problem can interrupt your workflow and leave you scratching your head for a solution. Thankfully, there are some tips you can try to resolve signal detection issues between your dock and monitor.Strategies For When The Monitor Is Recognized But Not Displaying Content
Sometimes, the monitor may be recognized by the system, but fail to display any content. This can be equally puzzling and disruptive. But don’t worry, there are strategies you can implement to troubleshoot this problem.1. Check connections and cables
– Start by disconnecting and reconnecting the docking station to your laptop. – Verify that both ends of the video cable are firmly attached and check for any damaged or bent pins. – Securely reconnect the cable to the monitor and docking station. – Ensure that the video cable (HDMI, or DisplayPort) is properly connected to both the monitor and the docking station.2. Verify power supply
– Unplug the power cord from the dock, usually marked by a blue light indicator. – Wait for a few seconds and plug it back in. – This can sometimes reset the power supply and resolve any temporary issues.3. Restart the system
– Restarting your computer can help resolve temporary glitches. – It refreshes the system and can establish a proper connection between the dock and monitor.4. Check for compatibility
– Ensure that your docking station is compatible with your laptop and monitor. – Consult the manufacturer’s specifications to confirm compatibility requirements.5. Update drivers and firmware
– Make sure that you have the latest drivers and firmware installed for both your docking station and monitor. – Check the manufacturer’s website for any available updates and install them accordingly.By following these strategies, you can increase your chances of resolving signal detection issues between your docking station and monitor. Remember to go through each step systematically to identify the cause of the problem and find an appropriate solution.
Explore Alternative Connection Methods
When your monitor plugged into the docking station is not working, it can be frustrating and hinder your productivity. However, there are alternative connection methods that you can explore to bypass the issues you’re facing with the docking station. In this article, we will discuss the advantages and disadvantages of using direct monitor connections versus docking stations. We will also provide you with some alternative methods to ensure your monitor works seamlessly without relying solely on the docking station.
Discussion Of Using Direct Monitor Connections Versus Docking Station
Direct monitor connections involve connecting your monitor directly to your laptop without the use of a docking station. This method provides a straightforward and reliable connection, eliminating any potential issues that may arise from a faulty docking station. However, it may lack the convenience of a docking station, which allows for easy connection and disconnection of multiple peripheral devices.
On the other hand, docking stations offer a convenient way to connect your laptop to various devices, including monitors, keyboards, and mice. They provide a centralized hub for all your peripherals and allow for a quick setup when transitioning from a desktop to a laptop workstation. However, docking stations are prone to certain issues, such as compatibility problems and intermittent connectivity, which can result in the monitor not working.
How To Bypass Issues With Docking Stations Using Other Methods
If you’re experiencing problems with your docking station and your monitor is not working, there are alternative methods you can try to ensure a reliable connection. Here are a few options:
- Use a different video cable: Sometimes, the issue may lie with a faulty video cable. Try using a different cable, such as HDMI or DisplayPort, to connect your monitor directly to your laptop. This eliminates any potential problems caused by the docking station’s video output.
- Connect through a USB port: If your laptop has a USB Type-C or Thunderbolt 3 port, you can consider connecting your monitor directly to this port using the appropriate adapter or cable. This bypasses the need for a docking station and provides a direct connection between your laptop and monitor.
- Use a different docking station: If you have access to another docking station, you can try connecting your monitor to it to see if the issue persists. This can help determine if the problem lies with the specific docking station or if there are compatibility issues between the docking station and your laptop.
By exploring these alternative connection methods, you can troubleshoot and resolve the issues you’re facing with your docking station and ensure that your monitor works seamlessly. Remember to check the connections, use different cables or ports, and test with a different docking station if available. This will help identify the root cause of the problem and find the best solution for your specific setup.
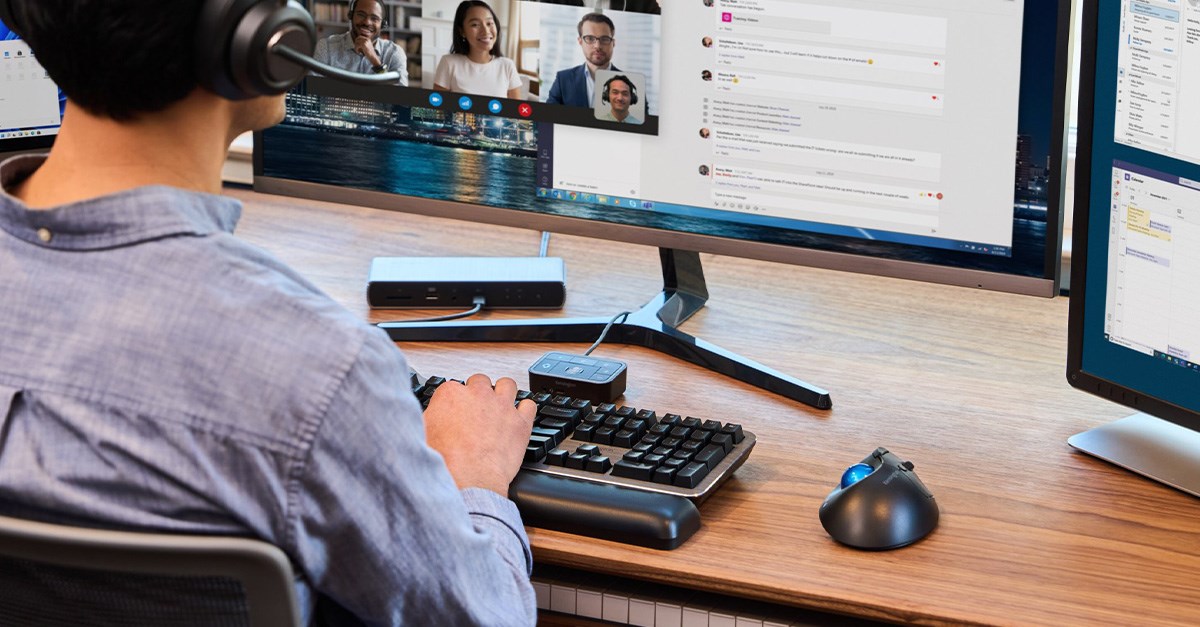
Credit: www.kensington.com
Seeking Professional Assistance
To troubleshoot a monitor not working when plugged into a docking station, try disconnecting and reconnecting the docking station to the laptop. Also, check the video cable for any damage or bent pins and securely reconnect it to both the monitor and docking station.
Ensure that the video cable is properly connected to the monitor and docking station, and consider restarting both the docking station and the computer to resolve any temporary issues.
When To Seek Help From It Professionals Or Support Services
If you have followed all the troubleshooting steps mentioned in the previous sections and your monitor plugged into a docking station is still not working, it might be time to seek professional assistance. IT professionals and support services can help diagnose and resolve complex issues related to hardware and software compatibility. It is advisable to reach out to them in the following scenarios:- Your monitor is not displaying any output even after reconnecting all the cables correctly.
- You have checked for any physical damages or bent pins in the video cable, but the issue persists.
- The docking station is not detecting the external monitor, and you have exhausted all possible solutions.
- Despite restarting your computer, the monitor remains unresponsive when connected to the docking station.
Warranty Considerations And Manufacturer Support
Before seeking professional assistance, it’s essential to check if your monitor or docking station is still under warranty. Warranty coverage can vary depending on the manufacturer, so it’s crucial to refer to the documentation or contact customer support to determine the warranty status for your specific device. Consider the following when it comes to warranty and manufacturer support:- Manufacturers often provide technical support for their products, including troubleshooting assistance and repair services.
- Some manufacturers may offer warranty extensions or additional support packages for a fee, providing peace of mind and additional services.
- If your monitor or docking station is still within the warranty period, contacting the manufacturer for support can help you avoid potential costs associated with third-party repairs.
- Be prepared to provide relevant information about your device, such as the model number, serial number, and the nature of the issue, when reaching out to the manufacturer for assistance.
Frequently Asked Questions For Monitor Plugged Into Docking Station Not Working
Why Won’t My Docking Station Detect My Monitor?
To troubleshoot why your docking station won’t detect your monitor, try these steps: 1. Disconnect and reconnect the docking station to your laptop. 2. Check for any damaged or bent pins on both ends of the video cable. 3. Securely reconnect the cable to the monitor and docking station.
4. Ensure that the video cable (HDMI or DisplayPort) is properly connected to both the monitor and docking station. 5. If the issue persists, refer to manufacturer support forums or contact technical support for further assistance.
How Do I Get My Monitor To Work With My Docking Station?
To get your monitor to work with your docking station, try these steps: 1. Disconnect and reconnect the docking station to your laptop. 2. Check for damaged or bent pins on both ends of the video cable. 3. Securely reconnect the cable to the monitor and docking station.
4. Ensure that the video cable (HDMI or DisplayPort) is properly connected. 5. If the issue persists, try unplugging the power cord from the dock and restarting your computer.
How Do I Get My Computer To Recognize My Docking Station?
To get your computer to recognize your docking station, follow these steps: 1. Disconnect and reconnect the docking station to your laptop. 2. Check the video cable for any damage or bent pins. 3. Securely reconnect the cable to the monitor and docking station.
4. Make sure the video cable is properly connected to the monitor and docking station. 5. Restart your computer to resolve any temporary issues. Ensure that the latest BIOS and drivers are installed, and check if the device is detected in Windows Device Manager.
Why Is My Usb-c Docking Station Hdmi Not Working?
Unplug and reconnect the docking station to the laptop. Check the video cable’s pins for damage. Securely reconnect the cable to the monitor and docking station. Ensure proper connection between the video cable and the monitor and docking station. Reboot both the docking station and the computer.
Conclusion
To troubleshoot a monitor not working when plugged into a docking station, there are several steps you can take. First, try disconnecting and reconnecting the docking station to your laptop. Check for any damaged or bent pins on the video cable and securely reconnect it to both the monitor and docking station.
Ensure that the video cable is properly connected to both the monitor and docking station. Additionally, you can try unplugging the power cord from the dock and then restarting your computer. By following these steps, you can resolve the issue and get your monitor working properly with the docking station.