Monitor Not Working When Plugged into Motherboard: Troubleshooting Guide
When a monitor is not working when plugged into the motherboard, it could be due to incorrect display configuration, faulty cables, or a damaged GPU or RAM. Plugging both monitors into the graphics card instead of one in each may resolve the issue.
It is also recommended to reseat the graphics card and RAM, as well as check the HDMI cable connection. Confirming that the HDMI is selected as the monitor’s source is another important step.
Confirm Cable And Power Integrity
Confirming cable and power integrity is essential when troubleshooting a monitor that is not working when plugged into the motherboard. Issues can arise from failing hardware components, improper HDMI cable connections, damaged or loosely connected cables, or incorrect display configurations.
Reseating the graphics card and RAM, checking for bent pins on display cables, and ensuring the correct monitor source settings can help resolve these problems.
When your monitor is not working when plugged into the motherboard, it is important to confirm the cable and power integrity. This step will help identify any potential issues with the cables or power supply that could be causing the problem.
Check For Any Visible Damage On Monitor Cables
Your first step should be to check for any visible damage on the monitor cables. Inspect both the HDMI or VGA cable and the power cable for any signs of fraying, bending, or breakage. If you notice any damage, it is recommended to replace the cables with new ones to ensure a proper connection.
Verify Power Cables Are Connected And Outlet Is Functional
Next, make sure that the power cables are properly connected to both the monitor and the power outlet. Double-check that the cables are securely inserted and not loose. Additionally, ensure that the outlet itself is functional by plugging in another electronic device and verifying that it powers on.
Ensure Monitor Is Powered On With Indicator Light
Check if the monitor is powered on by looking for the indicator light. Usually, a green light indicates that the monitor is on, while a red light may indicate a power issue. If the indicator light is not lit or shows an abnormal color, try pressing the power button on the monitor to turn it on. If it still does not power on, it might be necessary to consult the monitor manufacturer for further troubleshooting steps.
Monitor Input Source Selection
If your monitor is not working when plugged into your motherboard, it may be due to incorrect display configuration, faulty cables, or a damaged hardware component. Make sure to properly connect the HDMI cable to both your monitor and motherboard, and consider troubleshooting steps such as reseating the graphics card and RAM.
When a monitor isn’t working even though it’s connected to the motherboard, it can be a very distressing and frustrating experience. One of the common causes for this issue is improper input source selection on the monitor. In this section, we will discuss how to validate if the monitor is set to the correct input source and how to confirm if the motherboard supports the selected input, such as HDMI or VGA.
Validate Monitor Is Set To Correct Input Source
To ensure that the monitor is set to the correct input source, follow these steps:
- Check the monitor’s physical buttons or on-screen menu for an “Input Source” or “Source” button.
- Press the “Input Source” button to cycle through the available input options until you reach the correct one.
- Alternatively, navigate the monitor’s on-screen menu using the buttons and select the input source option from the menu.
By validating that the monitor is set to the correct input source, you eliminate the possibility of the monitor not receiving a signal due to incorrect input selection.
Confirm If Motherboard Supports Selected Input (e.g., Hdmi, Vga)
After ensuring the monitor is set to the correct input source, it is crucial to confirm that the selected input is supported by the motherboard. Different motherboards may have different input options, such as HDMI, VGA, DVI, or DisplayPort.
To confirm if the motherboard supports the selected input:
- Refer to the motherboard’s manual or documentation to identify the available input ports.
- Check for corresponding labels or icons next to the ports that indicate the supported input types.
- If the selected input matches one of the supported input types, it is compatible with the motherboard.
- If the selected input is not listed as a supported option, you may need to use an alternative input source or consider upgrading your motherboard.
By confirming if the motherboard supports the selected input, you can ensure compatibility and avoid any issues related to incompatible input connections.
By following these steps to validate the monitor’s input source and confirm motherboard compatibility, you can troubleshoot the issue of a monitor not working when plugged into the motherboard.
Inspect Motherboard And Monitor Ports
If your monitor is not working when plugged into the motherboard, one possible cause could be issues with the ports on both the motherboard and the monitor itself. By inspecting and addressing any problems with these ports, you may be able to resolve the issue and get your monitor working again.
Clean Debris From Video Ports On Both Motherboard And Monitor
Debris such as dust, lint, or dirt can accumulate in the video ports of both the motherboard and the monitor over time. This can cause poor or no connection between the two, resulting in a lack of display. To fix this issue, follow these steps:
- Power off your computer and unplug the monitor from the motherboard.
- Using a can of compressed air, blow out any debris from the video ports on both the motherboard and the monitor.
- Inspect the ports visually to ensure they are clean and free from any obstructions.
- Reconnect the monitor to the motherboard and power on your computer to check if the issue has been resolved.
Check For Physical Damage To Ports And Connectors
In some cases, physical damage to the ports or connectors on either the motherboard or the monitor can prevent a proper connection. Here’s how you can check for and address any physical damage:
- Inspect the video ports on both the motherboard and the monitor for any visible signs of damage, such as bent pins or broken connectors.
- If you notice any damage, try to carefully straighten any bent pins using a small tool like a tweezer.
- If the damage is severe or cannot be fixed, you may need to consider replacing the affected component.
- Once you have checked and addressed any physical damage, reconnect the monitor to the motherboard and test if the issue has been resolved.
By inspecting the ports on both the motherboard and the monitor, as well as addressing any debris or physical damage, you can increase the chances of fixing the issue of your monitor not working when plugged into the motherboard.
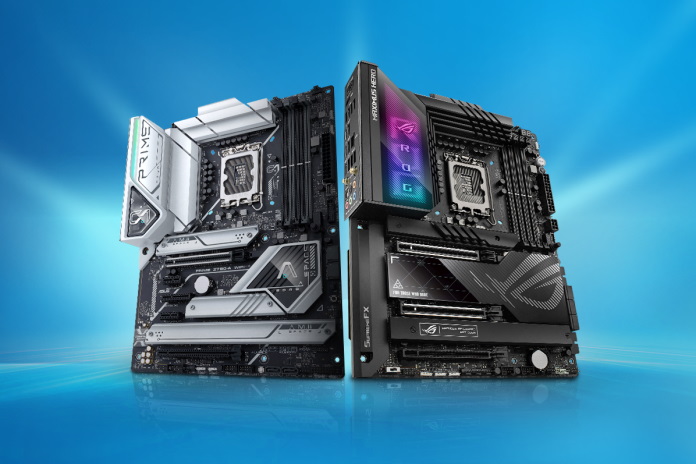
Credit: edgeup.asus.com
Test With Alternative Hardware
When your monitor is not working after being plugged into the motherboard, it can be a frustrating situation. However, before concluding that there is a hardware failure, it is important to test the setup with alternative hardware components. This can help determine whether the issue lies with the monitor itself, the cable, or the motherboard. Here are some steps you can take to troubleshoot the problem:
Use A Different Cable To Rule Out Cable Failure
One common cause of a monitor not working when plugged into the motherboard is a faulty cable. To rule out this possibility, try using a different cable to connect the monitor to the motherboard. This will help determine whether the issue lies with the cable or with other components. Make sure to use a cable that is compatible with both the monitor and the motherboard, such as an HDMI or DisplayPort cable.
Connect Monitor To Another Computer Or Laptop
If using a different cable did not resolve the issue, the next step is to connect the monitor to another computer or laptop. This will help determine whether the problem lies with the monitor or with the motherboard. Connect the monitor to a different device using the same cable and see if it works properly. If the monitor functions normally with another device, it indicates that the issue is not with the monitor but with the motherboard or its connections.
Try Another Monitor With The Same Motherboard
Alternatively, you can test the motherboard by using a different monitor. Connect another monitor to the motherboard using the same cable and see if it displays properly. If the alternative monitor works fine, it means that the issue lies with the original monitor. However, if the alternative monitor also does not work, it suggests that there may be a problem with the motherboard or its settings.
By testing the setup with alternative hardware, you can narrow down the possible causes of the monitor not working when plugged into the motherboard. Whether it’s a faulty cable, a monitor issue, or a problem with the motherboard, these troubleshooting steps will help you identify and resolve the problem effectively.
Updated Bios And Drivers
When a monitor isn’t working even though it’s connected to the motherboard, it can be a very distressing and frustrating experience. The issue might not necessarily be with the monitor itself, but rather with the BIOS version of the motherboard and the video/Graphics drivers installed. In this section, we will discuss the importance of checking and updating the motherboard BIOS version, as well as having the latest video/Graphics drivers installed.
Guide To Checking And Updating Motherboard Bios Version
If your monitor is not working when plugged into the motherboard, one of the first things you should check is the BIOS version of your motherboard. The BIOS (Basic Input Output System) is responsible for initializing hardware components and providing the necessary instructions for the operating system to function.
To check and update your motherboard BIOS, you can follow these steps:
- Identify your motherboard model and manufacturer.
- Visit the manufacturer’s website and navigate to the support section.
- Search for the latest BIOS version available for your specific motherboard model.
- Download the BIOS update file and follow the manufacturer’s instructions on how to install it.
Updating the BIOS can often fix compatibility issues and provide better support for the hardware components, including the monitor. It is important to note that BIOS updates should be approached with caution, as incorrect installation or interruption during the process can lead to permanent damage to the motherboard.
Importance Of Having The Latest Video/graphics Drivers Installed
In addition to updating the BIOS, ensuring that you have the latest video/Graphics drivers installed is crucial for proper functioning of the monitor when connected to the motherboard. Video/Graphics drivers act as a bridge between the operating system and the graphics card, enabling the display of visuals on the monitor.
Here are some key reasons why having the latest video/Graphics drivers is important:
- Optimal performance: Updated drivers can improve the performance of your graphics card, leading to smoother visuals and reduced screen flickering.
- Bug fixes and compatibility: Drivers updates often include bug fixes and enhancements that address compatibility issues with specific software or hardware.
- Security patches: Updated drivers can also include security patches that protect your system from potential vulnerabilities.
To update your video/Graphics drivers, you can follow these steps:
- Identify the make and model of your graphics card.
- Visit the manufacturer’s website or use a trusted driver update software.
- Download the latest version of the video/Graphics driver for your specific graphics card.
- Follow the installation instructions provided by the manufacturer or the software.
Regularly updating your video/Graphics drivers will ensure that your monitor is properly recognized and functions optimally when connected to the motherboard.
Bios Settings Adjustments
If your monitor is not working when plugged into the motherboard, it could be due to a variety of issues such as incorrectly connected cables, faulty hardware components, or incorrect BIOS configuration. Troubleshooting steps include reseating the graphics card and RAM, checking the HDMI cable connection, and ensuring that the monitor’s source is set to HDMI.
Navigating Bios To Ensure Integrated Graphics Are Enabled
When your monitor is not working after being plugged into the motherboard, the issue may lie in the BIOS settings. To resolve this, you need to navigate through the BIOS and ensure that the integrated graphics are enabled. Here’s how you can do it:
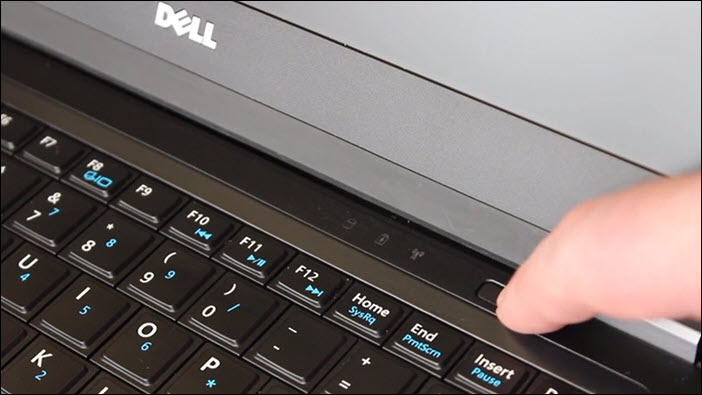
- Restart your computer: Begin by restarting your computer and accessing the BIOS. This is typically done by pressing a specific key, such as F2 or Delete, during the startup process. Keep an eye on the screen as it boots up for any instructions on which key to press.
- Enter the BIOS: Once you’ve identified the correct key, press it repeatedly until you enter the BIOS. The BIOS screen typically has a black or blue background with various options listed.
- Navigate to the “Advanced” or “Integrated Peripherals” menu: Use the arrow keys on your keyboard to navigate to the “Advanced” or “Integrated Peripherals” menu. The specific name may vary depending on your motherboard model.
- Enable integrated graphics: Look for an option related to integrated graphics or onboard video. It may be named something like “Onboard Graphics” or “IGPU Multi-Monitor.” Use the arrow keys to select the option and press Enter to enter the sub-menu.
- Enable the integrated graphics: In the sub-menu, you should find an option to enable the integrated graphics. It is usually set to “Auto” or “Disabled” by default. Use the arrow keys to select “Enabled” and press Enter to save the changes.
After making these adjustments, exit the BIOS and restart your computer. Your monitor should now be working when plugged into the motherboard.
Checking For Settings That May Disable Motherboard Video Ports
In addition to ensuring that integrated graphics are enabled, there could be other BIOS settings that disable the motherboard video ports. Here’s how you can check for such settings:
- Access the BIOS: Restart your computer and enter the BIOS using the appropriate key.
- Navigate to the “Advanced” or “Integrated Peripherals” menu: Use the arrow keys to navigate to the “Advanced” or “Integrated Peripherals” menu.
- Disable “Primary Display Adapter”: Look for an option called “Primary Display Adapter” or something similar. This option determines which display adapter (graphics card or integrated graphics) takes priority. If it is set to the graphics card, it may disable the motherboard video ports. Change the setting to “Integrated Graphics” or “Auto” to enable the motherboard video ports.
- Save and exit: Make sure to save your changes before exiting the BIOS. This is typically done by pressing the F10 key or following the on-screen instructions.
By checking and adjusting these settings in the BIOS, you can resolve the issue of your monitor not working when plugged into the motherboard. Ensure that both the integrated graphics are enabled and any settings disabling the motherboard video ports are changed. After making these adjustments, restart your computer and check if the monitor is now functioning properly.
Signs Of Motherboard Or Gpu Failure
One common sign of motherboard or GPU failure is when the monitor does not work when plugged into the motherboard. This can be due to a failing hardware component, loose cables, or incorrect display configuration. Ensure all connections are secure and check for any damaged components.
Identify Symptoms Suggesting A Failed Motherboard Or Gpu
When your monitor fails to work after being plugged into the motherboard, it could be an indication of a malfunctioning motherboard or GPU. Identifying the signs of failure is crucial in diagnosing the issue and finding a suitable solution. Here are some common symptoms that may suggest a problem with the motherboard or GPU:
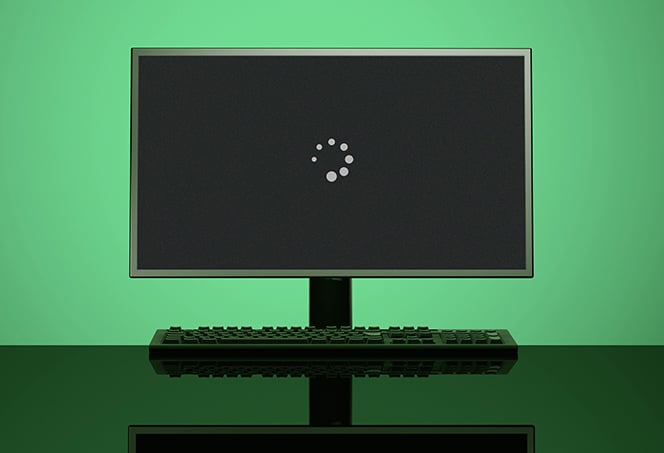
- No display output: One of the most obvious signs of a failed component is the absence of any display on the monitor. Despite being properly connected, the monitor remains blank, indicating a potential issue with the motherboard or GPU.
- Artifacts or distortions: If you notice strange artifacts, flickering, or distorted images on your screen, it could be a clear indication of a failing GPU. These visual abnormalities can disrupt your computing experience and may suggest the need for a replacement.
- System crashes or freezes: Another telltale sign of a failing motherboard or GPU is frequent system crashes or freezes. If your computer regularly experiences unexpected shutdowns or becomes unresponsive during normal operations, it’s worth considering the possibility of a hardware issue.
- Overheating: Excessive heat can cause damage to various components within your computer, including the motherboard and GPU. If you notice that your system is running hotter than usual or if you hear loud fan noises, it may indicate an underlying issue that requires attention.
- Error messages: Occasionally, error messages related to graphics or display drivers may appear on your screen. These error messages can provide important clues about the root cause of the problem and point towards a failing GPU or motherboard.
Steps In Diagnosing A Dead Integrated Gpu Or Motherboard Component
When faced with a non-functional monitor connected to the motherboard, it’s important to follow a systematic approach in diagnosing the issue. By carefully going through the following steps, you can narrow down the cause and potentially resolve the problem:
- Check connections: Ensure that all connections between the monitor and the motherboard are secure and properly plugged in. Sometimes, loose or improperly seated cables can lead to display issues.
- Test with another monitor: Connect a different monitor to the motherboard to determine if the problem persists. If the new monitor also fails to display anything, it suggests an issue with the motherboard or integrated GPU.
- Update drivers: Make sure that you have the latest graphics drivers installed on your computer. Outdated or incompatible drivers can contribute to display problems, so it’s essential to keep them updated.
- Test with a discrete GPU: If your motherboard supports a discrete graphics card, try installing one and connecting your monitor to it. If the display works with the discrete GPU, it implies a failure in the integrated GPU.
- Consult professional help: If you have followed these steps and still haven’t resolved the issue, it may be necessary to seek professional assistance from a technician or contact the manufacturer’s support for further guidance.
By closely observing the symptoms and properly diagnosing the problem, you can take appropriate measures to address the issue and get your monitor working again when plugged into the motherboard.
Detailed Monitor Not Working When Plugged Into Motherboard
When a monitor isn’t working even though it’s connected to the motherboard, it can be a very distressing and frustrating experience. In this section, we will provide you with a step-by-step walk-through to help you troubleshoot and fix the issue. Follow these instructions carefully to ensure your monitor starts working properly.
Step 1: Check The Cable Connections
The first thing you should do is check the cable connections between your monitor and motherboard. Make sure the HDMI cable is properly connected to both the monitor and the motherboard. If you’re using a different type of cable, such as DVI or VGA, ensure those cables are securely plugged in as well.
Step 2: Verify The Monitor Source
Once you’ve confirmed the cable connections are secure, check the monitor’s source. Ensure that HDMI is selected as the monitor’s source. This is a common reason why monitors may not detect their connected devices.
Step 3: Reseat Graphics Card And Ram
Reseating the graphics card and RAM can help resolve any loose connections that may be causing the monitor not to work. Follow these steps:
- Shutdown your computer and unplug it from the power source.
- Open the computer case and locate the graphics card.
- Carefully remove the graphics card from its slot and then reinsert it firmly.
- Repeat the same process for the RAM sticks.
- Close the computer case and plug it back into the power source.
- Power on your computer and check if the monitor is now working.
Step 4: Check Bios Settings
Incorrect BIOS settings can sometimes prevent the monitor from working. Access your computer’s BIOS settings by pressing the BIOS key during startup (usually Del, F2, or F10). Once in the BIOS, look for display-related settings such as ‘Primary Display’ or ‘Onboard Graphics’ and ensure they are correctly configured. Save any changes and exit the BIOS.
Step 5: Update Graphics Card Drivers
Outdated or incompatible graphics card drivers can also cause monitor issues. Visit the manufacturer’s website for your graphics card and download the latest drivers. Install them on your computer and restart. Check if the monitor is now working.
By following these step-by-step instructions, you should be able to troubleshoot and fix the issue of your monitor not working when plugged into the motherboard. If the problem persists, it may indicate a more complex hardware-related problem, and it’s recommended to seek professional assistance.
Seeking Professional Help
When you encounter the frustrating situation of your monitor not working when plugged into the motherboard, sometimes it is best to seek professional help in order to resolve the issue effectively. However, before reaching out for expert assistance, there are a few factors to consider that can help you determine when to contact the manufacturer support or consult an expert technician.
When To Contact Manufacturer Support Or Seek An Expert Technician
If you have exhausted all possible troubleshooting steps on your own but still cannot resolve the issue, it may be time to contact the manufacturer support or seek the help of an expert technician. Here are a few scenarios where professional assistance is recommended:
- Failing Hardware Component: If your monitor is not receiving a signal, it could be due to a failing hardware component. Both the motherboard and the graphics card are key components that can cause display issues. Contacting the manufacturer support or an expert technician can help diagnose and repair the specific hardware problem.
- Detection Problems: In some cases, the motherboard may not detect the monitor, or your second monitor may not be recognized. This can be a frustrating situation, and seeking professional help can ensure that the correct troubleshooting steps are taken to resolve the issue.
- Hardware Connectivity: If you have checked the HDMI cable connection between your monitor and motherboard but still experience no display, contacting the manufacturer support or an expert technician can help identify any connectivity issues and provide a solution.
Warranty Considerations And Potential Repair Costs
Before reaching out for professional help, it is important to consider warranty coverage and potential repair costs. Here are a few factors to keep in mind:
- Warranty Coverage: Check if your monitor or motherboard is still under warranty. If so, reaching out to the manufacturer support can help you understand the coverage and whether the issue falls under warranty, potentially saving you from additional repair costs.
- Potential Repair Costs: When seeking professional help, it is essential to understand the potential repair costs associated with the issue. Evaluate the cost of repair versus replacing the monitor or motherboard to make an informed decision.
- Expert Technician: Contacting an expert technician can provide you with a repair quote and valuable insights into the cause of the issue. They can guide you on the most cost-effective solution and help you understand if repairing the monitor or motherboard is feasible.
Remember, seeking professional help is a viable option when troubleshooting steps fail to resolve the issue with your monitor not working when plugged into the motherboard. Consider warranty coverage and potential repair costs to make an informed decision that suits your specific situation.
Frequently Asked Questions For Monitor Not Working When Plugged Into Motherboard
Why Is My Monitor Not Showing When Connected To Motherboard?
If your monitor is not showing when connected to the motherboard, ensure that both monitors are plugged into either the motherboard or the graphics card, not one in each. Also, check that the HDMI cable is properly connected to both the monitor and motherboard.
Lastly, try reseating the graphics card and RAM, and check for any bent pins on the display cable.
Why Is There No Display When I Plug Into My Motherboard?
If there is no display when you plug into your motherboard, it could be due to damaged or loosely connected cables, incorrect display configuration, faulty GPU or RAM, incorrect BIOS settings, faulty peripheral devices, or a damaged PSU. Ensure all connections are secure and check for any hardware issues.
Why Not Plug Monitor Into Motherboard?
Plugging a monitor into the motherboard may result in poor performance or no display at all. It is recommended to plug the monitor into the graphics card for optimal functionality.
How Do I Get My Motherboard To Recognize My Monitor?
To get your motherboard to recognize your monitor, follow these steps: 1. Plug your primary monitor into the HDMI port on your video card. 2. Plug your secondary monitor into the HDMI port on your motherboard. 3. Connect the other ends of the HDMI cables to the respective monitors.
4. Ensure that HDMI is selected as the monitor’s source. 5. If the issue persists, try reseating the graphics card and RAM, and check for any loose or damaged cables.
Conclusion
In troubleshooting why your monitor is not working when plugged into the motherboard, several factors may come into play. Make sure both monitors are connected to the graphics card and not split between the motherboard and graphics card. Reseating the graphics card and RAM, checking the HDMI cable connections, and confirming the monitor’s display output can also help resolve the issue.
If all else fails, consider the possibility of a failing hardware component. By following these steps, you can identify and address the problem, restoring your monitor to its proper functionality.