Monitor Not Working After Restart: Troubleshooting Tips
If your monitor is not working after a restart, try disconnecting all peripherals from your computer and then turning it on again. If that doesn’t work, check the port connectors on your computer and monitor for any damage.
Having a monitor that doesn’t work properly after a restart can be a frustrating experience. You eagerly turn on your computer, only to find that the screen remains blank. This issue can arise due to various reasons, including damaged cables, faulty peripherals, incorrect display configurations, or even a damaged power supply unit.
We will explore some possible solutions to get your monitor working again after a restart. By following these troubleshooting steps, you can hopefully resolve the issue and have your monitor back in working order.
Confirming Power And Connection Basics
If your monitor is not working after a restart, try disconnecting all devices and peripherals from your computer and then turning it on again. If the issue persists, check the port connectors on the computer and monitor for any damage.
Confirming Power and Connection Basics When your monitor is not working after a restart, it can be frustrating and hinder your productivity. However, before diving into complex troubleshooting steps, it’s essential to confirm the power and connection basics. By checking these fundamental aspects, you can rule out any simple issues and potentially resolve the problem quickly.Check Monitor Power Led Is On
The first step in confirming the power status of your monitor is to check if the power LED is on. This LED is typically located on the front or side of the monitor and indicates whether the monitor is receiving power. Make sure to:- Locate the power LED on your monitor
- Inspect if it is illuminated
- If the LED is not on, ensure the monitor is properly plugged into a working power outlet
- Try using a different power cable or adapter to eliminate the possibility of a faulty power source
Ensure All Cables Are Securely Connected
Sometimes, a loose or improperly connected cable can cause your monitor to not work after a restart. To address this issue, follow these steps:- Identify the cables connecting your monitor to the computer
- Check all cable connections, including the power cable and video cables
- Ensure that each connection is secure on both ends
- If you find any loose connections, firmly reconnect them
- Consider using cable management options, such as cable ties or clips, to keep cables organized and prevent accidental disconnections
Verify Monitor Is Set To The Correct Input Source
Another potential reason for a monitor not working after a restart is an incorrect input source selection. To check and adjust the input source, follow these steps:- On your monitor, locate the input source button or menu
- Press the button or access the menu to navigate through the available input sources
- Select the input source that matches the type of cable you are using to connect your monitor to the computer (e.g., HDMI, VGA, DVI)
- Check if the monitor displays the correct input source
- If necessary, cycle through the available input sources until you find the correct one
Diagnosing With Onboard Graphics
If your monitor is not working after a restart, try disconnecting all devices and peripherals from your computer and then turning it on again. If that doesn’t solve the issue, check the port connectors on the computer and the monitor for any damage.
Switch From Gpu To Onboard Graphics
If your monitor is not working after a restart, one possible solution is to switch from using your dedicated graphics card (GPU) to onboard graphics. This can help determine if the issue lies with your GPU or another component.
To switch to onboard graphics, follow these steps:
- Shut down your computer completely.
- Locate the display port on the back of your computer that is connected to your GPU.
- Disconnect the monitor cable from the GPU and connect it to the onboard graphics port.
- Power on your computer.
- If the monitor starts working with onboard graphics, it indicates a potential issue with your GPU.
Test With Alternative Video Output Port
If switching to onboard graphics did not resolve the issue, try testing your monitor with an alternative video output port on your computer. This can help determine if the problem lies with the specific output port you were using.
Follow these steps to test with an alternative video output port:
- Shut down your computer completely.
- Disconnect the monitor cable from the current video output port.
- Locate another video output port on your computer, such as HDMI, DisplayPort, or VGA.
- Connect the monitor cable to the alternative video output port.
- Power on your computer.
- If the monitor starts working with the alternative video output port, it indicates a potential issue with the original port.
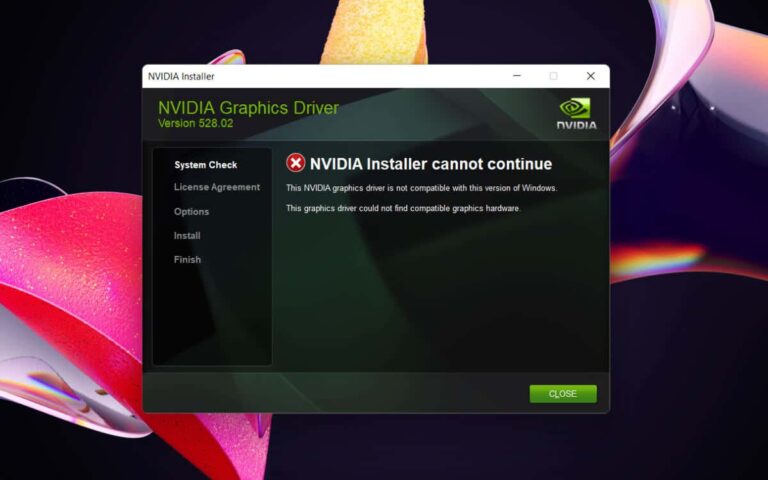
Updating Graphics Card Driver
If neither switching to onboard graphics nor testing with an alternative video output port resolved the issue, it may be necessary to update your graphics card driver. Outdated or incompatible drivers can cause problems with your monitor.
Follow these steps to update your graphics card driver:
- Open the Device Manager on your computer.
- Expand the “Display adapters” section.
- Right-click on the graphics card listed and select “Update driver”.
- Choose the option to search for updated drivers automatically.
- If an update is found, follow the on-screen instructions to install it.
- Restart your computer after the driver update is complete.
Updating the graphics card driver can often resolve compatibility issues and restore functionality to your monitor.
Video Cable And Port Inspection
When your monitor is not working after a restart, it can be frustrating and hinder your productivity. One common cause of this issue is a problem with the video cable or the ports on your computer and monitor. In this section, we will discuss how to inspect the video cable and port condition to troubleshoot and potentially resolve the problem.
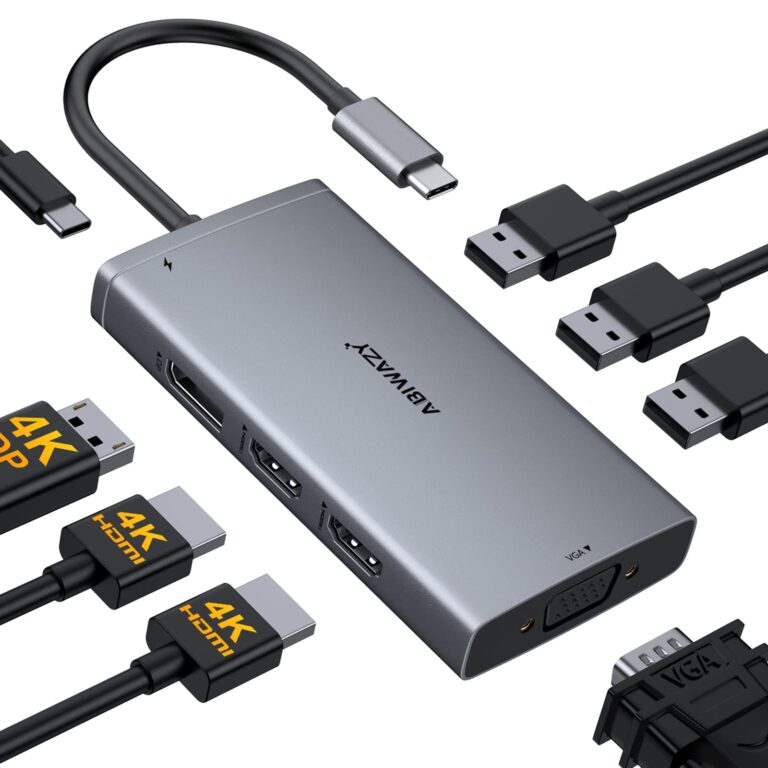
Check For Damage To Hdmi, Dvi, Dp, Vga Cables
Firstly, it is essential to check for any visible damage to the video cables. HDMI, DVI, DisplayPort (DP), and VGA cables are commonly used to connect monitors to computers. Inspect the cables for any signs of physical damage, such as frayed wires, bent connectors, or loose pins. If you notice any damage, it is recommended to replace the cable to eliminate the possibility of a faulty connection.
Inspect Port Condition On Both Pc And Monitor
In addition to checking the cable, inspecting the condition of the ports on both your computer and monitor is crucial. Dust, debris, or bent pins in the ports can prevent a proper connection and result in a non-functional monitor. Carefully examine the ports for any signs of damage and clean them if necessary. You can use compressed air or a soft brush to remove any dirt or debris that may be obstructing the connection.
Consider Trying A Different Video Cable
If you have checked both the cable and the ports for damage and cleaned them but the issue persists, it may be helpful to try using a different video cable. Sometimes, cables can degrade over time or experience internal faults that are not immediately visible. By replacing the cable with a known working one, you can determine if the problem lies with the cable itself.
By inspecting the video cable and port condition, you can effectively troubleshoot and fix the issue of the monitor not working after a restart. Ensure that the cables are undamaged and securely connected, and the ports are clean and free from any obstructions. If needed, try using a different video cable to further isolate the problem. These steps can help restore the functionality of your monitor and minimize any interruptions to your workflow.

Credit: www.agweb.com
Modifying Bios Settings
When your monitor is not working after a system restart, it can be a frustrating experience. However, one potential solution to this issue is to modify the BIOS settings. Accessing the BIOS can help troubleshoot display settings and resolve any compatibility issues that may be causing the problem. In this section, we will explore how to access the BIOS, reset it to default settings, and update the BIOS firmware for better compatibility.
Accessing Bios To Troubleshoot Display Settings
To access the BIOS and troubleshoot display settings, follow these steps:
- Start by restarting your computer.
- During the startup process, look for a prompt that indicates which key to press to enter the BIOS. This key can vary depending on the manufacturer of your computer or motherboard. It is commonly the Del key, F2, F10, or Esc. Refer to your computer or motherboard’s manual for the specific key.
- Once you enter the BIOS, navigate to the display settings or video settings section. This section may have a different name depending on the BIOS version and manufacturer.
- Check the settings for the primary display or display order. Ensure that the correct display is selected as the primary or that the display order is set correctly.
- If necessary, make any necessary adjustments to the display settings to ensure compatibility with your monitor.
- Save the changes and exit the BIOS. Restart your computer to see if the monitor now works properly.
Resetting Bios To Default As A Potential Fix
If accessing and modifying the BIOS settings did not resolve the issue, you can try resetting the BIOS to its default settings. Resetting the BIOS can help eliminate any incompatible or incorrect settings that may be causing the monitor not to work. Here’s how to reset the BIOS:
- Turn off your computer.
- Locate the CMOS battery on your motherboard. It is usually a silver circular battery.
- Remove the CMOS battery carefully.
- Wait for a few minutes to ensure that any residual charge is drained from the system.
- Reinsert the CMOS battery back into its slot.
- Power on your computer and check if the monitor is now functioning correctly.
Updating Bios Firmware For Compatibility
If you are still experiencing issues with your monitor after accessing the BIOS and resetting it to default settings, updating the BIOS firmware may help. BIOS updates often include improvements in compatibility and stability, which can resolve display problems. Here’s how to update the BIOS firmware:
- Visit the website of your computer or motherboard manufacturer.
- Locate the support or downloads section of the website.
- Search for your specific model or motherboard to find the latest BIOS firmware update.
- Download the BIOS update file and follow the manufacturer’s instructions on how to install it.
- Once the BIOS firmware is updated, restart your computer and check if the monitor is now working properly.
By modifying the BIOS settings, you can troubleshoot display issues and ensure compatibility between your computer and monitor. Accessing the BIOS, resetting it to default settings, and updating the BIOS firmware are potential solutions that can help get your monitor working again after a restart.
Windows Display Settings And Drivers
When your monitor stops working after a restart, it can be frustrating and prevent you from using your computer effectively. One common cause of this issue is incorrect display configuration in Windows settings or outdated display drivers. By addressing these two areas, you can resolve the problem and get your monitor working properly again.
Correcting Display Configuration In Windows Settings
In some cases, the display configuration in Windows settings may be incorrect, causing the monitor to not work after a restart. Follow these steps to correct the display configuration:
- Right-click on the desktop and select “Display settings” from the menu.
- Ensure that the correct display is selected in the “Display” drop-down menu.
- If you have multiple displays connected, make sure they are arranged correctly in the “Multiple displays” section.
- Adjust the resolution and scaling settings if needed, ensuring they are compatible with your monitor.
- Click “Apply” to save the changes.
Uninstalling And Reinstalling Display Drivers
If the display configuration in Windows settings is not the issue, outdated or corrupt display drivers could be causing the monitor problem. To uninstall and reinstall the display drivers, follow these steps:
- Press the Windows key + X and select “Device Manager” from the menu.
- Expand the “Display adapters” category.
- Right-click on the display driver and select “Uninstall device”.
- Check the box that says “Delete the driver software for this device” and click “Uninstall”.
- Restart your computer.
- After the computer restarts, the display driver will be automatically reinstalled. If not, you can visit the manufacturer’s website and download the latest driver for your specific monitor model.
Running Windows Update For Latest Os And Driver Versions
Another important step to resolve the monitor not working after a restart issue is to ensure that you have the latest operating system and driver versions installed. Running Windows Update can help you achieve this. Follow these steps:
- Click on the Windows Start button and select “Settings”.
- In the Settings window, click on “Update & Security”.
- Click on “Check for updates”.
- If any updates are available, click on “Download and install” to install them.
- Restart your computer after the updates are installed.
By correcting the display configuration in Windows settings, uninstalling and reinstalling display drivers, and running Windows Update for the latest OS and driver versions, you can effectively troubleshoot and resolve the issue of your monitor not working after a restart.
Frequently Asked Questions For Monitor Not Working After Restart
Why Is My Pc Turning On But Not My Monitor?
The main reason your PC turns on but not your monitor is likely due to damaged or loosely connected cables. Other causes might include incorrect display configuration, faulty GPU or RAM, incorrect BIOS settings, faulty peripheral devices, or a damaged PSU (Power Supply Unit).
Try checking and reconnecting all connections to resolve the issue.
Why Does My Monitor Not Turn On After Restart?
If your monitor is not turning on after a restart, try disconnecting all devices and peripherals from your computer, then turn it on again. If that doesn’t work, check the port connectors on both the computer and the monitor for damage.
You can also try uninstalling and reinstalling the display driver.
When I Restart My Computer There Is No Screen?
If you’re experiencing a black screen after restarting your computer, try disconnecting all devices and peripherals like the mouse, external hard drive, speakers, printers, scanners, etc. From the computer. Then, turn your computer on again. If that doesn’t work, check the port connectors on the computer and the monitor for any damage.
How Do I Fix An Unresponsive Monitor?
To fix an unresponsive monitor, first, disconnect all devices and peripherals from the computer, then try turning on the computer again. If that doesn’t work, check the port connectors on the computer and monitor for damage. You can also try uninstalling and reinstalling the display driver or resetting the BIOS settings.
If the issue persists, it could be a hardware problem, so you may need to check the CPU, motherboard, RAM, power supply, or graphics card connections.
Conclusion
If your monitor is not working after a restart, try disconnecting all devices and peripherals from the computer and turning it on again. If that doesn’t solve the issue, check the port connectors on the computer and monitor for any damage.
Another suggestion is to uninstall the display driver and restart the computer. If these steps don’t resolve the problem, you might need to troubleshoot the CPU, motherboard, RAM, power supply, or graphics card connections.