Monitor Not Starting With Computer: Troubleshooting Tips and Solutions
If your monitor is not starting with your computer, it could be due to a loose or damaged cable connection between the monitor and computer. Check all connectors and replace any worn or damaged cables.
This can be fixed by ensuring a secure cable connection between the monitor and computer. Having a monitor that doesn’t start with your computer can be a frustrating experience. You’re ready to get to work or start your gaming session, only to be met with a blank screen.
Before jumping to conclusions and assuming there’s a major issue with your equipment, there are a few simple steps you can take to troubleshoot the problem. We will explore the common causes for a monitor not starting with a computer and provide solutions to fix the issue. Whether it’s a loose cable connection or a malfunctioning hardware component, we’ll guide you through the troubleshooting process to ensure your monitor starts up smoothly alongside your computer.
Checklist Before You Start Troubleshooting
When your monitor doesn’t start with your computer, it can be quite frustrating. Before you dive into troubleshooting, there are a few key things you should check:
Ensure All Cables Are Securely Connected
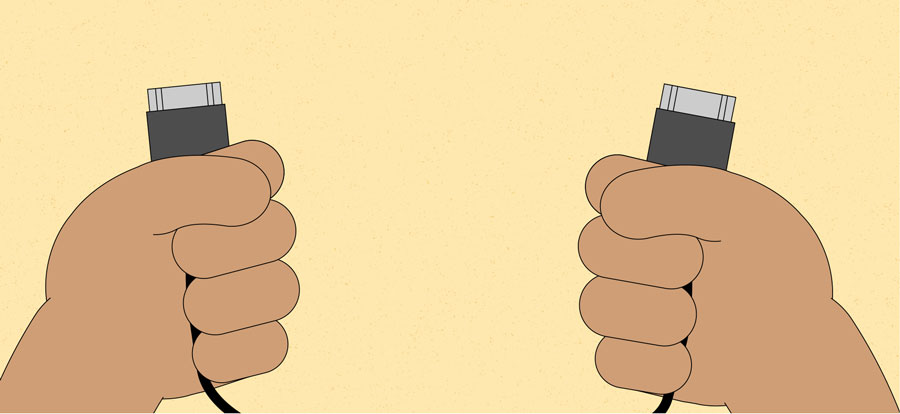
One of the most common reasons for a monitor not starting is a loose or damaged cable connection between your monitor and computer. Carefully inspect each connector to ensure they are firmly attached. If any cables look worn or damaged, it’s a good idea to switch them out for new ones.
Verify The Power Supply To The Monitor And Pc
Another important aspect to check is the power supply. Make sure that both the monitor and the PC are plugged in and receiving power. Check the power cables and the power outlets to ensure they are functioning properly.
Inspect For Any Visible Damage To Cables Or Ports
Take a close look at the cables and ports for any visible damage. Look for frayed wires, bent pins, or other signs of wear and tear. If you notice any damage, it’s advisable to replace the affected cables or ports to rule out any potential issues.
Confirm That The Monitor Is Powered On
It may sound simple, but sometimes the monitor itself may not be powered on. Double-check that the monitor is switched on and that the power indicator light is lit up. If it’s not, press the power button to turn it on.
By going through this checklist, you can identify any simple fixes before diving into more complex troubleshooting steps. Once you’ve ensured that all the connections are secure, the power supply is functioning correctly, and there is no visible damage, you can move on to more advanced troubleshooting methods if needed.
Diagnosing Monitor And Computer Connections
If your monitor is not starting with your computer, it could be due to a loose or damaged cable connection between the two. Check that all connectors are firmly attached and replace any worn or damaged cables. You can also try using different cables or ports to troubleshoot the issue.
ent port as well. Before assuming the issue is with the monitor, it’s important to diagnose the connections between the monitor and the computer. Differentiating between monitor and computer issues To determine whether the problem lies with the monitor or the computer, it’s essential to differentiate between the two. Start troubleshooting by checking the following: 1. Check the power – Ensure that both the monitor and the computer are receiving power. Check if the power cables are securely plugged in and the power outlets are functioning properly. 2. Inspect the cables – Examine the cables connecting the monitor and the computer. Make sure they are securely connected and free from any damages such as frayed wires or bent connectors. If any issues are found, replace the cables with new ones. 3. Monitor settings – Check the monitor’s settings to ensure it is set to the correct input source. Press the “Input” or “Source” button on the monitor to cycle through different options and select the appropriate one for the connected computer. 4. Computer graphics card – Verify that the computer’s graphics card is functioning correctly. Check if the graphics card is securely seated in the motherboard and that all cables connecting it are properly attached. Testing the monitor with another computer or laptop If the above steps haven’t resolved the issue, the next step is to determine if the monitor is the problem or if it lies with the computer. Follow these steps to test the monitor on another computer or laptop: 1. Disconnect the current computer – Unplug the monitor from the current computer and power source. 2. Connect the monitor to another computer – Use a different computer or laptop to connect the monitor. Ensure all cables are securely connected. 3. Turn on the monitor and the computer/laptop – Power on both the monitor and the separate computer/laptop to see if the monitor displays properly. If the monitor functions correctly with another device, this indicates that the problem lies within the original computer. Using a different cable to rule out cable faults If the monitor doesn’t display correctly with a different computer or laptop, the next step is to check the cable connecting the monitor to the original computer. Follow these steps: 1. Obtain a different cable – Use a known working cable or borrow one from another device. 2. Disconnect the current cable – Unplug the cable connecting the monitor to the computer. 3. Connect the new cable – Plug in the new cable, ensuring it is securely connected to both the monitor and the computer. 4. Test the monitor – Power on the monitor and the computer to see if the display appears correctly. If the monitor functions properly with the new cable, this indicates that the original cable was faulty. By carefully diagnosing the monitor and computer connections, you can identify whether the issue lies with the monitor, computer, or the cables. This process helps narrow down the problem and ensures you’re troubleshooting the right components. Remember to test the monitor with a different computer or laptop and try using a different cable to eliminate any potential issues.Hardware Issues And Simple Fixes
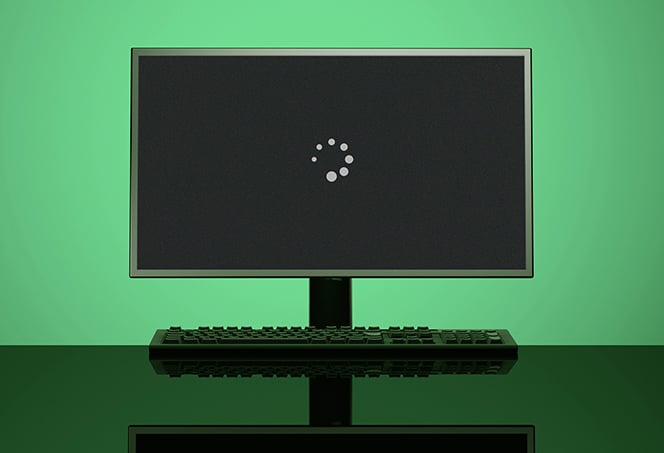
When your computer starts up, but the monitor remains blank, it can be frustrating. However, there are some simple steps you can take to troubleshoot and fix this issue. In this section, we will explore some common hardware issues and their simple fixes that can get your monitor up and running again.
Checking The Monitor’s Power Cable And Source
One of the first things you should check when your monitor isn’t starting with your computer is the power cable. Ensure that the power cable is securely connected to both the monitor and the power source. Sometimes, the cable might appear connected but may not be fully inserted, causing a loose connection.
If you find that the power cable is loose, remove it and then re-insert it firmly into the power socket. This simple step might be all it takes to resolve the issue. Additionally, check the power source to ensure it is delivering power and try plugging the cable into a different outlet, just to rule out any issues with the power source.
Examining The Video Cable And Its Connection
Another common cause of a monitor not starting with the computer is a faulty video cable or a loose connection. Check the video cable that connects your computer to the monitor. Look for any signs of damage or wear, such as frayed wires or bent pins.
If you notice any damage, it is best to replace the cable with a new one. Make sure to choose a cable that is compatible with both your computer and monitor. If the cable appears to be in good condition, check the connection points on both ends. Ensure that the cable is securely connected to both the computer’s video output port and the monitor’s video input port.
Resetting Monitor Settings Via Onboard Buttons Or Menus
If the power and video cables are securely connected and you’re still experiencing issues with your monitor, you can try resetting the monitor’s settings. Most monitors have onboard buttons or menus that allow you to adjust various settings, including brightness, contrast, and input source.
To reset the monitor settings, locate the buttons on the monitor or access the menu through the monitor’s OSD (on-screen display). Look for a “Factory Reset” option or a similar setting that will revert the monitor’s settings to their default values.
Press the appropriate button or navigate through the menu options to access the reset feature. Confirm the action, and the monitor will reset its settings. After resetting, check if the monitor starts up with the computer.
In conclusion, when your monitor is not starting with your computer, it can be due to hardware issues that can often be resolved with simple fixes. Check the power and video cables for any loose connections or damage and ensure they are securely connected. Additionally, try resetting the monitor settings to their default values.
Advanced Troubleshooting Techniques
If your monitor is not starting with your computer, it could be due to a loose or damaged cable connection. Check all connectors and replace any worn or damaged cables. You can also try using keyboard shortcuts or different ports to troubleshoot the issue.
Booting Into Safe Mode To Test Display Functionality
If your monitor is not starting with your computer, you can try booting into safe mode to test the display functionality. Safe mode starts your computer with only the essential programs and drivers, which can help identify if a software issue is causing the problem.
Here are the steps to boot into safe mode:
- Restart your computer.
- During the boot process, press the F8 key repeatedly until the Advanced Boot Options menu appears.
- Using the arrow keys, select “Safe Mode” or “Safe Mode with Networking” if you need internet access.
- Press Enter to start your computer in safe mode.
In safe mode, check if the monitor displays properly. If it does, it indicates that a software or driver issue is causing the problem. You can proceed to troubleshoot the specific software or driver causing the issue.
Clearing The Motherboard’s Cmos To Reset Bios Settings
If booting into safe mode doesn’t resolve the issue, you may need to clear the motherboard’s CMOS to reset the BIOS settings. Sometimes, incorrect BIOS settings can prevent the monitor from starting with the computer.
- Shut down your computer and unplug it from the power source.
- Open the computer case to access the motherboard.
- Locate the CMOS battery on the motherboard. It is a round, silver battery.
- Remove the CMOS battery carefully.
- Wait for approximately 5 minutes to allow the CMOS to discharge.
- Replace the CMOS battery back into its slot.
- Close the computer case and plug the computer back into the power source.
- Power on your computer and check if the monitor starts properly.
Clearing the CMOS resets the BIOS settings to their default values. This can fix any configuration issues that may be preventing the monitor from working.
Understanding And Using Pc Beep Codes For Diagnostics
Another advanced troubleshooting technique for a monitor not starting with the computer is to understand and use PC beep codes. Beep codes are a series of audible signals produced by the computer’s motherboard to indicate various hardware problems.
Here’s how you can use PC beep codes for diagnostics:
- Power on your computer and pay attention to the beeps it produces.
- Refer to your computer’s manual or the motherboard manufacturer’s website to understand the meaning of the beep codes.
- Identify the specific problem indicated by the beeps and take appropriate action to resolve it.
Beep codes can provide valuable information about hardware issues that may be causing the monitor not to start. By decoding the beep codes, you can diagnose and troubleshoot the problem effectively.
Software And Driver Conflicts
If your monitor is not starting with your computer, one possible reason could be a loose or damaged cable connection between the monitor and computer. To fix this, carefully check that all connectors are firmly attached and replace any worn or damaged cables.
Try using different cables to see if that resolves the issue.
Updating Or Rolling Back Graphics Drivers
To resolve software conflicts that may be causing your monitor not to start with your computer, you can start by updating or rolling back your graphics drivers. Outdated or incompatible graphics drivers can often cause issues with your monitor. Here’s how you can update or roll back your graphics drivers:- Open the Device Manager by pressing the Windows key + X and selecting Device Manager from the menu.
- In the Device Manager, expand the Display adapters category.
- Right-click on your graphics card and select Update driver.
- Choose the option to automatically search for updated driver software. Windows will search online for the latest driver and install it if found.
- If updating the driver doesn’t solve the issue, you can try rolling back the driver to a previous version. Right-click on your graphics card again, but this time select Properties.
- In the Properties window, navigate to the Driver tab and click on the Roll Back Driver button.
- Follow the on-screen instructions to complete the rollback process.
Resolving Software Conflicts With A Clean Boot Process
If updating or rolling back your graphics drivers didn’t resolve the issue, you can use the clean boot process to identify and resolve software conflicts. Sometimes, third-party programs or services can interfere with your monitor’s ability to start with your computer. Follow these steps to perform a clean boot:- Type “msconfig” in the Windows search bar and press Enter to open the System Configuration window.
- Navigate to the Services tab and check the box that says “Hide all Microsoft services”.
- Click on the “Disable all” button to disable all non-Microsoft services.
- Go to the Startup tab and click on “Open Task Manager”.
- In the Task Manager, disable all startup programs by right-clicking on each one and selecting “Disable”.
- Close the Task Manager and go back to the System Configuration window.
- Click on “OK” and restart your computer.
- After the restart, check if your monitor starts with your computer. If it does, it means that one of the disabled services or startup programs was causing the conflict.
- To identify the problematic program or service, enable them one by one and restart your computer after each enablement. When the issue reoccurs, you’ll know which program or service is causing the conflict.
- Once you’ve identified the culprit, you can either uninstall or disable it to prevent further conflicts.
When Hardware Replacement Is Necessary
When your computer monitor fails to start, it can be frustrating and disruptive. One of the common reasons for this issue is a hardware failure, specifically with the monitor or graphics card. In such cases, hardware replacement becomes necessary in order to resolve the problem effectively. In this section, we will discuss how to identify when the monitor or graphics card has failed and provide steps for safely replacing these PC components or the monitor itself.
Identifying When The Monitor Or Graphics Card Has Failed
When troubleshooting a monitor that is not starting with your computer, it is essential to first determine whether the issue lies with the monitor itself or the graphics card. Here are a few signs to look out for:
- No display: If your monitor remains blank or displays a black screen, it indicates a potential problem with either the monitor or the graphics card.
- Artifacts or distorted visuals: If you notice unusual artifacts or distorted visuals on your monitor, it could be a sign of a faulty graphics card.
- Intermittent display: Sometimes, the monitor might display visuals erratically or intermittently, indicating an issue with either the monitor or the graphics card.
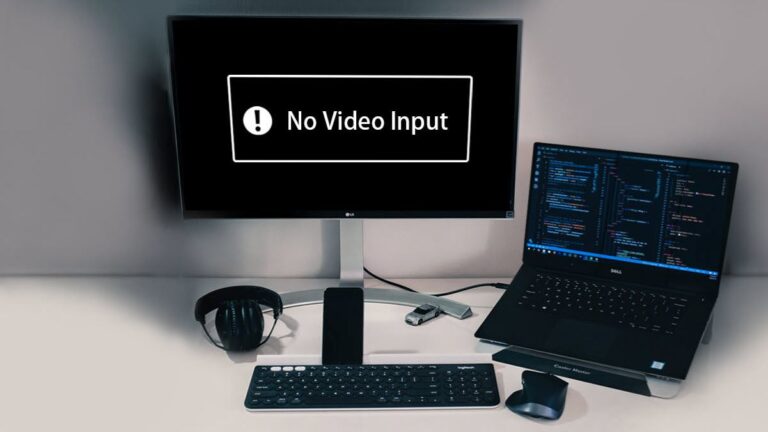
- No signal: If your monitor displays a “no signal” message even when the computer is turned on, it suggests a potential problem with the graphics card.
Steps For Safely Replacing Pc Components Or Monitor
If you have determined that either the monitor or the graphics card has failed, it’s time to consider replacing the faulty component. Follow these steps to ensure a safe replacement process:
- Power off and unplug the computer: Before starting the replacement process, make sure to shut down your computer and disconnect it from the power source. This precautionary step will prevent any electrical mishaps.
- Disconnect external peripherals: Disconnect any external peripherals connected to your computer, such as USB devices or additional monitors.
- Open the computer case: Depending on the type of computer you have, you may need to unscrew the case or remove panels to access the internal components.
- Identify the faulty component: Locate the monitor or graphics card within the computer. In some cases, they may be integrated into the motherboard.
- Disconnect and remove the faulty component: Carefully disconnect any cables connected to the failed component, such as video cables or power connectors. Securely remove the component from its slot or mounting bracket.
- Replace with a new component: Install the new monitor or graphics card into the appropriate slot or mounting bracket. Ensure it is seated correctly and securely fastened.
- Reconnect and secure cables: Connect any necessary cables to the new component, ensuring they are securely fastened. Pay attention to cable orientation to avoid any connection issues.
- Close the computer case: Once all connections have been made and components are secured, close the computer case and fasten any screws or panels that were removed earlier.
- Power on the computer: Plug the computer back in and turn it on. Check if the new monitor or graphics card is functioning properly. If not, double-check the connections and troubleshooting steps.
By following these steps, you can safely replace the faulty monitor or graphics card in your computer. Remember to handle the components with care and take necessary precautions to prevent any damage or electrical hazards.
Credit: www.avg.com
Frequently Asked Questions On Monitor Not Starting With Computer
Why Does My Monitor Not Turn On When I Start My Computer?
If your monitor isn’t turning on when you start your computer, it may be due to a loose or damaged cable connection. Check that all connectors are securely attached and replace any worn or damaged cables. Alternatively, try using a different cable or connecting the monitor to a different system to identify the cause.
Why Does My Computer Turn On But Nothing Goes To The Monitor?
If your computer turns on but nothing appears on the monitor, it could be due to a loose or damaged cable connection. Check that all connectors are securely attached and switch out any worn or damaged cables. If that doesn’t solve the issue, it could be a malfunctioning USB port or faulty hardware components.
Why Won’t My Monitor Work With My Pc?
The monitor may not be working with your PC due to a loose or damaged cable connection. Check all connectors and replace any worn or damaged cables. You can also try using a different cable or connecting the monitor to a different system to troubleshoot the issue.
Why Does My Pc Turn On But Not My Monitor And Keyboard?
Your PC may turn on but not your monitor and keyboard due to loose or damaged cable connections. Check that all connectors are securely attached and replace any worn or damaged cables. Other possible causes include faulty hardware components or incorrect settings in the BIOS.
Conclusion
To troubleshoot a monitor not starting with your computer, it is important to check for loose or damaged cable connections. Ensure all connectors are firmly attached and consider replacing any worn or damaged cables. You can also try forcing your monitor to wake up using keyboard shortcuts like Win+P or Ctrl+Alt+Del.
If the issue persists, it may be caused by faulty hardware components or incorrect BIOS settings. Try different solutions and seek professional assistance if needed to fix the problem and get your monitor working properly again.