Monitor Not Detecting HDMI Signal: Troubleshooting Tips
If your monitor is not detecting an HDMI signal from your laptop, try using a different HDMI cable to see if that solves the problem. Ensure that the cable is properly connected and check for any damage or fraying.
If the issue persists, you may need to replace the cable. Additionally, make sure that the HDMI port on your laptop is functioning properly.
Quick Checks For Hdmi Non-detection
When your monitor fails to detect an HDMI signal from your laptop, it can be frustrating and hinder your productivity. However, before you jump to conclusions and assume that your hardware is faulty, there are some quick checks you can perform to troubleshoot the issue. In this article, we will explore these checks in detail, helping you resolve the HDMI non-detection problem efficiently.
Ensure Hdmi Cable Is Securely Connected
To start, make sure that the HDMI cable connecting your laptop and monitor is securely plugged in. Sometimes, the cable may have become loose, resulting in the non-detection issue. Follow these steps:
- Locate the HDMI ports on your laptop and monitor.
- Check if the cable is fully inserted into both ports.
- If needed, gently push the cable into the ports until it fits snugly.
Inspect For Visible Damage On Hdmi Cable
If your HDMI cable is visibly damaged or shows signs of wear and tear, it can cause the non-detection problem. Here’s what you can do:
- Examine the entire length of the cable for any fraying, kinks, or physical damage.
- If you notice any damage, it is advisable to replace the cable with a new one.
Perform A Power Cycle On The Monitor And Laptop
A power cycle can help resolve temporary glitches that might be causing the HDMI non-detection. Follow these steps:
- Turn off both your laptop and monitor.
- Unplug the power cables from both devices.
- Wait for around 1 minute.
- Plug the power cables back in.
- Turn on your laptop first, and then the monitor.
Swap Out Hdmi Cables To Rule Out Cable Failure
In some cases, the HDMI cable itself may be faulty, causing the non-detection problem. By swapping out the cable, you can determine if the issue lies with the cable. Here’s what you need to do:
- Disconnect the HDMI cable from both your laptop and monitor.
- Replace it with a known working HDMI cable.
- Ensure the new cable is securely connected to both the laptop and monitor.
- Check if the non-detection issue persists.
By following these quick checks, you can identify and potentially resolve the HDMI non-detection problem between your laptop and monitor. Remember to double-check the connections, inspect the cable for damage, perform a power cycle, and swap out the HDMI cable if necessary. If the problem persists, it may indicate a deeper issue that requires further troubleshooting or professional assistance.
Diagnosing The Hdmi Port And Cable
If you’re experiencing the frustrating issue of your monitor not detecting an HDMI signal from your laptop, the problem could lie with either the HDMI port or the cable itself. In this section, we will explore the steps you can take to diagnose and fix these potential issues. By following these troubleshooting methods, you’ll be able to resolve the problem and get your laptop connected to your monitor with ease.
Testing With Alternate Hdmi Ports
If your laptop is not detecting HDMI signal on a specific port, it’s important to determine whether the issue is with the port itself or the cable. Start by testing the HDMI port with an alternate port on your laptop. If the alternate port works, it indicates that the previous port is faulty and should be replaced. This simple test can help you identify the root cause of the problem and take the necessary steps to fix it.
Utilizing Another Device To Test Hdmi Functionality
Another effective way to diagnose the issue is by using another device to test the HDMI functionality. Connect a different device, such as a gaming console or Blu-ray player, to the same HDMI port and see if it detects the signal. If the external device works properly with the HDMI connection, it suggests that the issue lies with your laptop’s HDMI output. This would require troubleshooting or possibly repairing your laptop’s HDMI port.
How To Examine Your Hdmi Cable For Faults
To ensure that the HDMI cable is not causing the issue, carefully examine it for any visible faults. Look for any signs of damage, such as frayed wires or broken connectors. If you notice any damage, it’s crucial to replace the cable with a new one. Even if the cable appears to be in good condition, it’s worth trying a different HDMI cable as a troubleshooting step.
Additionally, check that the HDMI cable is securely connected to both your laptop and the monitor. Sometimes, loose connections can prevent the signal from being detected. Ensure that the cable is firmly plugged into both devices to establish a reliable connection.
By systematically testing the HDMI ports and cable, you can identify and resolve the issue that’s causing your monitor to not detect the HDMI signal from your laptop. Whether it’s a faulty port or a damaged cable, following these troubleshooting methods will help you fix the problem and get your laptop connected to your monitor seamlessly.
Advanced Troubleshooting Techniques
Experiencing a problem where your monitor is not detecting an HDMI signal from your laptop? Try troubleshooting by checking the HDMI cable for any damage or looseness and consider using a different cable or port. It’s important to ensure a secure and functioning connection to resolve this issue.
If you’re experiencing issues with your monitor not detecting the HDMI signal from your laptop, there are a few advanced troubleshooting techniques you can try to resolve the problem. These techniques involve updating or rolling back graphics drivers, adjusting display settings on your laptop, and checking for hardware conflicts in Device Manager.
Updating Or Rolling Back Graphics Drivers
One possible reason for your monitor not detecting the HDMI signal could be outdated or incompatible graphics drivers on your laptop. To update or roll back your graphics drivers, follow these steps:
- Open the Start menu and type “Device Manager” in the search bar. Click on “Device Manager” to open it.
- In the Device Manager window, expand the “Display adapters” category to see the graphics drivers on your laptop.
- Right-click on the graphics driver and select “Update driver” to check for available updates. If updates are found, follow the on-screen instructions to install them.
- If updating the driver doesn’t resolve the issue, you can also try rolling back to the previous version. Right-click on the graphics driver and select “Properties.” In the Properties window, go to the “Driver” tab and click on “Roll Back Driver” if available.
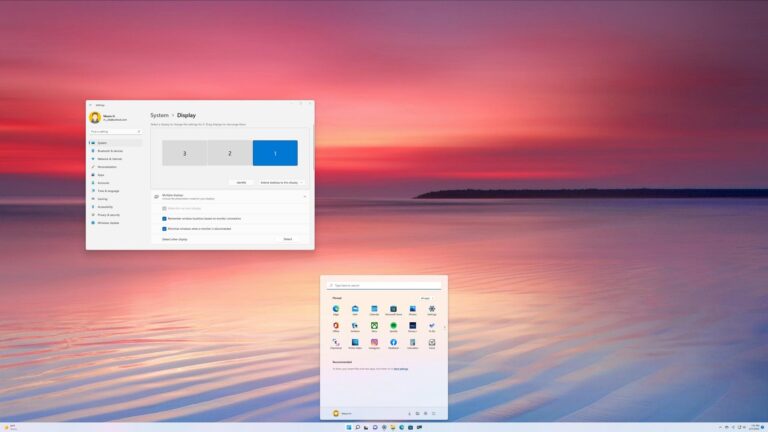
Adjusting Display Settings On Your Laptop
In some cases, the display settings on your laptop might be causing the monitor not to detect the HDMI signal. To adjust the display settings, follow these steps:
- Right-click on the desktop and select “Display settings” from the context menu.
- In the Display settings window, scroll down and click on “Advanced display settings.”
- Make sure that the resolution and refresh rate settings are appropriate for your monitor.
- If necessary, click on “Display adapter properties” to open the Graphics Properties window. Here, you can further customize the display settings.
- Click “Apply” and then “OK” to save the changes.
Checking For Hardware Conflicts In Device Manager
Hardware conflicts in Device Manager can also prevent your monitor from detecting the HDMI signal. To check for hardware conflicts, follow these steps:
- Open Device Manager by searching for it in the Start menu.
- In Device Manager, expand the categories and look for any devices with a yellow exclamation mark or a red “X” symbol.
- If you find any problematic devices, right-click on them and select “Update driver” or “Uninstall device” to troubleshoot the issue.
By following these advanced troubleshooting techniques, you can increase the chances of resolving the issue of your monitor not detecting the HDMI signal from your laptop. Remember to check for updates, adjust display settings, and resolve any hardware conflicts. If the problem persists, it may be worth seeking professional assistance.
Monitor Settings And Firmware Checks
If your monitor is not detecting an HDMI signal from your laptop, try troubleshooting the issue by checking the HDMI cable for any damage or loose connections. You can also try using a different HDMI cable or connecting to a different HDMI port on your monitor.
Verify Monitor Input Source Selection
One of the reasons why your monitor may not be detecting the HDMI signal from your laptop is due to incorrect input source selection. It is important to ensure that the monitor is set to the correct input source so that it can receive the signal from your laptop.
To verify the input source selection on your monitor, follow the steps below:
- Check the monitor’s physical buttons or on-screen display menu for an option to select the input source.
- Press the corresponding button or navigate to the input source option using the monitor’s menu and select HDMI as the input source.
- Once you have selected HDMI as the input source, check if the monitor detects the HDMI signal from your laptop.
Firmware Updates For The Monitor: Necessity And Process
Another factor that can affect the detection of HDMI signals is outdated firmware on the monitor. Firmware updates are essential as they often include bug fixes and improvements that can help address compatibility issues.
To update the firmware for your monitor, follow these steps:
- Visit the manufacturer’s website and navigate to the support or downloads section.
- Search for your specific monitor model and look for firmware updates specifically for your model.
- Download the latest firmware update file for your monitor.
- Once the download is complete, extract the files if necessary.
- Connect your laptop to the monitor using a different method, such as VGA or DisplayPort, if available.
- Run the firmware update file and follow the on-screen instructions to update the firmware of your monitor.
- After the firmware update is complete, reconnect your laptop to the monitor using the HDMI cable and check if the HDMI signal is now detected.
It’s important to regularly check for firmware updates for your monitor to ensure optimal performance and compatibility with your devices.
Operating System And Driver Updates
If your monitor is not detecting an HDMI signal from your laptop, try checking the HDMI cable for any damage or loose connections. Consider using a different cable or port to see if the issue is resolved. Reconnecting the HDMI cable or replacing it if it is damaged may help resolve the problem.
Ensuring Your Os Is Up-to-date
To troubleshoot the issue of your monitor not detecting an HDMI signal from your laptop, it is essential to make sure that your operating system (OS) is up-to-date. Operating system updates often include bug fixes, stability improvements, and compatibility enhancements that can potentially resolve the HDMI signal problem. Here’s how you can check for and install updates: 1. Windows OS: Click on the Start menu, select “Settings,” and then click on “Update & Security.” Under the “Windows Update” section, click on “Check for updates.” If updates are available, click on “Download and install.” Once the update process is complete, restart your laptop and check if the HDMI signal is now being detected by your monitor. 2. Mac OS: Click on the Apple menu, select “System Preferences,” and then click on “Software Update.” If updates are available, click on “Update Now.” After the update installation is finished, restart your laptop and test if the HDMI connection is now working.The Importance Of Timely Driver Updates For Gpu
Another crucial aspect of resolving the monitor not detecting HDMI signal issue is updating the graphics card driver, especially the GPU driver responsible for handling video output. Outdated or faulty drivers can hinder the proper detection of HDMI signals. Let’s look at how you can update your GPU driver: 1. Windows OS: Right-click on the Start menu and select “Device Manager.” Expand the “Display Adapters” category, right-click on your GPU, and choose “Update driver.” Select “Search automatically for updated driver software” and follow the on-screen instructions to complete the update process. Remember to restart your laptop afterward. 2. Mac OS: Open the Apple menu, click on “About This Mac,” and then choose “Software Update.” If any graphics driver updates are available, click on “Update” next to the GPU driver. After the update is finished, restart your laptop to apply the changes.Automating Updates For Future Prevention
To prevent encountering HDMI signal issues in the future, it is wise to automate the update process for both your operating system and graphics card driver. This ensures that you stay up-to-date with the latest improvements and fixes. Here’s how you can automate updates: 1. Windows OS: Go to the “Update & Security” settings as mentioned earlier. Under the “Windows Update” section, click on “Advanced options.” Toggle on the “Automatically download updates” and “Automatically install updates” options. This way, your OS will download and install updates without requiring manual intervention. 2. Mac OS: Open the “System Preferences” and select “Software Update.” Click on “Advanced,” and then check the box next to “Automatically keep my Mac up to date.” Your Mac will then automatically download and install updates as they become available. By ensuring that your operating system is up-to-date and your GPU driver is regularly updated, you increase the likelihood of resolving the HDMI signal detection issue. Additionally, automating updates saves you time and effort, keeping your laptop optimized for its best performance.
Credit: helpdeskgeek.com
What To Do When Settings Don’t Help
If you’ve tried adjusting the settings on your monitor and laptop but are still experiencing issues with your HDMI signal, there are a few additional steps you can take to troubleshoot the problem. Below, we will discuss three potential solutions that may help resolve the issue:
Using Windows Troubleshoot Feature For Display Issues
If you’re using a Windows operating system, you can utilize the built-in Troubleshoot feature to identify and resolve display-related problems. Here’s how:
- Right-click on the Windows Start button and select “Settings.”
- In the Settings menu, click on “System” and then select “Display” from the left-hand sidebar.
- Scroll down and click on the “Advanced display settings” link.
- Under the “Related settings” section, click on the “Display adapter properties” option.
- In the new window that opens, navigate to the “Troubleshoot” tab.
- Click on the “Troubleshoot” button and follow the on-screen instructions to resolve any detected display issues.
Resetting Graphics Adapter Through Bios
If the Troubleshoot feature did not resolve the problem, you can try resetting the graphics adapter through the BIOS (Basic Input/Output System) settings. Here’s how:
- Restart your computer and continuously press the key to access the BIOS settings (this key varies depending on your computer manufacturer).
- Navigate to the “Advanced” or “Advanced Settings” section using the arrow keys and press Enter.
- Look for an option related to the graphics adapter or display settings.
- Select the option to reset the graphics adapter or restore default settings.
- Save the changes and exit the BIOS settings, allowing your computer to restart.
Contacting Manufacturer Support Or Considering Professional Help
If both of the previous solutions have not resolved the issue, it may be necessary to contact your laptop or monitor manufacturer’s support team for further assistance. They will be able to provide specific troubleshooting steps or recommend professional help if needed.
Remember, if you are not comfortable performing these steps yourself, it is always recommended to seek the help of a qualified professional to avoid potentially causing further damage to your equipment.
Frequently Asked Questions On Monitor Not Detecting Hdmi Signal From Laptop
Why Is My Laptop Not Connecting To My Monitor Via Hdmi?
If your laptop is not connecting to your monitor via HDMI, it could be due to a faulty cable. Try using a different cable to see if that resolves the issue. If the cable is damaged, it will need to be replaced.
Why Does My Monitor Say No Signal When Hdmi Is Plugged In?
If your monitor says “no signal” when HDMI is plugged in, it could be due to a faulty cable. Try using a different HDMI cable to see if that resolves the issue. If the cable is damaged, you’ll need to replace it.
Why Is My Laptop Screen Not Showing On Hdmi?
If your laptop screen is not showing on HDMI, check for a faulty cable. Try using a different HDMI cable or reconnect the existing cable securely. If the issue persists, try connecting the laptop to a different HDMI port on your TV.
Why Is There No Hdmi Signal From My Device Monitor Laptop?
If your device monitor laptop is not displaying an HDMI signal, try using a different cable to see if it’s faulty. Check the cable for any damage and replace if necessary. Ensure the HDMI cable is properly connected to both your laptop and monitor.
Restart both devices and try different HDMI ports on your TV or monitor.
Conclusion
To troubleshoot the issue of your monitor not detecting the HDMI signal from your laptop, start by checking the HDMI cable you’re using. Unplug it and try switching to another cable to see if that resolves the problem. If the cable is damaged or frayed, it will need to be replaced.
Additionally, ensure that the cable is correctly inserted into both your laptop’s HDMI port and the monitor’s input. By following these steps, you can resolve the issue and regain a clear HDMI signal connection between your laptop and monitor.