Monitor Not Detected by Docking Station: Troubleshooting Tips
To fix a monitor not being detected by a docking station, try disconnecting and reconnecting the docking station to the laptop. Also, check for any damaged or bent pins on the video cable, and securely reconnect the cable to both the monitor and docking station.
Additionally, ensure that the video cable is properly connected to both the monitor and docking station. It is common for loose cables or incorrect connection configurations to cause display issues, so make sure everything is connected correctly.
Initial Checks For Monitor And Dock
To troubleshoot the issue of a monitor not being detected by a docking station, try disconnecting and reconnecting the docking station and video cable, checking for damaged pins. Ensure the video cable is securely connected to both the monitor and docking station.
Updating video card drivers and verifying Windows detection may also help resolve the problem.
tivity port on the docking station. Ensure that the other end of the cable is securely connected to the monitor’s corresponding input port. If your monitor uses HDMI or DisplayPort, connect the cable accordingly. Confirm monitor power and indicator lights To begin troubleshooting the issue of a monitor not being detected by the docking station, the first step is to check if the monitor is receiving power and if there are any indicator lights turned on. Often, a monitor may not be detected due to power-related issues. 1. Make sure that the monitor’s power cable is securely connected to both the monitor and a power source. Check if the power indicator light on the monitor is turned on or blinking. 2. If the monitor has multiple power inputs (such as from a power brick), ensure that the correct power input is being used and that it is properly connected. 3. If the monitor has an external power button, verify that it is turned on. Sometimes, monitors have power-saving modes or may require manual power activation. Check connection integrity and cable health The next step is to check the connection between the monitor and the docking station, as well as the health of the video cable being used. 1. Disconnect both ends of the video cable (HDMI, DisplayPort, etc.) that connects the monitor to the docking station. Inspect the connectors for any signs of damage or bent pins. If any damage is found, consider replacing the cable. 2. Once the cable is found to be in good condition, securely reconnect it to both the monitor and the docking station. Ensure that it is inserted fully and firmly. 3. Verify that the cable is connected to the correct video input ports on both the monitor and the docking station. Some monitors have multiple input options, so double-check that the correct input source is selected. Verify correct input selection on the monitor It is also important to ensure that the monitor is set to the correct input source, as this can also cause it not to be detected by the docking station. 1. On the monitor’s physical buttons or menu settings, navigate to the input source selection options. 2. Check if the input source selected matches the video cable connected to the docking station. For example, if using HDMI, make sure that the monitor is set to the HDMI input. 3. If the monitor has multiple input options, cycle through them to see if the desired input source is detected. By performing these initial checks for the monitor and dock, you can troubleshoot and rule out any simple issues that may be causing the monitor not to be detected by the docking station. These steps ensure that both the power connection and the cable connection are secure, and that the monitor is set to the correct input source.Confirm Docking Station Power And Status
When your monitor is not being detected by the docking station, it’s essential to troubleshoot the power and status of the docking station. This step is crucial because any issues with the power supply or indicator lights can cause connectivity problems between the docking station and the monitor.
Inspect Station Power Supply And Indicator Lights
Start by inspecting the power supply of the docking station. Ensure that the power cord is securely connected and plugged into a working power outlet. Check for any damages or frayed wires in the power cord. If you notice any issues, consider replacing the power cord to eliminate any potential power supply problems.
| Indicator Lights | Status |
|---|---|
| Power Indicator Light | Check if the power indicator light on the docking station is lit up. If it’s not illuminated, it indicates a power issue. Try unplugging the power cord from the docking station for a few seconds, then plug it back in. If the power indicator light still doesn’t turn on, you may need to contact technical support or consider replacing the docking station. |
| Connectivity Indicator Lights | Inspect the connectivity indicator lights on the docking station. These lights usually indicate whether the docking station is connected to the laptop and the monitor. If any of these lights are not lit up or flickering, it suggests a connection problem. Try disconnecting and reconnecting the docking station to the laptop to ensure a secure connection. |
Restart Docking Station And Monitor Sequence
Another step to consider is restarting the docking station and monitor sequence. This process helps to refresh the connection and resolve any temporary glitches.
- Power off the laptop, docking station, and monitor.
- Unplug the power cord from the docking station and monitor.
- Wait for a few minutes to allow all components to fully power down.
- Plug the power cord back into the docking station and monitor.
- Power on the docking station, followed by the monitor, and finally, the laptop.
- Check if the monitor is now being detected by the docking station.
Monitor Not Detected: Driver And Software Review
When you encounter the issue of your monitor not being detected by the docking station, it is crucial to review the drivers and software associated with both the docking station and the monitor. In this section, we will explore the necessary steps to troubleshoot and resolve this issue.
Update Docking Station Firmware And Drivers
To ensure optimal compatibility and functionality, it is essential to update the firmware and drivers of your docking station. Outdated firmware or drivers can cause communication issues between the docking station and the monitor, resulting in the monitor not being detected.
To update the docking station firmware and drivers:
- Visit the manufacturer’s website and navigate to the support or downloads section.
- Locate the model of your docking station and download the latest firmware update.
- Install the firmware update following the provided instructions.
- Next, download the latest drivers for your docking station.
- Install the drivers, ensuring that you follow the installation instructions precisely.
Review Monitor-related Software (graphics Drivers, Utilities)
In addition to updating the docking station firmware and drivers, it is essential to review the software associated with your monitor. Graphics drivers and utilities play a crucial role in enabling the detection and display of the monitor.
- Visit the manufacturer’s website and navigate to the support or downloads section.
- Find the model of your monitor and locate the graphics drivers.
- Download the latest graphics drivers specific to your monitor.
- Follow the provided instructions to install the graphics drivers correctly.
- Additionally, check if there are any monitor utility programs available for download.
- Install the necessary utility programs to optimize the monitor’s performance.
Reinstall Or Roll Back Drivers If Necessary
If updating the docking station and monitor-related software does not resolve the issue, it may be necessary to reinstall or roll back the drivers. Sometimes, driver conflicts or compatibility issues can prevent the proper detection of the monitor.
- Open the Device Manager on your computer.
- Expand the “Display adapters” category.
- Right-click on the display adapter associated with your docking station.
- Select the “Uninstall device” option or “Roll Back Driver” option if available.
- Follow the instructions provided to uninstall or roll back the driver.
- Once completed, restart your computer.
- Windows will automatically reinstall the driver or allow you to manually install the previous version.
By following these steps to update the docking station firmware and drivers, reviewing the monitor-related software, and reinstalling or rolling back drivers if necessary, you can resolve the issue of your monitor not being detected by the docking station. Ensure to follow the manufacturer’s instructions precisely and test the monitor’s detection after each step to track the progress of the troubleshooting process.
Docking Station Configuration And Compatibility
To troubleshoot a monitor not being detected by a docking station, try disconnecting and reconnecting the docking station to the laptop. Check for any damaged or bent pins on both ends of the video cable and securely reconnect it to the monitor and docking station.
Ensure that the video cable is properly connected to both the monitor and docking station.
Adjust Settings In The Operating System Display Panel
If your monitor is not being detected by the docking station, one possible solution is to adjust the settings in the operating system display panel. Here’s how:
- Right-click on the desktop and select “Display settings” from the context menu.
- In the Display settings window, scroll down to the “Multiple displays” section.
- Click on the drop-down menu under “Multiple displays” and select the desired display mode. You can choose to extend the display, duplicate the display, or show only on one display.
- Click on “Apply” to save the changes.
- If the monitor is still not detected, click on “Detect” to force Windows to search for connected displays.
Ensure Compatibility With Laptop Model And Operating System
Another important factor to consider when troubleshooting a monitor not being detected by the docking station is compatibility. Follow these steps to ensure compatibility:
- Check the compatibility of your docking station with your laptop model. Refer to the manufacturer’s website for information on compatible models.
- Ensure that your laptop’s operating system is supported by the docking station. Again, check the manufacturer’s website for compatibility information.
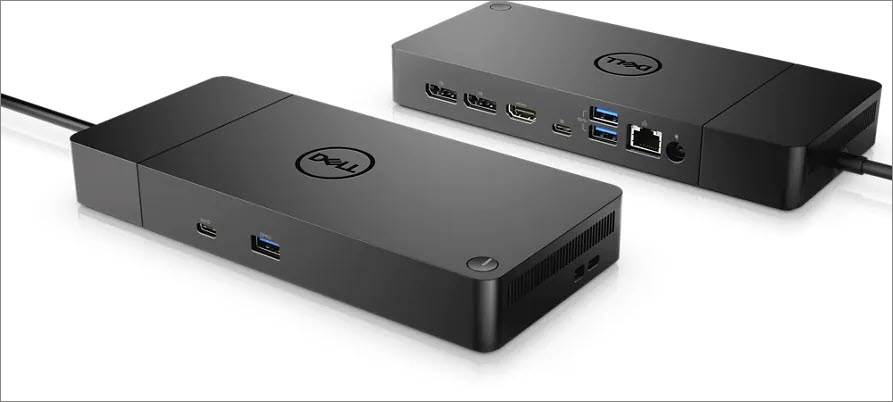
- Verify that the docking station has the necessary ports to connect your monitor. For example, if your monitor uses HDMI, ensure that the docking station has an HDMI port.
- If possible, try using a different docking station to see if the issue persists. This can help determine if the problem lies with the docking station or with the laptop.
When All Else Fails: External Solutions
If your monitor is not being detected by your docking station, try disconnecting and reconnecting the docking station to your laptop. Check the video cable for any damage or bent pins, and securely reconnect it to both the monitor and docking station.
Ensure that the video cable is properly connected to both the monitor and docking station.
When you’ve exhausted all the basic troubleshooting steps and your monitor is still not being detected by your docking station, it may be time to explore external solutions. These solutions involve considering adapter alternatives for connections and checking for potential hardware replacements or upgrades.
Consider Adapter Alternatives For Connections
If your monitor is not being detected by your docking station, one possible solution is to consider adapter alternatives for your connections. Sometimes, compatibility issues between devices can prevent a proper connection. For example, if you are using a DisplayPort cable but your docking station only supports HDMI, you may need an adapter to ensure a proper connection. Similarly, if you are using an older VGA monitor, you may need a VGA to HDMI adapter to connect it to your docking station.
Check For Potential Hardware Replacements Or Upgrades
In some cases, the issue may lie with the hardware itself. If the docking station is not providing enough power to the monitor or if the port on the docking station is faulty, you may need to consider replacing or upgrading your hardware. Start by checking if there are any firmware updates available for your docking station, as this can sometimes resolve compatibility issues. If all else fails, you may need to invest in a new docking station that is specifically designed to work with your monitor.
Remember, it’s important to troubleshoot thoroughly before resorting to external solutions. Ensure that all cables are properly connected, check for any damage or loose connections, and verify that your drivers are up to date.

Credit: plugable.com
Frequently Asked Questions For Monitor Not Detected By Docking Station
Why Won’t My Docking Station Recognize My Monitors?
Ensure proper connection of the docking station to your laptop and the monitor. Check for damaged or bent pins on the video cable and reconnect securely. Verify if the video cable is connected properly to the docking station and the monitor.
Update your video card drivers and check if the monitor is being detected by Windows.
How Do I Get My Monitor To Work With My Docking Station?
To get your monitor to work with your docking station, try the following steps: 1. Disconnect and reconnect the docking station to your laptop. 2. Check for damaged or bent pins on both ends of the video cable. 3. Securely reconnect the cable to the monitor and docking station.
4. Ensure the video cable (HDMI, or DisplayPort) is properly connected to the monitor and docking station. 5. Make sure your video card drivers are up to date and check if the monitor is being detected by Windows. Following these steps should help resolve any issues with your monitor not working with your docking station.
How Do I Get My Computer To Recognize My Docking Station?
To get your computer to recognize your docking station, try these steps: 1. Disconnect and reconnect the docking station to your laptop. 2. Check for damaged or bent pins on both ends of the video cable. 3. Make sure the video cable is securely connected to both the monitor and the docking station.
4. If using HDMI or DisplayPort, ensure the video cable is properly connected. 5. Check if your video card drivers are up to date by going to Device Manager or the manufacturer’s website.
Why Aren’t My Monitors Being Detected?
To troubleshoot the issue of monitors not being detected, first disconnect and reconnect the docking station and video cable. Check for any damaged or bent pins. Ensure the video cable is connected properly to the docking station and monitor. Power down the dock and reconnect.
Update video card drivers and check if the monitor is being detected by Windows. Verify BIOS and driver installation.
Conclusion
Ensure that the monitor is securely connected to the docking station and that the video cable is properly plugged in. Check for any damaged or bent pins on the video cable. If the issue persists, try disconnecting and reconnecting the docking station to the laptop.
Additionally, make sure your video card drivers are up to date. These steps should help resolve the problem of the monitor not being detected by the docking station.