Macbook Not Connecting to Monitor Usb C: Troubleshooting Solutions
MacBook not connecting to monitor USB C? Follow these steps to troubleshoot the issue and get your connection working smoothly again.
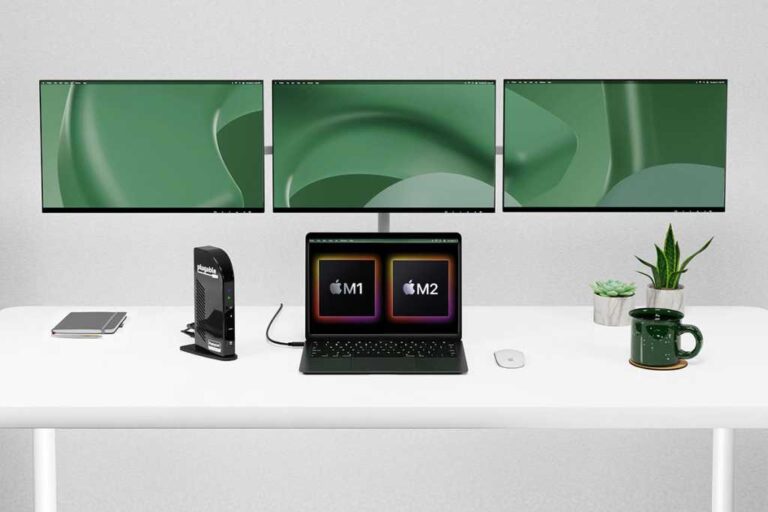
Integrating your MacBook with a monitor through USB C offers an excellent way to enhance your productivity, whether you need a larger display or multiple screens for multitasking. However, occasionally you may encounter issues where your MacBook fails to connect to the monitor through USB C.
This can be frustrating, but don’t worry, as there are several simple troubleshooting steps you can follow to resolve the problem. By ensuring you have the correct cables and adapters, updating your MacBook’s software, and adjusting your display settings, you can easily connect your MacBook to the USB C monitor and enjoy an extended or mirrored display.
Macbook To Monitor Connection Issues
Connecting your Macbook to a monitor using the USB-C port can greatly enhance your productivity and provide a larger screen for better visibility. However, there are times when this connection becomes problematic, leaving you frustrated and unable to benefit from the dual-screen experience. In this article, we’ll explore some common scenarios where your Macbook fails to connect to a monitor and offer practical solutions to help you identify whether it’s a hardware or software issue.
Common Scenarios Where Macbook Fails To Connect
If you encounter difficulty establishing a connection between your Macbook and a monitor via the USB-C port, you’re certainly not alone. Here are a few common scenarios that users often experience:
- No signal detected: You plug in the USB-C cable, but your monitor displays a “No signal” message, indicating that it is not receiving any input from your Macbook.
- Blank screen: The monitor appears to be connected, but the screen remains blank, with no image or display visible.
- Inconsistent connection: The Macbook and monitor establish a connection initially, but it is frequently interrupted or becomes unstable, causing the display to flicker or the connection to drop altogether.
Identifying Whether It’s A Hardware Or Software Problem
When faced with connection issues, it’s important to determine whether the problem lies with the hardware or software. Here’s how you can differentiate between the two:
Hardware:
If the connection issue is hardware-related, it means that there may be a problem with the physical components involved in the connection process. To identify a hardware issue, you can follow these steps:
- Try connecting your Macbook to a different monitor using the same USB-C cable. If the issue persists, it suggests a problem with the Macbook’s USB-C port.
- Attempt to connect another device to the problematic monitor using the same USB-C cable. If it works without any difficulties, it may indicate that the problem lies with your Macbook rather than the monitor.
Software:
Software issues are often easier to troubleshoot and resolve. To determine whether the connection problem is software-related, you can take these steps:
- Check for software updates on your Macbook and ensure that both your operating system and monitor firmware are up to date.
- Try connecting your Macbook to a different monitor or use a different USB-C port on your current monitor to rule out any potential compatibility issues.
- Restart your Macbook and perform a fresh connection to see if it resolves the problem. Sometimes, a simple restart can fix temporary glitches.
By following these steps and identifying whether your Macbook to monitor connection problem is hardware or software-related, you can better approach finding a solution and enjoy a seamless dual-screen experience once again.
Hardware Checks First
Troubleshoot MacBook connectivity issues with monitors through USB-C by performing hardware checks first. Identify potential problems and find solutions for your Macbook not connecting to a USB-C monitor.
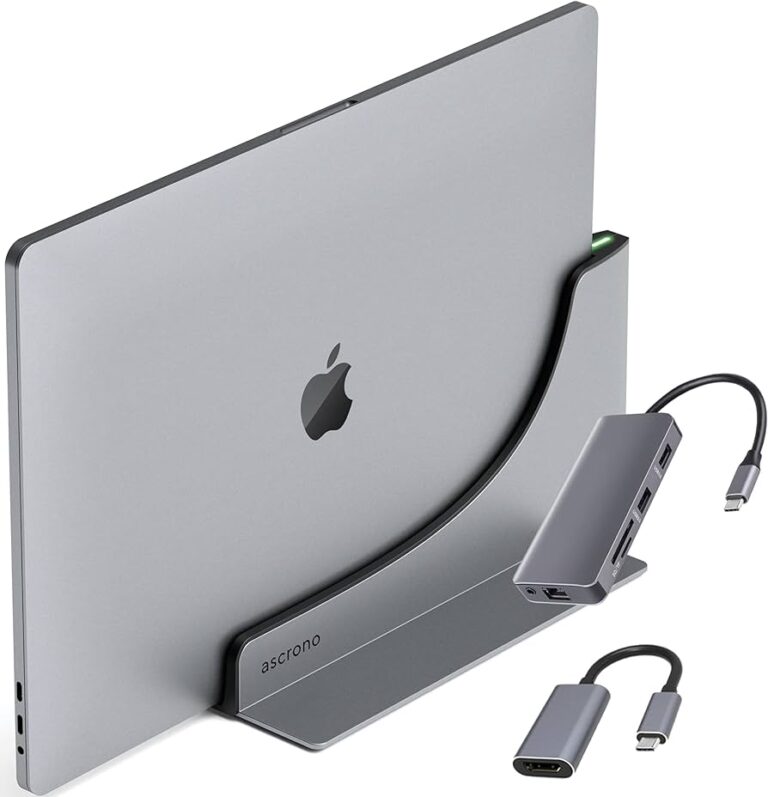
There can be multiple reasons why your Macbook is not connecting to a monitor via USB-C. Before jumping into software troubleshooting, it’s crucial to perform a series of hardware checks. By inspecting the USB-C port and cable, as well as testing the monitor and peripherals, you can identify any potential issues that may be causing the connection problem.
Inspect The Usb-c Port And Cable
An improperly inserted or damaged USB-C cable or port can be the root cause of your connectivity issues. To ensure everything is in order, follow these hardware checks:
- Physically examine the USB-C cable for any visible signs of damage, such as fraying or bent pins. Replace the cable if necessary.
- Check the USB-C port on your Macbook for any debris, dirt, or bent pins. If you notice any obstructions, gently clean the port using compressed air or a soft brush.
- Try connecting the USB-C cable to a different port on your Macbook, if available. This can help determine if the issue lies with a specific port or the cable itself.
- If possible, try using a different USB-C cable altogether. Incompatibility between the cable and your monitor can sometimes cause connection problems.
Testing The Monitor And Peripherals
After inspecting the USB-C port and cable, it’s essential to check if the monitor and connected peripherals are functioning properly. Here’s how:
- Connect the monitor to another device with a USB-C port, such as another computer or smartphone, to see if it establishes a connection. This will help determine if the issue lies with the monitor.
- Ensure that the monitor is powered on and set to the correct input source for the USB-C connection.
- If you’re using any adapters or hubs between your Macbook and the monitor, remove them temporarily and connect the USB-C cable directly to the monitor. This will help identify if the issue is related to the adapters or hubs being used.
- Try connecting a different peripheral device, such as a USB drive or external hard drive, to the USB-C port of your Macbook. If the peripheral device is not recognized, it might indicate a problem with the Macbook’s USB-C port.
By closely examining the USB-C port and cable, as well as testing the monitor and peripherals, you can pinpoint potential hardware issues responsible for the Macbook not connecting to the monitor via USB-C. Once you have completed these hardware checks, you can move on to software troubleshooting if the problem persists.
Software Troubleshooting Steps
If you’re experiencing connectivity issues with your MacBook not connecting to a USB-C monitor, software troubleshooting steps can often help resolve the problem. In this section, we’ll go over two important steps you can take to troubleshoot and potentially fix the issue.
Os And Driver Compatibility For Usb-c
One common reason why your MacBook might not be able to connect to a USB-C monitor is due to compatibility issues with the operating system (OS) and driver software. Before proceeding with any other troubleshooting steps, it’s essential to ensure that both your MacBook’s OS and the monitor’s driver software are up to date and compatible with each other.
- Click on the Apple menu located at the top left corner of your screen.
- Select “About This Mac” from the drop-down menu.
- A new window will appear, displaying your MacBook’s OS version.
If you discover that your OS is outdated, navigate to the Apple menu again and select “Software Update” to install the latest updates.
Similarly, for the monitor, it’s advisable to visit the manufacturer’s website and download the latest driver software specifically designed for your monitor model and the OS you’re using. Installing the latest driver can improve compatibility and increase the chances of successful connectivity.
Resetting Macbook’s System Management Controller (smc)
If compatibility is not the issue, resetting the System Management Controller (SMC) of your MacBook can help resolve various hardware-related problems, including USB-C connectivity issues. It’s a simple process that can be done by following these steps:
- Shut down your MacBook.
- Connect the power adapter to your MacBook.
- Press and hold the Shift + Control + Option keys along with the Power button for around 10 seconds.
- Release all the keys and the power button simultaneously.
- Turn on your MacBook by pressing the Power button.
After resetting the SMC, try connecting your MacBook to the USB-C monitor again and check if it resolves the issue.
By ensuring OS and driver compatibility and resetting the SMC, you can increase the likelihood of successfully connecting your MacBook to a USB-C monitor.
Macbook Not Connecting: Software Solutions
If you’re facing the frustrating issue of your Macbook not connecting to your USB-C monitor, don’t worry – there are software solutions that can help resolve this problem. In this article, we’ll explore two key software fixes that can potentially get your Macbook and monitor to establish a successful connection.
Updating Macos For Optimal Hardware Interaction
One of the simplest and most effective solutions to address the issue of a Macbook not connecting to a USB-C monitor is by updating your macOS to ensure optimal hardware interaction. Regular system updates are crucial as they often include fixes for compatibility issues between the operating system and external devices. Here are some steps you can take to update your macOS:
- Check for available updates: Go to the Apple menu and select “System Preferences.”
- Select “Software Update”: This will allow your Macbook to search for any available updates.
- Download and install the updates: If any updates are found, click on “Update Now” to initiate the download and installation process.
- Restart your Macbook: Once the updates are successfully installed, restart your Macbook to apply the changes.
By keeping your macOS up to date, you increase the likelihood of resolving any compatibility issues that may be causing the connection problem with your USB-C monitor. Now, let’s move on to the next software solution.
Checking For Monitor-specific Driver Updates
Another potential solution to your Macbook not connecting to a USB-C monitor is by checking for and installing any monitor-specific driver updates. Sometimes, monitors require specific drivers to communicate seamlessly with your Macbook. To check for these updates, follow these steps:
- Identify your monitor: Find the manufacturer’s name and model number of your USB-C monitor.
- Visit the manufacturer’s website: Go to the official website of the monitor’s manufacturer.
- Search for driver updates: Look for a “Support” or “Downloads” section on the website and search for driver updates using your monitor’s model number.
- Download and install the driver updates: If any updates are available, download them onto your Macbook and follow the manufacturer’s instructions to install them successfully.
By ensuring that you have the latest monitor-specific drivers installed, you increase the chances of establishing a smooth connection between your Macbook and USB-C monitor. Sometimes, these updates may include bug fixes or enhancements that will specifically address connection issues.
Remember, these software solutions can help resolve common issues with a Macbook not connecting to a USB-C monitor. By updating your macOS and checking for monitor-specific driver updates, you can significantly improve the chances of establishing a successful and consistent connection between your devices.
Optimizing Macbook Settings
Having trouble connecting your Macbook to an external monitor via USB-C? Don’t worry, we’ve got you covered. In this article, we’ll explore the various ways you can optimize your Macbook settings to ensure a seamless connection and a stunning display on your external monitor.
Configuring Display Settings For External Monitors
Configuring the display settings on your Macbook is essential for a successful connection to an external monitor. By adjusting these settings, you can optimize the visual output and ensure compatibility with your monitor’s capabilities.
Adjusting Resolution And Refresh Rate
The resolution and refresh rate of your Macbook’s external display can greatly impact the overall viewing experience. To optimize these settings, follow these steps:
- Open System Preferences by clicking on the Apple menu in the top-left corner of your screen.
- Select the Displays option.
- Click on the Arrangement tab.
- Check the “Mirror Displays” option if you want the external display to show the same content as your Macbook’s built-in display.
- Choose the “Optimize for” option if available, or manually adjust the resolution and refresh rate to match your external monitor’s specifications.
- Click Apply to save the changes.
By following these steps, you can ensure that your Macbook’s display output is in harmony with your external monitor, resulting in a sharper and smoother visual experience.
Optimizing your Macbook settings for connecting to an external monitor may seem like a daunting task at first, but with the right adjustments and configurations, you’ll be able to enjoy a seamless and visually stunning display. Take the time to fine-tune the resolution and refresh rate settings, and you’ll be rewarded with an enhanced viewing experience that truly showcases the power of your Macbook.
Credit: osxdaily.com
Enhanced Connection Tips
Get effective tips for resolving the issue of your Macbook not connecting to a USB C monitor. Find practical solutions to enhance the connection between your devices and enjoy seamless performance.
Having trouble with your MacBook not connecting to a monitor via USB-C? Don’t worry, we’ve got you covered with some enhanced connection tips to get you back up and running.
Third-party Utilities For Monitor Connections
If you’re experiencing difficulty connecting your MacBook to a monitor, utilizing third-party utilities can be a helpful solution. These utilities provide additional functionalities and customization options that can enhance your monitor connection experience. Consider the following third-party utilities for smoother connections:
- DisplayLink: With DisplayLink software, you can easily connect multiple monitors to your MacBook using a single USB-C cable. This utility allows for seamless connectivity, extended desktop options, and supports both Mac and Windows operating systems. It’s a reliable solution for those seeking flexibility and advanced features.
- FlexiHub: This software enables you to share USB devices over a network, making it an ideal choice for situations where your MacBook is unable to directly connect to the monitor. By using FlexiHub, you can access the monitor through another connected device, ensuring a stable and consistent connection.
- SwitchResX: If you’re encountering resolution or display issues when connecting your MacBook to a monitor, SwitchResX can come to your rescue. This utility enables you to optimize and fine-tune your screen resolutions, refresh rates, and other display parameters. With its extensive control options, you can tailor your monitor connection to your exact preferences.
Troubleshooting With Apple Diagnostics Or Apple Hardware Test
When facing connectivity problems with your MacBook and a monitor, it’s important to diagnose and troubleshoot the issue. Both Apple Diagnostics and Apple Hardware Test can help identify hardware or software problems that may be causing the connection failure. Follow these steps to run the relevant test:
- Begin by shutting down your MacBook and ensuring the monitor is properly connected via USB-C.
- Power on your MacBook while holding the Option-D keys simultaneously.
- A screen will appear, guiding you through the diagnostics process. Follow the on-screen instructions to complete the test.
Once the diagnostic or testing process is complete, any potential issues will be identified, allowing you to address them accordingly. If the problem persists, it’s recommended to seek assistance from an Apple support professional.
Frequently Asked Questions Of Macbook Not Connecting To Monitor Usb C
Why Is My Macbook Not Connecting To The Usb-c Monitor?
There can be several reasons why your MacBook is not connecting to the USB-C monitor. First, ensure that your monitor supports USB-C connectivity and that it’s compatible with your MacBook model. Check your cables and make sure they are securely connected.
Update your MacBook’s software and reset the SMC if necessary.
How Do I Troubleshoot Usb-c Connection Issues With My Macbook?
To troubleshoot USB-C connection issues with your MacBook, try the following steps:
1. Disconnect and reconnect the USB-C cable. 2. Use a different USB-C cable or adapter. 3. Restart your MacBook. 4. Update your MacBook’s software. 5. Reset the SMC. If the issue persists, contact Apple support for further assistance.
What Should I Do If My Macbook Screen Is Not Being Mirrored On The Usb-c Monitor?
If your MacBook screen is not being mirrored on the USB-C monitor, follow these steps:
1. Go to “System Preferences” on your MacBook. 2. Select the “Displays” option. 3. Click on the “Arrangement” tab. 4. Check the box that says “Mirror Displays” to enable screen mirroring. If the issue continues, ensure that both your MacBook and the USB-C monitor are updated with the latest software.
Conclusion
Resolving the issue of a MacBook not connecting to a USB-C monitor can be a challenging task. However, by following the troubleshooting steps mentioned in this blog post, you can troubleshoot and fix the problem effectively. Remember to check the cable connections, update the software, and adjust the display settings.
By taking these measures, you can ensure a seamless connection between your MacBook and USB-C monitor, enhancing your productivity and overall user experience.