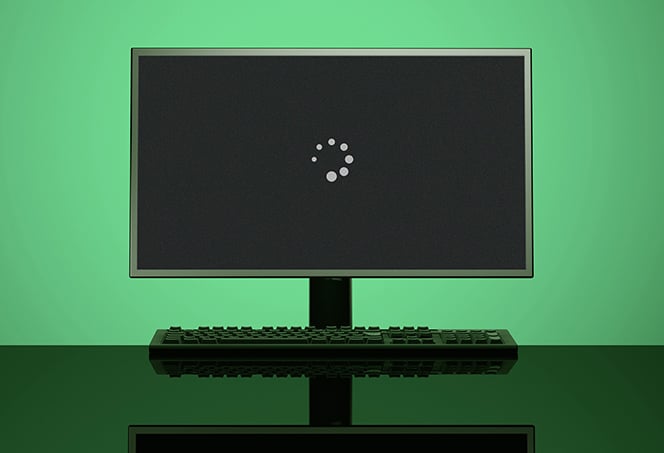
Lenovo Yoga External Monitor Not Working: Troubleshooting Guide
Lenovo Yoga external monitor not working? Check your cables and connectors to ensure a secure connection.
If the issue persists, try using a different monitor or cable.
Initial Checks For External Monitor Issues
Having trouble with your Lenovo Yoga external monitor? Before jumping to any conclusions, it’s essential to carry out a few initial checks. In this section, we will discuss the vital steps to diagnose and troubleshoot common external monitor issues.
Confirm Power And Monitor Brightness Settings
Firstly, ensure that your external monitor is receiving power and is turned on. Check all connections and cables to make sure they are properly plugged in and not loose. Additionally, make sure the power cable is firmly attached to the monitor.
- Confirm that the monitor’s power button or switch is in the “on” position.
- Check if the power cable is securely plugged into both the monitor and the power source.
- Adjust the brightness settings on the monitor to ensure it’s not set to the lowest level.
Verify Connection Integrity Between Devices
The next step is to verify the connection integrity between your Lenovo Yoga laptop and the external monitor.
- Inspect the cables to ensure they are not damaged and securely connected at both ends.
- If you are using an HDMI cable or any other specific connectors, refer to your Lenovo Yoga’s manual to ensure you have the correct cables and connections.
- Try disconnecting and reconnecting the cable at both ends to establish a secure connection.
Inspect For Physical Cable Or Port Damage
In some cases, external monitor issues can be attributed to physical cable or port damage. It’s crucial to visually inspect both the cables and the ports to identify any signs of damage.
- Check if there are any visible signs of damage, such as frayed cables or bent pins in the connectors.
- Try using a different cable or monitor to rule out the possibility of a faulty cable or port.
- If possible, test the external monitor with another device to determine if the issue lies with the monitor or your Lenovo Yoga laptop.
By following these initial checks, you can quickly identify and potentially resolve any external monitor issues you may be experiencing with your Lenovo Yoga laptop. If the problem persists even after performing these checks, further troubleshooting may be required.
Lenovo Yoga External Monitor Detection
Having trouble with your Lenovo Yoga external monitor not working? One common issue users face is the detection of the external monitor. If your Lenovo Yoga is not detecting the external monitor, there are a few troubleshooting steps you can follow to resolve the problem. In this article, we’ll explore three possible solutions to help you get your external monitor up and running.
Ensure Correct Display Mode Is Activated
The first step in troubleshooting your external monitor detection issue is to check whether the correct display mode is activated. Here’s how you can do it:
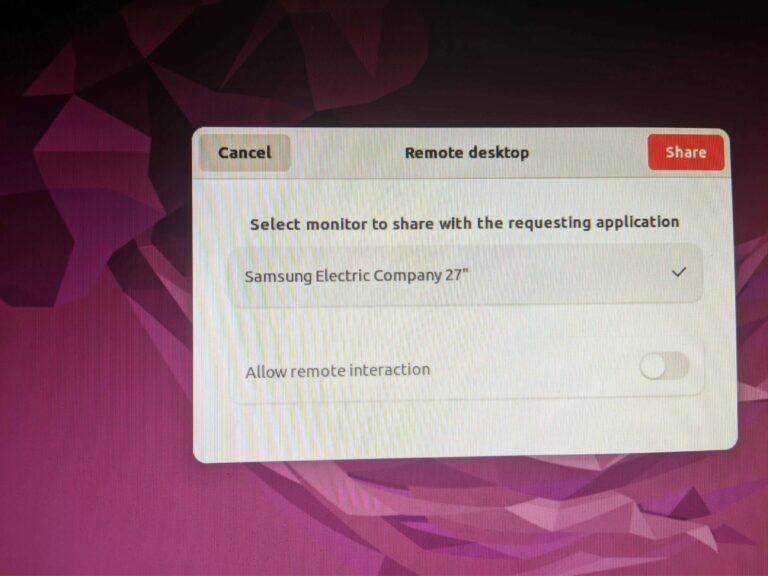
- Go to the Start menu and open the Settings.
- Click on System and then select Display.
- Scroll down to the Multiple displays section and ensure the ‘Extend these displays’ option is selected.
- If it’s not selected, choose it from the drop-down menu.
By activating the correct display mode, you are telling your Lenovo Yoga to extend its display to the external monitor, allowing it to detect the second screen.
Update Or Reinstall Graphics Drivers
Outdated or corrupt graphics drivers can often cause issues with external monitor detection. Here’s how you can update or reinstall your graphics drivers:
- Open the Device Manager by right-clicking on the Start menu and selecting Device Manager.
- Expand the Display adapters section.
- Right-click on your graphics driver and select Update driver.
- Follow the on-screen instructions to update the driver.
- If updating the driver doesn’t resolve the issue, you can also try reinstalling it. Right-click on your graphics driver again and select Uninstall device. Restart your computer, and Windows will automatically reinstall the graphics driver.
Updating or reinstalling the graphics drivers ensures that your Lenovo Yoga has the latest software to communicate with the external monitor effectively.
Verify Monitor Compatibility With Lenovo Yoga
Another factor that can affect external monitor detection is compatibility. It’s essential to ensure your monitor is compatible with your Lenovo Yoga. Here are a few steps you can follow:
- Check the user manual of your Lenovo Yoga for information on compatible monitors and connectors. It will provide you with the recommended specifications you should look for in an external monitor.
- Verify that you are using the correct cables and connections between your Lenovo Yoga and the external monitor. Make sure the cables are not loose.
- If possible, try using a different monitor or cable to check if the issue lies with the hardware.
Verifying monitor compatibility with your Lenovo Yoga ensures that you have the right equipment for seamless external monitor detection.
By following these troubleshooting steps, you can increase the chances of resolving your Lenovo Yoga external monitor detection issue. Ensure correct display mode is activated, update or reinstall graphics drivers, and verify monitor compatibility with your Lenovo Yoga to get your external monitor working again.
Display Settings Configuration
If you are facing issues with your Lenovo Yoga external monitor not working, it is crucial to check the display settings configuration. By accessing and adjusting the display settings in Windows, utilizing Lenovo Vantage software for display management, and configuring multiple display settings, you can resolve the issue and enjoy a seamless display experience.
Accessing And Adjusting Display Settings In Windows
To access and adjust the display settings in Windows, follow these steps:
- Click on the “Start” menu and select “Settings”.
- In the Settings window, click on “System”.
- Select “Display” from the left-side menu.
- Here, you can adjust the resolution, orientation, and scaling settings according to your preferences.
- Make sure to click on “Apply” after making any changes.
Utilizing Lenovo Vantage Software For Display Management
If you have Lenovo Vantage software installed on your Lenovo Yoga laptop, you can use it for display management. Here’s how:
- Open the Lenovo Vantage software on your laptop.
- Navigate to the “Display” section or a similar option.
- Here, you can customize various display settings, including brightness, contrast, color calibration, and more.
- Make the necessary adjustments and click on “Apply” to save the changes.
Configuring Multiple Displays Settings
If you want to configure multiple displays settings, ensuring seamless performance, follow these steps:
- Connect your external monitor to your Lenovo Yoga laptop using the appropriate cables (such as HDMI, VGA, or DisplayPort).
- Access the display settings in Windows using the steps mentioned earlier.
- Scroll down to the “Multiple displays” section.
- Select the desired display mode, such as “Extend these displays” to use your external monitor as an extension of your laptop screen.
- Adjust the resolution and other settings for each display if needed.
- Click on “Apply” to save the changes.
By following these steps, you can effectively troubleshoot and resolve the issue of your Lenovo Yoga external monitor not working. Remember to check the cables, ensure power connections are secure, and update your graphics drivers if necessary. Enjoy a seamless display experience with your Lenovo Yoga and external monitor.
Advanced Troubleshooting Techniques
When dealing with external monitor issues on your Lenovo Yoga, simple troubleshooting steps may not always resolve the problem. In such cases, it’s important to turn to advanced techniques that can help you identify and fix the underlying cause. Below, we discuss some advanced troubleshooting techniques to resolve external monitor issues on Lenovo Yoga laptops.
Bios Settings And Updates For Display Issues
In some cases, incorrect BIOS settings or outdated BIOS firmware can cause display issues with your external monitor on Lenovo Yoga. To check and update your BIOS settings, follow these steps:
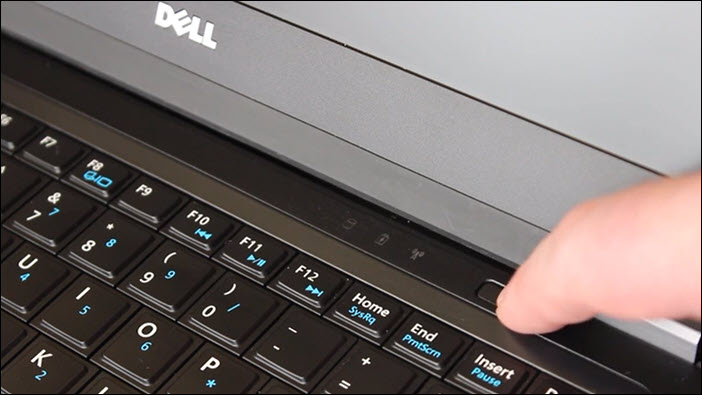
- Start your Lenovo Yoga laptop and press the Del or F2 key repeatedly to enter the BIOS settings.
- Navigate to the Display or Video section in the BIOS menu.
- Ensure that the Display Output or Multi-Monitor Support option is set to Enabled.
- If there is an option for VGA/DVI or HDMI Output, make sure it is set to the appropriate output port you are using.
- Save the changes and exit the BIOS settings.
- After updating the BIOS settings, visit Lenovo’s official support website and download the latest BIOS firmware update for your Lenovo Yoga model.
- Install the BIOS update according to the provided instructions.
- Restart your laptop and check if the external monitor is now working.
Potential Conflict Resolution With Third-party Software
In some cases, third-party software or drivers installed on your Lenovo Yoga can conflict with the display settings, resulting in external monitor issues. To identify and resolve such conflicts, follow these steps:
- Open the Control Panel on your Lenovo Yoga.
- Navigate to Programs or Programs and Features.
- Look for any recently installed software or drivers that may be related to display settings or graphics.
- Uninstall or disable any suspicious or unnecessary software.
- Restart your laptop and check if the external monitor is now working.
System Restore Or Recovery Options
If other troubleshooting techniques have failed to resolve the external monitor issue on your Lenovo Yoga, you can try using the system restore or recovery options to revert your laptop to a previous working state. Follow these steps:
- Click on the Start menu and select Settings.
- In the Settings menu, click on Update & Security.
- Go to Recovery and click on Restart now under the Advanced Startup section.
- On the Advanced Startup screen, select Troubleshoot.
- Select either System Restore or Reset this PC according to your preference.
- Follow the instructions provided to restore your laptop to a previous working state or perform a clean reset.
- After the restore or reset process is complete, check if the external monitor is now working.
By following these advanced troubleshooting techniques, you can effectively resolve external monitor issues on your Lenovo Yoga laptop. However, if the problem persists, it may be necessary to contact Lenovo support for further assistance.
When To Seek Professional Help
If you are experiencing issues with your Lenovo Yoga external monitor not working, there are a few steps you can take to troubleshoot. Check the cables and connectors to ensure they are properly connected and not loose. If possible, try using a different monitor or cable to see if the issue persists.
Additionally, make sure to check for any updates or driver issues that may be affecting the display.
Identifying Problems Requiring Technical Support
If you’ve followed all the troubleshooting steps mentioned in the previous section and your Lenovo Yoga external monitor is still not working, it may be time to seek professional help. Some issues may require technical support from Lenovo experts to resolve. Here are a few signs that indicate you should consider reaching out for professional assistance:
- If you have tried different cables and monitors but none of them work, it could be a hardware issue that needs expert diagnosis.
- If you notice any physical damage to the port or connector on your Lenovo Yoga, it’s best to let professionals handle the repair to avoid further damage.
- If your laptop’s display is working fine but the external monitor is not being detected by the system, it could indicate a software or driver-related problem that requires advanced troubleshooting.
- If you have already tried updating drivers and checking settings without success, a technical expert can provide further guidance and solutions.
Warranty Implications For Lenovo Yoga
Before seeking professional help, it’s important to consider the warranty implications for your Lenovo Yoga. If your device is still covered by warranty, reaching out to Lenovo’s customer support can help you avoid any out-of-pocket expenses. Most Lenovo laptops come with a one-year limited warranty, which covers manufacturing defects and hardware failures. However, it’s crucial to check the terms and conditions of your specific warranty to understand what issues are covered and the duration of the coverage.
Contact Information For Lenovo Customer Service
If you determine that professional assistance is necessary, contacting Lenovo customer service is your next step. Here’s how you can get in touch with them:
| Support Type | Contact Information |
|---|---|
| Phone | Call Lenovo customer service at 1-800-426-7378 (USA) or find the appropriate phone number for your country on Lenovo’s official website. |
| Live Chat | Visit Lenovo’s support website and initiate a live chat session with a representative who can guide you through troubleshooting steps or assist with a warranty claim. |
| Send an email to Lenovo’s customer support team at support@lenovo.com, explaining your issue in detail. Make sure to provide your laptop’s model number and any relevant serial numbers. |
Remember, contacting professional help should be your last resort after exhausting all possible troubleshooting steps. However, if you determine that your Lenovo Yoga external monitor issue requires expert attention or if your device is still under warranty, don’t hesitate to reach out for assistance. Lenovo customer support is there to provide the necessary guidance and solutions to get your external monitor working again.

Credit: egpu.io
Frequently Asked Questions On Lenovo Yoga External Monitor Not Working
Why Is My Laptop Not Detecting My External Monitor?
Your laptop may not detect your external monitor due to various reasons. Check the cables for loose connections. Refer to your PC manual to ensure correct connectors are used. Make sure the power cable is securely attached. Try using a different monitor or cable if available.
Troubleshoot display or monitor issues through Lenovo support.
Why Is My Lenovo Desktop Monitor Not Displaying Anything?
Possible answer: Check video cable connections and ensure they are secure. Update graphics drivers if outdated. Troubleshoot by using a different monitor or cable. Verify power cable is firmly attached to the monitor. Referring to the PC manual, check for connectors or HDMI.
Why Is My Lenovo Yoga Screen Going Black?
There are a few possible reasons why your Lenovo Yoga screen is going black. One reason could be a loose or damaged connection between the screen display and the Windows operating system. Another possibility is outdated graphics drivers or a problem with the graphics card.
To fix this issue, try resetting the display mode of your laptop by pressing Windows + Ctrl + Shift + B.
Why Did My External Monitor Stop Working?
There are several reasons why your external monitor may have stopped working. First, check the cables to ensure they are properly connected and not loose. Refer to your PC manual for information on connectors or HDMI. If possible, try using a different monitor or cable.
Also, make sure the power cable is securely attached to the monitor.
Conclusion
If you’re experiencing issues with your Lenovo Yoga external monitor not working, there are several troubleshooting steps you can take. Check the cables and ensure they are securely connected. Refer to your PC manual for more information on connectors or HDMI.
Consider trying a different monitor or cable if available. Additionally, you can go to your Settings, Update & Security, and view the update history to check for any necessary Intel Display updates. By following these steps, you should be able to resolve any problems with your external monitor and enjoy a seamless user experience.