Laptop Screen Not Displaying After Connecting to External Monitor: Troubleshooting Guide
If your laptop screen is not displaying after connecting to an external monitor, check for damage or bent pins on the video port and cable. Reconnect the monitor or try using a new video cable if necessary.
Checking for possible conflicts between accessories and the screen by disconnecting them can also help. Additionally, try changing the cable connecting the external monitor to see if the previous one was faulty. It’s important to troubleshoot these factors to resolve the issue.
Initial Checklist For Display Issues
When you connect your laptop to an external monitor and find that the laptop screen is not displaying, it can be frustrating. However, before jumping to conclusions that something is wrong with your laptop screen, there are a few steps you can take to troubleshoot the issue. By going through this initial checklist, you may be able to resolve the problem and get your display up and running again.
Confirm Cable And Port Condition
Firstly, check the video port on both your computer and the external monitor. Inspect the video cable as well, ensuring that there is no damage or any bent pins. If you notice any signs of damage, it’s crucial to replace the cable or have it repaired before proceeding. Damaged cables or ports can lead to poor or no connectivity between your laptop and the monitor, resulting in a blank screen.
Reconnect External Monitor
If you have confirmed that the cable and ports are in good condition, the next step is to reconnect the external monitor to your computer. Sometimes, a loose connection can cause the laptop screen to not display properly when connected to an external monitor. Disconnect the cable and reconnect it firmly, ensuring a secure connection. Once reconnected, check if the laptop screen starts displaying again.
Swap Video Cables If Available
If you have access to another video cable, it’s worth trying a different cable to determine if the issue lies with the cable itself. Swap out the video cable, making sure to connect the two devices using the new cable. If the laptop screen starts displaying after the swap, you can conclude that the previous cable was faulty. In this case, keep using the new cable to connect your laptop to the external monitor.
By following this initial checklist for display issues, you can troubleshoot your laptop screen not displaying after connecting to an external monitor. Checking the cable and port condition, reconnecting the external monitor, and swapping video cables if available can help resolve the problem and restore your display functionality.
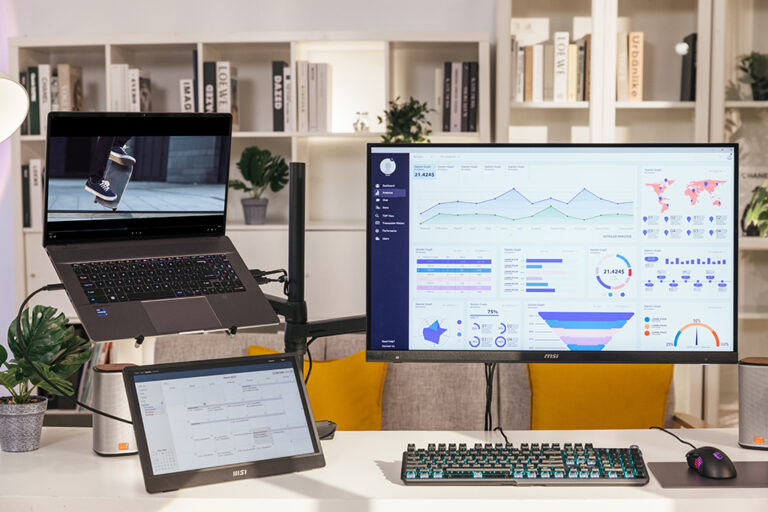
Credit: www.msi.com
Diagnosing Screen Blackout Causes
If your laptop screen is not displaying after connecting to an external monitor, check for any damage to the video port, monitor, or video cable. Make sure the pins are not bent. If there is no damage, try reconnecting the monitor or using a new video cable.
When you connect your laptop to an external monitor and the laptop screen fails to display, it can be quite frustrating. However, understanding the potential causes of this screen blackout can help you diagnose and resolve the issue effectively. In this section, we will explore some key steps to identify the reasons behind the problem.
Rule Out Accessory-induced Conflict
One common cause of a laptop screen not displaying after connecting to an external monitor is an accessory-induced conflict. To rule out this possibility, start by disconnecting all accessories connected to your laptop, such as USB devices. Then, check if the screen blackout issue persists. If disconnecting the accessories resolves the problem, it signifies a conflict between the accessories and the screen. In such cases, try connecting the external monitor without any accessories connected to see if the issue is resolved.
Verify Monitor And Laptop Compatibility
Another important step is to ensure compatibility between the monitor and your laptop. Check if both devices are compatible in terms of their video ports and cables. Inspect the video port on your laptop and monitor to ensure they are not damaged and the pins are not bent. If there is any damage, rectify it before proceeding. Additionally, confirm if the video cable you are using is compatible and functioning properly. You may also try connecting the two devices using a different video cable to eliminate any cable-related issues.
Check External Monitor’s Power And Connection Status
It’s crucial to check the power and connection status of the external monitor when troubleshooting a laptop screen blackout. First, make sure the external monitor is receiving power by connecting it to a functional power source. Additionally, ensure that the connection between the monitor and the laptop is secure. Check the video cable for any damage or loose connections and rectify them if necessary. By ensuring the power and connection status of the external monitor, you can pinpoint any issues related to its functionality.
By following these diagnostic steps, you can identify potential causes of a laptop screen not displaying after connecting to an external monitor. Remember to rule out accessory-induced conflicts, verify compatibility between the monitor and your laptop, and check the power and connection status of the external monitor. By doing so, you can troubleshoot the problem effectively and find the appropriate solution.
Common Fixes For Display Problems
Adjust Display Settings On Laptop
If your laptop screen is not displaying after connecting to an external monitor, the first step is to check the display settings on your laptop. Follow these steps to adjust the display settings:
- Right-click on your desktop and select “Display settings” from the drop-down menu.
- In the Display settings window, you will see two displays labeled as “Display 1” and “Display 2”.
- Select the display that corresponds to your laptop screen.
- Make sure the “Extend these displays” option is selected. This will enable the dual monitor functionality.
- Click on “Apply” to save the changes.
By adjusting the display settings on your laptop, you can ensure that both the laptop screen and the external monitor are recognized and working correctly.
Enable Dual Monitor Functionality
If adjusting the display settings does not fix the issue, you may need to enable the dual monitor functionality on your laptop. Here’s how to do it:
- Press the Windows key + P on your keyboard.
- A Project menu will appear on the right side of the screen.
- Select the “Extend” option to enable the dual monitor functionality.
- Check if the laptop screen starts displaying now.
Enabling the dual monitor functionality allows your laptop to extend the display to the external monitor, resolving any issues with screen display.
Update Or Rollback Graphics Drivers
If the above steps don’t resolve the display problem, the issue may be with your graphics drivers. Updating or rolling back the graphics drivers can often fix display issues. Follow these steps to update or rollback the graphics drivers on your laptop:
- Press the Windows key + X on your keyboard and select “Device Manager” from the menu.
- In the Device Manager window, expand the “Display adapters” section.
- Right-click on your graphics driver and select “Update driver” to update the driver. Alternatively, you can select “Properties” and then go to the “Driver” tab to roll back the driver to a previous version.
- Follow the on-screen instructions to complete the driver update or rollback process.
Updating or rolling back the graphics drivers can resolve compatibility issues and ensure that the laptop screen is displaying properly after connecting to an external monitor.
By following these common fixes for display problems, you can troubleshoot and resolve any issues with your laptop screen not displaying after connecting to an external monitor. Adjusting display settings, enabling dual monitor functionality, and updating or rolling back graphics drivers can help ensure a seamless and efficient display experience.
Advanced Troubleshooting Techniques
When your laptop screen fails to display after connecting to an external monitor, it can be frustrating. However, there are several advanced troubleshooting techniques you can try to resolve this issue. By following these techniques, you can investigate hardware failures, test with alternate user profiles, and explore BIOS/UEFI settings adjustments. Let’s dive into each of these techniques in detail:
Investigate Hardware Failures
One of the first steps in troubleshooting your laptop screen is to investigate hardware failures. Begin by checking the video port on your computer and the monitor for any damage, such as bent pins or physical damage. If you notice any issues, it’s crucial to repair or replace the damaged components. Additionally, ensure that the video cable connecting the laptop and the external monitor is not damaged or faulty. If it is, consider using a new video cable to connect the devices. By addressing any hardware failures, you can potentially fix the problem and restore the display.
Test With Alternate User Profiles
An effective way to determine if the issue lies with your laptop’s settings or with the hardware is to test with alternate user profiles. Set up a new user profile on your laptop and connect it to the external monitor. If the display works fine with the new profile, then it suggests that the problem is related to your current user profile settings. In that case, you can either tweak the settings or transfer your important files to the new user profile to resolve the issue.
Explore Bios/uefi Settings Adjustments
If neither investigating hardware failures nor testing with alternate user profiles resolves the problem, it’s time to explore adjustments in your BIOS/UEFI settings. Boot up your laptop and enter the BIOS/UEFI menu by pressing the appropriate key during startup (usually F2 or Del). Within the BIOS/UEFI settings, look for any display-related options that could be affecting the connection to the external monitor. Make sure the settings are correctly configured to enable the display on both your laptop screen and the external monitor. Save any changes made and restart your laptop to see if the issue is resolved.
By following these advanced troubleshooting techniques, you can increase your chances of fixing the laptop screen not displaying after connecting to an external monitor. Remember to check for hardware failures, test with alternate user profiles, and explore BIOS/UEFI settings adjustments. Applying these techniques systematically will help you identify and resolve the underlying issue, allowing you to enjoy a seamless display experience.
Resolving Specific External Monitor Hiccups
If your laptop screen is not displaying after connecting to an external monitor, check for any damage or bent pins on the video port and cable. Reconnecting or trying a new cable may resolve the issue. Disconnecting other accessories from your PC could also help if there is a conflict causing the problem.
Address Lack Of Sound On Monitor
If you have connected your laptop to an external monitor but are facing a lack of sound on the monitor, there are a few steps you can take to address this issue. Firstly, ensure that the audio cable is properly connected between your laptop and the monitor. Check for any loose connections or damaged cables. If necessary, try using a different audio cable to see if the issue is resolved. Secondly, check the audio settings on your laptop. Make sure that the audio output is set to the external monitor. To do this, right-click on the volume icon in the taskbar and select “Playback devices.” From the list of available devices, choose the external monitor as the default audio output. If the issue still persists, try updating the audio drivers on your laptop. Outdated or incompatible drivers can sometimes cause audio problems. You can download the latest drivers from the manufacturer’s website or use a driver update tool to automatically update them. Lastly, double-check the audio settings on the monitor itself. Some monitors have built-in speakers that may need to be enabled or adjusted. Refer to the monitor’s user manual for instructions on how to access the audio settings.Fix Non-responsive Laptop Screen
If your laptop screen is not displaying anything after connecting to an external monitor, try the following troubleshooting steps to fix the issue. Firstly, ensure that the external monitor is properly connected to your laptop. Check the video cable for any damage or loose connections. If possible, try using a different video cable to see if that resolves the problem. Next, check the display settings on your laptop. Right-click on the desktop and select “Display settings” from the context menu. Make sure that the external monitor is recognized and set as the primary display. If it is not, click on the “Detect” button to scan for connected displays. If the laptop screen is still not responsive, try adjusting the display resolution. Sometimes, the screen may not display anything if the resolution is set outside the supported range. Lower the resolution to a more standard setting and see if that solves the problem. If none of these steps work, try updating the graphics drivers on your laptop. Outdated or incompatible drivers can sometimes cause display issues. Visit the manufacturer’s website or use a driver update tool to download and install the latest drivers for your graphics card.Overcome External Monitor Recognition Failure
If your laptop fails to recognize the external monitor, follow these steps to overcome this issue. Firstly, ensure that the video cable is securely connected to both your laptop and the monitor. Check for any damage or bent pins on the cable and make sure all connections are tight. If the laptop still does not recognize the external monitor, try using a different video cable. Sometimes, faulty cables can cause recognition issues. Using a new cable can help determine if the problem lies with the cable or the laptop. Next, check the display settings on your laptop. Right-click on the desktop and select “Display settings” from the menu. Click on the “Detect” button to scan for connected displays. If the monitor is still not recognized, click on the “Identify” button to see if the laptop detects the external monitor but fails to display it correctly. If the issue persists, try updating the graphics drivers on your laptop. Outdated or incompatible drivers can sometimes lead to recognition failure. Visit the manufacturer’s website or use a driver update tool to download and install the latest drivers for your graphics card. In some cases, a BIOS update may also be required to resolve recognition issues. Check the laptop manufacturer’s website for any available BIOS updates and follow the instructions to update the BIOS. By following these steps, you should be able to address specific external monitor hiccups such as lack of sound, non-responsive laptop screen, and recognition failure. Remember to check all the connections, adjust settings, update drivers, and if necessary, seek further assistance from the laptop manufacturer or a professional technician.Frequently Asked Questions On Laptop Screen Not Displaying After Connecting To External Monitor
Why Is My Laptop Screen Not Working But External Monitor Does?
If your laptop screen is not working but the external monitor is, check the video port, cable, and pins for any damage or bending. Try reconnecting the monitor or using a new cable. Disconnect all accessories to rule out conflicts.
If the issue persists, it may be a cable or driver problem.
Why Does My Screen Go Black When I Connect An External Monitor?
When connecting an external monitor, your screen may go black due to damaged video ports or cables. Check for any physical damage and try reconnecting the monitor or using a new cable. Disconnecting any accessories may also help resolve conflicts with the screen.
How Do I Make My Laptop Screen Black When Connected To A Monitor?
To make your laptop screen black when connected to a monitor, first check for any damage to the video port on your computer or the monitor, as well as the video cable. If everything looks fine, try reconnecting the monitor or using a different video cable.
Disconnecting any accessories from your PC may also help resolve conflicts. If the issue persists, consider changing the cable connecting to the external monitor.
Why Is My Second Monitor Connected But Not Displaying?
If your second monitor is connected but not displaying, check for any damage to the video port on the computer or monitor, as well as the video cable. If everything appears fine, try reconnecting the monitor or using a different video cable.
Disconnecting other accessories from your PC may also help resolve conflicts.
Conclusion
To resolve the issue of a laptop screen not displaying after connecting to an external monitor, it is important to check the video port, monitor, and video cable for any damage or bent pins. If everything appears to be fine, try reconnecting the monitor or using a different video cable.
Additionally, disconnecting all accessories from the PC can help identify any conflicts causing the problem. If all else fails, changing the cable or seeking assistance from technical support may be necessary. Troubleshooting steps and solutions can vary based on the specific laptop and monitor models.
