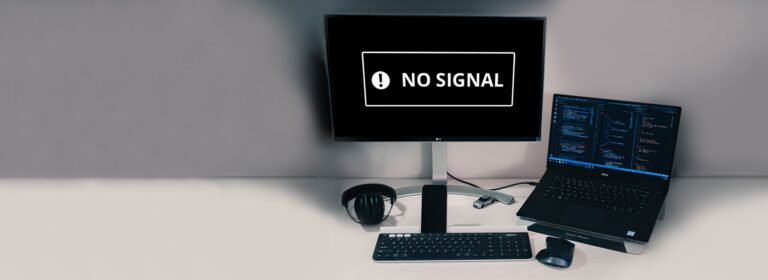
Laptop Not Connecting With Monitor: Troubleshooting Tips for Display Issues
If your laptop is not connecting with your monitor, check the video port and cable for any damage or bent pins. Reconnect the monitor to the computer or try using a new video cable if available.
Credit: www.dell.com
Assessing Physical Connections
The first step in troubleshooting a laptop not connecting with a monitor is to assess the physical connections. Follow these steps to ensure that all physical connections are intact and secure.
Check Cable Integrity For Any Sign Of Damage
Inspect the video cable for any signs of wear and tear, such as frayed wires or bent pins. If you notice any damage, it is recommended to replace the cable to ensure a proper connection between the laptop and the monitor.
Verify That Cables Are Securely Connected
Ensure that both ends of the video cable are securely plugged into the corresponding ports on the laptop and the monitor. Sometimes, loose connections can cause a display issue. Give each cable a gentle wiggle to confirm that it is firmly attached.
Examine Ports On Both Laptop And Monitor
Take a close look at the video ports on both the laptop and the monitor. Look for any debris or dirt that may be obstructing the connection. If you notice any buildup, gently clean the ports using a soft cloth or compressed air.
Attempt Monitor Connection With An Alternate Cable
If you have access to another video cable, try connecting the laptop and the monitor using the new cable. This will help determine if the issue lies with the cable or any other hardware component. If the monitor works fine with the alternate cable, it may indicate that the original cable is faulty and needs to be replaced.
Power Cycle Devices
When your laptop fails to connect with your monitor, it can be frustrating and hinder your productivity. One effective troubleshooting method that can often resolve this issue is power cycling your devices. Power cycling refers to the process of turning off and disconnecting the devices from their power source, which helps reset the connection between them. In this section, we will discuss how to properly power cycle your laptop and monitor, the importance of draining residual power, and the steps to reset the connection between the devices.
How To Properly Power Cycle Your Laptop And Monitor
Power cycling your laptop and monitor can help clear any temporary glitches or conflicts that may be preventing them from connecting. Follow these steps to ensure a proper power cycle:
- Turn off your laptop by clicking on the Start menu, selecting the Power option, and choosing Shut Down.
- Unplug the power adapter from your laptop.
- Disconnect any external devices or cables connected to your laptop and monitor.
- Turn off the monitor by pressing the power button.
- Unplug the power cable from the monitor.
- Wait for at least 30 seconds to a minute to allow any residual power to drain completely.
- Plug the power cable back into the monitor.
- Turn on the monitor by pressing the power button.
- Plug the power adapter back into your laptop.
- Turn on your laptop and wait for it to boot up.
Importance Of Draining Residual Power
Draining residual power is a crucial step in power cycling as it ensures that all capacitors and circuits in the devices are fully discharged. This helps eliminate any stored energy and clears any temporary settings or conflicts that may be causing the connection issue. By draining residual power, you are essentially starting with a clean slate and giving your laptop and monitor a fresh opportunity to establish a successful connection.
Steps To Reset The Connection Between Devices
Once you have power cycled your laptop and monitor, it’s time to reset the connection between them. Follow these steps:
- Connect the video cable firmly to the video port on the laptop.
- Connect the other end of the video cable to the video port on the monitor.
- Ensure that both ends of the video cable are securely connected and that none of the pins are bent.
- Turn on your laptop and wait for it to fully boot up.
- Turn on your monitor and wait for it to display the connected laptop’s screen.
- If the connection is still not established, try using a different video cable or connecting to a different video port on your laptop or monitor.
By power cycling your devices, draining residual power, and resetting the connection between them, you increase the chances of successfully connecting your laptop with your monitor. If the issue persists, further troubleshooting or assistance from technical support may be required. Now that you’re familiar with the power cycling process, give it a try when facing connection issues between your laptop and monitor.
Laptop And Monitor Settings
If your laptop is not connecting with the monitor, check the video port and cable for any damage or bent pins. Try reconnecting the monitor or using a new video cable to resolve the issue. Basic hardware troubleshooting, such as disconnecting accessories and refreshing the computer, may also help.
Navigating To Display Settings On Your Laptop
When your laptop and monitor are not connecting properly, it’s important to check and adjust the display settings on your laptop. This will help you troubleshoot and resolve any issues that may be preventing the connection. To navigate to the display settings on your laptop, follow these steps:
- Click on the “Start” menu located at the bottom left corner of your screen.
- Select “Settings” from the menu options.
- In the settings menu, click on “System”.
- From the left sidebar, choose “Display”.
- You will now see the display settings for your laptop.
Ensuring Correct Display Mode Is Selected
Once you have accessed the display settings on your laptop, it’s important to ensure that the correct display mode is selected. This will ensure that your laptop recognizes and communicates with the external monitor correctly. Follow these steps to check and select the correct display mode:
- Scroll down to the “Multiple displays” section in the display settings menu.
- Click on the drop-down menu next to “Multiple displays” and select the desired display mode. Options may include “Duplicate these displays”, “Extend these displays”, or “Show only on X”.
- Choose the display mode that suits your needs.
- Click on “Apply” to save the changes.
Adjusting Monitor Settings Through Built-in Menus
If you have ensured that the display settings on your laptop are correctly configured, but the monitor is still not connecting, try adjusting the monitor settings through its built-in menus. Follow these steps to make necessary adjustments:
- On the front or side of your monitor, look for buttons or a menu panel.
- Press the appropriate button to access the monitor’s built-in menus.
- Use the navigation buttons to locate the “Settings” or “Menu” option.
- Select the desired setting option to adjust the monitor’s display settings.
- Make any necessary changes, such as brightness, contrast, or input source, depending on your specific requirements.
- Save the changes and exit the menu.
Updating And Reinstalling Drivers
If your laptop is not connecting with the monitor, try checking the video port and cable for any damage or bent pins. Reconnecting the monitor to the computer or using a new video cable can also help resolve the issue.
Guide To Updating Video And Graphics Drivers
Video and graphics drivers are crucial components that facilitate the connection between your laptop and monitor. Outdated drivers can often lead to connectivity issues. To ensure a seamless connection, it is important to regularly update these drivers. Here’s a comprehensive guide on how to update video and graphics drivers:
- Start by identifying the make and model of your laptop’s video and graphics card. This information can usually be found in the device manager or by visiting the manufacturer’s website.
- Visit the manufacturer’s website and navigate to their support section or downloads page.
- Search for the latest drivers for your video and graphics card model.
- Download the appropriate driver files for your operating system.
- Once the download is complete, locate the downloaded file and run the installer.
- Follow the on-screen instructions to complete the installation process.
- Once the installation is complete, restart your laptop to ensure that the new drivers are properly loaded.
Updating your video and graphics drivers can often resolve connectivity issues between your laptop and monitor. By keeping these drivers up to date, you can ensure optimal performance and compatibility.
Reinstalling Drivers Step-by-step
If you continue to experience problems connecting your laptop to a monitor, reinstalling the drivers may help. Here’s a step-by-step guide on how to reinstall drivers:
- Open the Device Manager on your laptop. You can access this by right-clicking on the Start menu and selecting “Device Manager”.
- Expand the “Display Adapters” category to see a list of installed video and graphics drivers.
- Right-click on the relevant driver and select “Uninstall Device”. Confirm the uninstallation when prompted.
- Once the driver is uninstalled, restart your laptop.
- After the restart, Windows will automatically reinstall the driver for your video and graphics card.
Reinstalling the drivers can help fix any issues with the existing installation and ensure that the latest version of the drivers is correctly installed.
Potential Impact Of Outdated Drivers On Connectivity
Using outdated video and graphics drivers can significantly impact the connectivity between your laptop and monitor. These drivers are responsible for interpreting and transmitting the necessary signals, and outdated versions may not support the latest protocols and standards.
Outdated drivers can result in various issues, such as flickering screens, resolution problems, or complete failure to establish a connection. By keeping your drivers up to date, you can avoid these complications and ensure a smooth and stable connection between your laptop and monitor.
Software Conflicts And Resolutions
When your laptop fails to connect with your monitor, it can be frustrating and hinder your productivity. One of the common reasons for this issue is software conflicts. In this section, we will discuss how to identify and resolve software issues that may be hindering the connection between your laptop and monitor.
Checking For Conflicting Software Or Settings
Before diving into more advanced troubleshooting steps, it’s essential to check for any conflicting software or settings that may be causing the connectivity issue. Here are the steps to follow:
- Go to the Control Panel on your laptop’s operating system.
- Locate and click on “Display” or “Display Settings.”
- Check if there are any software or settings conflicts related to the display.
- Make sure the display settings are set to extend or duplicate the screen, depending on your preference.
Background Applications That Might Affect Display Output
Background applications can sometimes interfere with the display output, preventing your laptop from connecting with the monitor. Here’s how you can check for and resolve any issues caused by background applications:
- Press Ctrl + Shift + Esc to open the Task Manager.
- Go to the “Processes” or “Applications” tab.
- Look for any applications that might be using excessive system resources.
- Select the application and click on “End Task” or “Close” to stop it.
Resolving Software Issues Hindering Monitor Connection
If the above steps didn’t resolve the issue, you can try the following methods to fix software conflicts and ensure a successful connection between your laptop and monitor:
- Update your laptop’s graphics driver to the latest version.
- Uninstall any unnecessary or conflicting software that might be affecting the display.
- Restart your laptop and monitor to refresh the system.
- Try using a different video cable to establish the connection.
- Reset your laptop’s display settings to default.
By following these steps, you can successfully troubleshoot and resolve software conflicts that are hindering the connection between your laptop and monitor. Remember to double-check the hardware components and ensure they are not damaged or bent before proceeding with software troubleshooting.
When External Displays Are Not Detected
If your laptop is not connecting with your monitor, check for any damage to the video port and cable. Try reconnecting the monitor or using a different video cable. Basic troubleshooting steps can help resolve this issue.
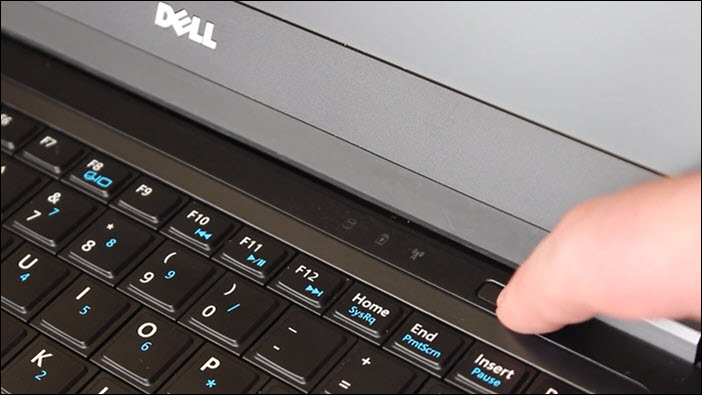
Detecting Displays Via Laptop’s Function Keys
One of the simplest ways to troubleshoot external display connection issues is by using your laptop’s function keys. These keys are specifically designed to help you switch between display modes and detect external monitors.
To detect displays using function keys, follow these steps:
- Ensure that your laptop is connected to the external monitor using the appropriate video cable.
- Press the Fn key on your laptop’s keyboard along with the corresponding function key (e.g., F8, F10, F12) that has the display icon.
- Wait for a few seconds to allow your laptop to detect the external monitor.
- If the display is not detected using the first combination, try using other function keys commonly associated with display detection.
Troubleshooting Unrecognized Monitors In The Operating System
If your laptop fails to detect an external monitor through the function keys, you can troubleshoot the issue directly within the operating system. Here’s how:
- Ensure that the video cable is properly connected to both the laptop and the monitor.
- Right-click anywhere on your desktop and select “Display settings” or similar option.
- In the display settings window, click on the “Detect” button.
- Wait for your operating system to scan for available displays. If an external monitor is detected, it should appear in the settings window.
- If the monitor is still not recognized, navigate to the “Advanced display settings” or “Display adapter properties” option in the settings window.
- Click on the “Properties” or “Driver” tab, then select “Update Driver” or “Update driver software.” Follow the on-screen instructions to update the display driver.
- Once the driver update process is complete, restart your laptop and check if the external monitor is now recognized.
The Role Of Firmware Updates In Resolving Detection Issues
Firmware updates play a crucial role in resolving external monitor detection issues. These updates ensure that your laptop’s hardware and software communicate effectively with external displays. To update your laptop’s firmware, follow these steps:
- Visit the official website of your laptop’s manufacturer and navigate to the support or downloads section.
- Search for the latest firmware update for your laptop model.
- Download the firmware update file and save it to a location on your laptop.
- Run the firmware update file and follow the on-screen instructions to install the update.
- Once the update is installed, restart your laptop and reconnect the external monitor.
- If the monitor is still not recognized, repeat the troubleshooting steps mentioned earlier or seek professional assistance.
‘laptop Not Connecting With Monitor: Troubleshooting Tips For Display Issues’
Having trouble connecting your laptop with a monitor? Display issues can be frustrating, but don’t worry – we’re here to help you troubleshoot the problem. In this article, we’ll provide expert advice for specific error messages, guide you on hardware diagnostics and built-in troubleshooting tools, and discuss when it’s time to seek professional help for persistent display issues.
Expert Advice For Specific Error Messages
If you’re encountering specific error messages while trying to connect your laptop with a monitor, it’s essential to understand the root cause. Here are some common error messages and expert advice to resolve them:
| Error Message | Expert Advice |
|---|---|
| Laptop screen not displaying on external monitor | Check the video port on your laptop and monitor for any damage or bent pins. Try reconnecting the monitor to the laptop or using a different video cable. |
| Docking station not detecting monitor | Disconnect all accessories from your laptop and reconnect the docking station. Ensure that the monitor is powered on and connected properly. |
| Laptop suddenly stopped recognizing the external monitor | Reset the monitor by unplugging it and pressing the power button. Try connecting the monitor again and make sure the HDMI cable is functioning correctly. |
Hardware Diagnostics And Built-in Troubleshooting Tools
If you’re experiencing display issues, it’s essential to perform hardware diagnostics and utilize built-in troubleshooting tools. Here’s what you can do:
- Disconnect all accessories from your laptop, including the monitor.
- Power off your laptop and restart it.
- Ensure that the video cable is securely connected to both the laptop and the monitor.
- Check for any software updates for your laptop’s graphics drivers and install them if available.
- Run hardware diagnostics on your laptop to identify any underlying issues.
- Utilize built-in troubleshooting tools provided by your laptop’s manufacturer to diagnose and fix display problems.
When To Seek Professional Help For Persistent Display Issues
If you’ve tried the troubleshooting tips mentioned above and are still facing persistent display issues, it may be time to seek professional help. Consider the following situations:
- You have followed all the recommended steps but are still unable to establish a connection between your laptop and the monitor.
- Your laptop’s graphics drivers are up to date, and hardware diagnostics show no issues, yet the display problem persists.
- You are encountering error messages that require specialized knowledge or advanced technical expertise to resolve.
Seeking professional assistance ensures that you receive expert guidance and increases the likelihood of resolving the display issues effectively.
By following these troubleshooting tips, you’ll be well-equipped to resolve display issues when your laptop is not connecting with a monitor. Remember, understanding specific error messages, performing hardware diagnostics, and seeking professional help when needed can save you time and frustration in the long run.
Identifying When It’s Time To Call An Expert
While most laptop to monitor connection issues can be resolved through basic troubleshooting, there are instances where it’s best to seek the assistance of an expert. Here are some signs that your laptop to monitor issue may be beyond the scope of basic troubleshooting:
Signs Your Laptop To Monitor Issue Is Beyond Basic Troubleshooting
- The video port on your laptop or monitor is damaged or the pins are bent.
- You have already checked the video cable for any damage or bent pins.
- You have tried reconnecting the monitor to the computer to no avail.
- You have attempted using a different video cable and the issue persists.
- Your laptop no longer recognizes your monitors.
- The brightness buttons on your laptop no longer work.
- Your laptop suddenly stopped recognizing the external monitor.
- Your docking station is not detecting the monitor.
Understanding Warranty Terms And When To Use Them
If your laptop is still within its warranty period, it’s important to understand the terms of the warranty and when it can be used. Refer to the manufacturer’s documentation or contact their customer support to determine if your laptop to monitor issue may be covered under warranty. Be sure to have the necessary details such as the purchase date, serial number, and any relevant proof of purchase.
Resources For Official Support Channels
When seeking assistance for a laptop to monitor issue, it’s recommended to reach out to the official support channels provided by the manufacturer. This ensures that you receive accurate information and guidance from trained professionals. Here are some common official support channels:
- Manufacturer’s website: Visit the official website of your laptop’s manufacturer to access their support section. Look for troubleshooting guides, forums, or contact information.
- Customer support hotline: Check the manufacturer’s website or documentation for their customer support hotline. This allows you to speak directly with a representative who can provide personalized assistance.
- Email or live chat support: Some manufacturers offer support through email or live chat. Look for these options on their website and provide detailed information about your laptop to monitor issue.
By utilizing these official support channels, you can ensure that you receive accurate and reliable assistance for your laptop to monitor issue.
Frequently Asked Questions On Laptop Not Connecting With Monitor
How Do I Get My Laptop To Recognize My Monitors?
To get your laptop to recognize your monitors, follow these steps: 1. Check the video port and cable for damage or bent pins. 2. Reconnect the monitor to the computer. 3. Try using a different video cable. 4. Disconnect all accessories from your laptop.
5. Make sure the external monitor is connected to a power source. 6. Update your display drivers. 7. Restart your computer. If the issue persists, consult with a professional or contact customer support for further assistance.
Why Is There No Signal Between My Laptop And Monitor?
The laptop and monitor may not be connecting due to damaged video ports or cables. Check for any physical damage or bent pins and reconnect the monitor to the computer. If possible, try using a different video cable.
What To Do If Laptop Monitor Is Not Displaying?
To fix a laptop monitor not displaying, check the video port and cable for damage or bent pins. If no damage is found, reconnect the monitor or try using a new cable. Disconnect all accessories from the laptop and restart it.
If the issue persists, update your display drivers or check the connections between the CPU, motherboard, RAM, power supply, and graphics card.
Why Is My Computer Not Showing Up On My Monitor?
If your computer is not showing up on your monitor, check for any damage to the video port or cable. Reconnect the monitor to the computer or try using a new video cable. Make sure all accessories are disconnected and restart your computer.
It could also be an issue with the CPU, motherboard, RAM, power supply, or graphics card not properly connected. Check them and try using them in another computer to confirm they’re working.
Conclusion
In order to resolve the issue of your laptop not connecting with the monitor, it is important to check for any damage to the video port on both the computer and the monitor, as well as the video cable. If there is no visible damage, try reconnecting the monitor to the computer or using a new video cable.
Basic hardware troubleshooting, such as disconnecting all accessories from your PC, can also help. Remember to ensure that all connections are properly plugged in and that the monitor is powered on. By following these steps, you should be able to resolve the issue and get your laptop to connect with the monitor again.