Kvm Switch Monitor Not Working: Troubleshooting Tips and Solutions
If your KVM switch monitor is not working, troubleshoot the issue by checking for transmission capacity or faulty video ports. Start by turning off all connected computers and peripherals, and ensure that the switch is supported, powered on correctly, and the keyboard, mouse, and monitor function normally with a direct connection to the server.
If the issue persists, consider replacing the KVM switch or troubleshooting specific brand-specific problems. Test the KVM switch by ensuring smooth and lag-free sharing of USB peripherals between connected computers. Additionally, check for compatibility and drivers for specific KVM switch models.
Avoid common issues with Mac compatibility or USB functionality.
Identifying Kvm Switch Failures
Having trouble with your KVM switch monitor not working? Don’t worry, troubleshooting is easy! Check if there is a lack of transmission capacity or if the video port on the KVM switch is defective. You can also try turning off all connected computers and peripherals for a quick test.
A KVM switch is an essential tool for managing multiple computers or servers from a single console. However, like any electronic device, it can encounter issues that prevent it from functioning properly. In this section, we will discuss how to identify and troubleshoot common KVM switch failures, including signs and symptoms of malfunction, common error messages, and initial quick checks.
Signs And Symptoms Of Malfunction
When a KVM switch is not working correctly, there are several signs and symptoms that you may encounter. These can include:
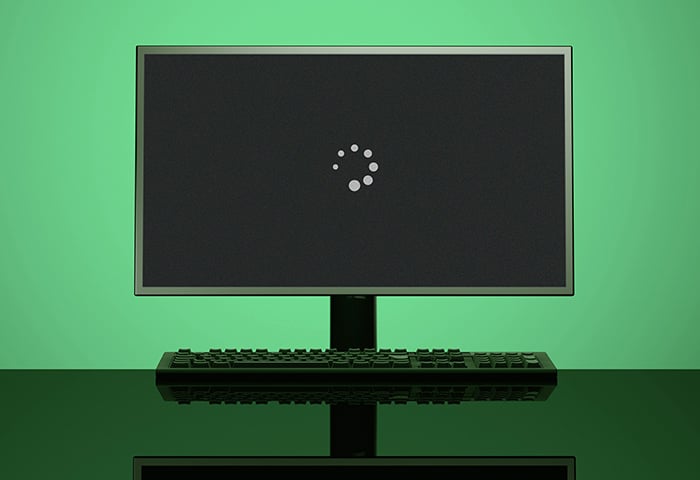
- Screen flickering
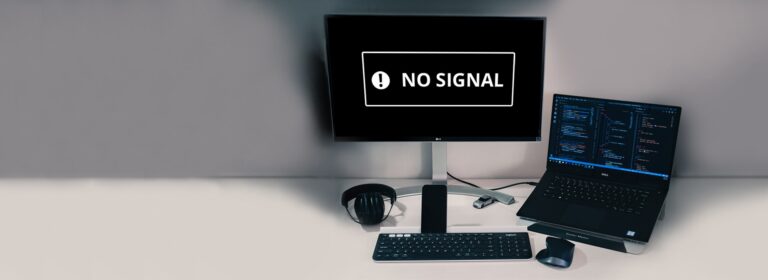
- No signal on the monitor
- Loss of keyboard and mouse functionality
- Incorrect display resolution
- USB device recognition issues
If you notice any of these symptoms, it is likely that there is a problem with your KVM switch that needs to be addressed.
Common Error Messages
When dealing with KVM switch failures, you may come across error messages that can provide valuable information about the issue at hand. Some common error messages include:
- “KVM switch not recognized”
- “Input signal out of range”
- “USB device not detected”
- “No video signal”
- “Keyboard not recognized”
These error messages can guide you in determining the root cause of the problem and help in finding the appropriate solution.
Initial Quick Checks
Before diving into complex troubleshooting steps, it’s important to perform some initial quick checks to rule out potential issues. Here are some simple checks you can do:
- Make sure all computers and peripherals connected to the KVM switch are turned off.
- Ensure that all cables and connectors are securely plugged in.
- Verify that the power supply for the KVM switch is properly connected and functioning.
By conducting these initial checks, you can eliminate any simple setup or connectivity problems, and focus on diagnosing the actual cause of the KVM switch failure.
Troubleshooting Tips And Solutions
Experiencing issues with your KVM switch monitor not working can be frustrating. Thankfully, there are several troubleshooting tips and solutions you can try to get your monitor up and running again. In this section, we will explore some common problems and provide steps to resolve them.
Power Cycling And Reconnecting
If you’re faced with a flickering screen or no display at all on your monitor, it’s worth trying a power cycle and reconnecting the cables. Follow these steps:
- Turn off all connected computers and peripherals.
- Disconnect the power cables from the KVM switch and the monitor.
- Wait for about 30 seconds.
- Reconnect the power cables to the KVM switch and the monitor.
- Turn on the devices and check if the monitor is now working properly.
Compatibility Checks
Another potential issue could be compatibility problems between your KVM switch and the devices you’re connecting. Perform the following checks:
- Ensure that the KVM switch you’re using is compatible with your server.
- Double-check the power connection of the KVM switch to ensure it is properly connected.
- If the keyboard, mouse, or monitor works fine with a direct connection to the server, consider replacing the KVM switch.
- Inspect the video port on the KVM switch and the video cable for any defects that may be causing the issue.
Firmware And Software Updates
Outdated firmware or software can sometimes cause compatibility issues or prevent the proper functioning of your KVM switch. Follow these steps to update them:
- Visit the manufacturer’s website and navigate to the support or downloads section.
- Look for firmware or software updates specifically for your KVM switch model.
- Download the latest updates and follow the provided instructions to install them.
- After the update process is complete, restart your devices and check if the monitor is now working.
Alternative Connection Methods
If the above steps don’t resolve the issue, you can try alternative connection methods to bypass any potential problems with the KVM switch. Consider these options:
- Connect the monitor directly to the computer without using the KVM switch to determine if the issue lies with the switch.
- Try using a different video cable or adapter to rule out any faulty connections.
- Test the monitor on another computer to ensure it’s functioning correctly.
By following these troubleshooting tips and solutions, you can increase the chances of resolving the KVM switch monitor not working issue. Remember to always check with the manufacturer’s documentation or support resources for specific troubleshooting steps related to your particular KVM switch model.
Resolving Video Signal Problems
Having trouble with your KVM switch monitor not working? Don’t worry! There are several troubleshooting steps you can try, such as checking the video port on the switch and ensuring it is powered on correctly. If all else fails, you may need to replace the KVM switch or resolve any keyboard, mouse, or USB device issues.
Adjusting Resolution Settings
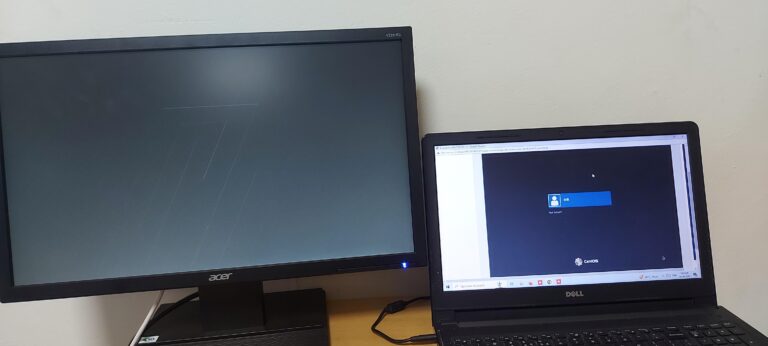
If you are experiencing a KVM switch monitor not working issue, one possible cause could be the resolution settings. It is essential to ensure that the selected resolution is supported by the KVM switch to avoid a blank screen or flickering.
To adjust the resolution settings, follow these steps:
- Access the display settings on your computer.
- Locate the resolution settings and select an option that is compatible with your KVM switch.
- Apply the changes and check if the monitor starts working properly.
Cable And Adapter Inspections
Another common reason for a KVM switch monitor not working is faulty cables or adapters. To resolve this issue, it is crucial to inspect and ensure the integrity of the cables and adapters connected to the KVM switch.
Perform the following steps to inspect the cables and adapters:
- Check for any visible physical damage on the cables and adapters.
- Make sure all connections are secure and not loose.
- If possible, try using different cables and adapters to see if the issue persists.
Port Testing And Switcher Functionality
In some cases, the problem may lie with the specific port on the KVM switch or the switcher functionality itself. To troubleshoot this, follow the below steps:
- Disconnect all devices connected to the KVM switch.
- Test each port on the KVM switch one by one by connecting a monitor directly to it.
- If the monitor works fine with direct connection, the issue may be with the switcher functionality.
- Try resetting the KVM switch or referring to the manufacturer’s instructions for troubleshooting steps.
By following these steps and addressing the resolution settings, cable and adapter inspections, and port testing, you can effectively troubleshoot and resolve video signal problems with your KVM switch monitor.
Navigating Peripheral Connectivity
When troubleshooting a KVM switch monitor that is not working, it is essential to address potential issues with peripheral connectivity. The following sections offer solutions for keyboard and mouse recognition fixes, USB device management, and driver verification and updates.
Keyboard And Mouse Recognition Fixes
If your KVM switch monitor is not recognizing the keyboard or mouse, here are some steps you can take to troubleshoot the issue:
- Check the connection: Ensure that all cables connecting the KVM switch, keyboard, and mouse are securely plugged in.
- Swap ports: Try connecting the keyboard and mouse to different ports on the KVM switch to rule out a faulty port.
- Reset devices: Power off the KVM switch and any connected computers, then turn them back on to reset the devices.
- Update drivers: Check for any driver updates for your keyboard and mouse and install them if available. This can often resolve compatibility issues.
Usb Device Management
Issues with USB devices connected to the KVM switch can often lead to monitor not working. Here are some steps to manage USB connectivity:
- Disconnect and reconnect USB devices: Remove all USB devices from the KVM switch, then reconnect them to ensure a fresh connection.
- Check USB compatibility: Verify that the USB devices you are using are compatible with the KVM switch. Some older devices may not work properly with certain switches.
- Limit USB devices: If you have multiple USB devices connected to the KVM switch, try disconnecting some of them, as too many devices can overload the switch’s transmission capacity.
Driver Verification And Updates
Ensuring that your drivers are up to date is crucial for the smooth operation of your KVM switch monitor. Follow these steps to verify and update your drivers:
- Identify the drivers: Determine the specific drivers required for your KVM switch and monitor. Refer to the manufacturer’s website or documentation for this information.
- Check for updates: Visit the manufacturer’s website and search for any available driver updates for your KVM switch and monitor.
- Download and install updates: Download the latest driver updates and follow the instructions provided by the manufacturer to install them correctly.
By following these steps to navigate peripheral connectivity, you’ll be able to troubleshoot common issues with your KVM switch monitor and ensure optimal performance.
Advanced Kvm Switch Resolutions
When it comes to resolving issues with a KVM switch monitor not working, there are several advanced resolutions you can try. These can help you troubleshoot the problem and get your KVM switch up and running smoothly again. In this section, we will discuss two key resolutions that can potentially fix the issue: Factory resets and advanced settings, and Technical support and manufacturer’s warranty.
Factory Resets And Advanced Settings
If you’re facing a KVM switch monitor not working issue, one of the first steps you can take is to perform a factory reset on the device. A factory reset can reset the KVM switch back to its default settings, potentially resolving any configuration-related issues that might be causing the problem. To perform a factory reset, consult the user manual or the manufacturer’s website for specific instructions.
In addition to factory resets, exploring the advanced settings of your KVM switch can also help you troubleshoot the monitor connectivity problem. These advanced settings often allow you to customize various parameters such as resolution, refresh rate, and input/output configurations. By adjusting these settings, you may be able to fix any compatibility issues between the KVM switch and your monitor.
Technical Support And Manufacturer’s Warranty
If performing factory resets and adjusting advanced settings doesn’t resolve the KVM switch monitor not working issue, it’s time to seek technical support from the manufacturer. Most reputable KVM switch manufacturers offer technical support services to assist users with troubleshooting and resolving any product-related issues. You can contact their support team through phone, email, or live chat.
It’s also important to check the manufacturer’s warranty policy for your KVM switch. If the switch is still covered under warranty, you may be eligible for a repair or replacement at no additional cost. Make sure to have your purchase details and serial number on hand when contacting the manufacturer’s support team.
Replacement Vs. Repair Considerations
If all else fails and the KVM switch monitor still isn’t working, it’s time to consider the option of replacement or repair. When deciding between the two, take into account factors such as the cost of repairs, the age of the switch, and the availability of replacement parts. In some cases, it may be more cost-effective to purchase a new KVM switch instead of repairing the existing one.
Before making a final decision, ensure that you have exhausted all troubleshooting options and sought technical support from the manufacturer. Once you have weighed all the considerations, you can make an informed choice that suits your needs and budget.

Credit: www.amazon.com
Frequently Asked Questions On Kvm Switch Monitor Not Working
Why Doesn T My Kvm Switch Work?
If your KVM switch isn’t working, make sure it is supported by your server and powered on correctly. If your keyboard, mouse, or monitor work fine with a direct connection to the server, consider replacing the KVM switch. Other potential issues can include keyboard, mouse, KVM switch, or USB-device problems.
Test the switch by seamlessly switching USB peripherals between connected computers.
Why Is Kvm Not Working?
If your KVM switch is not working properly, there are a few possible reasons. Check the transmission capacity or connectivity of the switch. Ensure all connected computers and peripherals are turned off. Verify the video port and cables for any defects.
Make sure the selected resolution is supported. If the issue persists, consider replacing the KVM switch or troubleshooting specific device problems.
How Do I Use A Kvm Switch On My Monitor?
To use a KVM switch on your monitor, follow these steps: 1. Connect your monitor to the KVM switch using the provided cables. 2. Connect your computers to the KVM switch using the appropriate cables. 3. Power on the KVM switch.
4. Use the KVM switch’s buttons or hotkeys to switch between connected computers. 5. Your monitor will display the output from the selected computer.
How Do You Test A Kvm Switch?
To test a KVM switch, connect all devices and ensure the smooth switching of USB peripherals between computers. Check for any lag or issues in sharing the keyboard, mouse, and other USB devices. Replace the switch if it can’t operate smoothly like a direct connection.
Conclusion
If you’re experiencing issues with your KVM switch monitor not working, there are several troubleshooting steps you can take. Start by checking the video port on the KVM switch and ensuring the video cable isn’t defective. Additionally, make sure the selected resolution is supported by the KVM switch.
If these steps don’t resolve the issue, consider replacing the KVM switch or seeking assistance from technical support. By following these tips, you can successfully troubleshoot and resolve the problems with your KVM switch monitor.