Troubleshooting Guide: JVC Monitor Not Turning On
If your JVC monitor is not turning on, first check if it is receiving power and if all cables are securely connected. If the issue persists, try resetting the monitor by unplugging it and plugging it back in.
Alternatively, you can search for troubleshooting guides on platforms like YouTube or DIY forums for specific solutions to common JVC monitor problems.
Initial Checks For Power Issues
If your JVC monitor is not turning on, there are a few initial checks you can perform. Make sure the monitor is receiving power and that all cables are securely connected. If the issue persists, you can try unplugging the monitor and then plugging it back in to reset it.
Confirm Power Outlet Functionality
When troubleshooting power issues with your JVC monitor, the first step is to confirm the functionality of the power outlet. Ensure that the outlet you are using is working properly by plugging in another electronic device and checking if it powers on. If the outlet is faulty, try using a different one or consider getting it fixed by a professional electrician.
Examine The Power Cable And Connector
The next step is to carefully examine the power cable and connector of your JVC monitor. Look for any visible signs of damage, such as frayed wires or bent pins. If you notice any issues, it’s important to replace the power cable with a new one that is compatible with your monitor model. Additionally, ensure that the power connector is firmly inserted into both the monitor and the power outlet, as a loose connection can prevent the monitor from turning on.
Check For Visible Led Indicators
One useful method to determine if there are any power-related issues with your JVC monitor is to check for visible LED indicators. Many monitors have LED lights that indicate whether the device is receiving power or not. Take a close look at your JVC monitor and see if there are any lit LED lights or any error codes being displayed. Refer to your monitor’s user manual to interpret any LED light patterns or error codes that you may come across.
Conclusion
By following these initial checks for power issues, you can troubleshoot why your JVC monitor is not turning on. Confirming the power outlet functionality, examining the power cable and connector, and checking for visible LED indicators are crucial steps in identifying and resolving power-related problems. If these checks do not resolve the issue, it may be necessary to seek professional assistance to diagnose and fix the problem.
Monitor Connection And Setup
If your JVC monitor is not turning on, there are troubleshooting steps you can take. Check if the monitor is receiving power and that all cables are connected securely. You can also try resetting the monitor by unplugging it and plugging it back in.
If the issue persists, seeking professional assistance may be necessary.
When troubleshooting a JVC monitor that is not turning on, it is important to start by assessing the monitor’s connection and setup. Several factors related to the monitor’s connection can contribute to this issue. By reviewing and addressing these factors, you can potentially resolve the problem and get your JVC monitor up and running again.
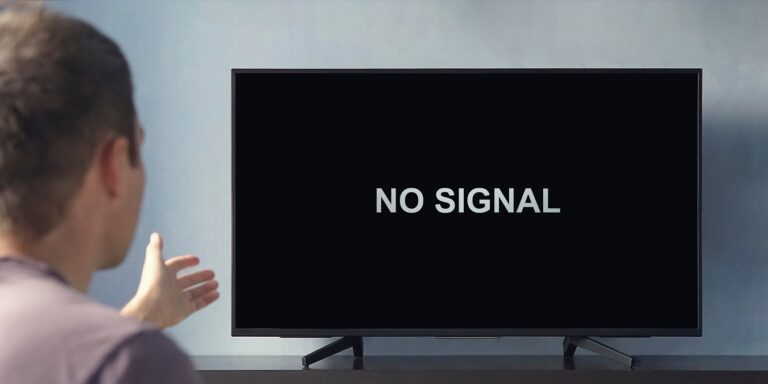
Assess Hdmi/vga Cable Integrity
The first step in troubleshooting your JVC monitor is to assess the integrity of the HDMI or VGA cable connecting it to your computer or external device. A loose or damaged cable can prevent the monitor from receiving a signal, causing it not to turn on. Inspect the cable for any visible signs of damage such as frayed ends or bent pins. Ensure that the cable is securely connected to both the monitor and the computer/external device. If necessary, try using a different cable to rule out a faulty connection as the cause of the issue.
Review Proper Input Source Selection
Incorrect input source selection can also lead to a JVC monitor not turning on. Make sure that the monitor is set to the correct input source that matches the device you are trying to connect. Use the monitor’s menu or input select button to navigate through the available input options and select the appropriate one. It is important to note that some JVC monitors may have multiple input ports, so be sure to select the correct one that corresponds to your device’s connection.
Evaluate External Device Power Status
Another aspect to consider when troubleshooting a JVC monitor not turning on is the power status of the external device connected to the monitor. Ensure that the device is powered on and functioning properly. Check for any indicator lights or power buttons on the device to confirm its power status. If the device is not receiving power or is malfunctioning, it can prevent the monitor from turning on. Troubleshoot the external device separately to resolve any power-related issues that may be affecting the JVC monitor’s functionality.
Power Cycle And Reset Procedure
Is your JVC monitor not turning on? Don’t worry, there are steps you can take to troubleshoot the issue. One of the first things you should try is power cycling the monitor. If that doesn’t work, performing a factory reset may be necessary. In this guide, we will walk you through the step-by-step power cycling process and provide instructions for a monitor factory reset. We will also discuss the importance of reviewing the monitor settings post-reset.
Step-by-step Power Cycling Guide
If your JVC monitor is not turning on, a power cycle can help resolve the issue. Follow these steps to power cycle your monitor:
- Unplug the monitor from the power source.
- Wait for at least 30 seconds to ensure that all residual power is drained.
- Plug the monitor back into the power source.
- Press the power button and check if the monitor turns on.
- If the monitor still doesn’t turn on, repeat the power cycle process one more time.
Power cycling can sometimes resolve minor technical glitches and restore the normal functionality of the monitor. If the issue persists, you may need to proceed with a factory reset.
Instructions For Monitor Factory Reset
If power cycling didn’t solve the issue, performing a factory reset might help. Please note that a factory reset will erase all saved settings and return the monitor to its original factory settings. To perform a factory reset on your JVC monitor, follow these instructions:
- Ensure that the monitor is powered off.
- Locate the reset button on the monitor. It is usually located on the back or side of the device.
- Using a small, pointed object like a paperclip, gently press and hold the reset button for about 10 seconds.
- Release the reset button.
- Wait for the monitor to restart. This may take a few moments.
After the factory reset, you will need to reconfigure the monitor settings to suit your preferences.
Monitor Settings Review Post-reset
Once you have performed a factory reset on your JVC monitor, it is important to review and adjust the settings according to your preferences. Take the time to go through the various menu options and customize the monitor for optimal performance. Check the brightness, contrast, color settings, and any other relevant settings that may enhance your viewing experience. By carefully reviewing the settings, you can ensure that the monitor is calibrated to your liking and functions properly.
A power cycle and a factory reset can often resolve issues with a JVC monitor that is not turning on. However, if the problem persists even after attempting these troubleshooting methods, we recommend seeking professional assistance or contacting JVC customer support for further guidance.

Credit: 247homerescue.co.uk
Internal Hardware Considerations
When your JVC monitor fails to turn on, it can be frustrating and inconvenient. There can be various underlying reasons for this issue, including internal hardware problems. Understanding the internal hardware considerations can help you troubleshoot the problem effectively and determine if professional repair is necessary.
Troubleshooting Guide: Signs Of Internal Failure
Before you decide to seek professional help, it is essential to identify the signs of internal failure in your JVC monitor. Here are some common indications:
- No power: The monitor shows no signs of life, such as no lights or sounds.
- Black screen: The monitor turns on, but the screen remains completely black.
- Flashing lights: The monitor displays flashing lights or a blinking power indicator.
- Strange noises: You may hear unusual sounds coming from the monitor, like buzzing or clicking.
- Picture distortion: The image appears distorted or discolored.
If you experience any of these signs, it suggests a possible internal hardware problem. However, it is crucial to note that these signs can also be caused by external factors, such as faulty cables or power supply issues, which should be checked before assuming internal failure.
Guidance On When To Seek Professional Repair
In certain cases, seeking professional repair is the best course of action to resolve internal hardware problems in your JVC monitor. Consider the following scenarios:
- If your monitor is still under warranty, contact the JVC customer support or authorized service center for assistance.
- If you are not experienced in handling electronic components or troubleshooting monitors, it is advisable to consult a professional technician.
- If you have tried basic troubleshooting steps, such as checking cables and power supply, but the issue persists, it indicates a deeper problem that requires professional expertise.
- When the cost of repairing the monitor is significantly lower than purchasing a new one, opting for professional repair can be a cost-effective solution.
Preventive Maintenance Tips For Monitor Longevity
While some hardware failures are unavoidable, taking preventive measures can extend the lifespan of your JVC monitor. Here are some tips for maintaining optimal performance:
- Keep the monitor in a well-ventilated area to prevent overheating.
- Clean the monitor regularly using a soft, lint-free cloth to remove dust and debris.
- Avoid placing the monitor near sources of moisture or extreme temperatures.
- Ensure all cables are securely connected and not bent or damaged.
- Use a surge protector to protect the monitor from power fluctuations.
Following these preventive maintenance tips can help minimize the risk of internal hardware failures and ensure your JVC monitor’s longevity.
Advanced Troubleshooting Techniques
When your JVC monitor refuses to turn on, it can be frustrating and leave you wondering what steps to take next. In such cases, advanced troubleshooting techniques can be your ally in resolving the issue and getting your monitor back up and running. In this section, we will explore two techniques that may help you identify and fix the problem: Firmware Update and Software Conflicts, and Capacitor Inspection for Seasoned Users.
Firmware Update And Software Conflicts
One of the first steps you can take when troubleshooting your JVC monitor is to check if a firmware update is available. Firmware updates often include bug fixes and improvements that can address issues like the monitor not turning on. To perform a firmware update on your JVC monitor, follow these steps:
- Visit the official JVC website and navigate to the support section.
- Look for the Downloads or Firmware section and search for the model number of your monitor.
- Download the latest firmware update file and save it to a USB flash drive.
- Connect the USB flash drive to your monitor’s USB port.
- Power on the monitor and navigate to the system settings.
- Locate the firmware update option and select the USB flash drive as the update source.
- Follow the on-screen instructions to initiate the firmware update.
- Once the update is complete, restart the monitor and check if it turns on.
In addition to firmware updates, software conflicts can also cause the monitor not to turn on. If you recently installed or updated any software on your computer that interacts with the monitor, such as graphics drivers or calibration software, there may be a conflict preventing the monitor from powering on. To troubleshoot software conflicts:
- Access your computer’s device manager.
- Expand the display adapters section.
- Right-click on your monitor’s driver and select Uninstall.
- Restart your computer to complete the driver removal.
- Visit the JVC website and download the latest driver for your monitor.
- Install the downloaded driver and restart the computer again.
- Try turning on the monitor and check if the issue is resolved.
Capacitor Inspection For Seasoned Users
For seasoned users or those comfortable with opening up their monitors, inspecting the capacitors can be a valuable troubleshooting step. Capacitors are electronic components that store electrical energy, and if they are faulty or damaged, they can prevent the monitor from turning on. Here’s how you can inspect the capacitors:
- Ensure the monitor is turned off and disconnected from the power source.
- Open the back panel or casing of the monitor.
- Locate the capacitors on the circuit board.
- Visually inspect the capacitors for any signs of bulging, leaking, or damaged components.
- If you notice any faulty capacitors, consider replacing them with new ones of the same specifications.
- Close the back panel or casing and reconnect the monitor to the power source.
- Turn on the monitor and check if it powers on successfully.
Contacting Jvc Customer Support
If the advanced troubleshooting techniques mentioned above do not resolve the issue with your JVC monitor not turning on, it may be time to contact JVC customer support. JVC’s customer support team consists of experts who can provide personalized assistance and guide you through the troubleshooting process. To contact JVC customer support, visit their official website and navigate to the Support or Contact section. Provide them with specific information about the issue and follow their guidance for further assistance.
Frequently Asked Questions For Jvc Monitor Not Turning On
Why Is My Jvc Not Turning On?
If your JVC TV is not turning on, first check if it is receiving power and if all cables are connected properly. Try resetting it by unplugging the TV for a while and then plugging it back in. If the issue persists, consult troubleshooting videos on YouTube or seek advice from DIY forums.
Does A Jvc Tv Have A Reset Button?
Yes, a JVC TV does not have a physical reset button. To reset it, unplug the TV, check the power connection and cables, and then plug it back in. If the problem persists, consult the user manual or contact JVC customer support for further assistance.
Why Is The Screen On My Tv Black?
If the screen on your TV is black, it could mean that the backlight is burnt out or not working. To check, turn off the lights and shine a flashlight on the screen. If you can see a picture with the flashlight, then the backlight may be the issue.
Try checking the power and cable connections and reset the TV. If the problem persists, consider replacing the screen or seeking professional help.
Why Is My Jvc Monitor Not Turning On?
There could be several reasons why your JVC monitor is not turning on. It could be due to a power issue, faulty cables, or a malfunctioning internal component. Make sure the monitor is receiving power and all cables are securely connected.
If the problem persists, it is recommended to contact a professional technician for further troubleshooting.
Conclusion
To troubleshoot a JVC monitor that won’t turn on, there are several steps you can take. First, check if your monitor is receiving power and if all cables are connected properly. If that doesn’t work, try resetting the monitor by unplugging it for a few minutes and then plugging it back in.
Additionally, you can try searching online for specific solutions or watching YouTube videos that provide proven fixes. Remember to always handle your monitor with care and consult a professional if needed.