Hubble Monitor Not Working: Troubleshooting Steps for Connectivity
If your Hubble monitor is not working, follow these troubleshooting steps to resolve the issue and get it back up and running quickly. Start by making sure the camera is plugged in and turned on, and check that it is connected to your Wi-Fi network.
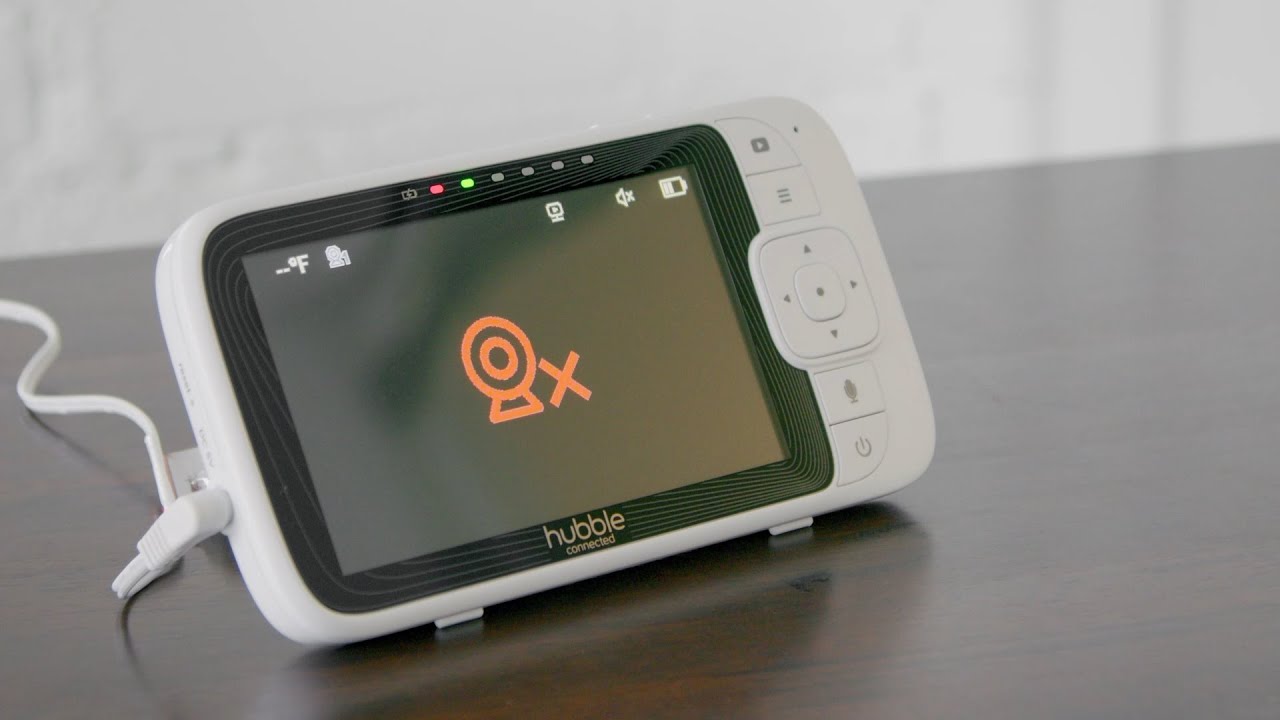
If the LED light on the camera is red and flashing slowly, it means the camera is not connected to your router or the internet. Try resetting the camera and your Wi-Fi connection to see if that resolves the issue.
If you are still experiencing problems, contact Hubble Connected customer service for further assistance.

Credit: www.amazon.com
Power And Hardware Verification
When your Hubble Monitor is not working, it can be quite frustrating. However, before jumping to conclusions about a faulty device, it’s important to perform power and hardware verification to ensure everything is in order. This step-by-step guide will help you troubleshoot common issues related to power supply and hardware connections.
Check The Hubble Monitor’s Power Supply
The first thing you should do is check the power supply of your Hubble monitor. Make sure it is plugged in and turned on. Additionally, ensure that the power outlet is functioning properly. Sometimes, a loose connection or a power outage can cause the monitor to stop working.
Inspect All Hardware Connections
Next, thoroughly inspect all hardware connections of your Hubble monitor. This includes checking the cables, ports, and any external devices that may be connected to the monitor. Ensure that all connections are secure and properly plugged in. Sometimes, a loose or faulty connection can lead to the monitor not working as intended.
If you find any loose connections, reattach them firmly. In case you suspect a cable or port issue, try using a different cable or port to see if the problem persists. By inspecting and securing all hardware connections, you can eliminate any potential issues related to faulty connections.
Confirm Operational Status Of The Hubble Monitor
Lastly, confirm the operational status of your Hubble monitor. Check if it powers on and displays any error messages or indicators. Keep an eye out for any abnormal behavior or unusual lights, as they can indicate underlying issues.
If you notice any problematic behavior, consult the user manual or reach out to customer support for further assistance. They will be able to guide you through specific troubleshooting steps tailored to your Hubble monitor’s model and firmware version.
By following these power and hardware verification steps, you can identify and potentially resolve the underlying issues causing your Hubble monitor not to work. Remember to be patient and thorough in your troubleshooting process, and don’t hesitate to seek professional help if needed.
Wi-fi And Router Configuration
If you’re facing issues with your Hubble Monitor not working, ensure that the camera is plugged in, connected to the Wi-Fi network, and the signal is strong. Troubleshoot the problem by following the steps provided by Hubble Connected Support.
Evaluate The Wi-fi Strength And Stability
When your Hubble monitor is not working, one of the first steps to take is to evaluate the strength and stability of your Wi-Fi connection. A weak or intermittent Wi-Fi signal can prevent the Hubble monitor from connecting to the network and accessing the internet.
To determine the Wi-Fi strength, you can try the following:
- Move the Hubble monitor closer to the router to see if the signal improves. Distance can sometimes affect Wi-Fi signal strength.
- Check if there are any physical barriers, such as walls or other electronic devices, that may be interfering with the Wi-Fi signal. If so, try rearranging or repositioning the router to minimize these obstructions.
- Use a Wi-Fi analyzer tool or app to assess the strength of your Wi-Fi signal. This will help you identify any areas of your home with weak signal coverage.
By evaluating the Wi-Fi strength, you can ensure that your Hubble monitor has a stable connection for optimal performance.
Verify Router Settings Compatibility
Another factor that can cause the Hubble monitor to not work is incompatible router settings. It’s essential to verify that your router settings are compatible with the Hubble monitor requirements.
Here are some steps to follow when checking router settings:
- Access your router’s configuration page by typing its IP address into a web browser.
- Check if your router is using a supported Wi-Fi standard (such as 802.11a/b/g/n/ac) and frequency band (2.4GHz or 5GHz). The Hubble monitor may only be compatible with specific standards, so make sure your router matches the requirements.
- Ensure that your router’s security settings (such as WPA2, WEP, or others) are supported by the Hubble monitor. Incompatible security settings can prevent a successful connection.
- Consider updating your router firmware to the latest version, as outdated firmware can cause compatibility issues with newer devices like the Hubble monitor.
By verifying the compatibility of your router settings, you can eliminate any potential conflicts that may be causing the Hubble monitor to malfunction.
Restart And Reconnect To The Network
If you’re still experiencing issues with your Hubble monitor, a simple restart and reconnection to the network might help resolve the problem. This process helps refresh the connection and establishes a new connection between the monitor and the router.
Follow these steps to restart and reconnect your Hubble monitor:
- Make sure the Hubble monitor is powered off by unplugging it from the power source.
- Turn off your router by unplugging it from the power source as well.
- Wait for about 30 seconds before plugging the router back in.
- Once the router has fully restarted, you can then plug the Hubble monitor back in to power it on.
- Ensure that the Hubble monitor is within range of the Wi-Fi signal and wait for it to establish a connection with the router.
By restarting and reconnecting to the network, you give the Hubble monitor a fresh start and the opportunity to establish a stable connection for proper functionality.
Troubleshooting Steps For Connectivity
If you’re experiencing connectivity issues with your Hubble Monitor, follow these troubleshooting steps to get it up and running again. Ensure the camera is plugged in, connected to the Wi-Fi network, and the signal is strong. If the camera is offline, try resetting it and checking your Wi-Fi connection.
Step-by-step Connection Issue Resolution
If you’re facing connectivity issues with your Hubble monitor, follow these step-by-step troubleshooting steps to resolve the problem:
- Check the power source: Ensure that your Hubble monitor is properly plugged in and turned on. In case of a battery-powered monitor, try recharging or replacing the battery pack.
- Verify Wi-Fi connection: Make sure that the Hubble monitor is connected to your Wi-Fi network. If the camera is not connected to the router, it won’t connect to the internet.
- Signal strength check: Ensure that the Wi-Fi signal strength in the area where you are using the Hubble monitor is strong enough. Weak or intermittent Wi-Fi connection can cause connectivity issues.
- Reset Wi-Fi connection: If the Wi-Fi connection seems to be the problem, try resetting it. Disconnect the Hubble monitor from the Wi-Fi network and reconnect it.
- Update firmware: Check if there are any firmware updates available for your Hubble monitor. Keeping the firmware up to date can improve performance and resolve connectivity issues.
- Check for interference: Interference from other devices can affect the connectivity of your Hubble monitor. Keep the monitor away from devices like microwaves, cordless phones, and other electronics.
- Contact customer service: If none of the above steps work, reach out to Hubble Connected customer service for further assistance and support.
Updating Firmware For Optimal Performance
To ensure optimal performance and fix connectivity issues, it is important to keep your Hubble monitor’s firmware up to date. Follow these steps to update the firmware:
- Visit the official Hubble Connected website and navigate to the support or downloads section.
- Locate the firmware update file specific to your Hubble monitor model.
- Download the firmware update file to your computer or mobile device.
- Connect your Hubble monitor to the computer or mobile device using the provided USB cable or through a wireless connection.
- Access the Hubble monitor’s settings or control panel and navigate to the firmware update section.
- Follow the on-screen instructions to select and install the downloaded firmware update file.
- Once the firmware update is installed, restart the Hubble monitor and check if the connectivity issues have been resolved.
Guidelines For Resetting The Hubble Monitor
If you’re still experiencing connectivity issues with your Hubble monitor, resetting the monitor can often help. Follow these guidelines to reset your Hubble monitor:
- Locate the reset button on the Hubble monitor. This is usually a small button located on the back or bottom of the device.
- Using a paperclip or a small tool, press and hold the reset button for about 10 seconds.
- Release the reset button and wait for the Hubble monitor to restart.
- Once the monitor has restarted, go through the initial setup process again, including connecting to your Wi-Fi network.
- After the setup is complete, check if the connectivity issues have been resolved.
Network And Signal Interferences
If your Hubble monitor is not working, it could be due to network and signal interferences. Ensure that your camera is connected to the Wi-Fi network and that the signal is strong. Troubleshoot connectivity issues by following the steps provided by Hubble Connected Support.
Identifying Potential Interference Sources
When your Hubble monitor is not working, network and signal interferences could be the culprit. Identifying potential sources of interference is the first step towards resolving this issue. Here are some common sources to look out for:
- Other wireless devices: Devices such as cordless phones, baby monitors, and microwaves emit signals that can interfere with the Hubble monitor’s connection. Keep the Hubble monitor away from these devices for optimal performance.
- Obstacles: Thick walls, metal objects, and other obstructions can weaken the Wi-Fi signal. Ensure that the Hubble monitor is placed in a location with a clear line of sight to the Wi-Fi router.
- Neighboring networks: If you live in an area with multiple Wi-Fi networks in close proximity, they can interfere with each other. Change your Wi-Fi channel to a less crowded one to minimize signal disruption.
- Electrical appliances: Large electrical appliances like refrigerators, televisions, and washing machines can emit electromagnetic waves that interfere with the Hubble monitor’s signal. Keep the monitor away from such appliances.
Tips For Minimizing Signal Disruption
To ensure a stable and uninterrupted Hubble monitor connection, here are some tips to minimize signal disruption:
- Keep the Hubble monitor and the Wi-Fi router in close proximity to each other to maintain a strong signal.
- Position the Wi-Fi router at an elevated location for better coverage and reduce obstructions.
- Consider using Wi-Fi range extenders or mesh network systems to amplify the signal and extend its reach.
- Regularly update the firmware of your Wi-Fi router to benefit from improved performance and bug fixes.
- Avoid placing the Hubble monitor near reflective surfaces like mirrors and metal objects, as they can reflect and weaken the signal.
- Reduce the number of connected devices on your Wi-Fi network to prioritize bandwidth for the Hubble monitor.
Optimal Placement For Hubble Monitor Setup
The placement of the Hubble monitor plays a crucial role in ensuring a reliable connection. Follow these guidelines for optimal placement:
- Place the Hubble monitor in a central location within the range of your Wi-Fi router.
- Avoid placing the monitor near large objects that can absorb or obstruct the Wi-Fi signal.
- If possible, elevate the Hubble monitor to a higher position, such as mounting it on a wall, to improve the signal coverage.
- Ensure that the monitor is not placed too close to walls or corners, as it may weaken the signal.
- Avoid placing the monitor in areas with high levels of electromagnetic interference, such as near electrical wires or circuit breaker boxes.
By identifying potential interference sources, following tips to minimize signal disruption, and ensuring optimal placement, you can significantly improve the performance of your Hubble monitor. Implement these practices to resolve network and signal interferences and enjoy uninterrupted monitoring of your precious ones.
Advanced Troubleshooting Tactics
If your Hubble monitor is not working, follow the connectivity troubleshooting steps on HubbleConnected’s YouTube channel to prevent interference and ensure a stable Wi-Fi connection. You can also check Hubble Connected’s support page for solutions to common issues like offline cameras and device limit messages.
Troubleshooting Complex Connectivity Issues
If you’re experiencing complex connectivity issues with your Hubble monitor, don’t panic. There are several troubleshooting tactics you can try to resolve the problem. By following these steps, you can identify and fix any underlying issues preventing your Hubble monitor from working properly.
- Check the LED status: A red and slowly flashing LED indicates that your camera is not connected to your router or the internet. Make sure your camera is properly plugged in and turned on.
- Verify Wi-Fi connection: Ensure that your camera is connected to the Wi-Fi network and receiving a strong signal. Weak or intermittent Wi-Fi connection can cause the camera to go offline. If necessary, move the camera closer to the router or consider using a Wi-Fi extender.
- Prevent interference: Interference between the camera and other devices can disrupt the connection. Keep the camera away from other electronic devices, microwaves, cordless phones, and metal objects that may obstruct the Wi-Fi signal.
- Reset the camera: If all else fails, you can try performing a factory reset on your Hubble monitor. This will restore the device to its original settings and often resolves software-related issues. Refer to the instructions provided below for the factory reset procedures.
Instructions For Factory Reset Procedures
If you need to perform a factory reset on your Hubble monitor, follow these simple steps:
- Locate the reset button on your device. This is usually found on the back or bottom of the monitor.
- Using a small, pointed object such as a paperclip or pin, press and hold the reset button for about 10 seconds.
- Release the reset button and wait for the device to restart. This may take a few minutes.
- Once the monitor has rebooted, it should be restored to its default settings.
Accessing Technical Support Resources
If you’ve tried troubleshooting and a factory reset, but your Hubble monitor still isn’t working, it’s time to reach out for technical support. The Hubble Connected Support Team is available to assist you with any technical issues you may be facing.
To access technical support resources, follow these steps:
- Visit the Hubble Connected Support website.
- Search for your specific issue or question in the support database for immediate troubleshooting assistance.
- If you’re unable to find a solution, reach out to the support team directly via phone or email.
- Provide them with detailed information about your issue, including any troubleshooting steps you have already attempted.
- The support team will work with you to diagnose and resolve the problem as quickly as possible.
Remember, technical issues happen, but with these advanced troubleshooting tactics and access to technical support resources, you’ll be well-equipped to handle any challenges with your Hubble monitor.
Hubble Connected Support Access
If you’re experiencing issues with your Hubble monitor not working, check out Hubble Connected Support for troubleshooting steps, including connectivity and camera setup. Ensure your camera is correctly plugged in, connected to Wi-Fi, and has a stable signal to resolve any problems.
Utilizing Hubble Connected Online Help
If you’re experiencing issues with your Hubble Monitor not working, don’t worry! Hubble Connected offers comprehensive online support to help you troubleshoot and resolve any connectivity problems you may be facing.
When it comes to accessing Hubble Connected support, the first step is to visit their website and navigate to the support section. Here, you’ll find a wealth of resources, guides, and FAQs designed to assist you in resolving issues like camera connectivity, Wi-Fi setup, and more.
Here are some common troubleshooting steps available through Hubble Connected online support:
- Verify that your camera is plugged in and turned on.
- Ensure that your camera is connected to the Wi-Fi network and has a strong signal.
- Check if the LED light on your camera is red and slowly flashing, which indicates a connection issue.
- Recharge or replace the battery pack if your Hubble monitor has no display.
- Reset the units by disconnecting the battery pack and unplugging both the parent and camera units.
Contacting Customer Service For Assistance
If you’ve tried troubleshooting on your own but are still unable to resolve the issue, reaching out to Hubble Connected customer service can provide further assistance. Their knowledgeable and friendly support team is available to help you get your monitor up and running again.
To contact customer service, simply visit the Hubble Connected website and find their “Contact Us” page. Here, you’ll find contact information such as phone numbers or email addresses, depending on your preferred method of communication. Don’t hesitate to reach out and explain your issue in detail – the support team is dedicated to finding a solution to your problem.
Community-driven Solutions Discussion
In addition to the official support provided by Hubble Connected, there is also a vibrant community of Hubble users who are always willing to share their experiences and solutions. Engaging with this community can often provide insightful tips and tricks for resolving common Hubble monitor issues.
One way to tap into this community-driven knowledge base is by participating in online forums or discussion boards dedicated to Hubble Connected products. These platforms allow users to share their troubleshooting experiences, suggest solutions, and ask questions.
By actively engaging in these discussions, you can benefit from the collective wisdom of fellow Hubble users and potentially find unique solutions to your specific monitor issues.
Remember, when it comes to troubleshooting your Hubble Monitor, utilizing the Hubble Connected online support resources, reaching out to customer service, and joining community-driven discussions are all effective strategies to get your monitor back in working order.
Frequently Asked Questions Of Hubble Monitor Not Working
How Do I Reset My Hubble Monitor?
To reset your Hubble monitor, follow these steps: 1. Make sure the camera is plugged in and turned on. 2. Check that the camera is connected to your Wi-Fi network. 3. If the camera is offline, disconnect the battery pack and unplug both units.
4. Recharge or replace the battery pack if there is no display. 5. Once the camera is reset, you can set it up again.
How Do I Get My Hubble Monitor To Work?
To get your Hubble monitor to work, make sure it is plugged in and turned on. Connect it to your Wi-Fi network and ensure a strong signal. If the LED is red and slowly flashing, it means the camera is not connected to your router.
Reset the camera if needed. Contact Hubble Connected customer service for further assistance.
Why Is My Hubble Connected Camera Not Working?
If your Hubble connected camera is not working, make sure it is plugged in and turned on. Check if it is connected to the Wi-Fi network properly. If the LED is red and slowly flashing, it means the camera is not connected to the router or the internet.
Try resetting the camera or contact Hubble Connected customer service for further troubleshooting.
Why Does My Hubble Baby Monitor Go Offline?
Your Hubble baby monitor may go offline due to reasons like the camera being turned off or a weak and intermittent Wi-Fi connection. To resolve this, make sure the camera is turned on and connected to the Wi-Fi network properly.
Conclusion
If you’re facing issues with your Hubble monitor not working, don’t worry! Follow these troubleshooting steps to get it up and running again. Firstly, ensure that your camera is plugged in and turned on. Check if it’s connected to the Wi-Fi network and has a strong signal.
If the camera’s LED is red and flashing slowly, it means it’s not connected to your router. Additionally, make sure to reset the camera by disconnecting the battery pack and unplugging both units. We apologize for the inconvenience and are working on resolving this issue promptly.