Computer Not Displaying on Monitor: Troubleshooting Solutions
To fix a computer not displaying on a monitor, you can try forcing the monitor to wake up using the keyboard shortcut Win+P or Ctrl+Alt+Del. If that doesn’t work, check for damaged or loosely connected cables, as this is a common cause of the issue.
Confirming Power And Sleep Mode Status
If your computer is not displaying on the monitor, try using keyboard shortcuts like Win+P or Ctrl+Alt+Del to force it to wake up. Check for loose or damaged cables and connections, and consider adjusting your power-saving settings to prevent the monitor from turning off.
Other troubleshooting steps include resetting the UEFI/BIOS and trying a different cable.
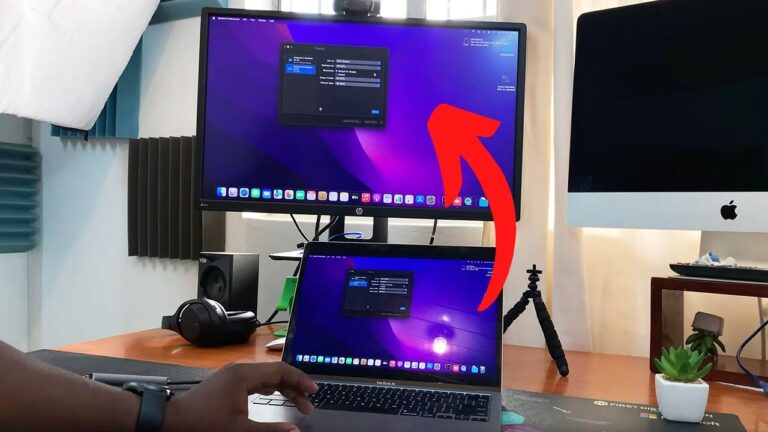
# Confirming Power and Sleep Mode Status ## Check if the monitor is powered on In order to diagnose why your computer is not displaying on the monitor, the first step is to ensure that the monitor is powered on. It may sound obvious, but sometimes a simple oversight can lead to unnecessary troubleshooting. Follow these steps to confirm if the monitor is powered on: 1. Check the power cable connection at the back of the monitor and ensure it is securely plugged into a power outlet. 2. Verify that the power indicator light on the monitor is illuminated. If it is not, press the power button or toggle the power switch to turn on the monitor. 3. If the power light is still not lit, try plugging the monitor into a different power outlet or replace the power cable if necessary. ## Identify signs of computer being in sleep mode Another common reason for a computer not displaying on the monitor is when it is in sleep mode. Sleep mode is a power-saving feature that temporarily suspends your computer’s activity to conserve energy. To check if your computer is in sleep mode, look for the following signs: 1. Check if the power indicator light on the computer tower is blinking or pulsating. This indicates that the computer is in sleep mode. 2. Listen for any fan or hard drive activity. If the computer is silent and unresponsive, it is likely in sleep mode. 3. Check the monitor for a “No Signal” message or a blank screen. This can be an indication that the computer is in sleep mode. ## Wake up the computer using keyboard shortcuts If you have confirmed that the monitor is powered on and the computer is in sleep mode, you can try to wake up the computer using keyboard shortcuts. Here are two commonly used keyboard shortcuts: 1. Press the Win+P keys simultaneously on your keyboard. This shortcut opens the Display settings and allows you to select a display mode. Choose “Extend” or “Duplicate” to wake up the computer and display the content on the monitor. 2. Alternatively, press the Ctrl+Alt+Del keys on your keyboard. This shortcut opens the Task Manager, and once it is opened, the computer should wake up from sleep mode and display the login screen on the monitor. By following these steps, you can confirm the power and sleep mode status of your computer and monitor. If the issue persists, you may need to proceed with further troubleshooting steps to resolve the problem. Remember that resolving issues related to computer display requires patience and attention to detail. Sometimes, a simple adjustment or reset can quickly solve the problem and save you from unnecessary frustration.Verifying Cable Connections
If you’re experiencing a computer not displaying on the monitor, try verifying cable connections to ensure they are not damaged or loosely connected. This can be a common reason for no display and can easily be fixed by checking and properly securing the cables.
When your computer fails to display anything on the monitor, it can often be due to damaged or loosely connected cables. In order to troubleshoot this issue, it is essential to verify the cable connections between your computer and monitor. This guide will walk you through the necessary steps to ensure all cable connections are in order.
Inspect All Cable Connections Between The Computer And Monitor
Begin by carefully inspecting all the cable connections between your computer and monitor. Make sure that each cable is securely connected at both ends. Sometimes, during the movement or cleaning of your computer setup, cables can become loose, resulting in no display on the monitor.
If you find any loose cables, make sure to secure them properly by firmly plugging them into their respective ports. Ensuring a secure connection is crucial for maintaining a stable signal between your computer and monitor.
Secure Any Loose Cables
If you come across any cables that appear damaged or frayed, it is advisable to replace them with new ones. Damaged cables can interfere with the transmission of signals, leading to no display on the monitor.
Additionally, make sure to organize and route the cables in a way that minimizes tangling or accidental disconnection. Keeping the cables neat and tidy can prevent future issues with connectivity.
Test With Alternative Cables If Available
If you have access to alternative cables, it is worth testing them to determine if the issue persists. Sometimes, faulty cables can be the root cause of no display on the monitor.
Using alternative cables will help you identify whether the problem lies with the original cables or other components of your computer setup. If the monitor displays properly with the alternative cables, you can conclude that the original cables need replacement.
However, if the issue still persists even with alternative cables, further troubleshooting may be required to pinpoint the cause of the problem.
By carefully inspecting cable connections between your computer and monitor, securing any loose cables, and testing with alternative cables, you can effectively troubleshoot the no display issue. Ensuring a stable and secure connection is essential for allowing the transmission of signals between your computer and monitor, leading to a successful display. Taking these steps will help you resolve the issue efficiently and get your computer back on track.
Adjusting Display Settings
If your computer is not displaying on the monitor, there are a few troubleshooting steps you can take. Check cables for any damage or loose connections, try a different cable if necessary, and adjust power-saving settings on your PC to prevent the monitor from turning off.
Adjusting Display Settings Accessing the display settings via safe mode or another monitor To troubleshoot a computer not displaying on the monitor, you can access the display settings through safe mode or by connecting another monitor. Safe mode allows you to start your computer with minimal drivers and services, which can help identify and resolve display issues. Follow these steps to access display settings via safe mode: 1. Reboot your computer. 2. During the startup process, press the F8 key repeatedly until the Advanced Boot Options menu appears. 3. Select “Safe Mode” from the list using your keyboard arrows and hit Enter. 4. Once in safe mode, go to the Start menu, right-click on the desktop, and select “Display Settings” from the drop-down menu. 5. From there, you can adjust the resolution, color depth, and monitor settings to troubleshoot the display issue. Alternatively, you can connect another monitor to your computer to rule out any hardware-related problems. If the second monitor displays properly, it indicates that the issue lies with your original monitor. Ensure correct display output is selected If your computer is turned on but not displaying anything on the monitor, make sure that the correct display output source is selected. Follow these steps to ensure the correct display output is selected: 1. Check the physical connections between your computer and the monitor, ensuring that the cables are securely plugged in. 2. Press the input/source button on your monitor to cycle through the available options and select the correct input source for your computer. 3. If you are using multiple monitors, ensure that your computer is set to extend or duplicate the display across all connected monitors. 4. Restart your computer to apply the changes and see if the display issue is resolved. Update or rollback graphics drivers Outdated or faulty graphics drivers can cause display issues on your computer. To resolve this, you can update or rollback the graphics drivers. Follow these steps: 1. Press the Windows key + X on your keyboard and select “Device Manager” from the pop-up menu. 2. Expand the “Display Adapters” category. 3. Right-click on the graphics driver and select “Update driver” to search for the latest driver updates online. 4. If an update is found, follow the on-screen instructions to install it. 5. If updating the driver doesn’t resolve the issue, you can right-click on the graphics driver and select “Properties” to access the driver properties. 6. Under the “Driver” tab, click on the “Roll Back Driver” button to revert to the previous version of the driver. 7. Restart your computer to apply the changes. By accessing the display settings via safe mode or another monitor, ensuring the correct display output is selected, and updating or rolling back the graphics drivers, you can troubleshoot and resolve display issues on your computer. Remember to check both the hardware connections and software settings to identify the root cause of the problem.Hardware Component Checks
If your computer is not displaying on the monitor, there could be various hardware component issues causing this problem. Check the cables for damage or loose connections, try different cables if necessary, and ensure your monitor and graphics card are functioning properly.
When your computer fails to display on the monitor, it can be a frustrating experience. However, there are several steps you can take to troubleshoot and identify the issue. One effective approach is conducting hardware component checks, which involves verifying the functionality of various hardware components associated with the display. By following these steps, you can potentially pinpoint the root cause of the problem and find a suitable solution.Testing With An Alternative Monitor
One of the first steps to take when troubleshooting a computer that isn’t displaying on the monitor is to test with an alternative monitor. This helps determine whether the issue lies with the monitor itself or with other hardware components. To do this, follow these steps:- Obtain a different monitor or borrow one from a friend or colleague.
- Disconnect the current monitor from your computer.
- Connect the alternative monitor to your computer using the appropriate cables, ensuring a secure connection.
- Power on your computer and observe if the alternative monitor displays any content.
Check For Gpu Functionality Or Onboard Video
Another crucial step in hardware component checks is assessing the functionality of the Graphics Processing Unit (GPU) or onboard video, depending on your computer setup. To perform this check, please refer to the following steps:- Ensure your computer is turned off and unplugged from the power source.
- If your computer has a dedicated graphics card, remove it from the motherboard.
- Carefully reseat the graphics card back into the appropriate slot on the motherboard. Ensure it is securely fastened.
- Alternatively, if your computer relies on onboard video, locate the video connections on the rear of the computer. It may be necessary to consult the user manual for your specific model.
Listen For Beep Codes Indicating Hardware Issues
Beep codes are audible signals produced by the computer’s motherboard during the booting process. These signals can indicate various hardware issues, including problems related to the display. To listen for beep codes, follow these steps:- Ensure your computer is turned off and unplugged from the power source.
- Remove the computer case to gain access to the motherboard.
- Locate the small speaker on the motherboard. It is typically labeled with “SPKR” or something similar.
- Power on the computer and listen for any beeping sounds. Take note of the number and pattern of the beeps.
Clearing Cmos To Reset Bios Settings
In some cases, incorrect BIOS settings can lead to display issues on your computer. Clearing the CMOS (Complementary Metal-Oxide-Semiconductor) can reset the BIOS settings to their default values, potentially resolving the problem. To clear CMOS, perform the following steps:- Turn off your computer and unplug it from the power source.
- Open the computer case to access the motherboard. Refer to the motherboard manual if necessary.
- Locate the CMOS battery on the motherboard. It is typically a circular silver battery.
- Remove the CMOS battery and wait for approximately 10 minutes.
- Reinsert the CMOS battery back into its original position.
- Close the computer case and reconnect the power source.
- Turn on the computer and check if the display issue has been resolved.
Computer On, No Monitor Signal
It can be quite frustrating when you turn on your computer, only to be greeted by a blank screen. This issue, commonly known as “No Monitor Signal,” can prevent you from accessing your computer and using it as intended. However, there are several troubleshooting steps you can follow to resolve this problem and get your computer up and running again. In this article, we will explore the potential causes of a ‘no signal’ error from the monitor and provide you with possible solutions to fix it.
Troubleshoot ‘no Signal’ Error From The Monitor
If your computer powers on but you’re not receiving any signal on your monitor, you’ll need to troubleshoot the issue to identify and resolve the underlying problem. Here are some steps you can take:
- Check the cable connections: Start by ensuring that all the cables connecting your computer to the monitor are properly plugged in and secure. Sometimes, loose or damaged cables can cause a ‘no signal’ error. Make sure to check both the power and display cables.
- Try a different cable: If checking the connections doesn’t solve the issue, try using a different cable. Sometimes, faulty cables can prevent the signal from reaching your monitor.
- Test the monitor on another computer: To determine if the problem lies with your computer or the monitor itself, connect the monitor to another computer or laptop. If the monitor works fine on another system, it indicates that the issue is with your computer.
- Restart your computer: Sometimes, a simple restart can fix temporary glitches that may be causing the no signal error.
- Update your graphics card drivers: Outdated or incompatible graphics card drivers can also result in a ‘no signal’ error. Visit the manufacturer’s website to download and install the latest drivers for your graphics card.
- Reset the BIOS/UEFI settings: In some cases, incorrect BIOS/UEFI settings can lead to a ‘no signal’ error. You can try resetting the BIOS/UEFI settings to their default values to see if it resolves the problem.
Possible Causes And Solutions For ‘no Signal’ Message
Now that we’ve covered some troubleshooting steps, let’s take a deeper look at the possible causes and solutions for a ‘no signal’ error:
| Possible Cause | Solution |
|---|---|
| Loose or damaged cable connections | Check and reseat all cable connections or try using a different cable. |
| Outdated or incompatible graphics card drivers | Update the graphics card drivers to the latest version provided by the manufacturer. |
| Incorrect BIOS/UEFI settings | Reset the BIOS/UEFI settings to default or optimal values. |
| Faulty graphics card or motherboard | Consider reseating or replacing the graphics card if necessary. |
| Defective monitor | If the monitor works on another system, consider contacting the manufacturer for repair or replacement options. |
By following the troubleshooting steps and considering the possible causes and solutions mentioned above, you should be able to resolve the ‘no signal’ error on your computer’s monitor. Remember to exercise caution when handling any hardware components and seek professional assistance if needed. Hopefully, this guide has helped you troubleshoot and fix the issue, allowing you to enjoy your computer once again.
Troubleshooting Solutions Integrated In Devices
If your computer is not displaying on the monitor, there are a few troubleshooting solutions you can try. Resetting the UEFI/BIOS, checking for loose or damaged cables, and trying a different cable are some steps you can take to resolve the issue.
Additionally, adjusting power-saving settings on your PC can prevent the monitor from turning off unexpectedly.
Utilizing Motherboard Display Ports When Available
One effective troubleshooting solution for a computer not displaying on the monitor is to utilize the motherboard display ports when available. These display ports, located at the back of the computer tower, can be used to connect the monitor directly to the motherboard, bypassing any potential issues with the graphics card or other external connections.
By using the motherboard display ports, you can determine whether the problem lies with the graphics card or any external connections. To utilize these ports, simply disconnect the monitor cable from the graphics card and connect it to one of the available display ports on the motherboard.
If the display works fine through the motherboard display port, then it indicates a problem with the graphics card or its drivers. In this case, you may need to update the graphics card drivers or replace the card if it is faulty.
Resetting Uefi/bios Settings
Another troubleshooting solution integrated in devices is to reset the UEFI/BIOS settings. UEFI (Unified Extensible Firmware Interface) or BIOS (Basic Input/Output System) settings can sometimes get corrupted or misconfigured, leading to issues with the display.
To reset the UEFI/BIOS settings, you will need to access the UEFI/BIOS setup screen during the startup process. The key to access the setup screen varies depending on the manufacturer, but it is usually displayed on the startup screen or mentioned in the motherboard manual.
Once you access the UEFI/BIOS setup screen, navigate to the “Reset to Default” or “Load Defaults” option, and select it. This will reset all the settings to their default values, which can often resolve display-related issues.
Exploring Built-in Hardware Diagnostic Tools
In addition to utilizing motherboard display ports and resetting UEFI/BIOS settings, another troubleshooting solution integrated in devices is to explore the built-in hardware diagnostic tools. Many devices nowadays come with diagnostic tools that can help identify and resolve hardware issues.
To access these tools, restart your computer and look for an option like “Boot Menu” or “Diagnostic Tools” during the startup process. Press the corresponding key to enter the menu and select the diagnostic tool option.
The built-in hardware diagnostic tools will scan various components of your computer, including the graphics card and monitor, for any issues. It will provide detailed reports and sometimes even suggest solutions to fix the problems.
By exploring these built-in hardware diagnostic tools, you can effectively troubleshoot and resolve any hardware-related issues that may be causing the computer not to display on the monitor.
Maintenance Tips And Practices
Keeping your computer in top shape involves regular maintenance to ensure optimal performance and longevity. A crucial aspect of computer maintenance is troubleshooting and addressing issues related to the display on your monitor. In this article, we will explore some essential tips and practices to help you resolve the problem of your computer not displaying on the monitor.
Regularly Updating System Drivers
System drivers are essential software that allows your computer’s operating system to communicate with hardware components such as the monitor. Outdated or incompatible drivers can often lead to display issues, including a blank screen on your monitor. To ensure your system drivers are up to date:
- Visit the manufacturer’s website for your computer or motherboard.
- Locate the support or downloads section.
- Find the appropriate drivers for your system, especially those related to display or graphics.
- Download and install the latest drivers.
Regularly updating your system drivers can help resolve compatibility issues and improve the overall performance of your computer’s display.
Ensuring Proper Ventilation And Cleaning To Prevent Overheating
Overheating can be a common cause of display issues on a computer. When components such as the CPU or graphics card overheat, they may not function correctly, resulting in a blank screen on your monitor. To prevent overheating:
- Ensure that your computer is placed in a well-ventilated area.
- Clean the fans and air vents regularly to remove dust and debris buildup.
- Consider using a cooling pad or additional fans to improve airflow.
Proper ventilation and cleaning practices can help maintain a stable temperature within your computer, minimizing the risk of overheating and display problems.
Importance Of Surge Protection For Hardware Longevity
Power surges can occur unexpectedly and damage your computer’s hardware components, including the monitor. Protecting your computer with surge protection measures is vital for maintaining hardware longevity and preventing display issues. Here are some steps you can take to safeguard your computer:
| Surge Protection Measures: |
|---|
| Use a surge protector or uninterrupted power supply (UPS) for your computer. |
| Ensure that all power cables are securely connected. |
| Avoid plugging your computer into power outlets with fluctuating voltage. |
| Consider investing in a high-quality surge protector with built-in voltage regulation. |
By implementing surge protection measures, you can safeguard your computer’s hardware from power fluctuations and prevent potential damage that may affect the display on your monitor.
Credit: www.drivereasy.com
Frequently Asked Questions For Computer Not Displaying On Monitor
Why Is My Pc Not Displaying On My Monitor?
If your PC is not displaying on your monitor, there could be several reasons. Check if the cables are damaged or loosely connected. Try using different cables or ports. Ensure that the monitor is powered on and the PC is awake.
You can also try resetting the BIOS or adjusting power-saving settings.
How Do You Fix A Computer That Is On But The Screen Is Black?
To fix a computer with a black screen, try pressing the keyboard shortcut Win+P or Ctrl+Alt+Del to wake up the monitor. Check for loose or damaged cables. If using a laptop, the GPU or display may be damaged, or the LVDS cable might be loose.
Adjust power-saving settings to prevent the monitor from turning off.
Why Is My Laptop On But Not Displaying On The Screen?
If your laptop is on but not displaying on the screen, it could be due to several reasons. Some possible causes are damaged or loosely connected cables, incorrect display settings, a corrupt or damaged internal disk drive, a damaged display, or a loose LVDS cable.
Check these potential issues to troubleshoot the problem.
Why Does My Monitor Turn Off But My Pc Is Still On?
Your monitor may turn off while your PC is still on due to power-saving settings. Check your PC’s power-saving settings and adjust them to prevent the monitor from turning off automatically. Additionally, ensure that all cables are properly connected and not damaged.
Conclusion
If you’re facing the frustrating issue of a computer not displaying on your monitor, there are several troubleshooting steps you can take. First, check for damaged or loosely connected cables, as this is a common culprit. You can also try rebooting your computer or clearing the CMOS.
Additionally, make sure your power-saving settings are adjusted properly to prevent the monitor from turning off. By following these steps, you can hopefully resolve the issue and get your computer to display on your monitor again.