Computer Monitor Not Turning on: Troubleshooting Solutions to Get Your Display Back
If your computer monitor is not turning on, check the cables for any damage or loose connections. Test the cables on another computer or use different cable cords to ensure they are working properly.
If the cables are fine, verify that you have selected the correct input source on your monitor. If all else fails, there may be an issue with the monitor itself, and it might need to be checked by a professional.
Confirm Monitor Power And Indicators
One common issue that computer users often encounter is their monitor not turning on. It can be frustrating, especially if you rely on your computer for work or entertainment. In this blog post, we will focus on the subheading: Confirm Monitor Power and Indicators. By following these troubleshooting steps, you can identify and resolve the issue swiftly.
The first step is to check the power cable connections for your monitor. Loose or damaged cable connections can prevent the monitor from turning on. Carefully examine each connector to ensure they are firmly attached. Replace any worn or damaged cables with new ones.
Next, pay attention to the power indicator lights on your monitor. These lights provide valuable information about the power status of your device. Refer to the monitor’s user manual to understand the meaning of each indicator light.
If the power indicator light is off, it could indicate a power supply issue. Ensure that the power cable is securely plugged into both the monitor and the power outlet. If necessary, try a different power outlet to rule out any issues with the power source.
On the other hand, if the power indicator light is flashing or displaying unusual patterns, it could indicate a hardware problem. In such cases, consult the manufacturer’s troubleshooting guide or contact their customer support for further assistance.
If the power cable connections and indicator lights appear to be functioning correctly, you can try performing a power reset for the monitor. This process can help resolve any temporary issues that may be preventing the monitor from turning on.
- Ensure that the monitor is powered off. If necessary, disconnect the power cable from the monitor and wait for a few minutes.
- While the monitor is disconnected from the power source, press and hold the power button for around 15 seconds. This will discharge any residual power in the monitor.
- Reconnect the power cable to the monitor and plug it back into the power outlet.
- Turn on the monitor and check if it powers up successfully.
If the monitor still does not turn on after performing a power reset, it may indicate a more complex issue that requires professional assistance. Contact the manufacturer’s support team or consult a qualified technician for further troubleshooting.
By following these steps to confirm the monitor’s power and indicators, you can increase your chances of identifying and resolving the issue quickly. Remember to carefully check the power cable connections, assess the power indicator lights, and perform a power reset if necessary. With these troubleshooting methods, you can get your computer monitor up and running again in no time.

Credit: www.pcmag.com
Examine Video Cables And Ports
When your computer monitor refuses to turn on, it can be frustrating and worrisome. However, before you start panicking, it’s important to perform some troubleshooting steps to identify the root cause of the issue. One common reason for a monitor not turning on is a problem with the video cables and ports.
Check For Damage Or Loose Connections
The first step in examining the video cables and ports is to check for any visible damage. Inspect the cables carefully, looking for signs of fraying or connector pins that may be bent or broken. Additionally, ensure that all connections are securely attached to both the monitor and the computer.
If you notice any worn-out or damaged cables, it’s advisable to replace them with new ones. Sometimes, loose connections can also cause the monitor to not turn on. By firmly reattaching all the connectors, you can eliminate this as a potential issue.
Try Alternative Cables (hdmi, Dvi, Displayport)
If the cables appear to be in good condition and the connections are secure, the next step is to try using alternative cables. Depending on your monitor and computer’s available ports, you may have multiple options such as HDMI, DVI, or DisplayPort.
By trying different cables, you can determine if the issue lies with the specific cable you were using initially. Sometimes, a faulty cable can prevent the monitor from turning on, and using an alternative cable can solve the problem.
Test The Monitor With A Different Computer
If after checking the video cables and ports the issue persists, it’s a good idea to test the monitor with a different computer. This will help determine if the problem lies with your computer or with the monitor itself.
By connecting the monitor to another computer that you know is functioning properly, you can identify whether the monitor is the culprit. If the monitor works fine with a different computer, then the issue likely lies with your computer’s graphics card or other hardware components.
Ensure that the monitor is properly powered on and try adjusting the display settings on the computer to ensure compatibility. If the monitor still doesn’t turn on, it might be time to seek professional assistance or contact the manufacturer for further guidance.
Computer Monitor Not Turning On: Settings Check
When your computer monitor fails to turn on, it can be frustrating and disrupt your work or entertainment. However, before jumping to conclusions about a faulty monitor, it’s important to perform a settings check. Often, a simple review and reset of monitor settings or exploration of the graphic card control panel can resolve the issue. Additionally, ensuring that the correct input source is selected can make all the difference in restoring functionality. In this article, we will explore each of these steps in detail to help you troubleshoot and resolve the problem.
Review And Reset Monitor Settings
If your computer monitor is not turning on, it’s worth reviewing and resetting the monitor settings to see if that fixes the issue. Follow these steps:
- Check the power cable: Ensure that the power cable is securely connected to both the monitor and the power outlet. If it’s loose, plug it in firmly.
- Inspect the display cables: Check that the HDMI, DisplayPort, or VGA cables (whichever is applicable to your setup) are properly connected to both the monitor and the computer. Replace any cables that appear worn or damaged.
- Reset monitor settings: Some monitors have a reset option in the menu settings. Press the menu button on your monitor, navigate to the reset option, and select it to restore the monitor’s default settings.
Explore Graphic Card Control Panel
If the previous steps didn’t resolve the issue, it may be worth exploring the graphic card control panel settings. Here’s how:
- Access the graphic card control panel: Right-click on your desktop and select the graphic card control panel option. This can vary depending on the make and model of your graphic card.
- Check multiple display settings: Ensure that the correct display settings are selected, especially if you have multiple monitors connected. Confirm that the monitor you’re having trouble with is set as the primary display.
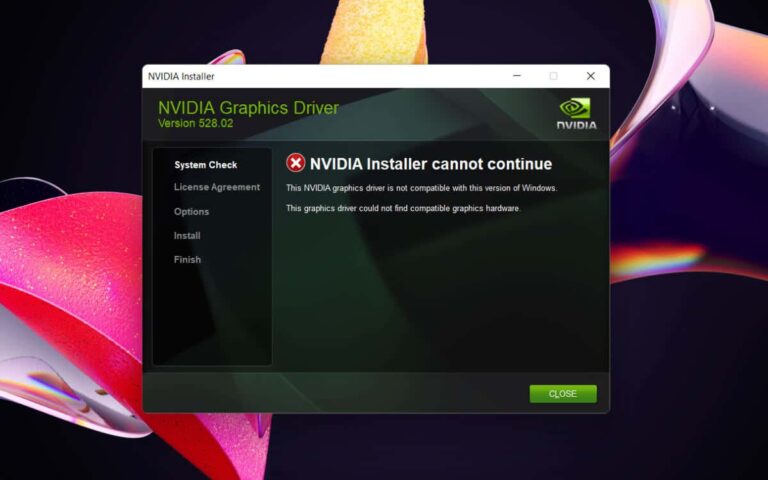
- Update graphic card drivers: Visit the manufacturer’s website or use a trusted driver update tool to ensure that you have the latest drivers for your graphic card installed. Outdated drivers can sometimes cause display issues.
Ensure Correct Input Source Is Selected
If your computer monitor is still not turning on, it’s crucial to verify that the correct input source is selected. Here’s how:
- Press the monitor’s power button: Make sure the monitor is powered on by pressing the power button.
- Access the monitor’s menu settings: Use the menu buttons on the monitor to navigate to the input source selection.
- Select the correct input source: Choose the input source that matches the cable connection you are using (HDMI, DisplayPort, VGA, etc.).
By following these steps, you can troubleshoot and potentially resolve the issue of your computer monitor not turning on. However, if the problem persists, it may be necessary to seek professional assistance or consider replacing the monitor.
Troubleshooting Solutions For Software Issues
When your computer monitor refuses to turn on, it can be frustrating and inconvenient. However, before panicking and assuming the worst, it’s important to remember that there could be software-related issues causing this problem. In this section, we will explore some troubleshooting solutions to address these software issues effectively. By following these steps, you can hopefully resolve the problem and get your monitor up and running again.
Update Or Rollback Graphic Drivers
One common cause of a monitor not turning on is outdated or faulty graphic drivers. These drivers act as the communication link between your computer’s operating system and the graphics hardware. To ensure that your drivers are not the culprit, you should regularly check for updates.
Updating your graphic drivers can be done in a few simple steps:
- Open the Start menu and type “Device Manager” in the search bar.
- Click on the Device Manager application to open it.
- Expand the category labeled “Display adapters” to reveal the graphics card.
- Right-click on the graphics card and select “Update driver.”
- Follow the on-screen instructions to complete the driver update process.
If updating the drivers does not solve the issue or if you suspect that the latest driver update is causing the problem, you can also try rolling back the driver to a previous version. Here’s how:
- Open the Device Manager as mentioned earlier.
- Expand “Display adapters” and right-click on the graphics card.
- Select “Properties” from the context menu.
- Navigate to the “Driver” tab and click on “Roll Back Driver.”
- Follow the instructions provided to complete the rollback process.
Boot In Safe Mode To Diagnose Issues
Another useful troubleshooting solution is to boot your computer in “Safe Mode.” Safe Mode is a diagnostic mode that allows your computer to start with only the basic software and drivers necessary for operation. By booting in Safe Mode, you can determine if the problem is caused by a software conflict.
- Turn off your computer completely.
- Press the power button to turn it on.
- As soon as you see the manufacturer’s logo, press and hold the “F8” key.
- In the Advanced Boot Options menu, use the arrow keys to select “Safe Mode” and press “Enter”.
- Wait for your computer to boot into Safe Mode.
Once in Safe Mode, observe if your monitor turns on properly. If it does, it indicates that a software conflict is causing the issue. You can then proceed to troubleshoot the conflicting software and resolve the problem.
Check For Windows Updates Or Conflicts
Windows updates are crucial for ensuring the stability and functionality of your computer system. In some cases, outdated Windows versions or conflicts with other software can prevent your monitor from turning on. Therefore, it’s essential to check for updates and resolve any conflicts.
- Open the Start menu and go to “Settings.”
- Click on “Update & Security.”
- Click on “Windows Update” in the left-hand navigation pane.
- Click on “Check for updates” and wait for the process to complete.
- If updates are available, click on “Install” to update your Windows version.
If updating Windows does not solve the issue, you can check for conflicts by uninstalling recently installed software or drivers that might be causing conflicts. To uninstall software:
- Open the Start menu and go to “Settings.”
- Click on “Apps” or “Apps & Features.”
- Scroll through the list of installed software and select the one causing conflicts.
- Click on “Uninstall” and follow the on-screen instructions to complete the process.
By following these troubleshooting solutions, you can effectively address software-related issues that prevent your computer monitor from turning on. However, if the problem persists, it may indicate a hardware issue that requires professional assistance. It’s always recommended to consult with a technician in such cases.
Get Your Display Back: Component Testing
If your computer monitor is not turning on, there could be a variety of reasons behind it. One of the most effective ways to troubleshoot the issue is to perform component testing. By inspecting for faulty monitor components, testing with an alternative display unit, or considering professional repair or replacement, you can potentially identify and resolve the problem.
Inspect For Faulty Monitor Components
Before moving forward with any solution, it’s important to inspect your monitor for any faulty components. Here are a few steps you can take:
- Check that all video connections between your monitor and computer are secure and properly attached. Look out for any loose or damaged cables, and replace them if necessary.
- Examine the power supply and make sure it is functioning correctly. A faulty power supply can prevent your monitor from turning on.
- Inspect the monitor’s buttons and controls. Sometimes, a malfunctioning power button or control settings can be the cause behind the issue.
Test With An Alternative Display Unit
If inspecting the monitor components does not solve the problem, you can try testing with an alternative display unit. This allows you to determine whether the issue lies with the monitor itself or with the computer’s graphics card or software. Here’s what you can do:
- Connect your computer to a different monitor or TV using a different set of cables. This will help determine if the problem is isolated to the original monitor or if it persists across other displays.
- If the alternative display unit works, the issue likely lies with your original monitor. Consider professional repair or replacement.
- If the alternative display unit does not work either, the problem may be related to your computer’s graphics card or software. Additional troubleshooting steps may be necessary.
Consider Professional Repair Or Replacement
If all else fails, it may be time to consider professional repair or replacement options. Here are a few suggestions:
- Contact the manufacturer or a professional technician for assistance. They can help diagnose the issue and provide guidance on whether the monitor can be repaired or if it needs to be replaced.
- If your monitor is still under warranty, check if the warranty covers the current issue. This can save you from incurring any additional costs.
- Research and compare prices for new monitors on the market. This allows you to make an informed decision on whether it’s more cost-effective to repair or replace your current monitor.
Frequently Asked Questions Of Computer Monitor Not Turning On
Why Isn’t My Computer Monitor Turning On?
If your computer monitor is not turning on, check the cable connections between the monitor and computer. Make sure they are securely attached and not damaged. If the cables are fine, try using a different cable or connecting to another computer to determine if the issue is with the monitor.
Reseating or testing the CPU, motherboard, RAM, power supply, or graphics card may also help identify any connection issues.
Why Is My Computer Turning On But No Display?
There could be various reasons for your computer turning on but no display. Check for loose or damaged cable connections between your monitor and computer. Try using different cables to see if that solves the issue. Make sure you’re using the correct input source on your monitor.
It’s also possible that there may be an issue with your display components like the CPU, motherboard, RAM, power supply, or graphics card. Try reseating or testing these components to ensure they’re properly connected and working.
What Causes A Dead Monitor?
A dead monitor can be caused by loose or damaged cable connections between the monitor and computer. Check all connectors and replace any worn or damaged cables. Another possible cause is an issue with the data cable. Try using a different cable to see if that resolves the problem.
Additionally, a faulty display driver or hardware components like the CPU, motherboard, RAM, power supply, or graphics card may be to blame. Make sure these are properly connected and functioning.
Why Is My Monitor Connected But Not Displaying?
If your monitor is connected but not displaying, check the cable connection between your monitor and computer. Make sure all connectors are securely attached and replace any worn or damaged cables. You can also try pressing the keyboard shortcut Win+P or Ctrl+Alt+Del to force the monitor to wake up.
If the issue persists, it could be due to a faulty data cable or a problem with your monitor.
Conclusion
If your computer monitor is not turning on, there are several steps you can take to troubleshoot the issue. First, check all video connections to ensure they are firmly attached and replace any damaged cables. You can also try forcing the monitor to wake up using keyboard shortcuts.
If these steps do not work, there may be an issue with the monitor itself or with the CPU, motherboard, RAM, power supply, or graphics card. Try reseating these components or testing them in another computer. Remember to always check for any software or firmware updates as well.
