Asus Monitor Not Connecting to PC: Troubleshooting Tips for a Secure Connection
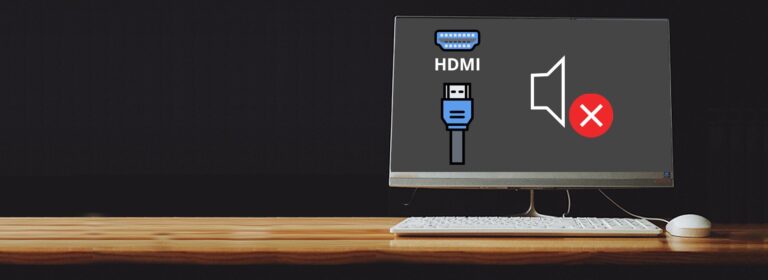
To fix Asus monitor not connecting to the PC, ensure the cable is securely plugged in and try using a different cable if necessary. Make sure the input resource on the monitor matches the connector/cable being used.
Confirming Monitor And Pc Compatibility
To confirm the compatibility between your Asus monitor and PC, ensure that the cable connecting them is secure. If the issue persists, try using a different cable. Also, check that the input resource on the monitor matches the connector or cable you are using.
Troubleshooting guides from Asus’s official support can provide further assistance.
Review Asus Monitor Specifications
Before troubleshooting any connectivity issues, it is important to review the specifications of your Asus monitor. This will ensure that it is compatible with your PC and can support the desired output resolution. To do this, follow these steps:- Identify the model number of your Asus monitor. You can usually find this information on the back of the monitor or in the user manual.
- Visit the official Asus website and search for your specific model.
- On the product page, look for the detailed specifications section.
- Take note of the supported input ports (VGA, DVI, HDMI, DisplayPort) and the maximum resolution supported by the monitor.
Check Pc Output Ports And Compatibility
To establish a successful connection between your PC and Asus monitor, it’s crucial to check both the output ports of your PC and their compatibility with the input ports on the monitor. Follow these steps to ensure compatibility:- Identify the output ports available on your PC. Common types include VGA, DVI, HDMI, and DisplayPort. These are typically located on the back of your PC tower or the side of your laptop.
- Consult your PC’s user manual or the manufacturer’s website to determine the specific output capabilities of your PC.
- Compare the output ports on your PC with the input ports mentioned in the Asus monitor specifications.
- If needed, use appropriate adapters or converters to bridge any compatibility gaps between your PC and the monitor.

Credit: www.zdnet.com
Inspecting Physical Connections
To troubleshoot the issue of an Asus monitor not connecting to the PC, ensure that the cable connecting the monitor to the PC is securely attached and not faulty. Check that the input resource on the monitor matches the connector or cable being used.
Additionally, make sure the operating system is not in hibernation or power-save mode.
When encountering an issue with your Asus monitor not connecting to your PC, one of the first steps to take is inspecting the physical connections. This involves examining the condition of cables and ports, as well as securing and re-seating all relevant connectors.
Examine Condition Of Cables And Ports
To start troubleshooting, check the condition of the cables and ports connecting your PC to the external monitor. Ensure that the cables are not damaged or frayed, as this can affect the signal transmission. If you notice any visible damage, it’s advisable to replace the cable with a new one.
Additionally, examine the ports on both the PC and the monitor. Dust or debris might accumulate over time, affecting the connection. Use a soft brush or a can of compressed air to clean the ports, ensuring a clean and secure connection.
Secure And Re-seat All Relevant Connectors
Loose connections can cause the monitor not to connect properly to the PC. To address this, secure and re-seat all relevant connectors. This includes disconnecting and then firmly reconnecting the cables on both ends, making sure they are securely plugged into the correct ports.
To ensure a proper connection, you may also try swapping the cables or connectors if possible. This can help determine whether the issue lies with the cable or the port.
By inspecting the physical connections and ensuring they are secure and in good condition, you can effectively troubleshoot and resolve the issue of your Asus monitor not connecting to your PC. Continue with the remaining steps in our troubleshooting guide to narrow down the problem further.
Assessing Correct Input Source Selection
To troubleshoot an Asus monitor not connecting to PC, first ensure the cable is secure and try changing it if needed. Check that the input resource on the monitor matches the connector/cable being used. If the monitor is still not working, it may be due to loose or misconfigured connections.
Guide On Accessing Monitor’s Input Source Settings
In order to connect your Asus monitor to your PC successfully, it is important to assess the correct input source selection. This can be done by following a simple guide on accessing the monitor’s input source settings:
- First, ensure that your monitor is powered on and connected to your PC using the appropriate cable.
- Locate the input source button on your monitor. This is usually located on the front or side panel of the monitor.
- Press the input source button to access the input source menu.
- Using the menu navigation buttons on your monitor, navigate to the desired input source option.
- Once you have selected the correct input source, press the input source button again to confirm your selection.
By following this guide, you will be able to access your monitor’s input source settings and select the appropriate input source for your PC.
Tips To Match Input Source With Pc’s Output
To ensure a successful connection between your Asus monitor and PC, it is crucial to match the input source with your PC’s output. Here are some tips to help you do just that:
- Check the type of cable you are using to connect your PC to the monitor. For example, if you are using an HDMI cable, make sure the input source on the monitor is set to HDMI.
- Verify that the cable is securely connected to both your PC and the monitor. A loose connection can result in a no signal error.
- Ensure that your PC’s output settings are configured correctly. This can usually be done through the display settings in your operating system.
- If you are using multiple monitors, make sure the correct monitor is selected as the primary display.
- Try using a different cable or connector if you are experiencing issues. Sometimes, a faulty cable or connector can prevent a successful connection.
By following these tips, you can ensure that the input source on your Asus monitor matches your PC’s output, allowing for a seamless and error-free connection.
Power And Signal Troubleshooting
If your Asus monitor is not connecting to your PC, first check if the cable connecting both devices is secure. You can also try changing the cable to see if the previous one was faulty. Make sure the input resource on the external monitor matches the connector/cable you are using.
Troubleshoot external display connection issues with the official support from Asus.
Confirm Monitor Power Status
Before diving into complicated troubleshooting steps, it’s essential to ensure that your monitor is receiving power. Follow these steps to confirm the power status of your Asus monitor:
- Check if the power cable is securely connected to both the monitor and the power outlet.
- Verify that the power indicator light on the monitor is illuminated. If not, try using a different power outlet or cable to rule out any power-related issues.
- Make sure the monitor is turned on by pressing the power button, typically located on the front or side of the monitor.
- If your monitor has an external power supply, double-check that it is plugged in correctly and functioning properly.
Confirming the power status of your monitor is the first step in troubleshooting any connection issues. If the monitor still doesn’t display any signs of power, you may need to contact Asus support for further assistance.
Investigate Signal Transmission Issues
If your Asus monitor is receiving power but still not connecting to your PC, it’s time to investigate signal transmission issues. Follow these steps to troubleshoot signal problems:
- Check the cable connecting your PC to the monitor. Ensure that it is securely connected to both the PC’s video output port and the monitor’s input port.
- If possible, try using a different cable to connect your PC to the monitor to rule out any cable-related issues. Sometimes, a faulty cable can prevent a proper signal transmission.
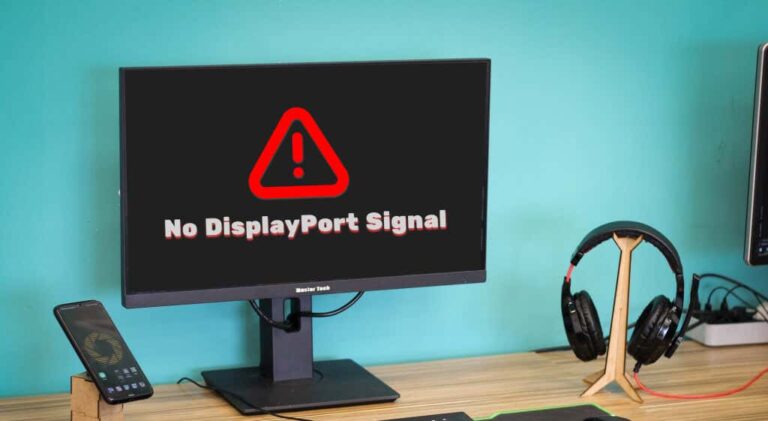
- Make sure that the input resource on the external monitor matches the connector or cable you are using. For example, if you are using an HDMI cable, ensure that the monitor’s input source is set to HDMI.
- Verify that your PC or laptop is not in hibernation, sleep, or power-save mode. Wake it up if necessary and see if the connection is restored.
By following these troubleshooting steps, you can identify and resolve common power and signal issues that may be preventing your Asus monitor from connecting to your PC. If the problem persists, it may be worth reaching out to Asus customer support for further assistance.
Updating Graphics Drivers
To fix the issue of an Asus monitor not connecting to a PC, ensure that the cable connecting the PC to the external monitor is secure. Consider changing the cable if necessary and make sure the input source on the monitor matches the connector/cable being used.
Troubleshooting steps can be found on the official ASUS support website.
Steps To Check And Update Pc Graphics Drivers
If your Asus monitor is not connecting to your PC, one of the possible reasons could be outdated or conflicting graphics drivers. Updating your PC’s graphics drivers can often resolve connection issues and ensure compatibility with your Asus monitor.
- Step 1: Identify your graphics card model
- Press the Windows key + R to open the Run dialog box.
- Type “dxdiag” and press Enter to open the DirectX Diagnostic Tool.
- In the System tab, you will find the name and model of your graphics card under the “Display” section.
- Step 2: Download the latest drivers
- Step 3: Uninstall old drivers
- Press the Windows key + X and select “Device Manager” from the menu.
- In the Device Manager window, expand the “Display adapters” category.
- Right-click on your graphics card and select “Uninstall device.”
- Follow the on-screen instructions to complete the uninstallation process.
- Step 4: Install the new drivers
- Step 5: Restart your PC
The first step is to identify the model of your graphics card, which will help you find the appropriate drivers. You can do this by following these steps:
Once you have identified your graphics card model, you can visit the manufacturer’s website (such as NVIDIA, AMD, or Intel) to download the latest drivers for your specific card.
Before installing the new drivers, it is important to uninstall the old drivers to prevent any conflicts or compatibility issues. To uninstall the old drivers, follow these steps:
After uninstalling the old drivers, you can proceed with installing the new drivers. Locate the downloaded driver file and double-click on it to start the installation. Follow the on-screen instructions to complete the installation process.
After installing the new drivers, it is recommended to restart your PC to ensure that the changes take effect.
How To Troubleshoot Driver Conflicts
In some cases, driver conflicts can prevent your Asus monitor from connecting to your PC. To troubleshoot driver conflicts, follow these steps:
- Step 1: Open the Device Manager
- Step 2: Expand the “Display adapters” category
- Step 3: Check for conflicts
- Step 4: Resolve conflicts
- Right-click on the conflicting device and select “Update driver” to install the latest driver.
- If updating the driver does not resolve the conflict, you can try uninstalling the conflicting driver and reinstalling it.
- In some cases, you may need to uninstall and reinstall both the conflicting driver and the graphics card driver.
- Step 5: Restart your PC
Press the Windows key + X and select “Device Manager” from the menu.
In the Device Manager window, expand the “Display adapters” category to see the installed graphics cards.
Look for any yellow exclamation marks or warning symbols next to your graphics card. This indicates a driver conflict or problem.
If you see any driver conflicts, you can try the following methods to resolve them:
After resolving any driver conflicts, it is recommended to restart your PC to ensure that the changes take effect.
By following these steps to update your PC’s graphics drivers and troubleshoot driver conflicts, you can increase the chances of resolving connectivity issues with your Asus monitor. Ensure to maintain the necessary connection between your PC and the monitor to enjoy a seamless viewing experience.
Operating System Considerations
To troubleshoot Asus Monitor not connecting to PC, ensure the cable connection is secure and try replacing the cable. Verify that the input resource on the monitor matches the connector/cable in use. Also, check if the operating system is in hibernation, sleep, or power saving mode.
damage or if it has been bent or twisted. In some cases, the cable may need to be replaced. However, in certain situations, the issue of an Asus monitor not connecting to a PC could be related to the operating system. This is an important aspect to consider, as the operating system plays a crucial role in recognizing and establishing a connection between the monitor and the PC. In order to troubleshoot this problem, there are a couple of operating system considerations that you should keep in mind.Verify Power Settings (sleep/hibernation Modes)
When your operating system enters sleep or hibernation mode, it can cause the monitor not to connect to your PC. This is because these power-saving modes can disrupt the normal functioning of the display. To address this issue, it is essential to check and verify the power settings of your operating system. To check the power settings on Windows, follow these steps:- Click on the ‘Start’ button and select ‘Settings’.
- In the settings menu, click on ‘System’.
- Select ‘Power & sleep’ from the left side menu.
- Under the ‘Screen’ section, adjust the time duration for ‘Screen’ and ‘Sleep’ to your desired settings.
- Click on the Apple icon in the top left corner of your screen and then select ‘System Preferences’.
- In the System Preferences menu, click on ‘Energy Saver’.
- Make sure that the ‘Display sleep’ and ‘Computer sleep’ sliders are set to the desired duration.
Instructions For Display Recognition In Operating System
Another crucial aspect to consider is the proper display recognition in your operating system. Sometimes, the OS might fail to detect or recognize the external monitor, leading to connectivity problems. To resolve this, you can follow the instructions below based on your operating system: On Windows:- Right-click on the desktop and select ‘Display settings’.
- Scroll down to the ‘Multiple displays’ section and click on ‘Detect’.
- If the monitor is not detected, click on ‘Identify’ to search for the monitor.
- If the monitor still doesn’t show up, click on ‘Graphics properties’ or ‘Graphics options’ and look for an option to ‘Force detect’ or ‘Scan for displays’.
- Click on the Apple icon in the top left corner of your screen and select ‘System Preferences’.
- In the System Preferences menu, click on ‘Displays’.
- Click on the ‘Detect Displays’ button.
Monitor Factory Reset And Modes
If you are experiencing connectivity issues between your Asus monitor and PC, it may be useful to perform a factory reset and explore different display modes and settings. This can help resolve any software-related issues and ensure optimal performance. Here’s how you can perform a factory reset on your Asus monitor:
Procedure For Asus Monitor Factory Reset
- Power off your monitor and disconnect it from the power source.
- Locate the On-Screen Display (OSD) buttons on your monitor.
- Press and hold the menu button on your monitor, then power on the monitor.
- Continue holding the menu button for about 5 seconds until the OSD menu appears.
- Navigate to the “Reset” or “Factory Reset” option using the arrow buttons, then press the menu button to select it.
- Confirm the reset by selecting “Yes” or “OK” when prompted.
- Wait for the reset process to complete and then power off and on your monitor.
Performing a factory reset can often resolve issues caused by misconfigured settings or software glitches. However, if the issue persists, you can also explore different display modes and settings to ensure compatibility and optimal performance. Here are some display modes you can try:
Exploring Different Display Modes And Settings
1. Standard mode:
This is the default display mode that provides accurate color reproduction for general use.
2. Game mode:
This mode enhances contrast and saturation to deliver a more immersive gaming experience.
3. Movie mode:
Movie mode enhances the display’s color temperature and contrast to make movies and videos appear more vibrant and cinematic.
4. Vivid mode:
This mode increases brightness, saturation, and sharpness to make images more visually striking.
To access these modes, locate the display settings on your Asus monitor. It is usually accessed through the OSD menu. Navigate to the display mode option and select the desired mode that suits your preference or the task at hand.
By performing a factory reset and exploring different display modes, you can troubleshoot connectivity issues and optimize your Asus monitor’s performance. Remember to check for cable connections and ensure they are secure as well. If the problem persists, you may consider reaching out to Asus support for further assistance.
Pc And Monitor Eco-system Troubleshooting
When it comes to setting up your computer and monitor, it’s important to ensure that they are working harmoniously together. If your Asus monitor is not connecting to your PC, there could be a few issues within the PC and monitor eco-system that need to be addressed. In this section, we will discuss some common troubleshooting steps to help you resolve the problem.
H3check Pc’s Display Settings For Multiple Monitors/h3
One possible reason why your Asus monitor is not connecting to your PC could be due to multiple monitor settings. Sometimes, your PC might still be detected as having multiple monitors connected, which can cause conflicts and prevent the connection with your Asus monitor. To check and adjust your display settings, follow these steps:
- Right-click on your desktop and select “Display settings” from the dropdown menu.
- In the Display settings window, you will see a section titled “Multiple displays.” Make sure it is set to “Extend these displays” if you only want to use your Asus monitor and not multiple monitors.
- If it is set to “Duplicate these displays” or “Show only on 1” or “Show only on 2,” change the setting to “Extend these displays.”
- Click on “Apply” to save the changes.
By adjusting your PC’s display settings to single monitor mode, you can ensure that your Asus monitor is the primary and only display being used by your PC.
H3inspect Third-party Software That Could Affect Connection/h3
In some cases, third-party software installed on your PC could interfere with the connection between your PC and Asus monitor. These software programs might have settings or configurations that conflict with the proper functioning of your monitor.
To rule out any software-related issues, follow these steps:
- Open Task Manager by pressing
Ctrl + Shift + Escon your keyboard. - Go to the “Startup” tab in Task Manager.
- Look for any third-party software that might affect the display or graphics settings.
- Disable or remove any unnecessary startup programs that could potentially interfere with the connection.
- Restart your PC to apply the changes.
By inspecting and disabling any third-party software that might be affecting the connection, you can ensure that your Asus monitor can establish a stable connection with your PC.
Final Resolutions And Expert Advice
If your Asus monitor is not connecting to your PC, start by checking the cable connection to ensure it is secure. Consider trying a different cable to see if the issue lies with the previous one. Also, make sure the input resource on the external monitor matches the connector or cable you are using.
Troubleshoot further by checking if the operating system is in hibernation, sleep, or power-save mode. If all else fails, consult official support or online resources for specific solutions.
Final Resolutions and Expert Advice Asus Monitor Not Connecting to PC If you’re encountering a frustrating issue with your Asus monitor not connecting to your PC, don’t worry, as there are several steps you can take to troubleshoot and resolve the problem. In this section, we’ll provide you with a summary of comprehensive troubleshooting steps, as well as guidance on when to seek professional support or warranty service.Summary Of Comprehensive Troubleshooting Steps
When faced with the issue of an Asus monitor not connecting to your PC, you can follow these comprehensive troubleshooting steps to resolve the problem: 1. Check the cable: Ensure that the cable connecting your PC to the external monitor is securely plugged into both devices. Sometimes, a loose or faulty cable can cause a connection problem. If you suspect the cable might be the issue, try changing it with a new one. 2. Verify input resource: Make sure that the input resource on your external monitor matches the connector or cable you are using. For example, if you are using an HDMI cable, ensure that the input source on the monitor is set to HDMI. 3. Power mode: Check if the operating system on your PC has entered hibernation, sleep, or power-save mode. If so, wake up the system to see if the connection is restored. 4. Signal cable: Verify the signal cable, such as VGA, DVI, HDMI, or DisplayPort, is securely connected on both ends. Try reseating the cable to ensure a stable connection. If you have followed these troubleshooting steps and are still experiencing issues with your Asus monitor not connecting to your PC, it may be time to seek additional support.When To Seek Professional Support Or Warranty Service
If none of the above solutions have resolved the problem, it might be necessary to seek professional support or warranty service. Here are a few scenarios when it is advisable to do so: 1. Persistent issue: If the problem persists even after attempting all troubleshooting steps, it may indicate a more complex issue that requires professional assistance. 2. Hardware-related problems: If you suspect that the issue lies with the hardware components of either your PC or the Asus monitor, it is best to consult an expert technician who can diagnose and repair the specific problem. 3. Warranty coverage: If your Asus monitor is still under warranty, it is recommended to reach out to the manufacturer’s customer support or service center. They can guide you on the next steps, which may involve repair or replacement, depending on the terms of your warranty. Remember, troubleshooting steps can vary based on the specific model and configuration of your Asus monitor and PC. It is always a good practice to refer to the manufacturer’s official support documentation or contact their customer support for model-specific troubleshooting advice. By following the comprehensive troubleshooting steps mentioned above and knowing when to seek professional support or warranty service, you can increase your chances of successfully resolving the issue of an Asus monitor not connecting to your PC. Implement these troubleshooting steps and take the necessary actions to ensure a seamless and reliable connection between your Asus monitor and PC. If you need further assistance, feel free to reach out to our customer support team, who will be happy to help you navigate through this issue.Frequently Asked Questions For Asus Monitor Not Connecting To Pc
Why Is My Asus Monitor Not Detected By My Computer?
If your ASUS monitor is not detected by your computer, check that the cable connecting them is secure. Try using a different cable to see if the issue is with the cable itself. Make sure the input resource on the monitor matches the connector you’re using.
Also, ensure that the operating system is not in hibernation or power-save mode. Check for any loose connections or cable damage.
Why Won’t My Pc Connect To My Monitor?
Ensure that the cable connecting your PC to your monitor is securely plugged in. Try using a different cable to see if the issue is with the cable itself. Make sure the input resource on the monitor matches the connector/cable you are using.
Check if the operating system is in hibernation, sleep, or power-save mode.
How Do I Connect My Asus Monitor To My Computer?
To connect your ASUS monitor to your computer, follow these steps: 1. Make sure the cable connecting your PC to your monitor is secure. 2. Try changing the cable if it doesn’t work. 3. Ensure that the input resource on the monitor matches the connector/cable you’re using.
4. Check if your operating system is in hibernation, sleep, or power-save mode. 5. If you still have issues, refer to the troubleshooting guides on the ASUS official website.
Why Is My Computer Not Showing A Monitor?
If your computer is not showing a monitor, check if the cable connecting your PC to the external monitor is secure. Try changing the cable to see if the previous one was faulty. Make sure the input resource on the external monitor is the same as the connector/cable you’re using.
It’s also important to check if the operating system is in hibernation or power-save mode.
Conclusion
When encountering Asus monitor connection issues, there are a few troubleshooting steps to consider. First, ensure that the cable connecting your PC to the monitor is secure and in good condition. If the issue persists, try changing the cable to identify any faults.
Additionally, check that the input resource on the monitor matches the connector or cable being used. Finally, if the operating system has entered hibernation, sleep, or power-save mode, it could affect the monitor’s display. By following these steps, you can address and resolve common connection problems with your Asus monitor.