Bios Not Showing Up on Monitor : Troubleshooting Guide
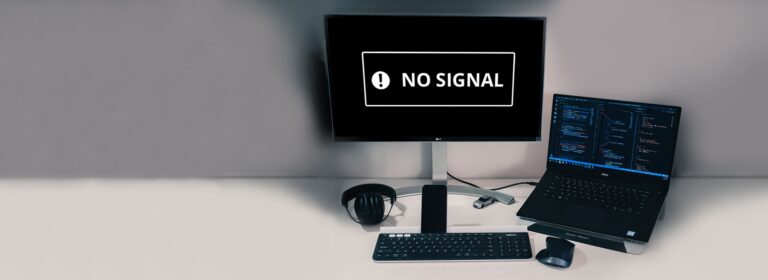
Bios not showing up on monitor can be caused by various hardware or software issues. We will explore possible reasons and troubleshooting steps to fix this problem.
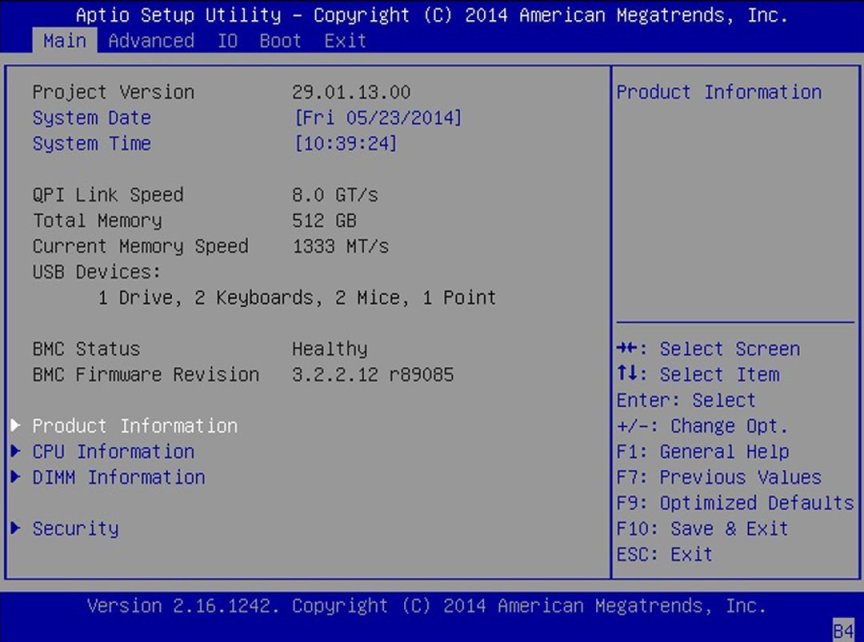
The BIOS (Basic Input/Output System) is a crucial component of your computer that initializes hardware and starts the operating system. When the BIOS doesn’t appear on the monitor during startup, it can be frustrating and indicate an underlying problem. There are several potential causes for this issue.
It could be due to a faulty connection between the computer and monitor, an outdated or incompatible display driver, incorrect BIOS settings, or a malfunctioning hardware component. In order to resolve the problem, you can try troubleshooting steps like checking the cable connections, updating the display driver, resetting BIOS settings, or contacting technical support. When the BIOS doesn’t show up on your monitor, it’s important to identify and resolve the underlying issue to ensure your computer’s proper functioning. By following the troubleshooting steps outlined you can troubleshoot and fix the problem efficiently.

Credit: www.nvidia.com
Initial Checklist
When you encounter the frustrating issue of your computer’s BIOS not showing up on the monitor, there are a few essential steps you can take to troubleshoot the problem. By going through this initial checklist, you can quickly identify and resolve the issue that’s preventing the BIOS from displaying on your monitor. Follow these steps in order to ensure a smooth troubleshooting process.
Confirm If The Monitor Is Powered On
First and foremost, let’s make sure the monitor is powered on. It may sound obvious, but sometimes a simple oversight can cause unnecessary confusion. Check if there is any power indicator light on the monitor, typically located at the front or bottom of the screen. If the light is off, make sure the power cable is securely plugged into the monitor and a working power outlet. After confirming the power source, press the power button on the monitor to turn it on. If the monitor’s power indicator light is on, move on to the next step.
Check Connections Between The Computer And Monitor
Now let’s ensure that the connection between your computer and the monitor is properly established. Begin by inspecting the video cable that connects the computer and the monitor. Verify that the cable is securely plugged into both the computer’s video output port and the monitor’s video input port. It’s recommended to disconnect and reconnect both ends of the cable to ensure a secure connection. If you are using a VGA cable, make sure the pins are not bent or damaged. In the case of HDMI or DisplayPort cables, check if there are any visible signs of damage on the connectors. Once you have checked and reestablished the connections, proceed to the next step.
Ensure Monitor Is Set To The Correct Input Source
Another common issue that can prevent the BIOS from showing up on the monitor is an incorrect input source selection. Most modern monitors allow you to choose from multiple input sources, such as HDMI, DisplayPort, or VGA. To determine if this is the cause of the problem, locate the input source button or menu on your monitor. Press the button or navigate through the menu to select the input source that matches the cable connection you are using. For example, if you are using an HDMI cable, select the HDMI input source. After selecting the correct input source, wait a few seconds to see if the BIOS screen appears on the monitor. If the problem persists, move on to the final step.
Quick Assessment Of Computer’s Power Status
The last step in the initial checklist is to evaluate the power status of your computer. Ensure that your computer is receiving adequate power by checking if the power cable is securely connected to a working outlet. Confirm if your computer’s power button or LED lights are indicating that it’s turned on. If the computer is powered on, you may need to perform a hard reset by holding down the power button for approximately 10 seconds to force a restart. On the other hand, if the computer is not powering on, it’s recommended to consult a professional technician or the manufacturer for further assistance.
Through this initial checklist, you have covered the fundamental troubleshooting steps to resolve the issue of the BIOS not showing up on your monitor. By confirming the monitor’s power status, checking the connections, ensuring the correct input source, and assessing the computer’s power status, you have effectively eliminated common causes of this problem. If the issue persists, it’s advisable to reach out to technical support or seek professional assistance to identify and resolve the underlying problem.
Common Causes And Solutions
When your computer’s BIOS doesn’t show up on the monitor, it can be a frustrating experience. Fortunately, there are several common causes and solutions you can explore to resolve this issue. By investigating hardware connections, reseating or replacing the BIOS battery, resetting BIOS settings through the motherboard jumper, and updating or recovering the motherboard BIOS, you can troubleshoot and fix the problem.
H3investigate Hardware Connections/h3
One of the first steps to take when your BIOS isn’t showing up on the monitor is to check your hardware connections. Ensure that all cables are securely plugged into the correct ports on your computer. Sometimes, a loose connection can cause the BIOS to fail to display. In particular, pay attention to the connection between your monitor and the graphics card or motherboard.
H3reseat Or Replace Bios Battery/h3
If investigating the hardware connections hasn’t resolved the issue, the next step is to reseat or replace the BIOS battery. The BIOS battery is responsible for providing power to the CMOS memory, which stores the BIOS settings and keeps the system clock running. Follow these steps:
- Power off your computer and disconnect all cables.
- Locate the BIOS battery on your motherboard. It is typically a small, round battery.
- Carefully remove the battery from its slot. If reseating, wait for a few seconds before reinserting it. If replacing, dispose of the old battery properly and replace it with a new one of the same type.
- After reseating or replacing the battery, reconnect all cables and power on your computer to see if the BIOS displays on the monitor.
H3reset Bios Settings Through Motherboard Jumper/h3
If reseating or replacing the BIOS battery didn’t resolve the issue, another solution is to reset the BIOS settings using the motherboard jumper. The jumper is a small plastic cap or switch located on the motherboard. Follow these steps:
- Refer to your motherboard’s documentation to locate the BIOS reset jumper.
- Power off your computer and disconnect all cables.
- Move the jumper to the reset position, usually by removing it from the original pins and placing it on the reset pins.
- Wait for a few seconds and then move the jumper back to its original position.
- Reconnect all cables and power on your computer to see if the BIOS displays on the monitor.
H3update Or Recover Motherboard Bios/h3
If none of the previous solutions have resolved the issue, consider updating or recovering the motherboard BIOS. Outdated or corrupted BIOS versions can cause compatibility problems and prevent the BIOS from displaying on the monitor. Refer to your motherboard manufacturer’s website for detailed instructions on how to update or recover the BIOS. Typically, this involves downloading a BIOS update file and installing it using specialized software provided by the manufacturer.
By investigating hardware connections, reseating or replacing the BIOS battery, resetting BIOS settings through the motherboard jumper, and updating or recovering the motherboard BIOS, you have taken proactive steps to address the issue of the BIOS not showing up on your monitor. Hopefully, one of these solutions has resolved the problem and you can now proceed with using your computer as intended.
Hardware Malfunction Diagnosis
When your computer fails to display the BIOS on the monitor, it can be a frustrating and worrisome experience. However, before you start panicking about major hardware issues, it’s important to go through a systematic process of elimination to diagnose the problem effectively. In this section, we will discuss some key steps you can take to determine the cause of the BIOS not showing up on your monitor.
Testing With An Alternative Monitor
One of the first things you should do when troubleshooting this issue is to connect your computer to an alternative monitor. This helps determine whether the problem lies with the monitor or the computer itself. To do this, follow these steps:
- Disconnect the current monitor from your computer
- Connect a known working monitor to your computer
- Power on your computer and check if the BIOS displays on the alternative monitor
If the BIOS shows up on the alternative monitor, then the issue is likely with your original monitor. Consider replacing it or seeking professional repair services.
Checking Video Cables And Ports For Damage
Another potential reason for the BIOS not displaying on your monitor is faulty video cables or damaged ports. Here’s what you can do to check for issues in this area:
- Inspect the video cable connecting your monitor to the computer for any visible damage
- If possible, try using a different video cable to connect your monitor to the computer
- Check the video ports on both the computer and the monitor for any signs of physical damage
If you notice any damage in the cable or the ports, replacing them may resolve the issue. Additionally, ensure that the cable is securely connected to both the computer and the monitor.
Signs Of Life In Motherboard And Connected Devices
If neither the alternative monitor nor the video cables and ports are the culprits, it’s time to inspect the motherboard and connected devices for signs of life. Follow these steps:
- Power on your computer and carefully observe the lights, fans, and other indicators on the motherboard
- Listen for any unusual sounds, such as beeps or clicks, that can provide insight into the problem
- Check if the computer is booting up by listening for the sound of the operating system loading
If you notice that the motherboard is not showing any signs of life, it could indicate a more serious hardware issue. It is advisable to consult a professional technician for further diagnosis and repair.
Swap Graphic Cards If Integrated Video Doesn’t Work
If your computer has an integrated graphics card and the BIOS still does not show up, you can try swapping it out with a dedicated graphics card (if available). Here’s how you can do it:
- Power off your computer and open the case
- Locate the integrated graphics card on the motherboard
- Remove it carefully from the PCIe slot
- Insert the dedicated graphics card into the PCIe slot
- Close the case and power on your computer
If the BIOS displays after swapping out the graphics card, it indicates a problem with the integrated graphics. Consider updating the relevant drivers or contacting the manufacturer for assistance.
Bios Accessibility And Recovery
Having trouble with your BIOS not appearing on your monitor? Learn how to access and recover your BIOS settings with our step-by-step guide. Get your system back on track in no time.
Utilize Motherboard Manual For Bios Reset Instructions
In case your computer’s BIOS is not showing up on the monitor, one possible solution is to perform a BIOS reset. This can help resolve any issues or conflicts that may be preventing the BIOS from properly displaying on your screen. To reset the BIOS, you can refer to the motherboard manual that came with your computer. The manual contains specific instructions on how to reset the BIOS settings to the default configuration.
Accessing Bios With Different Keyboard Shortcuts
Accessing the BIOS of your computer can be done using specific keyboard shortcuts. Depending on the manufacturer and model of your motherboard, the keyboard shortcut to access the BIOS may vary. Here are some commonly used keyboard shortcuts to access the BIOS:
| Manufacturer | Keyboard Shortcut |
|---|---|
| ASUS | Del or F2 |
| Gigabyte | Del or F2 |
| MSI | Del or F2 |
| ASRock | Del or F2 |
| Intel | F2 |
These keyboard shortcuts are entered during the computer’s startup process. Once you press the appropriate key, your computer will enter the BIOS interface, allowing you to access and modify the BIOS settings.
When To Consider A Motherboard Replacement
If you have tried resetting the BIOS and accessing it using different keyboard shortcuts but still cannot get it to show up on your monitor, it may be time to consider replacing the motherboard. A faulty or malfunctioning motherboard can cause various issues, including the BIOS not displaying correctly. Before considering a motherboard replacement, it is essential to diagnose the issue thoroughly to ensure that the problem is indeed with the motherboard.
Troubleshooting Guide Specifics
When your computer starts up, the Basic Input/Output System (BIOS) plays a critical role in initializing hardware components and ensuring a smooth boot process. However, encountering issues with BIOS not showing up on the monitor can be frustrating. In this troubleshooting guide, we will provide you with specific steps to diagnose and resolve this problem. So, let’s delve into the details!
Detailed Bios Troubleshooting Steps For Varying Bios Manufacturers
If you are experiencing BIOS-related issues, it is essential to understand that the troubleshooting steps may differ depending on the manufacturer of your BIOS. Here are detailed instructions for some popular BIOS manufacturers:
| BIOS Manufacturer | Troubleshooting Steps |
|---|---|
| American Megatrends (AMI) |
|
| Phoenix Technologies |
|
| Insyde Software |
|
No matter which BIOS manufacturer you have, ensuring the cable connections are secure and resetting the BIOS settings should be the initial steps in troubleshooting this issue.
Identifying Motherboard Beep Codes And Post Messages
When troubleshooting BIOS problems, it’s important to pay attention to your computer’s beep codes and Power-On Self-Test (POST) messages. These audible and visual signals can provide vital clues about the nature of the issue. Here are some beep codes and POST messages you might encounter:
- Continuous short beeps: Indicates a possible memory issue.
- One long and two short beeps: Suggests a video card problem.
- No beep sound: Could indicate a power supply problem.
- POST message “CMOS Checksum Error”: Indicates a CMOS battery failure.
By identifying these beep codes and POST messages, you can narrow down the potential causes and take appropriate action to resolve the issue.
When To Seek Professional Help Or Manufacturer Support
In some cases, troubleshooting BIOS issues may require professional assistance or manufacturer support. Here are a few situations in which reaching out for help is advisable:
- If you have followed the troubleshooting steps but the problem persists.
- If you are uncomfortable working with hardware components.
- If your computer is still under warranty, seeking manufacturer support can ensure you don’t void the warranty.
Remember, professional help or manufacturer support can provide the expertise and resources needed to resolve complex BIOS problems effectively.
Frequently Asked Questions For Bios Not Showing Up On Monitor
Why Is My Bios Not Showing Up On The Monitor?
There can be several reasons why your bios is not showing up on the monitor. It could be due to a faulty cable connection, a malfunctioning graphics card, or an issue with the monitor itself. Make sure to check all these components and try troubleshooting steps like resetting the CMOS battery or updating the graphics drivers.
How Do I Troubleshoot Bios Not Showing Up On The Monitor?
If your bios is not showing up on the monitor, you can try troubleshooting steps like checking the cable connections, testing with a different monitor, or resetting the CMOS battery. Updating the graphics drivers and checking for any hardware conflicts can also help resolve the issue.
If the problem persists, it’s advisable to seek professional assistance.
Can A Faulty Graphics Card Cause Bios Not To Display?
Yes, a faulty graphics card can cause the bios not to display. If the graphics card is not functioning properly or if there is a compatibility issue, it can prevent the bios from showing up on the monitor. In such cases, you may need to replace or repair the graphics card for the bios to be visible again.
Conclusion
To sum it up, troubleshooting BIOS-related issues can be a perplexing task, especially when your monitor fails to display the BIOS. However, by following the troubleshooting steps mentioned you can effectively resolve this problem and get your BIOS to show up on the monitor.
Remember to check your connections, reset the CMOS, and update your BIOS if necessary. With these solutions at your disposal, you’ll be up and running in no time.
