Why is Monitor Not Displaying Anything: Troubleshooting Guide
If your monitor is not displaying anything, check if the cables connected are damaged or if you’re using the correct input source. Test the cables on another PC or try attaching other cable cords to your system.
If everything seems fine, there may be some issues with your monitor. Having a monitor that is not displaying anything can be a frustrating experience, especially when you rely on it for work or entertainment. There could be several reasons why your monitor is not showing any visuals, and it’s important to troubleshoot the problem to get it working again.
We will explore some possible causes for a monitor not displaying anything and provide some solutions to fix the issue. Whether it’s a problem with the cables, input source, or the monitor itself, we’ll guide you through the troubleshooting process to help you get your monitor back up and running.
Confirming Monitor Power Status
When you encounter the frustrating issue of your monitor not displaying anything, the first step is to confirm the power status. There are a few factors to consider:
Verify Monitor Is Turned On
The simplest explanation for a monitor not displaying anything is that it may not be turned on. Double-check the power button to ensure it is in the “On” position. Sometimes, the power button can be located on the side or bottom of the monitor. Make sure it is pressed firmly to power on the monitor.
Inspect Power Cables And Connections
Next, take a close look at the power cables and connections. Ensure that the power cord is securely plugged into both the monitor and the power outlet. If the cable appears to be damaged or frayed, it may be causing the issue. Consider trying a different power cable to see if that resolves the problem.
Check Power Indicator Lights
Most monitors have power indicator lights that provide useful information about their status. Check if the power indicator light on your monitor is illuminated. If the light is off, it could indicate a power issue, such as a faulty power supply. On the other hand, if the light is glowing or blinking, it suggests that power is being received but there may be another underlying problem.
By carefully examining these power-related factors, you can narrow down the possible causes of your monitor’s lack of display. In some cases, the issue may lie outside the power component, and further troubleshooting might be necessary. However, it’s always best to start by confirming the monitor’s power status and ruling out any simple fixable factors.
Verifying Cable Integrity
If your monitor is not displaying anything, one of the potential reasons could be issues with the cables connecting your monitor to the computer. To troubleshoot and confirm whether the cables are causing the problem, follow the steps below:
Examine All Cable Conditions
First, visually inspect the cables for any signs of damage, such as frayed wires, bent pins, or loose connectors. Damaged cables can interrupt the video signal and result in a blank screen. Ensure that all cables are securely connected at both ends as well.
Test With Alternate Cables
If the cables appear to be in good condition, try using alternate cables to establish if the issue lies with the original cables. Swap out the video cable connecting the monitor to the computer with a known working cable and see if the display appears. This step can help identify if the original cables are faulty.
Confirm Correct Port Usage
Make sure you are using the correct input source or port on both the monitor and the computer. Check the user manual or documentation of your specific monitor model to determine the correct port to use. Additionally, ensure that your computer’s display settings are configured correctly to output to the selected port.
If after following these steps, your monitor still doesn’t display anything, it’s likely that there may be other underlying issues unrelated to the cables. Further troubleshooting or professional assistance may be required to identify and resolve the problem.
Graphics Card Considerations
If your monitor is not displaying anything, there are a few things you can check. First, make sure the cables are not damaged and try using different cables. Also, ensure that you are using the correct input source. If all else fails, there may be an issue with the monitor itself.
cting the monitor. If the issue persists, there might be some considerations related to the graphics card that you need to take into account.Inspect For Secure Gpu Seating
One possible reason for the monitor not displaying anything could be an improperly seated graphics processing unit (GPU) in the system. To resolve this issue, you need to ensure that the GPU is securely seated in its slot. Here’s how you can do it:- Power off your computer and disconnect the power cable.
- Open the computer case to access the internal components.
- Locate the GPU, which is usually inserted into a PCI-Express slot on the motherboard.
- Gently press down on the GPU to ensure that it is fully inserted into the slot.
- Make sure that the GPU is firmly secured by tightening any screws or latches that hold it in place.
- Close the computer case and reconnect the power cable.
- Power on the computer and check if the monitor now displays the desired output.
Test With Integrated Graphics If Available
If your computer has integrated graphics capabilities, you can test if the monitor displays anything when using the integrated graphics instead of the dedicated graphics card. Follow these steps:- Power off your computer and disconnect the power cable.
- Remove the dedicated graphics card from the PCI-Express slot.
- Connect the monitor cable to the onboard graphics port on the motherboard.
- Reconnect the power cable and power on the computer.
- If the monitor displays the expected output, it indicates that the dedicated graphics card might be faulty.
- You can consider replacing or troubleshooting the dedicated graphics card if necessary.
Input Source And Compatibility
When troubleshooting why your monitor is not displaying anything, it is important to consider the input source and compatibility. Sometimes, the issue may lie in the settings on your monitor or the compatibility between devices.
Selecting The Right Input On Monitor
To ensure that your monitor is displaying correctly, it is crucial to select the right input source. Most monitors have multiple input options such as HDMI, VGA, DVI, or DisplayPort. If you have connected your computer to the monitor using a specific input, make sure that you have selected the corresponding input source on your monitor.
Here’s how you can select the right input on your monitor:
- Press the menu button on your monitor to access the settings menu.
- Navigate to the “Input” or “Source” option using the arrow buttons on your monitor.
- Select the input source that matches the cable connected to your computer.
By selecting the correct input source, you can ensure that the monitor receives the signal from your computer and displays the content appropriately.
Confirm Compatibility Between Devices
Another factor that can affect the display on your monitor is the compatibility between devices. Different devices may have varying display resolutions and refresh rates, which can result in compatibility issues.
Here are some steps to confirm compatibility between your devices:
- Check the display settings on your computer.
- Right-click on your desktop and select “Display settings”.
- Ensure that the resolution and refresh rate are set to values supported by your monitor.
- Review the specifications of your monitor and the devices connected to it.
- Ensure that the resolutions and refresh rates used by your devices are within the supported ranges.
- If necessary, adjust the display settings on your computer to match the specifications of your monitor.
| Device | Supported Resolutions | Supported Refresh Rates |
|---|---|---|
| Monitor Model X | 1920×1080, 1280×720 | 60Hz, 75Hz |
| Graphics Card Model Y | 1920×1080, 2560×1440 | 60Hz, 144Hz |
By confirming compatibility between your devices, you can avoid potential issues that may prevent your monitor from displaying anything.
In conclusion, when troubleshooting why your monitor is not displaying anything, it is essential to consider the input source and compatibility between devices. Selecting the right input source on your monitor and confirming compatibility between devices can help resolve any display issues you may encounter.
Adjusting Display Settings
If your monitor is not displaying anything, there are a few steps you can take to troubleshoot the issue. First, check if the cables connected to the monitor are damaged. You can also try using different cables or attaching them to another PC.
Ensure that you are using the correct input source and if everything seems fine, there may be issues with your monitor.
Accessing Display Settings Via Another Monitor Or Remote Login
If your monitor is not displaying anything, one solution is to access the display settings via another monitor or through remote login. This allows you to troubleshoot and make necessary adjustments to the settings without relying solely on the malfunctioning monitor.
To access display settings via another monitor, follow these steps:
- Connect the alternate monitor to your computer using the appropriate cables.
- Power on both the computer and the secondary monitor.
- Once connected, the display should appear on the alternate monitor.
- Access the display settings by right-clicking on the desktop and selecting “Display settings” from the context menu.
- Adjust the display settings as needed. This may include changing the resolution, orientation, or display mode.
- Save the changes and disconnect the alternate monitor.
If you don’t have access to another monitor, you can still adjust the display settings through remote login. To do this:
- Use a remote desktop software or app, such as Remote Desktop Connection for Windows or Chrome Remote Desktop for Chrome OS.
- Establish a remote connection to your computer from another device.
- Once connected, access the display settings on your remote device.
- Adjust the display settings as needed, ensuring the resolution and refresh rate are suitable for your monitor.
- Save the changes and disconnect from the remote session.
Ensuring Proper Display Resolution And Refresh Rate
Another reason for your monitor not displaying anything could be an incorrect display resolution or refresh rate. These settings determine the clarity and smoothness of the visuals on your screen. To ensure proper display resolution and refresh rate:
- Access the display settings on your computer as mentioned above.
- Navigate to the “Display” or “Screen” section.
- Check the current resolution and refresh rate settings.
- If the resolution is too low, adjust it to the recommended resolution for your monitor.
- Similarly, ensure that the refresh rate matches the capabilities of your monitor.
- Save the changes and restart your computer for the new settings to take effect.
By adjusting the display settings either through another monitor or remote login, and ensuring the proper display resolution and refresh rate, you can troubleshoot and resolve the issue of your monitor not displaying anything. Remember to double-check the cables and connections as well, as these can also contribute to display problems.
Updating And Reinstalling Drivers
If your monitor is not displaying anything, check the cables for damage and try using different cables or input sources. If the issue persists, there may be a problem with the monitor itself. Restarting your computer or using a different data cable might also help resolve the issue.
Updating and Reinstalling Drivers Guide for graphics driver update Updating your graphics driver is essential for ensuring that your monitor displays properly. Outdated or corrupted drivers can often be the cause of the issue where your monitor is not displaying anything. In this section, we will guide you through the process of updating your graphics driver. Here’s a step-by-step guide on how to update your graphics driver on your Windows PC: 1. Identify your graphics card manufacturer: Before updating your graphics driver, you need to know the manufacturer of your graphics card. Common manufacturers include NVIDIA, AMD, and Intel. 2. Visit the manufacturer’s website: Once you know the manufacturer, go to their official website. Look for the “Support” or “Downloads” section and navigate to the graphics driver section. 3. Locate the correct driver: Find the most recent driver that is compatible with your graphics card and operating system. Download the driver to a location on your computer that you can easily access. 4. Uninstall the old driver: Before installing the new driver, it’s important to uninstall the old one. To do this, go to the “Device Manager” in your Windows Control Panel and locate the graphics card under the “Display adapters” section. Right-click on the graphics card and select “Uninstall device.” Follow the prompts to complete the uninstallation process. 5. Install the new driver: Once the old driver is uninstalled, double-click on the downloaded driver file to initiate the installation process. Follow the on-screen instructions to install the new driver. During the installation, you may need to restart your computer. 6. Verify the driver installation: After the installation is complete, go back to the “Device Manager” and check if the new driver is listed under the “Display adapters” section. This indicates a successful installation. Steps to reinstall graphics drivers If updating the graphics driver doesn’t resolve the issue, reinstalling the graphics drivers might help. Follow these steps to reinstall the graphics drivers on your Windows PC: 1. Uninstall the current graphics driver: Similar to updating the driver, start by uninstalling the current graphics driver. Open the “Device Manager” and locate your graphics card under the “Display adapters” section. Right-click on the graphics card and select “Uninstall device.” Follow the prompts to complete the uninstallation. 2. Restart your computer: After uninstalling the driver, restart your computer. This ensures that any remaining files from the previous driver are cleared from your system. 3. Install the latest graphics driver: Once your computer has restarted, visit the manufacturer’s website and download the latest graphics driver that is compatible with your system. Double-click on the downloaded file to begin the installation process and follow the on-screen instructions. 4. Verify the driver installation: After the installation is complete, go to the “Device Manager” and check if the new driver is listed under the “Display adapters” section. This confirms that the drivers have been successfully reinstalled. By following these step-by-step instructions for updating and reinstalling graphics drivers, you can troubleshoot the issue of your monitor not displaying anything. Keeping your drivers up to date is crucial for optimal performance and ensuring that your monitor functions properly.Analyzing Display On Alternate Monitor
If your monitor is not displaying anything, there are several things you can check. Firstly, ensure that the cables connecting the monitor are not damaged. Try using the cables on another PC or using different cable cords. If the cables are working fine, check if you’re using the correct input source.
If all else fails, there may be some issues with your monitor.
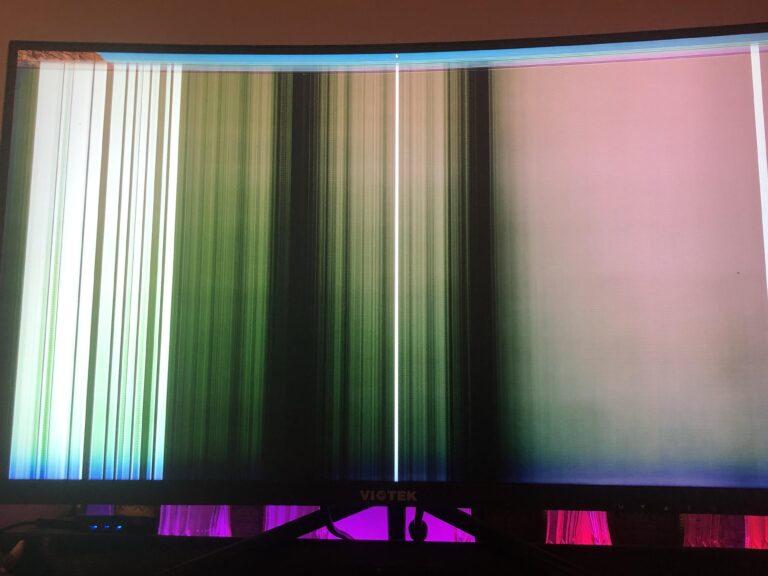
Test System With A Different Monitor
If you’re facing issues with your monitor not displaying anything, one of the first troubleshooting steps is to test your system with a different monitor. This can help identify if the problem lies with the monitor itself or with other components of your system. When testing with a different monitor, make sure to use a monitor that is known to be in working condition. Connect the alternate monitor to your computer using the appropriate cables and power it on. If the alternate monitor displays the output from your computer, it indicates that there might be an issue with your original monitor.Identifying Potential Monitor Defect
If the alternate monitor also does not display anything, the problem might not be with your monitor, but with other components of your system. In such cases, it’s important to ensure that your monitor is functioning properly. Start by checking the power supply and the power cable of your monitor. Make sure the monitor is receiving power and that the power cable is securely connected. Next, check the video cables connecting your monitor to the computer. Ensure that the cables are not damaged or loose. Try using different cables or swapping them with known working ones to eliminate the possibility of a faulty cable. If your monitor has multiple input sources, double-check that the correct input source is selected. Sometimes, the monitor may be set to display from a different input source than the one your computer is connected to. If you’ve gone through these steps and your monitor still doesn’t display anything, it’s possible that there might be a defect in the monitor itself. In such cases, contacting the manufacturer or a professional technician for further assistance is recommended.Possible Hardware Component Failures
When your monitor fails to display anything, it can be frustrating and concerning. This issue can be caused by various hardware component failures in your computer system. To determine the specific cause and troubleshoot the problem effectively, consider the following:
Testing Ram Sticks Individually
One possible hardware component that may be causing the monitor not to display anything is a faulty RAM stick. RAM (Random Access Memory) is responsible for storing and retrieving data that is currently being used by your computer.
To test RAM sticks individually, follow these steps:
- Shut down your computer and disconnect all cables and power sources.
- Open the case and locate the RAM sticks on your motherboard.
- Remove all but one RAM stick.
- Power on your computer and check if the monitor displays anything.
- If the monitor still doesn’t display anything, power off the computer and repeat the process with a different RAM stick.
If the monitor starts displaying content with a specific RAM stick removed, it indicates that the removed stick is faulty and needs to be replaced.
Check For Motherboard Post Issues
Another hardware component that can cause a monitor to display nothing is a problem with the motherboard’s POST (Power-On Self-Test) process. POST is a series of diagnostic tests that a computer performs when it is powered on to verify the functionality of various hardware components.
To check for motherboard POST issues, follow these steps:
- Make sure your computer is powered off and disconnected from any power sources.
- Open the computer case and locate the CMOS (Complementary Metal-Oxide-Semiconductor) battery on the motherboard.
- Remove the CMOS battery and wait for a few minutes.
- Reinsert the CMOS battery and power on the computer.
- Observe if the monitor displays anything during the boot process.
If the monitor still does not display anything, it is recommended to consult a professional technician or contact the manufacturer for further assistance.
By testing RAM sticks individually and checking for motherboard POST issues, you can identify and potentially resolve hardware component failures that may be causing your monitor to not display anything.
Troubleshooting Guide For Power Supply And Motherboard
If your monitor is not displaying anything, there could be issues with your power supply unit (PSU) or motherboard. In this troubleshooting guide, we will walk you through the steps to inspect the functionality of your power supply unit and run diagnostic tests on your motherboard.
Inspect Power Supply Unit (psu) Functionality
The power supply unit (PSU) is responsible for supplying power to your computer components. If the PSU is not functioning properly, it may affect the display on your monitor. Here are some steps to inspect the functionality of your PSU:
- Check the power cable connection from the PSU to the wall outlet and ensure it is securely plugged in.
- Inspect the power cable for any visible damage or frayed wires. Replace the cable if necessary.
- Make sure the PSU switch is turned on. Sometimes it may accidentally get switched off.
- If you have a spare PSU or access to another computer with a working PSU, try swapping them and see if the monitor displays anything. This will help determine if the issue is with the PSU.
Motherboard Diagnostic Tests
The motherboard is the central component of your computer that connects all the hardware components together. If there are issues with the motherboard, it can affect the display on your monitor. Here are some diagnostic tests you can perform:
- Check for any visible signs of damage on the motherboard, such as burnt components or swollen capacitors.
- Remove and reseat the RAM modules. Sometimes a loose RAM module can cause display issues.
- Disconnect all unnecessary components, such as hard drives and expansion cards, and try booting up the computer with only the essential components connected. This will help identify if a faulty component is causing the issue.
- If you have access to a spare motherboard or another computer with a working motherboard, try swapping them and see if the monitor displays anything. This will help determine if the issue is with the motherboard.
By following this troubleshooting guide for power supply and motherboard issues, you can identify the root cause of your monitor not displaying anything. Remember to exercise caution when working with computer components and ensure that you are properly grounded to avoid any static electricity damage. If the issue persists, it may be advisable to seek professional help.

Credit: www.google.com
Frequently Asked Questions For Why Is Monitor Not Displaying Anything
Why Is My Monitor On But Not Displaying?
If your monitor is on but not displaying, check if the cables are damaged and try different cables. Make sure you’re using the correct input source. If everything seems fine, there may be issues with your monitor. Restart your computer and reconnect the data cord.
If the screen remains black, there may be a problem with the graphics driver or LCD display backlight. Test the display by connecting an external monitor.
Why Is My Monitor Blank I Don’t See Anything On It?
If your monitor is blank and you don’t see anything on it, try these steps: 1. Check if the cables connected to the monitor are damaged. 2. Test the cables on another PC or use different cable cords. 3. Verify that you’re using the correct input source.
4. If everything seems fine, there may be issues with your monitor. 5. Restart your computer and reconnect the data cord. 6. Try a different cable if the monitor is getting power but not displaying anything. (Source: Javatpoint)
How Do I Get My Monitor To Work Again?
To get your monitor working again, follow these steps: 1. Check the cables for any damage and try connecting them to another PC or using different cable cords. 2. Ensure that you’re using the correct input source on the monitor. 3.
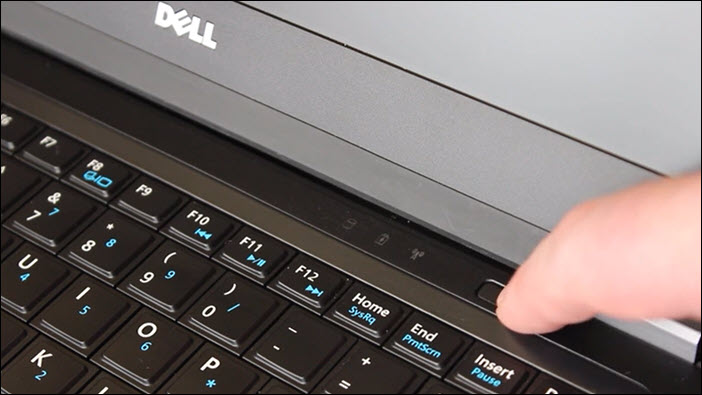
If everything seems fine, there may be issues with your monitor itself. 4. Try rebooting your computer by holding down the power button until it turns off. 5. Test the display by connecting an external monitor to see if the computer is operating.
Why Is My Computer Screen Black But Still Running?
If your computer screen is black but still running, it could be due to a corrupted graphics driver or a problem with the LCD display backlight. To check, connect an external monitor and restart the computer. If the external monitor works, it indicates an issue with your computer’s screen.
Conclusion
To troubleshoot why your monitor is not displaying anything, you can start by checking the cables for any damages and trying different cable cords or another PC. Ensure you are using the correct input source. If everything seems fine, there might be some issues with your monitor.
Rebooting your computer by holding the power button can also help. If the problem persists, you can try connecting an external monitor to test the display. Remember to replace any faulty cables if necessary.