What to Do If Monitor is Not Turning on: Troubleshooting Tips
If your monitor is not turning on, first check the power cable and make sure the port is functioning properly. You can also try using a different cable and adjusting the brightness and contrast settings.
If these steps don’t work, there may be an issue with the monitor’s power supply, motherboard, or graphics card, and it may require professional repair or replacement.
Power Supply And Cable Connections
If your monitor is not turning on, there are a few steps you can take to troubleshoot the issue. First, check the power supply and cable connections to ensure they are securely connected. If that doesn’t solve the problem, try using a different cable or adjusting the brightness and contrast settings on your computer.
When your monitor is not turning on, one of the first things you should check is the power supply and cable connections. Faulty connections or a power supply issue can prevent the monitor from receiving power and turning on. Here are some steps you can take to troubleshoot and fix this problem.
Verify The Monitor Is Plugged In And Powered On
First, make sure that the monitor is properly plugged into the power outlet. Check the power cable and ensure that it is securely connected to both the monitor and the wall socket. Additionally, check the power switch on the monitor and make sure it is turned on.
Check All Cable Connections Between The Monitor And Computer
Next, inspect the cable connections between your monitor and computer. Ensure that the video cable (typically VGA, HDMI, or DisplayPort) is firmly connected to both the monitor and the computer’s graphics card or integrated graphics port. If you are using multiple monitors, verify that all cable connections are secure and properly aligned.
If you are using an external power adapter for your monitor, ensure that it is correctly connected and providing power to the monitor.
Examine The Power Cable And Replace If Damaged
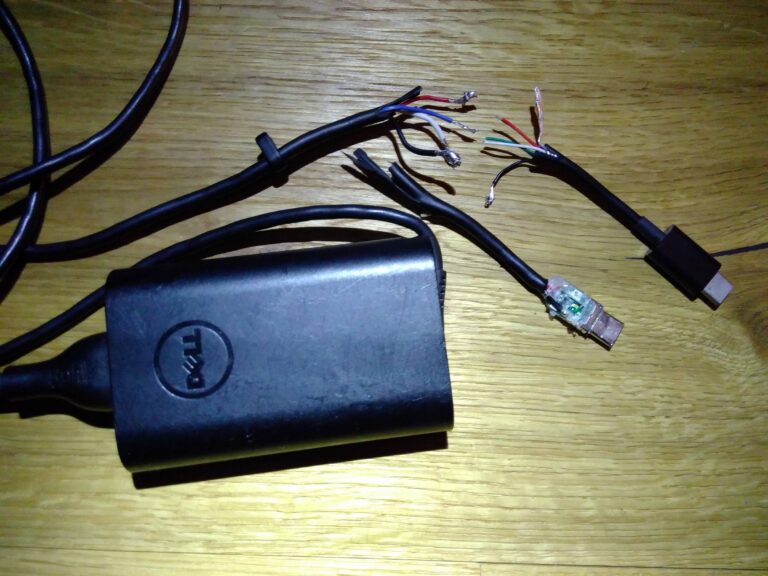
If the power cable appears to be damaged or worn out, it may be the cause of the issue. Inspect the cable for any frayed wires, bent pins, or other signs of damage. If you notice any problems, it is recommended to replace the power cable with a new one.
Remember to use a power cable that is compatible with your monitor’s power requirements. Refer to your monitor’s user manual or consult the manufacturer’s website for the correct specifications.
By troubleshooting and ensuring that the power supply and cable connections are in proper working condition, you can resolve many cases where the monitor is not turning on. If the issue persists, there might be other underlying problems that require further investigation or professional assistance.
Alternate Power And Signal Sources
If your monitor is not turning on, it could be due to issues with the power supply or signal sources. In this section, we will explore some troubleshooting steps to help you resolve the problem.
Use A Different Power Outlet
One of the first things you should try is plugging your monitor into a different power outlet. Sometimes, the outlet you are using may not be providing enough power or may be defective. By connecting your monitor to a different outlet, you can determine if the issue lies with the power source.
Connect To An Alternate Computer Or Device
If using a different power outlet doesn’t resolve the issue, you can try connecting your monitor to an alternate computer or device. This will help you determine if the problem is specific to your computer or if it is a monitor-related issue.
Replace Signal Cables (hdmi, Displayport, Vga, Etc.)
Another potential cause for a monitor not turning on is faulty signal cables. To rule out this possibility, it is recommended to replace the cables connecting your monitor to your computer or device. Whether you are using HDMI, DisplayPort, VGA, or any other type of cable, make sure to inspect them for any physical damage or loose connections.
By following these steps and troubleshooting the power and signal sources, you can identify the cause of your monitor not turning on and take the appropriate action to fix the issue.
Internal Hardware And Peripherals
If your monitor is not turning on, there are a few things you can try to troubleshoot the issue. First, check the power cable and make sure it is properly connected. If that doesn’t work, ensure that the port is functioning correctly.
You can also try adjusting the screen resolution or using keyboard shortcuts to wake up the monitor. If all else fails, it may be worth considering getting it repaired or replacing it.
Test Monitor With Another Computer
If your monitor is not turning on, one possible cause could be a problem with the internal hardware or peripherals. To troubleshoot this, try connecting the monitor to another computer and see if it turns on. If it does, then the issue may lie with your computer’s hardware or settings.
Swap Out Video Cables For Known Working Ones
If testing the monitor with another computer did not resolve the issue, the next step is to check the video cables. Disconnect the current video cables and swap them out for known working ones. This will help determine whether the problem lies with the cables themselves.
Ensure Video Ports On The Computer Are Functional
If the monitor still does not turn on after swapping out the video cables, it’s possible that the video ports on the computer are not functioning properly. To check this, try connecting your monitor to different video ports on the computer, such as HDMI, DVI, or VGA. Ensure each port is clean and free of dust or debris that could hinder proper connection.
If none of these troubleshooting steps resolve the issue, it may be necessary to consult a professional technician or contact the manufacturer for further assistance.
External Display And Adapter Settings
If your monitor is not turning on, there are a few steps you can take to troubleshoot the issue. First, check that the power cable is securely connected. If it is, you may need to ensure that the port is functioning properly.
If these steps don’t work, consider getting professional assistance or replacing the monitor.
Confirm Correct Input Source On Monitor Settings
One common reason why your monitor may not be turning on is due to an incorrect input source selected on the monitor settings. To resolve this, follow these steps:
- First, locate the buttons or controls on your monitor. These are typically found on the front or bottom of the monitor.
- Press the menu or settings button to access the monitor’s menu.
- Navigate to the input source or input select option using the arrow buttons on the monitor.
- Select the correct input source for your computer, such as HDMI, DisplayPort, or VGA.
- After selecting the correct input source, exit the menu and check if the monitor turns on.
By confirming the correct input source on the monitor settings, you ensure that the monitor is receiving the signal from your computer correctly. This simple adjustment can often resolve the issue of a monitor not turning on.
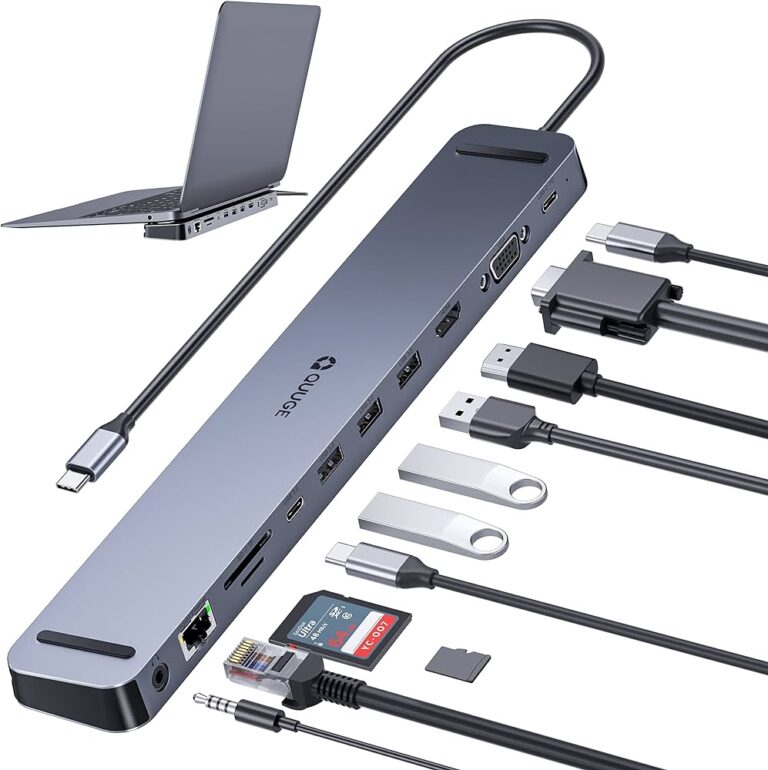
Inspect For Any External Adapter Or Dock Connections
If your monitor is still not turning on, it’s important to inspect for any external adapter or dock connections that may be causing the issue. Here’s what you need to do:
- Check all cable connections between the monitor, computer, and any external adapters or docks.
- Ensure that the cables are securely plugged in and that there are no loose connections.
- If you are using an external adapter or dock, disconnect it from both the monitor and the computer, and then reconnect it.
- Make sure that the adapter or dock is properly inserted and securely connected to both the monitor and the computer.
Inspecting and rechecking the connections can often resolve any signal or power issues that may be preventing the monitor from turning on. Sometimes, a loose or improper connection can be the culprit behind the problem.
Adjust Hardware Brightness Settings If Available
If your monitor is still not turning on, you can try adjusting the hardware brightness settings, if available. Follow these steps:
- Locate the brightness buttons or controls on your monitor. These are usually represented by a sun or lightbulb symbol.
- Press the brightness button to access the brightness settings.
- Use the up or down arrow buttons to increase or decrease the brightness level.
- Try increasing the brightness to see if it makes a difference.
- If the brightness settings do not resolve the issue, you can try other hardware settings, such as contrast or gamma, if available on your monitor.
Adjusting the hardware brightness settings can sometimes help in cases where the monitor is not turning on due to low or incorrect brightness levels. It’s worth trying this simple solution before seeking further assistance.
Video And Graphics Card Checks
If your monitor is not turning on, there could be several reasons why. First, check the power cable and make sure it’s properly connected. If the cable is fine, check the port and ensure it’s working. If these steps don’t solve the issue, consider troubleshooting the monitor or seeking professional help.
If your monitor is not turning on, one of the potential culprits could be an issue with your video or graphics card. In this section, we will explore some checks you can perform to troubleshoot and potentially resolve the problem.
Re-seat Or Replace Graphics Card If Applicable
If you have a desktop computer and suspect that the graphics card might be causing the issue, you can start by re-seating the card. Sometimes, the card might have become loose over time or due to movement. To re-seat the graphics card:
- Shut down your computer and disconnect the power cable.
- Open the computer case and locate the graphics card.
- Carefully remove the graphics card from its slot.
- Inspect the card and the slot for any visible damage or debris.
- If everything looks fine, re-insert the graphics card firmly back into the slot.
- Close the computer case and reconnect the power cable.
- Turn on your computer and check if the monitor turns on.
If re-seating the graphics card doesn’t resolve the issue, it might be necessary to replace the card entirely. Consult the documentation for your computer or seek professional assistance if you’re unsure about the process.
Update Or Roll Back Video Drivers
Outdated or incompatible video drivers can sometimes cause the monitor to not turn on. To update or roll back the video drivers:
- Right-click on the Start menu and select Device Manager.
- In the Device Manager window, expand the Display adapters category.
- Right-click on the listed video card and select Update driver.
- Follow the on-screen instructions to check for driver updates.
- If updates are available, proceed with the installation.
- If updating the drivers doesn’t fix the issue, you can try rolling back to a previous version of the driver:
- Right-click on the video card in Device Manager and select Properties.
- In the Properties window, go to the Driver tab.
- Click on the Roll Back Driver button and follow the instructions.
After updating or rolling back the video drivers, restart your computer and check if the monitor turns on.
Look For Any Signs Of Hardware Failure (burnt Smell, Unusual Noises)
If re-seating or replacing the graphics card and updating the video drivers don’t resolve the issue, it’s important to inspect the hardware for any signs of failure. This can include:
- A burnt smell coming from the computer or graphics card.
- Unusual noises, such as clicking or buzzing, coming from the graphics card or computer.
If you notice any of these signs, it’s recommended to seek professional assistance or contact the manufacturer for further guidance. They will be able to assess the situation and provide appropriate solutions.
Display Settings And Software Conflicts
When your monitor is not turning on, it can be quite frustrating as it can hinder your productivity and prevent you from using your computer. There can be various reasons behind this issue, and one of them is display settings and software conflicts. In this section, we will explore some troubleshooting steps you can take to resolve this problem.
Boot Into Safe Mode To Diagnose Software Issues
- Restart your computer and continuously press the F8 key before the Windows logo appears.
- A menu will appear. Select “Safe Mode” using the arrow keys and press Enter.
- In Safe Mode, your computer will start with minimal drivers and services, allowing you to diagnose any software conflicts.
- If your monitor turns on in Safe Mode, it indicates that a software conflict is causing the issue.
- To identify the conflicting software, uninstall any recently installed programs or updates.
- After removing the software, restart your computer normal mode to check if the monitor turns on.
Check Display Settings In Operating System
- If your monitor is not turning on, it could be due to incorrect display settings in your operating system.
- Click on the “Start” menu and select “Settings” or “Control Panel”.
- Navigate to “Display” settings.
- Ensure that the resolution and refresh rate settings are compatible with your monitor.
- If necessary, adjust these settings to match the recommended specifications for your monitor.
- Save the changes and restart your computer to see if the monitor turns on.
Reset Or Update Bios/uefi Settings
- In some cases, the BIOS or UEFI settings may cause conflicts with your monitor.
- Restart your computer and enter the BIOS/UEFI setup by pressing the specified key (e.g., F2 or Delete) during the startup process.
- Locate the option to reset the BIOS settings to default or update the BIOS firmware.
- Choose the appropriate option based on your needs.
- Save the changes and exit the BIOS/UEFI setup.
- Restart your computer to check if the monitor turns on.
Monitor And System Troubleshooter Tools
If your monitor is not turning on, it can be a frustrating experience. However, there are several troubleshooter tools you can utilize to diagnose and fix the issue. By following these steps, you can potentially resolve the problem and get your monitor up and running again.
H3use Built-in Operating System Troubleshooter/h3
One of the first steps you should take when your monitor is not turning on is to use the built-in troubleshooter tool provided by your operating system. Operating systems such as Windows and macOS have their own diagnostic tools that can help identify and fix common monitor issues. To use the troubleshooter, follow these steps:
- Go to the “Settings” menu of your operating system.
- Navigate to the “Display” or “Screen” settings.
- Look for an option that allows you to troubleshoot display or monitor issues.
- Follow the on-screen instructions provided by the troubleshooter.
The built-in troubleshooter will scan your system for any potential problems and attempt to fix them automatically. This can be a quick and effective way to resolve common monitor issues without the need for any additional tools or technical knowledge.
H3refer To Monitor’s Manual For Specific Diagnostic Tests/h3
If the built-in troubleshooter does not resolve the issue, you can refer to your monitor’s manual for specific diagnostic tests. Most monitor manuals include troubleshooting sections that provide step-by-step instructions for diagnosing and fixing common problems. To perform these diagnostic tests, follow these steps:
- Locate the manual that came with your monitor.
- Find the troubleshooting section within the manual.
- Look for specific diagnostic tests related to your issue.
- Follow the instructions provided in the manual to perform the diagnostic tests.
The manual will guide you through the diagnostic process, helping you identify the root cause of the issue. This can be especially helpful if the problem is specific to your monitor model or manufacturer. By following the instructions in the manual, you can systematically troubleshoot the issue and potentially find a solution.
Professional Support And Repair Options
If your monitor is not turning on, it can be a frustrating experience. Luckily, there are professional support and repair options available to help you resolve the issue. Whether it’s contacting the manufacturer for warranty or repair services, reaching out to a professional computer technician, or evaluating the cost-effectiveness of repair versus replacement, these options can help you get your monitor back up and running.
Contact Manufacturer For Warranty Or Repair Services
If your monitor is still under warranty, it’s best to contact the manufacturer for assistance. Most manufacturers provide warranty services that cover repairs or replacements for certain defects or malfunctions. To initiate the process, visit the manufacturer’s website or contact their customer support. Provide them with the necessary details, such as the model number, serial number, and proof of purchase, to make the warranty claim smoother.
Reach Out To A Professional Computer Technician
If your monitor is no longer under warranty or the warranty does not cover the issue you’re experiencing, it may be beneficial to seek help from a professional computer technician. These experts have the knowledge and experience to diagnose and troubleshoot various monitor problems. Look for reputable computer repair shops or technicians in your area and schedule an appointment for them to assess and fix the issue. Be sure to inquire about their fees and turnaround time to make an informed decision.
Determine The Cost-effectiveness Of Repair Vs. Replacement
Before deciding on whether to repair or replace your monitor, it’s essential to evaluate the cost-effectiveness of each option. Consider factors such as the age of the monitor, the severity of the issue, and the cost of repair versus the price of a new monitor. In some cases, repair may be a more affordable solution, especially if it’s a minor problem. However, if the repair cost is close to or exceeds the cost of a new monitor, it might be more practical to invest in a replacement. Assess your specific situation and budget to make the best decision for your needs.

Credit: www.pcmag.com
Frequently Asked Questions On What To Do If Monitor Is Not Turning On
What To Do If Your Monitor Won T Turn On?
If your monitor won’t turn on, check the power cable and port. Make sure they’re properly connected. Try a different cable or adjust the brightness and contrast. If the issue persists, it might be worth troubleshooting or getting professional help.
Why Does My Computer Turn On But No Display?
If your computer turns on but there’s no display, it could be due to a loose or improper connection between the CPU, motherboard, RAM, power supply, or graphics card. Try reseating all of these components to ensure they’re properly connected.
You can also test them in another computer to check if they’re working correctly.
How Do I Get My Monitor To Work Again?
To get your monitor to work again, follow these steps: 1. Check the power cable and ensure it’s properly connected. 2. Make sure the port is functioning correctly. 3. Check for loose or improper connections. 4. Try using a different cable.
5. Adjust the brightness and contrast settings. If the issue persists, consider seeking professional help or purchasing a new monitor.
What To Do If Your Monitor Screen Is Black?
If your monitor screen is black, there are a few steps you can take: 1. Check the power cable and make sure it is securely connected. 2. Ensure the port is working properly. 3. Try a different cable to see if there is a problem with the current one.
4. Adjust the brightness and contrast settings on the monitor. 5. If none of these solutions work, it may be time to seek professional help or consider replacing the monitor.
Conclusion
If your monitor is not turning on, there are a few steps you can take to troubleshoot the issue. Firstly, check the power cable and make sure it is securely connected. If that is not the problem, try checking the port and ensure it is functioning properly.
If these steps do not solve the issue, you may need to consult a professional technician. Remember to always handle your electronic devices with care and seek expert advice when needed.
