Computer Not Sending Signal to Monitor: Troubleshooting Guide
If your computer is not sending a signal to your monitor, make sure that the cable connecting your computer to the monitor is securely plugged in. Verify that the cable is not loose or damaged, and try reseating the connection if necessary.
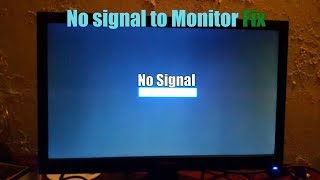
Having a computer that is not sending a signal to the monitor can be a frustrating issue to deal with. You may experience a blank screen, with the monitor displaying a message such as “no signal. ” This can also be accompanied by the keyboard not working properly.
In order to resolve this problem, it is important to first check the cable connecting your computer to the monitor. Often, a loose or damaged cable can be the cause of this issue. We will explore some troubleshooting steps to help you fix the problem of your computer not sending a signal to the monitor.
Confirm Computer And Monitor Power
One common issue that users may encounter is when their computer fails to send a signal to the monitor. This can be frustrating, especially if you are unable to access your important files or complete your work. In such cases, it is essential to confirm that both your computer and monitor are receiving power and are turned on. Let’s explore how to check this aspect to resolve the issue of no signal to the monitor.
Ensure Both Devices Are Powered On
Before moving forward with any troubleshooting steps, make sure that your computer and monitor are powered on. It may seem like a simple step but sometimes we overlook the basic things. Confirm that the power button on your computer tower is pressed and the device is running. Additionally, check if your monitor is turned on by pressing the power button on the monitor itself.
Check Power Cables And Outlets
The next step is to verify the power cables and outlets. Make sure that the power cables of both your computer and monitor are securely connected to their respective outlets. Inspect the power cable at both ends to ensure there are no loose connections or damages. If possible, try plugging your computer and monitor into different power outlets, as there could be an issue with the outlet itself.
If you are using a power extension or surge protector, check that it is functioning properly. Sometimes, power fluctuations or a faulty extension can prevent the computer and monitor from receiving adequate power.
| Steps to Confirm Computer and Monitor Power |
|---|
| 1. Press the power button on your computer tower to turn it on. |
| 2. Press the power button on the monitor to ensure it is powered on. |
| 3. Check that the power cables of both your computer and monitor are securely connected to their respective outlets. |
| 4. If using a power extension or surge protector, verify that it is functioning properly. |
| 5. If necessary, try plugging your computer and monitor into different power outlets to rule out any issues with the current outlet. |
By following these steps, you can ensure that both your computer and monitor are receiving adequate power. This will eliminate the possibility of a power-related issue causing the no signal problem. If the issue persists even after confirming the power status, you can move on to the next troubleshooting steps to resolve the problem.
Check And Secure Connections
If your computer is not sending a signal to your monitor, there are a few simple steps you can take to check and secure your connections. Start by ensuring that the cable between your computer and monitor is firmly plugged in, as a loose connection could be causing the issue.
Additionally, try using a different cable or port to rule out any possible faults.
Inspect And Reseat Video Cable
One of the common reasons why a computer does not send a signal to the monitor is due to a loose video cable connection. If the cable connecting your computer to the monitor is not securely plugged in, it can result in a ‘no signal’ error. To fix this issue, follow these steps: 1. Turn off your computer and monitor. 2. Locate the cable connecting your computer to the monitor. It is usually a VGA, DVI, HDMI, or DisplayPort cable. 3. Gently inspect both ends of the cable for any visible damage or bent pins. If you notice any issues, consider replacing the cable. 4. Carefully unplug the cable from both the computer and the monitor. 5. Ensure that both ends of the cable are clean and free from debris. 6. Insert the cable firmly into the respective ports on both the computer and the monitor. You should feel it click into place. 7. Make sure the connection is secure by gently wiggling the cable. It should not come loose. 8. Power on your computer and monitor to check if the signal is now being sent. By inspecting and reseating the video cable, you can eliminate any potential connection issues that may be causing the ‘no signal’ error.Validate Monitor Input Selection
In some cases, the monitor may not receive a signal because the input selection is incorrect. Many monitors have multiple input ports such as VGA, DVI, HDMI, and DisplayPort. If the monitor is set to receive a signal from the wrong input source, it will display a ‘no signal’ message. To validate the monitor input selection, follow these steps: 1. Press the menu button on your monitor to access the on-screen display (OSD) menu. 2. Navigate to the input source or input selection option using the menu buttons on your monitor. 3. Use the arrow keys or navigation buttons to select the appropriate input source that matches the cable connection from your computer. 4. Press the menu button or an enter/OK button on your monitor to confirm the input selection. 5. The monitor should now try to detect a signal from the selected input source. It’s important to ensure that you have selected the correct input source that matches the cable connected to your computer. By validating the monitor input selection, you can resolve any issues related to incorrect input source settings. Remember, it is essential to check and secure the connections of your computer and monitor to troubleshoot the ‘no signal’ issue effectively. Inspect and reseat the video cable to eliminate loose connections, and validate the monitor input selection to ensure the correct input source is selected.Inspect Video Cables And Ports
One common reason for a computer not sending a signal to the monitor is a problem with the video cables or ports. If the connection between your computer and monitor is not secure or if the cables are damaged, it can result in a ‘no signal’ message on your monitor. In this section, we will explore two important troubleshooting steps to inspect the video cables and ports.
Look For Visible Damage To Cables
The first step in inspecting the video cables is to check for any visible damage. Examine the entire length of the cable, including the connectors at both ends. Look for signs of fraying, bending, or any other physical damage.
If you notice any damage, it is essential to replace the cable with a new one. A damaged cable can lead to poor or no signal transmission, affecting the display output on your monitor. By replacing the problematic cable, you can ensure a secure and reliable connection between your computer and monitor.
Test With Alternative Cable If Possible
If you don’t see any visible damage to the cable, a good troubleshooting step is to test it with an alternative cable. Sometimes, even if the cable appears to be fine, it may still have an internal issue that is causing the signal problem.
To perform this test, you will need access to another cable that is compatible with your computer and monitor. Disconnect the current cable and replace it with the alternative cable. Make sure to secure the connections properly.
If the monitor displays a signal with the alternative cable, it indicates that the original cable is faulty. In this case, you should replace the cable to ensure a stable and uninterrupted connection between your computer and monitor.
However, if the monitor still shows no signal even with the alternative cable, the issue might lie with the video ports on either the computer or the monitor. In such cases, it is recommended to move on to the next troubleshooting steps to identify and resolve the problem.
Swap Out The Graphics Card
If your computer is not sending a signal to your monitor, one possible solution is to swap out the graphics card. The graphics card is responsible for rendering and displaying images on your monitor, so if it’s not functioning properly, it can result in a “no signal” error.
Remove And Re-insert Graphics Card
The first step in swapping out the graphics card is to remove it from your computer. Before doing this, make sure to power off your computer and disconnect it from the power source. Open up your computer case and locate the graphics card, which is usually inserted into a PCI-E slot on the motherboard. Gently push down on the small lever or tab that is securing the graphics card in place, and then carefully remove it from the slot.
Once you have removed the graphics card, inspect it for any visible damage or debris. Clean the golden contacts on the bottom of the card with a soft, lint-free cloth if necessary. Then, align the graphics card with the PCI-E slot and firmly re-insert it. Make sure it is properly seated and secure by pushing down on the lever or tab until you hear a click.
Try Using Integrated Graphics If Available
If your computer has integrated graphics capabilities, you can try using them as an alternative to the dedicated graphics card. Integrated graphics are built into the motherboard and use the CPU to process and display graphics. To do this, you will need to connect your monitor to the video output port on the motherboard instead of the dedicated graphics card.
First, power off your computer and disconnect it from the power source. Locate the video output ports on the back of your computer case. The ports connected to the dedicated graphics card are usually located higher up, while the ports connected to the motherboard are lower down. Connect your monitor to one of the video output ports connected to the motherboard.
Once you have made the connection, power on your computer and check if the monitor receives a signal. If it does, it means that your integrated graphics are working properly and the issue may lie with the dedicated graphics card. However, if the monitor still does not receive a signal, it’s possible that the problem is unrelated to the graphics card.
Remember to revert back to using the dedicated graphics card if you were previously using it for gaming or graphics-intensive tasks. Integrated graphics may not provide the same level of performance and capabilities as dedicated graphics cards.
Signal To Monitor: Bios And Post Check
If you find yourself in a situation where your computer is turned on, but your monitor is displaying a “no signal” message, it can be frustrating to troubleshoot the issue. One common cause of this problem is a miscommunication between your computer’s BIOS (Basic Input/Output System) and the monitor’s POST (Power-On Self-Test) check. In this article, we will explore some steps you can take to diagnose and resolve this issue.
Listen For Beep Codes
When your computer starts up, it performs a series of internal checks known as the POST. This process helps detect hardware issues and ensures your computer is ready to operate. One way to determine if your computer is successfully completing the POST check is to listen for beep codes. Different beep patterns indicate specific hardware errors or successful initialization. Check your computer’s documentation or manufacturer’s website to identify the meanings behind each beep code.
Look For Status Leds
In addition to listening for beep codes, your computer’s motherboard may have status LEDs that provide visual indications of its current state. These LEDs are usually located near the RAM slots or power connectors. They can provide valuable information about the health of your system. For example, a green LED may indicate that the system is functioning properly, while a red LED may indicate a hardware issue. Refer to your motherboard’s manual for a detailed description of the LED codes and their meanings.
Attempt To Access The Computer’s Bios
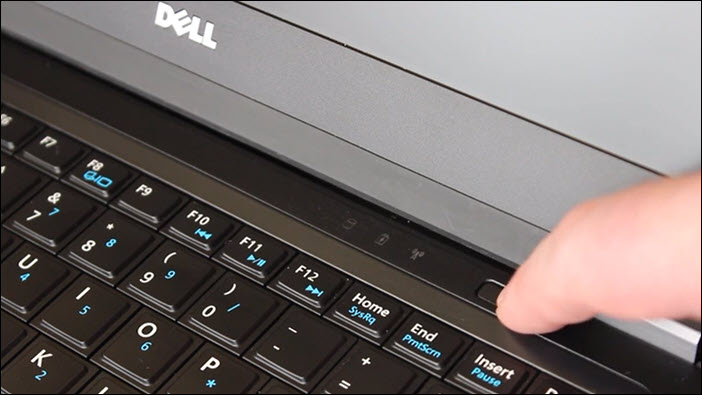
Accessing your computer’s BIOS can provide insight into the source of the “no signal” issue. To access the BIOS, restart your computer and look for an on-screen prompt or a specific key combination to press during boot-up. Common keys for entering the BIOS include F2, F10, and Del. Once in the BIOS, check the settings related to display and make sure they are configured correctly. For example, ensure that the primary display device is set to the correct output, such as HDMI or VGA.
By following these steps, you can troubleshoot the “no signal” issue between your computer and monitor. Remember to check for beep codes, look for status LEDs, and attempt to access the computer’s BIOS. These actions will help you identify any hardware or configuration issues and guide you towards a resolution.
Test Monitor With Another Device
One way to troubleshoot the issue of your computer not sending a signal to the monitor is to test the monitor with another device. This will help you determine whether the problem lies with the computer or the monitor itself. Follow these steps to test the monitor with another device:
Connect To A Different Computer Or Laptop
To check if the issue is with the computer, try connecting the monitor to a different computer or laptop. This will help you determine if the problem lies with the graphics card or other components of your computer. Follow these steps:
- Turn off both the computer and the monitor.
- Disconnect the monitor cable from the back of your computer.
- Connect the monitor cable to the other computer or laptop.
- Turn on both the computer and the monitor.
- If the monitor displays the signal properly with the other device, then the problem is likely with your computer.
Use Another Display With The Current Computer
If the monitor works fine with another device, then the issue might be with the graphics card or other components of your computer. To confirm this, try using another display with your current computer. Here’s how:
- Turn off both the computer and the monitor.
- Disconnect the monitor cable from the back of your computer.
- Connect another display (such as a TV or a different monitor) to your computer.
- Turn on both the computer and the new display.
- If the new display shows the signal properly, then it indicates a problem with your original monitor.
By following these steps, you can identify whether the issue lies with your computer or the monitor itself. This will help you further troubleshoot and resolve the problem of the computer not sending a signal to the monitor.
Update Or Reinstall Graphics Drivers
If your computer is not sending a signal to your monitor, it could be due to loose cables or a damaged video cable. To fix this issue, you can try reseating the cables and making sure they are securely connected.
You can also update or reinstall your graphics drivers, as outdated or corrupted drivers can cause display problems.
If your computer is not sending a signal to the monitor, one possible cause could be outdated or corrupted graphics drivers. Graphics drivers are responsible for communication between your computer’s hardware components, such as the graphics card, and the operating system. When these drivers are not up-to-date or functioning properly, it can result in a lack of signal to your monitor.Boot Into Safe Mode If Necessary
Before updating or reinstalling your graphics drivers, it may be necessary to boot your computer into Safe Mode. Safe Mode is a diagnostic mode that allows your computer to run with minimal drivers and services, making it easier to troubleshoot and fix issues. To boot into Safe Mode, follow these steps:- Start or restart your computer.
- As soon as the computer starts booting, press and hold the F8 key.
- A menu will appear. Use the arrow keys to select “Safe Mode” and press Enter.
- Once your computer has booted into Safe Mode, you can proceed with updating or reinstalling your graphics drivers.
Use Device Manager To Update Drivers
To update or reinstall graphics drivers, you can use the Device Manager utility in Windows. Here’s how:- Right-click on the Start button and select “Device Manager”.
- In Device Manager, expand the “Display adapters” category.
- Right-click on your graphics card and select “Update driver”.
- Choose the option to search automatically for updated driver software.
- If an updated driver is found, follow the on-screen instructions to install it.
- If no updates are found, you can try uninstalling the graphics driver and then reinstalling it.
- To uninstall the driver, right-click on your graphics card and select “Uninstall device”.
- After uninstalling, restart your computer and the driver will be automatically reinstalled.
Computer Not Sending Signal: Os Issues
When your computer fails to send a signal to the monitor, it can be frustrating and hinder your productivity. One possible cause for this issue is related to the operating system (OS) running on your computer. In this section, we will explore potential OS issues that might be preventing your computer from sending a signal to the monitor. By addressing these issues, you can resolve the problem and get your computer working properly again.
Explore Potential Updates Or System Restore
If your computer is not sending a signal to your monitor, it could be due to outdated or incompatible software or drivers. In some cases, installing the latest updates for your operating system can fix the issue. To do this:
- Go to the “Settings” menu on your computer.
- Click on the “Updates & Security” option.
- Check for any available updates and install them.
If updating your OS does not resolve the issue, you can try performing a system restore. This will revert your computer back to a previous state when it was working correctly. To initiate a system restore:
- Press the Windows key and search for “System Restore”.
- Select “Create a restore point” from the search results.
- Click on the “System Restore” button and follow the on-screen instructions to restore your computer to an earlier date.
Check For Malware Or Software Conflicts
In some cases, malware or software conflicts can prevent your computer from sending a signal to the monitor. To check for malware, you can use reputable antivirus software to scan your computer for any potential threats. If any malware is detected, follow the recommended steps to remove it.
Software conflicts can also cause the issue. To determine if this is the case, try booting your computer in safe mode. Safe mode allows your computer to start with only essential system files and drivers, excluding any non-essential software. To boot your computer in safe mode:
- Restart your computer.
- As your computer starts up, press the F8 key repeatedly until you see the “Advanced Boot Options” menu.
- Use the arrow keys to select “Safe Mode” and press Enter.
If your computer successfully boots in safe mode and sends a signal to the monitor, it indicates a software conflict. You can then proceed to uninstall any recently installed software or perform a clean boot to identify the conflicting application.
By exploring potential OS issues such as updates or system restore and checking for malware or software conflicts, you can troubleshoot the problem of your computer not sending a signal to the monitor. Taking these steps will help you resolve the issue and get your computer back up and running smoothly.
When Diy Troubleshooting Fails
Is your computer not sending a signal to your monitor? Ensure that the cable connecting your computer to the monitor is securely plugged in. If the issue persists, try troubleshooting the video cable or replacing it if necessary.
When DIY Troubleshooting Fails Sometimes, despite our best efforts, DIY troubleshooting may not be enough to fix the issue of a computer not sending a signal to the monitor. In such cases, it is essential to consider other options to resolve the problem effectively. Two primary alternatives to explore are the consideration of warranty or repair services and finding a certified technician or support service.Consideration Of Warranty Or Repair Services
If DIY troubleshooting fails, and your computer is still under warranty, it can be advantageous to explore warranty or repair services. Warranty-covered repairs often provide peace of mind, as they can be performed by the manufacturer or an authorized service center. This ensures that the repair is done by professionals who have expertise in resolving hardware-related issues. It is important to review the terms and conditions of your warranty to determine if the computer not sending a signal to the monitor is covered. If it is, contact the manufacturer or the retailer from whom you purchased the computer to initiate the warranty claim process. They will guide you through the necessary steps and may assist in troubleshooting over the phone or provide instructions for mail-in repair if required.Locate A Certified Technician Or Support Service
If your computer is no longer under warranty or if the warranty does not cover the issue at hand, it is advisable to seek assistance from a certified technician or support service. Certified technicians have the expertise and the necessary tools to diagnose and resolve complex hardware issues effectively. When looking for a certified technician or support service, it’s important to ensure they are qualified and experienced in dealing with the specific problem of a computer not sending a signal to the monitor. You can search online for certified technicians or support services in your area or consider reaching out to your computer’s manufacturer for a list of authorized repair centers. When selecting a technician or support service, consider the following factors: – Reputation: Look for reviews or testimonials from previous customers to ensure the technician or service has a track record of providing quality repairs. – Certification: Check if the technician or service is certified by reputable organizations such as CompTIA or manufacturers themselves. – Cost: Inquire about the cost of the repair upfront to avoid any surprises later on. It’s also worth comparing prices between different technicians or services to ensure a fair price. – Turnaround time: Ask about the estimated time it will take for the repair to be completed. This will help you better plan and manage your expectations. By considering warranty or repair services and locating a certified technician or support service, you increase your chances of successfully resolving the issue of a computer not sending a signal to the monitor. These professionals have the knowledge and expertise to diagnose and fix complex hardware problems, ensuring that your computer is up and running smoothly again. Don’t hesitate to reach out to them for assistance when DIY troubleshooting fails.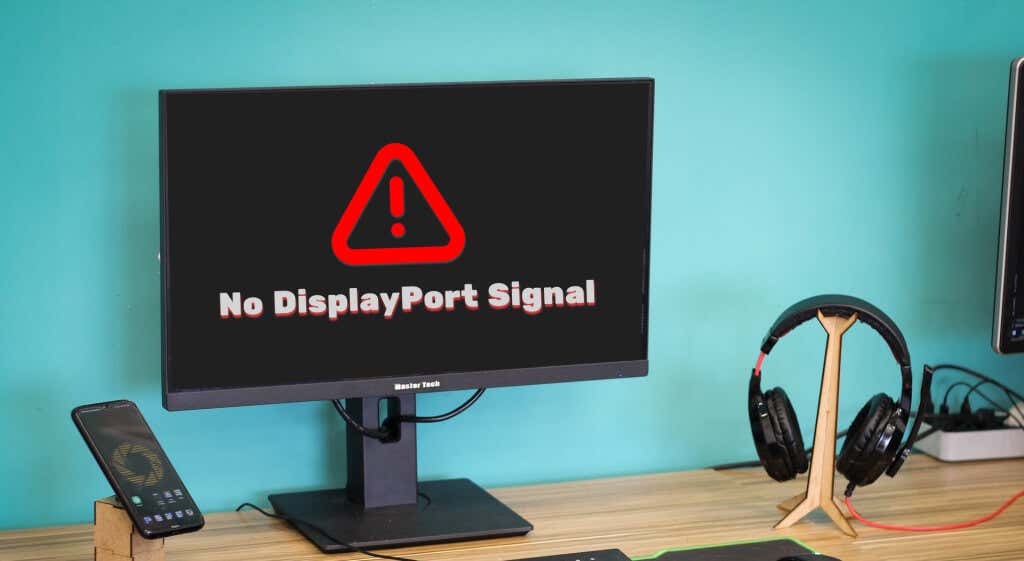
Credit: helpdeskgeek.com
Frequently Asked Questions For Computer Not Sending Signal To Monitor
Why Is My Monitor Not Getting A Signal From My Computer?
If your monitor is not receiving a signal from your computer, the most common cause is a loose cable connection. Turn off your computer, unplug the cable connecting your monitor to your PC, and then firmly plug it back in.
This should ensure a secure connection. If the issue persists, try using a different cable or testing the monitor with another system. Make sure to check and secure all cable connections and update or reinstall graphics drivers if necessary.
Why Is My Pc Not Connecting To My Monitor?
If your PC is not connecting to your monitor, there are a few possible reasons. First, check that the cable connecting your PC to the monitor is secure. Try using a different cable to see if the issue is with the cable itself.
You can also try connecting the monitor to a different system to see if it works. Another possibility is that the graphics card may need to be reseated or there may be an issue with the drivers.
How Do I Fix No Signal On My External Monitor?
To fix no signal on your external monitor: 1. Check the cable connections to ensure they are secure. 2. Turn off and on the display to refresh the connection. 3. Try using a different cable to eliminate any faults. 4. Test the monitor on another system to see if it works.
5. Update or reinstall graphics drivers if necessary.
Why Is My Graphics Card Not Sending Signal To My Monitor?
The most common cause of your graphics card not sending a signal to your monitor is a loose cable connection. Make sure the cable is securely plugged into both your graphics card and monitor. If the issue persists, try testing with a different monitor or display and check for any damages to the graphics card.
Make sure to update or reinstall your graphics drivers as well.
Conclusion
To troubleshoot the issue of a computer not sending a signal to the monitor, it is important to inspect the cables for any looseness. Ensure that the cable connecting your computer to the monitor is firmly plugged in. If the issue persists, it may be caused by a damaged video cable.
In this case, try connecting the monitor and the computer with a different cable. Additionally, checking and securing the cable connections, reseating the graphics card, and updating the graphics drivers can help resolve the problem. By following these steps, you can fix the “no signal” error and get your computer connected to the monitor again.