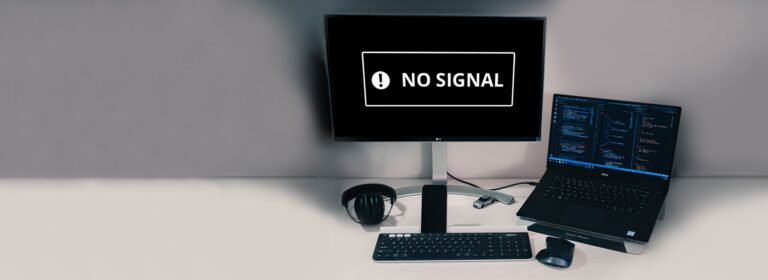
System Unit Not Displaying on Monitor: Troubleshooting Guide
If your system unit is not displaying on the monitor, it could be due to loose or faulty cables, damaged or improperly connected components such as the CPU, motherboard, RAM, power supply, or graphics card. You can try reseating these components or connecting them properly.
Another troubleshooting step is to test the monitor and display cord on another computer to see if they are working properly. If the issue persists, it may indicate a problem with the graphics card or other hardware. (120 words)
Verify Cable Connections
When your system unit fails to display on the monitor, one of the common causes can be loose or faulty cable connections. To resolve this issue, it is important to verify the cable connections and ensure they are securely connected. Follow the steps below to troubleshoot this problem:
Ensure All Cables Are Securely Connected
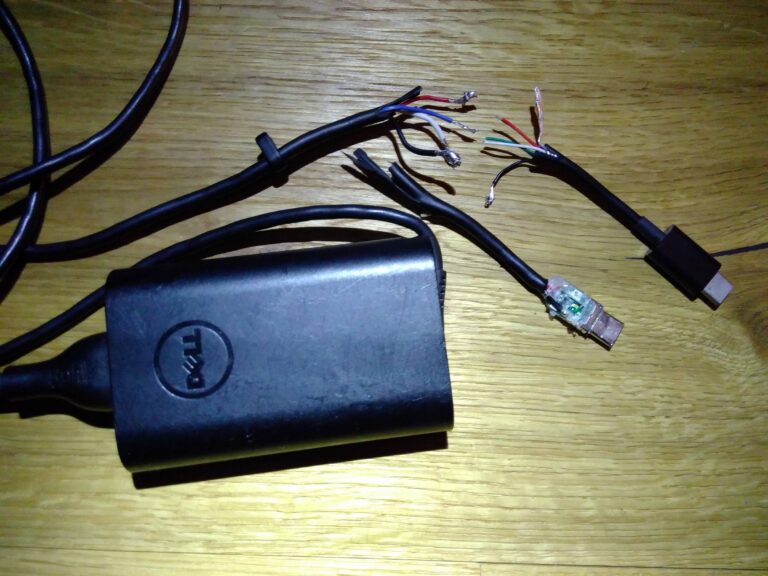
The first thing you should do is check all the cable connections between the system unit and the monitor. Make sure that the power cable, VGA/HDMI/DVI cable, and any other cables are firmly plugged in. It’s possible that a loose connection is preventing the display from appearing on your monitor.
Check For Any Visible Damage To Cables
Inspect the cables for any signs of physical damage, such as cuts, fraying, or bent pins. If you notice any visible damage, it is recommended to replace the cable with a new one to rule out the possibility of a cable malfunction.
Replace With A Spare To Rule Out Cable Malfunction
If you don’t have a spare cable available, try borrowing one from a friend or family member to test if the issue is with the cable itself. By using a different cable, you can determine whether the problem lies with the cable or some other component of your system unit.
By verifying and ensuring the cable connections are secure, checking for visible damage, and replacing with a spare if necessary, you can effectively troubleshoot the issue of the system unit not displaying on the monitor. This step is crucial in identifying and resolving any cable-related problems that may be causing the display issue.
Assess Power And Source Input
The system unit not displaying on the monitor could be due to loose or faulty cables, damaged or improperly connected components such as the CPU, motherboard, RAM, power supply, or graphics card. Troubleshoot by reseating the connections and trying different cables or components in another computer to ensure they are working properly.
System Unit Not Displaying on Monitor: Assess Power and Source Input When troubleshooting a system unit that is not displaying on the monitor, it is important to assess the power and source input. This step will help identify any issues related to the system unit or monitor being properly powered and the correct input source being selected. By following the steps outlined below, you can ensure that the necessary power is supplied to the system unit and that the correct input source is chosen on the monitor. Confirm the system unit and monitor are powered on: To start, make sure both the system unit and monitor are powered on. This may seem obvious, but sometimes simple oversights can lead to unnecessary troubleshooting. Check that the power cords are securely plugged into both the system unit and the monitor. Ensure that the power switch on both devices is in the “on” position. If any power indicators are present on the system unit or monitor, confirm they are illuminated or displaying activity. Validate the correct input source is selected on the monitor: If your monitor has multiple input source options (such as HDMI, VGA, or DisplayPort), it is crucial to validate that the correct input source is selected. Using the wrong input source can result in no signal being displayed on the monitor. Consult the monitor’s user manual or menu settings to determine how to access the input source selection options. Once in the menu, navigate to the input source settings and verify that the appropriate option is chosen. If you are unsure which input source to select, try each option one at a time until the system unit’s display appears on the monitor. Pay attention to any change in the display or error messages that may indicate an incompatible input source. By confirming that both the system unit and monitor are powered on and that the correct input source is selected, you can effectively troubleshoot and resolve the issue of a system unit not displaying on the monitor.Internal Component Inspection
If you’re experiencing the issue of the system unit not displaying on the monitor, it could be due to loose cables or improperly connected internal components such as the CPU, motherboard, RAM, power supply, or graphics card. Reseating these components and checking their functionality in another computer can help troubleshoot the problem.
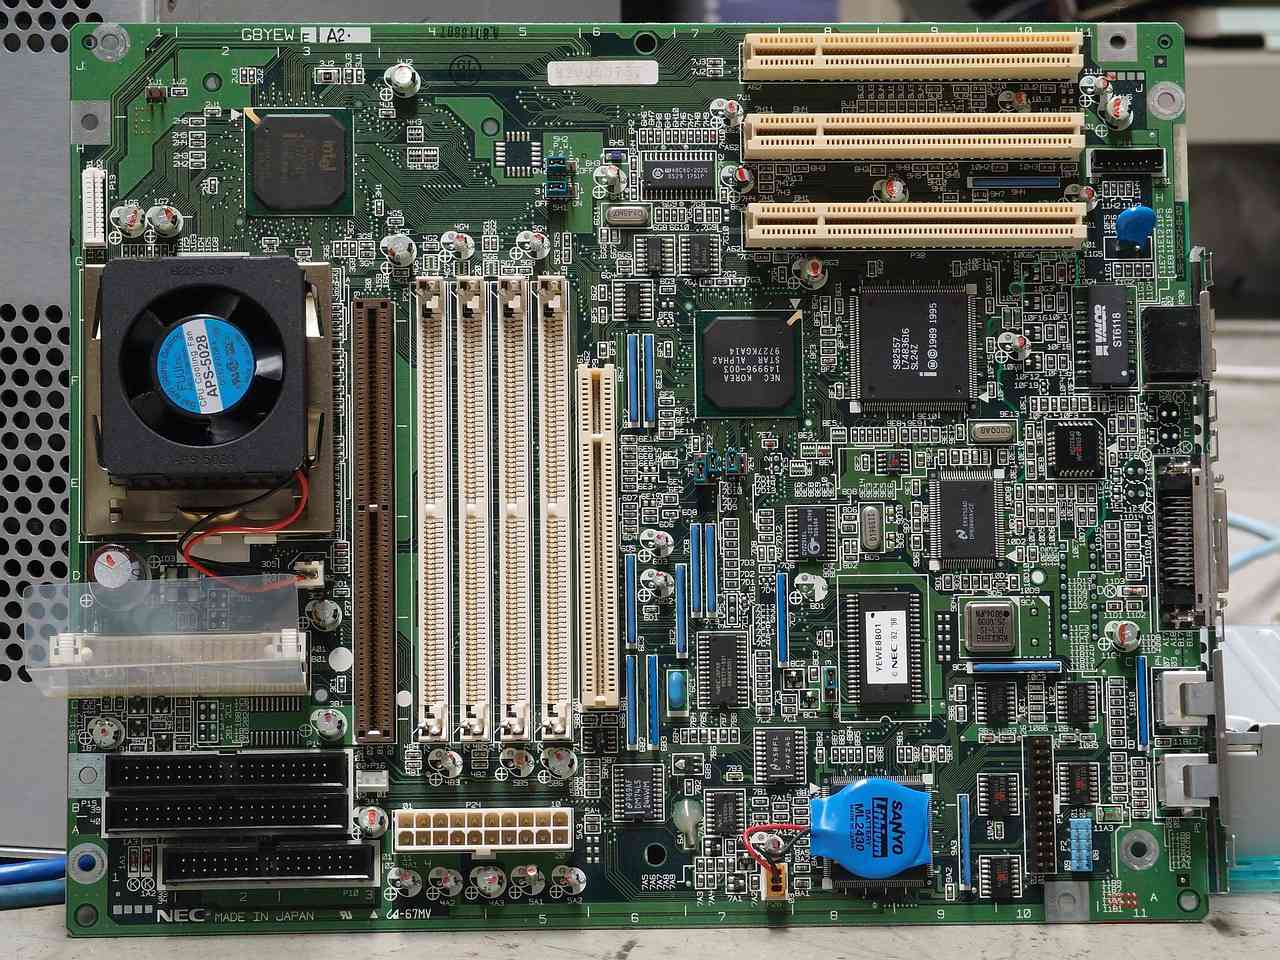
Guide On Reseating Cpu, Ram, And Gpu
If your system unit is not displaying on the monitor, it could be due to internal component connection issues. A common solution is to reseat the CPU, RAM, and GPU to ensure they are properly connected. Here’s a step-by-step guide on reseating these components:
- Turn off your computer and unplug the power cord.
- Remove the system unit cover to gain access to the internal components.
- Locate the CPU socket on the motherboard and carefully lift the retention lever to release the CPU.
- Take out the CPU and inspect it for any bent pins or physical damage. If necessary, clean the CPU and apply a fresh layer of thermal paste before reseating it.
- Align the CPU correctly with the socket and gently lower it back into place.
- Press the CPU down firmly and secure it by lowering the retention lever.
- Next, locate the RAM slots on the motherboard. Press down on the retaining tabs on both sides of the RAM module to release it.
- Remove the RAM module from the slot and inspect it for any visible damage.
- If the RAM module is clean and undamaged, reinsert it into the slot at a slight angle and press it down until the retaining tabs click into place.
- To reseat the GPU, locate the PCIe slot on the motherboard where it is installed.
- Press down on the lever at the end of the slot to release the GPU.
- Carefully remove the GPU from the slot and inspect it for any visible damage or loose connections.
- If the GPU is clean and undamaged, align it correctly with the PCIe slot and firmly push it down until the lever clicks into place.
Steps To Clear The Cmos To Reset Bios Settings
In some cases, the system unit not displaying on the monitor can be attributed to incorrect BIOS settings. Clearing the CMOS (Complementary Metal-Oxide-Semiconductor) can help reset the BIOS settings to default. Follow these steps to clear the CMOS:
- Turn off the computer and unplug the power cord.
- Locate the CMOS battery on the motherboard. It is a small, circular battery.
- Remove the CMOS battery by gently pushing on the retaining clip and popping it out.
- Wait for around 5 minutes to ensure that the residual power is fully drained.
- Reinsert the CMOS battery back into its slot, making sure it is securely in place.
- Plug in the power cord and turn on the computer.
- The BIOS settings should now be reset to their default configuration.
Overview Of Checking The Motherboard For Any Signs Of Damage
If your system unit is not displaying on the monitor, it is crucial to check the motherboard for any signs of damage. Follow these steps to inspect the motherboard:
- Turn off your computer and unplug the power cord.
- Remove the system unit cover to gain access to the internal components.
- Visually inspect the motherboard for any physical damage, such as burnt marks, swollen capacitors, or loose connections.
- If you notice any signs of damage, it is recommended to consult a professional or replace the motherboard.
Troubleshooting With Alternative Methods
When your system unit is not displaying on the monitor, it could be due to loose or faulty cables, damaged or improperly connected components such as the CPU, motherboard, RAM, power supply, or graphics card. Try reconnecting these components and testing them in another computer to ensure they are functioning properly.
Using Integrated Graphics Instead Of Discrete Gpu
One alternative troubleshooting method you can try when your system unit is not displaying on the monitor is to use the integrated graphics instead of the discrete GPU. This can help determine if the issue lies with the graphics card.
- Power off your computer and disconnect the power cable.
- Open the system unit casing to access the internal components.
- Locate the graphics card and gently remove it from the slot.
- Connect your display cable directly to the motherboard’s video output.
- Close the system unit casing and reconnect the power cable.
- Power on your computer and check if the display is now working.
If the display works with the integrated graphics, it indicates that there might be an issue with the discrete GPU. You can try updating the GPU drivers or replacing the graphics card to resolve the problem.
Testing With A Different Monitor Or Display Cord
Another troubleshooting method to consider when dealing with a system unit that is not displaying on the monitor is to test it with a different monitor or display cord. This helps determine if the problem lies with the current monitor or the cords being used.
Follow these steps to test with a different monitor or display cord:
- Power off your computer and disconnect the power cable.
- Disconnect the current monitor or display cord from the system unit.
- If you have a spare monitor or display cord, connect it to the system unit.
- Ensure that the connections are secure.
- Power on your computer and check if the display is now working.
If the display works with the different monitor or display cord, it suggests that the issue might be with the original monitor or cord. Consider replacing them to resolve the problem.
Configuration And Resolution Settings
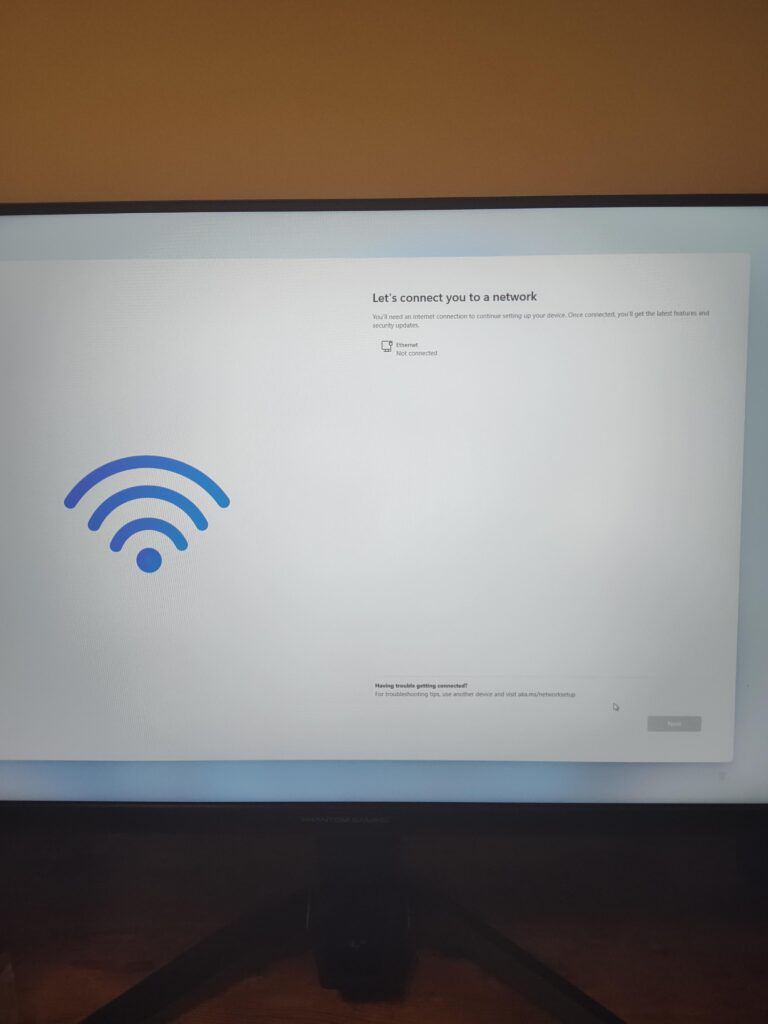
One of the common issues that users may encounter when their system unit is not displaying on the monitor is related to configuration and resolution settings. Incorrect display settings in the operating system or outdated graphics drivers can often be the culprits behind this problem. In this section, we will discuss how to adjust display settings in the operating system and update or rollback graphics drivers to resolve this issue.
Adjust Display Settings In The Operating System
If your system unit is not displaying on the monitor, one of the first troubleshooting steps you can take is to adjust the display settings in the operating system. Here’s how you can do it:
- Right-click on the desktop and select “Display Settings” from the context menu.
- In the Display Settings window, you can adjust the resolution, orientation, and scale to fit your monitor’s capabilities. If the display is set to an incompatible resolution, it can result in no signal on your monitor.
- Try selecting a lower resolution and see if the display appears. If it does, gradually increase the resolution until you find the optimal settings for your monitor.
By adjusting the display settings in the operating system, you can ensure that the resolution and other graphical settings are compatible with your monitor, potentially resolving the issue of no display.
Update Or Rollback Graphics Drivers
Outdated or incompatible graphics drivers can also cause the system unit to not display on the monitor. Updating or rolling back the graphics drivers can help resolve this issue. Follow the steps below to update or rollback the graphics drivers:
- Open the Device Manager by pressing
Windows + Xkeys and selecting “Device Manager” from the menu. - Expand the “Display Adapters” category to view the installed graphics card.
- Right-click on the graphics card and select “Update Driver” to check for updates online. If updates are found, follow the on-screen instructions to install them.
- If updating the driver doesn’t resolve the issue, you can try rolling back the driver to a previous version. Right-click on the graphics card and select “Properties.” Go to the “Driver” tab and click on “Roll Back Driver.”
- Follow the instructions to complete the driver rollback. Once done, restart your system unit and check if the display appears on the monitor.
Updating or rolling back the graphics drivers can help ensure that they are compatible with your system and the monitor, potentially resolving any issues causing the no display problem.
In conclusion, configuration and resolution settings play a crucial role in resolving the issue of a system unit not displaying on the monitor. By adjusting the display settings in the operating system and updating or rolling back the graphics drivers, you can effectively troubleshoot and fix this issue, restoring the display functionality of your system unit.
Credit: www.nytimes.com
Decoding Beep Codes And Led Indicators
When encountering issues with your system unit not displaying on the monitor, it can be frustrating to identify the root cause. However, beep codes and LED indicators can serve as valuable diagnostic tools to help you decipher the problem. These codes and signals provide important clues about the hardware components and errors that may be preventing your monitor from displaying anything.
Interpret Common Beep Patterns And Led Signals
Beep codes are an audible way for your computer to communicate with you when there is a problem during the boot process. Meanwhile, LED indicators on the system unit or motherboard can provide visual cues about the system status. By understanding the meaning behind these signals, you can gain insights into the underlying issues affecting your display.
Interpreting Beep Codes:
Beep codes are usually represented by a series of short and long beeps. The number, length, and pattern of the beeps can vary depending on the manufacturer and BIOS (Basic Input/Output System) version. Here are some common beep patterns and their possible interpretations:
| Beep Pattern | Possible Meaning |
|---|---|
| One short beep | System is booting up successfully |
| Continuous beeping | RAM (Random Access Memory) is not detected or is malfunctioning |
| One long, two short beeps | Video card or display adapter issue |
| Repeated short beeps | Power supply or motherboard issue |
Understanding LED Indicators:
LED indicators, often found on the system unit or motherboard, can provide visual information about the system’s status. LED colors and blinking patterns can vary, but here are some common indications:
- Steady green LED: Indicates that the system is powered on and functioning normally
- Blinking green or amber LED: Can signify various errors, such as a failed boot or hardware problem
- No LED activity: Suggests a power or motherboard issue that prevents the system from starting
Action Plan Based On Diagnostic Indicators
Now that you’ve decoded the beep codes and LED signals, it’s time to develop an action plan to resolve the issue. Here are some steps to consider based on the diagnostic indicators:
- Refer to the system unit or motherboard manual to understand the specific beep codes and LED signals for your hardware.
- If you encounter a specific beep pattern or LED indication, cross-reference it with the manual or manufacturer’s website to identify the possible hardware component causing the problem.
- Reseat any loosely connected hardware components, including the CPU, RAM, power supply cables, and graphics card.
- Verify that the monitor and display cables are properly connected and functioning. Consider trying a different monitor or display cord to eliminate potential issues.
- If the diagnostic indicators point to a specific hardware component failure, such as a faulty RAM module or video card, consider replacing or repairing the component.
- If the issue persists despite your troubleshooting efforts, consulting a professional technician or contacting the manufacturer’s support can provide further assistance.
Remember, decoding the beep codes and LED indicators is just the first step in troubleshooting your system unit not displaying on the monitor. By following the action plan based on these diagnostic indicators, you can effectively pinpoint and address the underlying hardware issues to get your monitor back up and running.
System Unit Not Displaying On Monitor: Guide
If your system unit is not displaying on the monitor, it could be due to loose or faulty cables, improperly connected components like the CPU, motherboard, RAM, power supply, or graphics card, or incorrect display settings. Try reseating the components and checking the cables, or try using them in another computer to troubleshoot the issue.
Steps For Testing Individual Components Externally
If you’re experiencing issues with your system unit not displaying on the monitor, it could be caused by various components not being properly connected. Follow these steps to test each component externally:
- Make sure to completely shut down your computer before proceeding.
- Start by checking the CPU. Carefully remove it from the motherboard and reseat it securely. Ensure that the CPU fan is also connected properly.
- Next, check the motherboard. Verify that all cables and connectors are tightly connected to the motherboard. If necessary, disconnect and reconnect them to ensure a secure connection.
- Check the RAM modules. Remove them one by one and clean their contacts with a soft cloth. Then, reseat them back into their slots firmly.
- Inspect the power supply. Ensure that all power cables, including the main 24-pin ATX connector and the CPU power connector, are properly connected.
- Lastly, check the graphics card or video card. Remove it from the motherboard and reseat it firmly. If you have an integrated graphics card, try connecting your monitor to the motherboard’s video output.
- After checking each component, try connecting them to another computer to verify if they’re working properly.
When To Consider Professional Repair Or Replacements
If you have followed the steps above and are still experiencing issues with your system unit not displaying on the monitor, it may be time to consider professional repair or replacements. Here are some scenarios where seeking professional assistance may be necessary:
- If you notice physical damage or burnt components on the motherboard or any other internal components, it’s best to consult a professional technician for repair or replacement.
- If you lack the technical expertise or tools required to diagnose or fix the issue, seeking professional help can save you time and potential further damage.
- If you have already tested the individual components externally and they are confirmed to be working, there may be an underlying hardware or compatibility issue that requires professional troubleshooting.
- In situations where your system unit is under warranty, it’s advisable to contact the manufacturer or authorized service center for assistance.
Remember, troubleshooting hardware-related issues can sometimes be complex, and attempting to fix them without proper knowledge or experience may cause further damage. Seeking professional help can ensure a safe and reliable resolution to your system unit not displaying on the monitor.
Frequently Asked Questions For System Unit Not Displaying On Monitor
Why Is My Cpu On But No Display In Monitor?
If your CPU is on but there is no display on your monitor, it could be due to loose or faulty cables, improperly connected components such as the motherboard, RAM, power supply, or graphics card. Try reseating these components and checking their connections.
Another possible solution is to test the components in another computer to ensure they are working properly.
Why Is My Pc On But No Signal To Monitor?
If your PC is on but there is no signal to your monitor, it could be due to loose or faulty cables. Ensure that all cables are properly connected and try using different cables or a different monitor. Other possible causes include issues with the CPU, motherboard, RAM, power supply, or graphics card.
Reseating these components or testing them in another computer may help determine if they are the problem.
Why Is My Laptop Powering On But No Display?
If your laptop is powering on but there’s no display, it could be due to a loose connection or fault in the CPU, motherboard, RAM, power supply, or graphics card. Try reseating these components or check if they work on another computer.
Faulty or loose cables can also cause the issue.
How Do You Fix A Computer That Is On But The Screen Is Black?
To fix a computer with a black screen, make sure all cables are properly connected and try reseating the CPU, motherboard, RAM, power supply, and graphics card. If the issue persists, test the components on another computer to check for any faults.
Additionally, check for loose or faulty cables and try a different monitor or display cord. If these steps don’t work, it may indicate a problem with the GPU or internal disk drive.
Conclusion
To troubleshoot the issue of the system unit not displaying on the monitor, it is important to check for loose or faulty cables, ensure that the CPU, motherboard, RAM, power supply, and graphics card are properly connected. Trying a new monitor or display cord can also help in identifying and resolving the problem.
If the issue persists, it might be necessary to seek professional assistance to diagnose and fix the underlying cause. Remember to follow the appropriate steps and consider all possible factors to get your system unit to display on the monitor again.