Steam Deck Not Connecting to Monitor? Here’s the Fix!
If your Steam Deck is not connecting to your monitor, try unplugging and replugging the display cable, using a different display input port, checking the input selection, or trying a new cable. You can also try connecting to a different source or using a dock/dongle with display out capabilities.
If none of these steps work, you can try rebooting the Steam Deck, updating its software, or changing the HDMI cable and USB C adapter. Hard resetting the Steam Deck by holding the power and volume down buttons may also help.
Make sure the connection between the Steam Deck and the HDMI monitor is secure. Additionally, you can connect your Steam Deck to a TV or monitor using a USB-C to HDMI adapter.
Initial Checks Before Fix Attempts
If you are experiencing difficulties with your Steam Deck not connecting to your monitor, it is essential to perform some initial checks before proceeding with any fix attempts. By following these steps, you can ensure that all possible physical and power-related issues are ruled out:
Verify All Physical Connections
Start by checking all the physical connections between your Steam Deck and the monitor. Ensure that the display cable is securely plugged into both the Steam Deck and the monitor. Sometimes, loose connections can cause display problems. If the issue persists, unplug and replug the display cable, try a different display input port on the monitor, or consider trying a new cable altogether.
Assess Monitor And Steam Deck Power Status
Next, make sure that both your monitor and Steam Deck are powered on. Verify that the monitor is receiving power by checking if it displays any lights or indicators. If necessary, check the power cord and ensure it is properly connected. Similarly, ensure that your Steam Deck has sufficient battery power and is turned on. If you are unsure about the power status, try charging the Steam Deck or connecting it to a power source.
Ensure Compatibility Of Monitor Resolution With Steam Deck
When connecting your Steam Deck to a monitor, it is important to ensure that the monitor’s resolution is compatible with the Steam Deck. Some monitors may have specific resolution requirements, and mismatched resolutions can lead to display issues. Check the specifications of your monitor and make sure it supports the resolution output of your Steam Deck. If needed, adjust the resolution settings on both the monitor and the Steam Deck to match.
By conducting these initial checks, you can eliminate any physical connection issues, assess the power status of your devices, and ensure compatibility between the monitor and Steam Deck’s resolution. If the problem persists after conducting these checks, you can proceed to further troubleshooting and fix attempts to resolve the Steam Deck not connecting to the monitor issue.
Steam Deck To Monitor Connections
If you’re experiencing issues with your Steam Deck not connecting to a monitor, try troubleshooting steps such as checking the display cable, trying a different input port, or using a new cable. You can also try rebooting the Steam Deck, updating it, or changing the HDMI cable or USB C adapter for a potential fix.
Steaming Deck to Monitor Connections Are you facing difficulties connecting your Steam Deck to your monitor? Don’t worry, we’ve got you covered. In this section, we will explore the importance of selecting the right port, the differences between HDMI and USB-C connections, and potential impacts of cable faults.Importance Of Selecting The Right Port
When connecting your Steam Deck to a monitor, selecting the right port is crucial for a seamless and stable connection. Not all ports are created equal, and using the wrong one can lead to compatibility issues and decreased performance. For a reliable connection, make sure to identify the correct port on both your Steam Deck and monitor. Common ports include HDMI, DisplayPort, and USB-C. Once you’ve identified the compatible port, choose the appropriate cable or adapter accordingly.Differences Between Hdmi And Usb-c Connections
Understanding the differences between HDMI and USB-C connections can help you troubleshoot any connection issues with your Steam Deck and monitor. HDMI (High-Definition Multimedia Interface) cables are widely used for audio and video transmission. They support high-resolution and high-quality content, making them ideal for gaming. HDMI cables are backward compatible, meaning you can connect an older HDMI version to a newer one. USB-C, on the other hand, is a versatile and increasingly popular connection option. Apart from supporting audio and video transfer, USB-C cables also provide power and data transfer capabilities. This means you can connect your Steam Deck to a monitor while simultaneously charging it or transferring data.Potential Impact Of Cable Faults
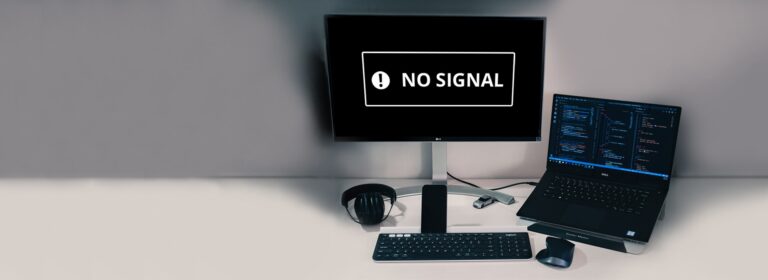
Cables can sometimes be the culprit behind connectivity issues. Whether it’s a loose connection, cable damage, or an incompatible cable, it’s important to consider the potential impact of cable faults when troubleshooting Steam Deck to monitor connections. A faulty cable can result in no signal or a poor-quality display. It’s crucial to ensure that the cable is securely connected on both ends and that there are no visible signs of damage. Additionally, using a high-quality and reliable cable can prevent connection issues and provide a stable and optimal gaming experience. In conclusion, selecting the right port, understanding the differences between HDMI and USB-C connections, and ensuring cable quality are vital for a successful Steam Deck to monitor connection. By following these guidelines and troubleshooting potential cable faults, you can enjoy your gaming sessions on a larger screen without any connectivity hiccups.Software Settings And Updates
When it comes to connecting your Steam Deck to an external monitor, there are several important factors to consider. One of the key aspects is ensuring that your software settings and updates are in order. Keeping your system up to date and adjusting the display settings correctly can make a significant difference in establishing a seamless connection between your Steam Deck and monitor.
Checking And Adjusting Steam Deck Display Settings
To ensure that your Steam Deck is properly connected to your monitor, it is crucial to check and adjust the display settings accordingly. Here are some steps to consider:
- Access the Steam Deck menu and go to “Settings”.
- Select “Display & Sound” to access the display settings.
- Check if the appropriate display resolution is selected for your monitor.
- Verify if the display mode is set to extend or duplicate.
- Ensure that the refresh rate is set correctly for optimal visual performance.
By following these steps and carefully adjusting the display settings on your Steam Deck, you can significantly improve the chances of successfully connecting to your monitor.
Importance Of Keeping Steam Deck Firmware Updated
Keeping your Steam Deck firmware updated is essential for various reasons, including improving the compatibility and functionality of the device when connecting to external displays. Here’s why updating your firmware is crucial:
- Fixes bugs and software glitches that may hinder the connection process.
- Enhances the overall performance and stability of the Steam Deck.
- Introduces new features and optimizations that can improve the display output.
To update the firmware of your Steam Deck, ensure that you are connected to a stable internet connection and follow the instructions provided by Valve Corporation.
Role Of Drivers In External Display Functionality
Drivers play a vital role in enabling the external display functionality of your Steam Deck. These drivers act as software interfaces between your operating system and the monitor, ensuring seamless communication and compatibility. Here’s what you need to know:
| Key Points |
|---|
| Make sure that your graphics card drivers are up to date as outdated or incompatible drivers can hinder the connection to an external monitor. |
| Visit the official website of your graphics card manufacturer to download and install the latest drivers for your specific model. |
By keeping your drivers updated, you can overcome potential compatibility issues and maximize the external display functionality of your Steam Deck.
Credit: www.gamingonlinux.com
Steam Deck Not Connecting To Monitor? Here’s The Fix!
If you are experiencing issues with your Steam Deck not connecting to a monitor, there are several troubleshooting steps you can take to resolve the problem. In this article, we will guide you through the process of fixing this issue step by step.
Resetting The Steam Deck: Hard Reset Methodology
If your Steam Deck is not connecting to the monitor, performing a hard reset might help resolve the problem. Here’s how you can do it:
- Hold down the power button and the volume down button simultaneously.
- Continue holding the buttons for about 10 seconds.
- Your Steam Deck will restart, and hopefully, the issue will be resolved.
Troubleshooting With Alternative Monitors Or Docks
If the previous step didn’t fix the issue, you can try troubleshooting with alternative monitors or docks. Follow these steps:
- Connect your Steam Deck to a different monitor or dock with display output capabilities.
- If the connection works, it indicates that the issue may be with the original monitor or dock.
- You can then further investigate and potentially replace the faulty monitor or dock.
Changing Cables And Adapters: Steps To Identify A Faulty Connection
If troubleshooting with alternative monitors or docks didn’t solve the problem, you can check for faulty connections by changing cables and adapters. Here’s what you can do:
- Unplug and replug the display cable.
- Try using a different display input port on both the monitor and the Steam Deck.
- Check the input selection on the monitor to make sure it’s set to the correct input source.
- If possible, try using a different cable or adapter as they can sometimes be the cause of the issue.
By following these troubleshooting steps, you should be able to resolve the issue of your Steam Deck not connecting to a monitor. If none of the above methods work, we recommend reaching out to Steam Support for further assistance.
Advanced Solutions And Support
If you are experiencing difficulty with your Steam Deck not connecting to a monitor, don’t worry. There are advanced solutions and support options available to help you troubleshoot and resolve the issue. In this section, we will explore different approaches and resources that you can utilize to get your Steam Deck up and running with your monitor.
Exploring The Use Of Different Source Docks Or Dongles
If your Steam Deck is not connecting to your monitor, one possible solution is to try using different source docks or dongles. A source dock or dongle acts as an intermediate device that connects the Steam Deck to the monitor, allowing for display output. By trying different source docks or dongles, you can determine if the issue lies with the specific dock or dongle you are using.
- Unplug and replug the display cable to ensure a secure connection.
- Try a different display input port on your monitor.
- Check the input selection on your monitor to make sure it is set to the correct input source.
- Try using a new cable, as the cable itself may sometimes be faulty.
- If possible, try connecting your Steam Deck to a different source such as a laptop, desktop, or phone/tablet with display output capabilities to determine if the issue is specific to your monitor.
When To Seek Professional Help Or Contact Support
If you have exhausted all troubleshooting steps and are still unable to connect your Steam Deck to your monitor, it may be time to seek professional help or contact customer support. Professional help can come in the form of a technician who specializes in hardware or a knowledgeable individual who can provide further assistance.
Before seeking professional help or contacting support, it’s a good idea to gather all relevant information about your setup, such as the model of your Steam Deck, monitor, and any source docks or dongles you are using. This information can help the professionals or support team better understand your specific situation and provide more targeted solutions.
Community Resources For Additional Troubleshooting Guidance
If you prefer to explore troubleshooting options on your own or seek guidance from a community of like-minded individuals, there are community resources available for additional troubleshooting guidance. These resources can provide valuable insights, tips, and solutions based on the experiences of other Steam Deck users.
Here are some community resources you can turn to:
By engaging with these communities, you may find others who have encountered similar issues and have successfully resolved them. Additionally, you can post your own questions and provide details about your setup to seek guidance and suggestions from the community.
In conclusion, if you are facing difficulties with your Steam Deck not connecting to your monitor, you have advanced solutions and support options available to you. Try exploring different source docks or dongles, know when to seek professional help or contact support, and leverage community resources for additional troubleshooting guidance. With these resources at your disposal, you can effectively troubleshoot and resolve the issue, ensuring a seamless gaming experience with your Steam Deck and monitor setup.
Frequently Asked Questions Of Steam Deck Not Connecting To Monitor
Why Is My Steam Deck Screen Not Working?
To troubleshoot a Steam Deck screen not working, try these steps: 1. Check the display cable and replug it. 2. Try a different display input port. 3. Verify the input selection on the monitor. 4. Try using a new cable or a different source.
5. Restart the Steam Deck or do a hard reset. 6. Ensure secure connections between the Steam Deck and HDMI monitor. 7. Use a USB-C to HDMI adapter to connect to a TV or monitor. 8. Contact Steam Support for further assistance.
How Do I Get Steam Deck To Play Games On My Monitor?
To connect your Steam Deck to a monitor, simply use a USB-C to HDMI adapter and connect it to the USB-C port on the device. Then, plug one end of the HDMI cable into the adapter and the other end into your monitor.
Make sure the monitor is set to the correct input source.
How Do I Connect My Steam Deck To Usb-c Monitor?
To connect your Steam Deck to a USB-C monitor, follow these steps: 1. Use a USB-C to HDMI adapter to connect your Steam Deck to the monitor. 2. Insert one end of the HDMI cable into the adapter and the other end into the monitor.
3. Make sure the connections are secure. 4. Select the correct input source on your monitor. 5. Your Steam Deck should now be connected to the USB-C monitor and ready for use. Note: If there is no display detected, try unplugging and replugging the display cable, using a different display input port, checking input selection, or trying a new cable.
Additionally, you can try using a different source and/or dock/dongle if available.
Why Is My Steam Deck Not Connecting To The Monitor?
There could be several reasons for this issue. Make sure to unplug and replug the display cable, try a different display input port, and check the input selection. It’s also worth trying a new cable, as they can sometimes be faulty.
Additionally, you can try connecting the Steam Deck to a different source or using a dock/dongle with display out capabilities.
Conclusion
In case you’re having trouble connecting your Steam Deck to a monitor, there are a few steps you can take to resolve the issue. First, try unplugging and replugging the display cable, changing the input port, or using a different cable.
You can also try connecting the Steam Deck to a different source or using a dock/dongle that supports display output. If all else fails, a hard reset or updating the Steam Deck might solve the problem. Remember to check the connection between the Steam Deck and the HDMI monitor as well.
By following these troubleshooting steps, you should be able to connect your Steam Deck to a monitor without any issues.
