External Monitor Not Detected Windows 11: Troubleshooting Guide
To fix an external monitor not being detected on Windows 11, go to Display Settings, navigate to System > Display, scroll down to Scale & layout, expand Multiple displays, click on Detect, and select Extend these displays if the second monitor is detected. If the issue persists, check if the monitor is plugged into a power source, turned on, and the computer is restarted.
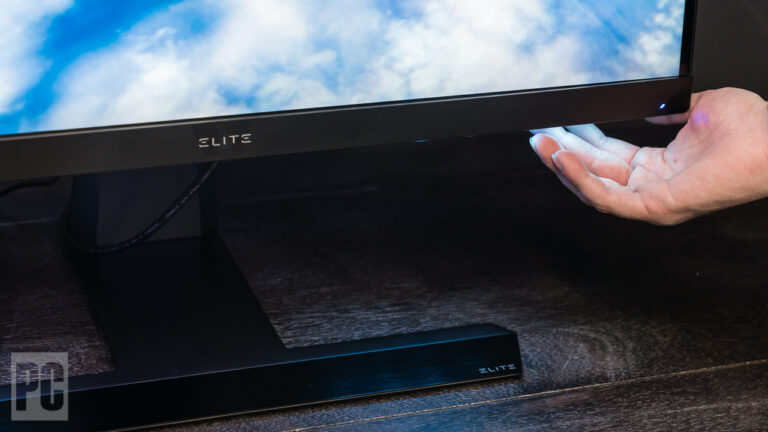
Ensure the correct input port is chosen on the monitor’s built-in controls and check the signal cable connection between the display and the graphics card.
Credit: www.windowscentral.com
Common Reasons Monitors Aren’t Detected
Having an external monitor can greatly enhance your Windows 11 experience, providing you with more screen real estate and increased productivity. However, at times, you may encounter issues where your external monitor is not being detected. This can be frustrating, but there are several common reasons behind this problem that you can troubleshoot.
Cable Connectivity Issues
One of the most common reasons for monitors not being detected is cable connectivity issues. Ensure that the cable connecting your external monitor to your computer is securely plugged into both the monitor and the computer’s graphics card port. Sometimes, the cable may appear connected but might be loose, causing a poor connection. Try unplugging and re-plugging the cable to ensure a proper connection.
Incompatible Or Outdated Drivers
Incompatible or outdated drivers can also lead to your external monitor not being detected. Drivers act as the communication bridge between your monitor and your computer’s operating system. If the driver for your external monitor is incompatible with Windows 11 or if it is outdated, it may result in detection issues. To resolve this, ensure that you have the latest drivers installed for your monitor. Visit the manufacturer’s website or use Windows Update to download and install the appropriate drivers.
Incorrect Display Settings
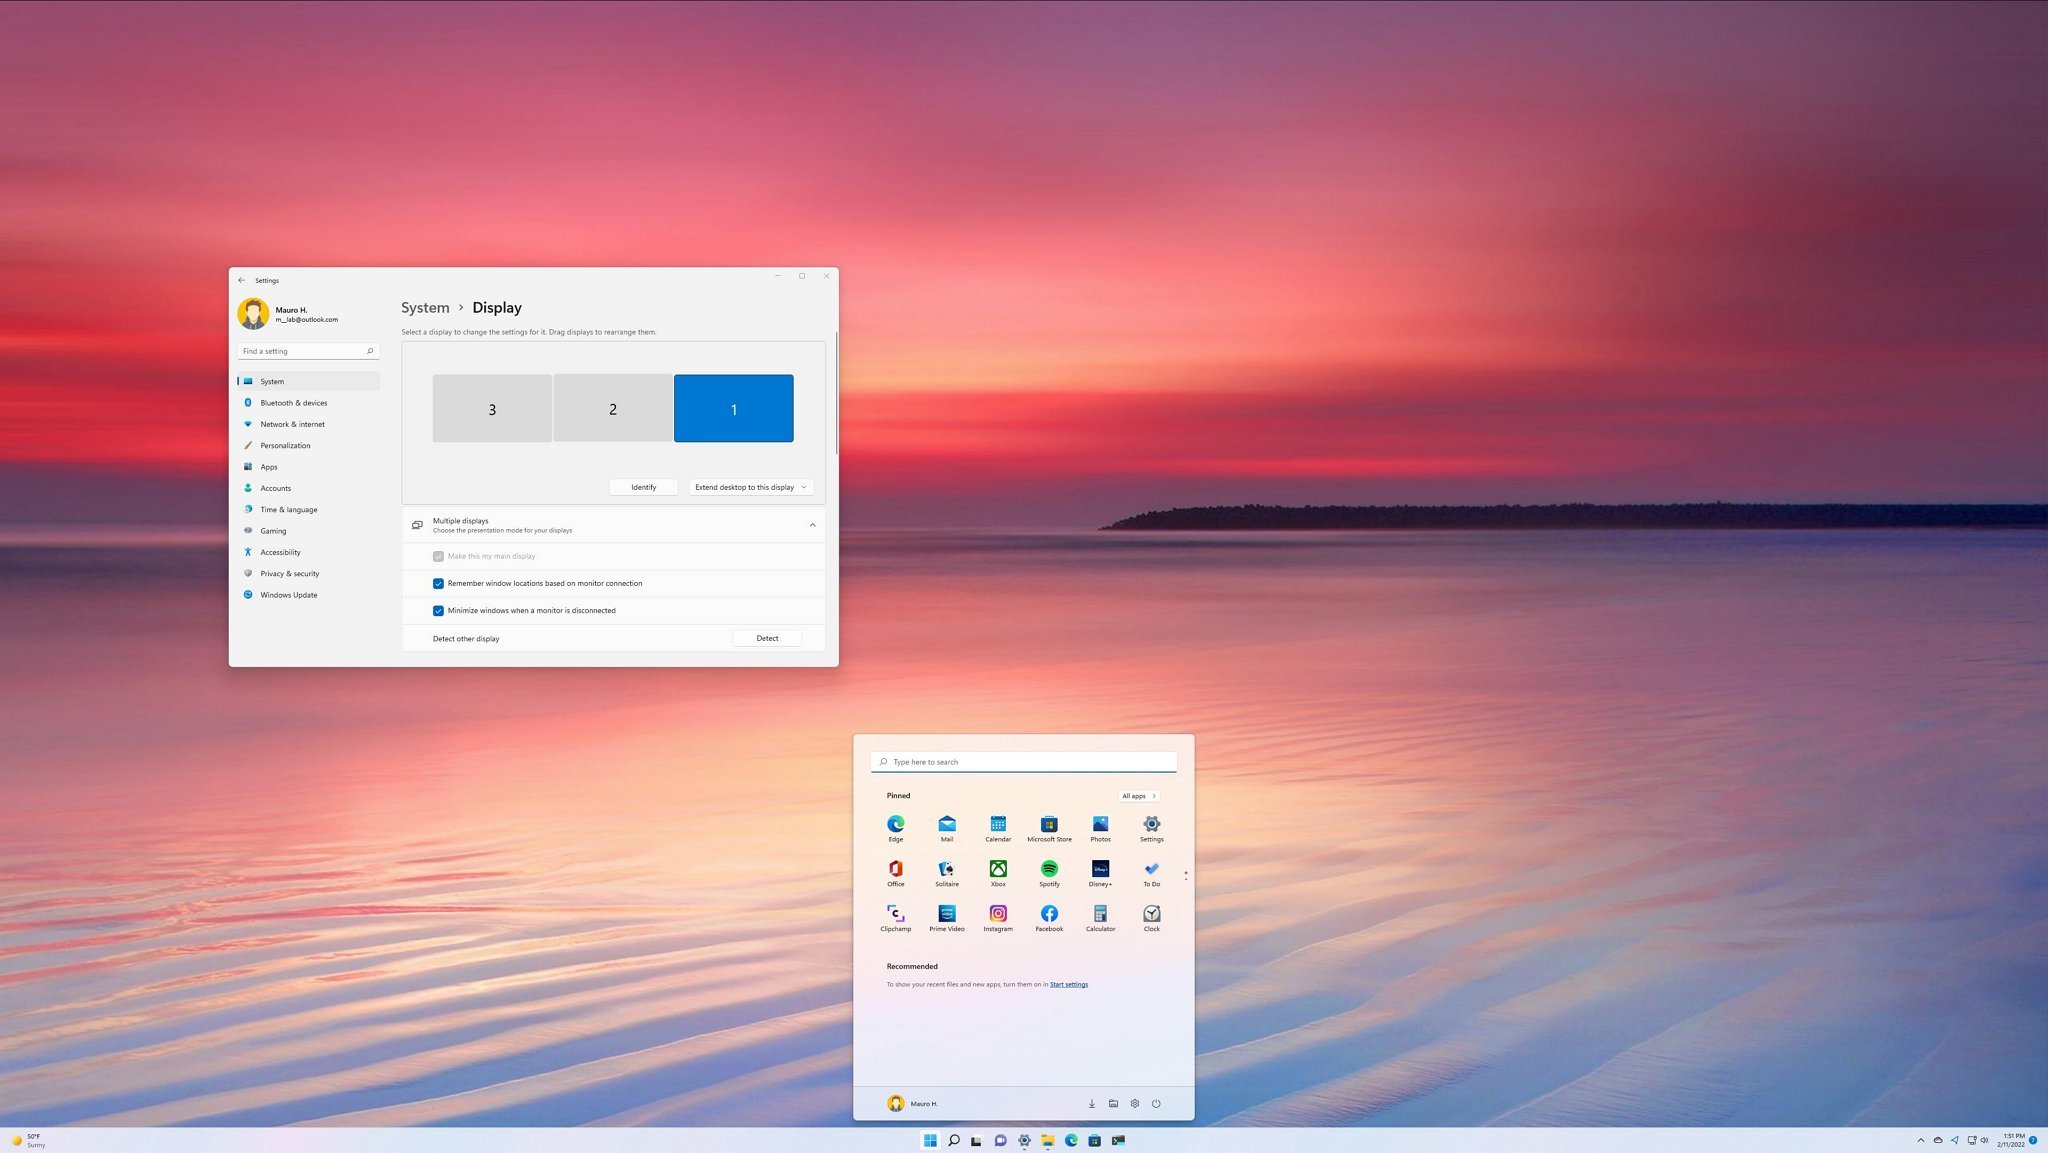
Incorrect display settings can also cause your external monitor not to be detected. In Windows 11, you can check your display settings to ensure that your external monitor is properly configured. To do this, click on the Start menu, go to System, and select Display. Under the Scale & layout section, expand the Multiple displays options. Click on the Detect button to refresh the display connection and detect your external monitor. If it is detected, select the Extend these displays option from the drop-down menu to enable extended desktop mode.
Hardware Failures Or Incompatibilities
Hardware failures or incompatibilities can also prevent your external monitor from being detected. It is possible that there may be an issue with either your computer’s graphics card or the external monitor’s hardware. Check if the monitor is powered on and connected to a power source. Power off your computer and restart it to refresh the connection. Additionally, check the signal cable connection between the display and the graphics card to ensure it is secure. If the problem persists, it may be necessary to consult with a technician or contact the manufacturer for further assistance.
Checking And Adjusting Display Settings
To check and adjust display settings for an external monitor not detected in Windows 11, go to System > Display in the left panel of the settings menu. Scroll down to Scale & layout and click on “Detect” under Multiple displays.
If the second monitor is detected, select “Extend these displays” from the drop-down menu to ensure it is functioning properly.
To begin troubleshooting the issue of an external monitor not being detected on Windows 11, you need to navigate to the display settings. Here’s how you can do it:- From the left panel of your Windows 11 desktop, click on the Start button located at the bottom left corner of the screen.
- In the Start menu, search for and click on “Settings” to open the Windows Settings.
- Within the Windows Settings, locate and click on “System”.
- From the System settings, find and select “Display” from the menu on the left side of the screen.
- Scroll down to the “Scale & layout” section within the Display settings.
- Expand the “Multiple displays” option by clicking on it.
- Next, click on the “Detect” button. Windows 11 will start searching for connected displays.
- If your second monitor is detected, you will be able to see it listed. Click on it.
- From the drop-down menu, select “Extend these displays” to ensure both screens are utilized.
- Scroll back up to the “Scale & layout” section within the Display settings.
- Under the “Display resolution” heading, you can adjust the resolution of each display individually using the provided drop-down menu.
- Beneath the resolution settings, you will find the “Display orientation” option. Choose between landscape, portrait, or flipped orientation to suit your preferences.
- Still within the Display settings window, scroll down to the “Advanced display settings” section.
- Click on the “Display mode” option and choose the appropriate mode from the provided drop-down menu. Common options include “Duplicate these displays” and “Show only on 1” (or 2, depending on the connected monitors).
- Once you have selected the desired display mode, click on the “Apply” button to save the changes.
Updating And Reinstalling Drivers
When it comes to troubleshooting issues with an external monitor not being detected in Windows 11, one of the most effective solutions is updating and reinstalling the drivers for your graphics card. Outdated or corrupted drivers can often be the culprit behind this problem, and by ensuring you have the latest drivers installed, you can improve compatibility and resolve any compatibility issues between the monitor and your computer.
Identifying The Graphics Card Model
To update or reinstall drivers for your graphics card, you first need to identify the graphics card model installed on your Windows 11 system. Follow these steps to find out:
- Right-click on the Start button and select “Device Manager” from the context menu.
- In the Device Manager window, expand the “Display adapters” category to reveal the graphics card model.
Take note of the graphics card model name, as you will need this information to find the correct drivers for your GPU.
Finding The Latest Drivers For Your Gpu
Once you have identified the graphics card model, you can proceed to download the latest drivers for your GPU. Visit the official website of the GPU manufacturer to locate the appropriate drivers. Alternatively, you can use automatic driver update tools or third-party software to simplify this process and ensure you get the most up-to-date drivers for your GPU.
Proper Driver Installation Steps
Before installing the updated drivers, it is crucial to follow the proper installation steps to ensure a successful and error-free driver update. Here are the recommended steps:
- Download the driver installation file from the manufacturer’s website or the software you are using.
- Right-click on the downloaded file and select “Run as administrator” to initiate the installation process.
- Follow the on-screen instructions provided by the driver installer.
- Once the installation is complete, restart your computer to apply the changes.
Reinstalling Drivers As A Last Resort
If updating the drivers did not resolve the issue of your external monitor not being detected in Windows 11, reinstalling the drivers can be considered as a last resort. Reinstalling the drivers can help resolve any potential conflicts or issues that may have occurred during the initial installation.
- Open the Device Manager by right-clicking on the Start button and selecting “Device Manager” from the context menu.
- Expand the “Display adapters” category to reveal your graphics card.
- Right-click on the graphics card and select “Uninstall device” from the context menu.
- Follow the on-screen prompts to complete the uninstallation process.
- Once the drivers are uninstalled, restart your computer.
- Upon restarting, Windows 11 will automatically detect and reinstall the drivers for your graphics card.
By following these steps, you can ensure a proper update or reinstallation of the drivers for your graphics card, potentially resolving the issue of your external monitor not being detected in Windows 11.
External Monitor Not Detected Windows 11: Physical Checks
If you’re experiencing issues with your external monitor not being detected on Windows 11, there are several physical checks you can perform. By inspecting cables and connections, testing alternative cables or ports, ensuring monitor compatibility, and troubleshooting power issues, you can effectively address the problem and get your external monitor up and running.
Inspecting Cables And Connections
Cables and connections are often the culprits behind a monitor not being detected. Start by checking if all cables are securely connected. Ensure that the HDMI, DisplayPort, or VGA cable is firmly plugged into both your computer and the monitor. It’s also important to make sure that the cables are not damaged or frayed. Examine the connectors for any bent pins or visible signs of wear and tear. If you find any issues, consider replacing the cables to see if it resolves the problem.
Testing With Alternative Cables Or Ports
If inspecting the cables and connections doesn’t solve the issue, it’s worth testing with alternative cables or ports. Swap out the existing cable with a new one or try using a different cable type if your monitor and computer support it. Additionally, you can try connecting your external monitor to a different port on your computer. For example, if you’re currently using HDMI, try using DisplayPort or VGA instead. This step helps to rule out any potential issues with specific cables or ports.
Ensuring Monitor Compatibility
Before assuming that there is a problem with your computer or cables, ensure that your monitor is compatible with Windows 11. Visit the manufacturer’s website to check if there are any specific drivers or firmware updates available for your monitor. Installing the latest updates can often resolve compatibility issues and improve performance. Make sure to follow the manufacturer’s instructions carefully when updating your monitor’s drivers or firmware.
Troubleshooting Power Issues
In some cases, power issues can prevent your external monitor from being detected. Start by checking if the monitor is plugged into a power source and turned on. Ensure that the power cord is securely connected at both ends. If using a power strip or surge protector, try plugging the monitor directly into a wall outlet to eliminate any potential power-related issues. Additionally, try restarting your computer as a simple refresh can sometimes resolve power-related connection problems.
By performing these physical checks, you can effectively troubleshoot the issue of your external monitor not being detected on Windows 11. If these steps don’t resolve the problem, it may be necessary to explore other possible causes or consult with a technical professional for further assistance.
Advanced Troubleshooting Techniques
To troubleshoot the issue of an external monitor not being detected on Windows 11, start by checking the display settings in the System menu. Navigate to Scale & layout, expand Multiple displays, and click on Detect. If the monitor is detected, select Extend these displays.
Additionally, ensure the monitor is plugged in and turned on, and try restarting the computer to refresh the connection. Verify the signal cable connection between the display and the graphics card as well.
Booting Into Safe Mode For Diagnostics
If you’re facing issues with your external monitor not being detected in Windows 11, one of the first advanced troubleshooting techniques you can try is booting into safe mode. Safe mode allows your computer to start with minimal drivers and services, helping you determine if any third-party software or drivers are causing conflicts with your external monitor.
Resetting Display Settings Via Command Prompt
In some cases, corrupted or incorrect display settings can prevent Windows 11 from detecting your external monitor. To reset the display settings, you can use the command prompt to execute a few simple commands. This process can help resolve any configuration issues that may be causing the detection problem.
Checking Windows 11 Updates And System Patches
Regularly checking for Windows 11 updates is crucial to ensure that your operating system is running smoothly and has the latest compatibility fixes. Sometimes, issues with external monitor detection can be caused by outdated system software. By keeping your system up to date, you can address any bugs or compatibility issues that may be affecting the detection of your external monitor.
Resolving Conflicts With Docking Stations Or Adapters
If you are using a docking station or an adapter to connect your external monitor, it’s essential to check for any conflicts that may arise. Sometimes, certain docking stations or adapters may not be compatible with Windows 11, resulting in detection issues. Ensuring that you are using the correct and updated drivers for your docking station or adapter can help resolve conflicts and improve external monitor detection.
Note: If you have tried these advanced troubleshooting techniques and are still experiencing issues with your external monitor not being detected in Windows 11, it is recommended to reach out to Microsoft Support or consult with a professional technician for further assistance.
Frequently Asked Questions For External Monitor Not Detected Windows 11
Why Is My External Monitor Not Detected?
To resolve the issue of your external monitor not being detected, follow these steps: 1. Go to System > Display in the Display Settings. 2. Expand Multiple displays and click on Detect. 3. If your second monitor is detected, select Extend these displays from the drop-down menu.
4. Ensure the monitor is plugged into a power source and turned on. 5. Power off and restart your computer to refresh the connection. 6. Check the input port settings on your monitor. 7. Verify the signal cable connection between the display and graphics card.
If the problem persists, refer to the Microsoft Community or seek further assistance.
Why Won’t My Computer Detect My Second Monitor Anymore?
Check the Display Settings. Go to System > Display, click on Detect, and select Extend these displays if the second monitor is detected. Make sure the monitor is plugged in and turned on, restart the computer, and check the signal cable connection.
Why Won T My Monitor Connect Windows 11?
To troubleshoot why your monitor won’t connect to Windows 11, check the Display Settings. Go to System > Display, expand Multiple displays, and click on Detect. If your monitor is detected, select Extend these displays. Also, make sure the monitor is plugged in and turned on, and restart your computer.
Check the cable connection between the monitor and graphics card.
How Do I Get My Second Monitor To Work On Windows 11?
To get your second monitor working on Windows 11, follow these steps: 1. Go to Display Settings by navigating to System > Display. 2. Expand Multiple displays under Scale & layout. 3. Click on Detect to see if your second monitor is detected.
4. If detected, select Extend these displays from the drop-down menu. 5. If not detected, check if the monitor is plugged into a power source and turned on. 6. Power off your computer and restart it. 7. Ensure the correct input port is selected on the monitor’s built-in controls.
8. Check the signal cable connection between the display and graphics card. Read more on Microsoft Community or watch a tutorial on YouTube for troubleshooting if the issue persists.
Conclusion
If you are facing the issue of your external monitor not being detected on Windows 11, there are a few steps you can follow for troubleshooting. Start by checking the display settings and selecting the option to extend these displays if your second monitor is detected.
Additionally, ensure that the monitor is plugged into a power source and turned on. Restarting your computer can also help refresh the connection. If the issue persists, check the signal cable connection between the display and the graphics card. By following these steps, you can resolve the problem and enjoy a seamless dual-monitor setup.