Troubleshooting: Monitor Not Turning on With New Graphics Card
To resolve the issue of a monitor not turning on with a new graphics card, make sure the card is properly seated in the PCIe slot, the PCIe power connectors are plugged in correctly, and the monitor cable is properly connected. If needed, try using a different cable.
If the screen remains black, there may be a problem with the graphics card itself. However, it is important to ensure that the card is securely installed and all cables are properly connected before assuming it is defective. If you recently installed a new graphics card in your computer but are facing the problem of the monitor not turning on, there are a few potential solutions you can try.
This article will guide you on how to troubleshoot and resolve this issue, allowing you to make the most out of your new graphics card. By following these steps, you will be able to ensure that the graphics card is correctly installed, and address any potential problems that may be preventing the monitor from turning on. So, let’s dive in and get your monitor up and running with your new graphics card!
Identifying Common Installation Missteps
Ensure proper installation of the new graphics card by checking if it is correctly seated in the PCIe slot and the PCIe power connectors are properly plugged in. Verify that the monitor cable is also securely connected. If the screen remains black, it may indicate a faulty graphics card.
Consider trying a different cable or seeking further troubleshooting advice.
Check If The Gpu Is Properly Seated In The Pcie Slot
One of the most common causes of a monitor not turning on after installing a new graphics card is an improperly seated GPU in the PCIe slot. To ensure that the GPU is properly seated, follow these steps:
- Power down the computer and disconnect the power cable.
- Open the computer case and locate the PCIe slot where the graphics card is installed.
- Remove the graphics card from the PCIe slot by gently pressing down on the release latch and pulling the card straight out.
- Inspect the PCIe slot for any debris or obstructions and clean it if necessary.
- Align the gold contacts on the bottom of the graphics card with the PCIe slot and firmly press the card into place.
- Ensure that the card is securely fastened by tightening the screws or latch that holds it in place.
Once the GPU is properly seated, reconnect the power cable and turn on the computer to check if the monitor turns on.
Confirm That Pcie Power Connectors Are Securely Plugged In
Another common installation misstep that can cause a monitor not to turn on with a new graphics card is improperly connected PCIe power connectors. To confirm that the PCIe power connectors are securely plugged in, follow these steps:
- Power down the computer and disconnect the power cable.
- Locate the PCIe power connectors on the graphics card and the corresponding cables from the power supply unit.
- Check that the connectors match and align properly.
- Plug in the PCIe power connectors firmly, ensuring that they are fully inserted into the graphics card.
- If the connectors have latches, make sure they are engaged to secure the connection.
Once the PCIe power connectors are securely plugged in, reconnect the power cable and turn on the computer to see if the monitor turns on.
Verify Correct Monitor Cable Connection And Try Alternative Cables
If the monitor still does not turn on, it is essential to verify the correct monitor cable connection. Follow these steps:
- Power down the computer and disconnect the power cable.
- Inspect the current monitor cable for any damages or loose connections.
- Disconnect the current monitor cable from both the graphics card and the monitor.
- Check for any bent or missing pins in the monitor cable connectors and straighten them if necessary.
- Connect the monitor cable securely to both the graphics card and the monitor.
- If the monitor still does not turn on, try using an alternative monitor cable to eliminate the possibility of a faulty cable.
If the monitor turns on with the alternative cable, consider replacing the original cable.
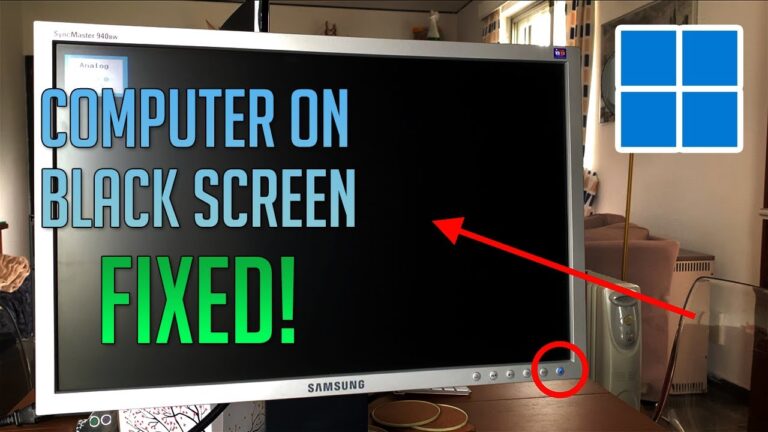
Credit: www.reddit.com
Signs Of A Faulty Graphics Card
When installing a new graphics card, one of the frustrating problems that may arise is a monitor that fails to turn on. This issue can leave users scratching their heads, wondering what went wrong. However, there are several signs that can indicate a faulty graphics card and help troubleshoot the problem.
Recognize Post Beep Patterns Indicating Hardware Issues
One of the first signs to look for when experiencing a monitor not turning on with a new graphics card is the presence or absence of POST (Power-On Self-Test) beep patterns. These audio signals emitted by the computer during startup can provide valuable insights into hardware issues. If the computer beeps multiple times, it indicates a potential problem with the graphics card or other components.
To better understand the meaning behind these beep patterns, refer to the computer’s motherboard manual or manufacturer’s website for a comprehensive list of beep codes. By identifying the specific pattern and duration of beeps, users can narrow down the underlying hardware issue and determine if the graphics card is indeed faulty.
Observe Fan Activity And Lights On The New Graphics Card
Another important indicator of a faulty graphics card is the activity of its fans and lights. When the computer powers on, carefully observe the graphics card to check if the fans are spinning and the lights are on. If the fans fail to spin or the lights remain off, it suggests a potential problem with the graphics card’s power supply or the card itself.
To troubleshoot this issue, double-check the connections of the PCIe power connectors from the power supply unit to the graphics card. Ensure they are securely plugged in and making proper contact. Additionally, verify that the graphics card is seated correctly in the PCIe slot, as improper alignment can cause the fans and lights to malfunction.
Understand Black Screen Implications Post Gpu Installation
A black screen after installing a new graphics card is a common issue that can be a result of various factors. It is crucial to understand the implications of a black screen to effectively troubleshoot the problem. In some cases, a black screen may indicate a faulty graphics card that requires replacement.
However, before jumping to conclusions, it is essential to check other potential causes. For instance, ensure that the monitor cable is correctly plugged in and that the monitor itself is functioning properly. Trying a different cable or connecting the monitor to another device can help determine if the black screen is indeed related to the graphics card.
In addition, it is worth mentioning that outdated or incompatible drivers can also lead to a black screen. Therefore, updating the graphics card drivers to the latest version from the manufacturer’s website is recommended.
Validating Psu Requirements For New Gpu
Ensure the proper installation of your new graphics card by checking if it is seated correctly in the PCIe slot, if the PCIe power connectors are plugged in securely, and if the monitor cable is connected properly. If you still experience a black screen, it could be a sign of a faulty graphics card.
Try using a different cable or seek further assistance.
Evaluate If The Power Supply Unit Meets The New Gpu’s Power Needs
When encountering issues with a monitor not turning on after installing a new graphics card, it is crucial to evaluate whether the installed power supply unit (PSU) meets the power requirements of the GPU. Inadequate power supply can result in various performance issues, including black screens or no display output.
To ensure the power supply unit is sufficient for the new GPU, consider the following steps:
- Check the power requirements of the new graphics card. You can find this information in the manufacturer’s documentation or on their official website.
- Review the specifications of your current power supply unit.
- Compare the power requirements of the graphics card with the power supply unit’s capacity.
If the power supply unit falls short of the new GPU’s power needs, it is recommended to upgrade to a higher capacity PSU. This will help prevent power-related issues and ensure stable performance of the graphics card.
Assess The Necessity Of Power Cable Adapters For The Graphics Card
In addition to confirming the power supply unit’s capacity, it is vital to assess whether power cable adapters are needed for the new graphics card. Power cable adapters are often required when the PSU does not have the necessary connectors to directly supply power to the GPU.
To determine if power cable adapters are necessary, follow these steps:
- Identify the connectors required by the graphics card for power supply. Manufacturers usually specify the type and number of connectors needed.
- Inspect the available connectors on your power supply unit.
- Compare the connectors required by the GPU with the connectors available on the PSU. If there is a mismatch, power cable adapters will be necessary.
When using power cable adapters, ensure they are properly connected, avoiding any loose connections that could lead to power interruptions. It is also recommended to use high-quality power cable adapters from reputable manufacturers.
By validating the PSU requirements for your new GPU and assessing the necessity of power cable adapters, you can troubleshoot monitor issues and ensure a seamless installation process for your graphics card.
Compatibility Check For New Hardware
If your monitor is not turning on with a new graphics card, there are a few things you can check. Ensure that the graphics card is properly seated in the PCIe slot and that the PCIe power connectors are plugged in correctly.
Also, make sure the monitor cable is properly connected and try using a different cable if possible. If you still get a black screen, it may indicate a faulty graphics card.
Review Motherboard Compatibility With The New Gpu
One of the most common reasons for a monitor not turning on after installing a new graphics card is compatibility issues with the motherboard. It is important to review the compatibility between the new GPU and the motherboard to ensure they can work together seamlessly.
To check the compatibility, refer to the motherboard’s documentation or visit the manufacturer’s website. Look for information about supported graphics card models, PCIe slot requirements, and any specific instructions for installation.
Ensure that the motherboard’s PCIe slot is the right version to support the new graphics card. For example, if the GPU requires a PCIe 3.0 slot, make sure your motherboard has at least one available.
Ensure That The Graphics Card Driver Is Up To Date And Properly Installed
Another potential issue that can prevent your monitor from turning on with a new graphics card is outdated or improperly installed drivers.
Before installing the new GPU, ensure that you have the latest graphics card driver downloaded and ready. Visit the manufacturer’s website or use an automatic driver update software to download the most recent driver version compatible with your graphics card model and operating system.
Once the driver is downloaded, properly install it by following the instructions provided. Make sure to uninstall any previous graphics card drivers before proceeding with the installation of the new one.
Confirm That Bios Settings Are Configured To Utilize The New Gpu
Configuring the BIOS settings correctly is crucial when installing a new graphics card. If the settings are not properly configured, the computer may fail to recognize and utilize the new GPU, resulting in a monitor not turning on.
To confirm that the BIOS settings are configured correctly, follow these steps:
- Turn on your computer and press the designated key to enter the BIOS. This is often the “Delete” or “F2” key.
- Once in the BIOS, navigate to the “Advanced” or “Integrated Peripherals” section.
- Look for an option related to the graphics card or display settings.
- Ensure that the setting is configured to use the new GPU as the primary display adapter.
- Save the changes and exit the BIOS.
By following these steps and confirming that the BIOS settings are configured correctly, you can ensure that your monitor will turn on after installing a new graphics card.
If the issue persists after checking motherboard compatibility, updating the graphics card driver, and configuring the BIOS settings, it may be necessary to seek further assistance or consider alternative troubleshooting options.
Switching Monitor Inputs And Testing Displays
If your monitor is not turning on with a new graphics card, there are a few possible solutions to try. Ensure that the card is properly seated in the PCIe slot and that the power connectors are properly plugged in.
Additionally, make sure the monitor cable is plugged in correctly and try using a different cable if possible. If you still get a black screen, it might indicate a faulty graphics card.
Switching Monitor Inputs and Testing Displays When you install a new graphics card and your monitor fails to turn on, it can be frustrating and confusing. However, before assuming that the graphics card is faulty, it is important to troubleshoot the issue by testing different monitor inputs and employing alternate display methods. By following these steps, you can eliminate possible monitor issues and ensure that the problem lies with the graphics card.Troubleshoot By Testing With Different Monitor Inputs (hdmi, Dvi)
One of the first troubleshooting steps you should take when your monitor fails to turn on with a new graphics card is to test different monitor inputs. This can help determine whether the issue lies with the specific input you are currently using. To test different inputs, follow these steps:- Ensure that your computer is turned off and disconnected from the power source.
- Disconnect the current cable connecting your monitor to the graphics card.
- Connect an HDMI cable between your monitor and the HDMI port on the graphics card.
- If the issue persists, try using a DVI cable instead. Disconnect the HDMI cable and connect the DVI cable between your monitor and DVI port on the graphics card.
Employ Alternate Display Methods To Eliminate Monitor Issues
To further troubleshoot the issue and eliminate possible monitor issues, you can employ alternate display methods. This involves connecting your monitor to a different system or using a different monitor altogether. Here are the steps to follow:- If available, connect your current monitor to a different system using the same cable and input method.
- If the monitor displays properly on the different system, it indicates that the monitor itself is not the issue.
- If available, connect a different monitor to your system using the same cable and input method.
- If the different monitor displays properly on your system, it indicates that the issue lies with your original monitor.
Advanced Gpu Troubleshooting Techniques
If your monitor is not turning on after installing a new graphics card, make sure it is properly seated in the PCIe slot and that the power connectors are plugged in correctly. Check the monitor cable connections and try using a different cable if necessary.
If you still get a black screen, it could indicate a faulty graphics card.
If you’ve recently installed a new graphics card and are facing issues with your monitor not turning on, there are several advanced troubleshooting techniques you can try to resolve the problem. These techniques can help you identify and fix display conflicts, diagnose driver-related problems, and seek support from the manufacturer’s forums for specific GPU troubleshooting. Let’s dive into each of these techniques in detail:
Reset Bios Settings To Default To Resolve Display Conflicts
If your monitor fails to turn on after installing a new graphics card, it could be due to conflicts with your BIOS settings. Resetting your BIOS settings to default can help resolve these conflicts and potentially fix the issue. Follow these steps:
- Start by turning off your computer.
- Locate the BIOS reset jumper on your motherboard. Refer to the manufacturer’s documentation to find its exact location.
- Using a jumper cap or a small piece of conductive material, momentarily connect the two pins of the reset jumper.
- Remove the jumper after a few seconds to reset the BIOS settings to default.
- Start your computer and check if the monitor turns on properly.
Perform A Safe-mode Boot To Diagnose Driver-related Problems
If resetting the BIOS settings doesn’t resolve the issue, the problem might be related to incompatible or faulty graphics card drivers. Performing a safe-mode boot can help diagnose and troubleshoot these driver-related problems. Here’s how you can do it:
- Shut down your computer completely.
- Turn on your computer and repeatedly press the F8 key before the Windows logo appears.
- Select the “Safe Mode” option from the Advanced Boot Options menu using your keyboard arrows.
- Once in safe mode, go to the Device Manager by right-clicking on the Start menu and selecting “Device Manager.”
- Expand the “Display adapters” category and right-click on your graphics card.
- Select “Uninstall device” and follow the on-screen instructions to remove the graphics card drivers.
- Restart your computer and check if the monitor turns on with the new graphics card.
Consult Manufacturer Support Forums For Specific Gpu Troubleshooting
If the previous troubleshooting methods didn’t solve the issue, it’s crucial to seek support from the manufacturer’s support forums. These forums are dedicated to addressing specific GPU-related issues and can provide valuable insights and solutions. Follow these steps to access the support forums:
- Search for the manufacturer of your graphics card and visit their official website.
- Look for the “Support” or “Help” section on the website.
- Find the “Forums” or “Community” subsection.
- Create an account or log in to your existing account.
- Post a description of your problem, including any relevant details, error messages, and steps you’ve taken so far.
- Engage with other users and support representatives to seek a resolution to your issue.
By following these advanced GPU troubleshooting techniques, you can increase your chances of resolving the issue with your monitor not turning on after installing a new graphics card. Remember to seek professional assistance if necessary.
Frequently Asked Questions Of Monitor Not Turning On With New Graphics Card
Why Is My Monitor Not Working With My Graphics Card?
If your monitor is not working with your graphics card, ensure that the card is properly seated in the PCIe slot and that the PCIe power connectors are properly plugged in. Also, check the monitor cable connection. Try using a different cable or monitor if you have one.
If the screen remains black, the graphics card may be faulty.
Why Does My Gpu Have Power But No Display?
If your GPU has power but no display, make sure it’s properly seated in the PCIe slot and the power connectors are plugged in correctly. Check the monitor cable and try a different one if needed. If the screen remains black, it could be a faulty graphics card.
Why Is My Computer Not Turning On After Installing Graphics Card?
There are a few possible reasons why your computer is not turning on after installing a graphics card: 1. Check if the graphics card is properly seated in the PCIe slot. 2. Ensure that the PCIe power connector(s) are properly plugged in.
3. Check if the monitor cable is properly plugged in. 4. Try using a different monitor cable. 5. If you still get a black screen, the graphics card may be broken. To fix the issue, make sure the graphics card is seated correctly, the power connectors are plugged in properly, and the monitor cable is connected securely.
Why Does My Pc Show A Black Screen After Installing A New Graphics Card?
If your PC shows a black screen after installing a new graphics card, there could be a few reasons. First, make sure the card is properly seated in the PCIe slot. Then, check that the PCIe power connector is plugged in correctly.
Finally, ensure that the monitor cable is plugged in properly. Try a different cable if you have one. If you still get a black screen, the card may be faulty.
Conclusion
To troubleshoot a monitor that is not turning on with a new graphics card, it is important to ensure proper installation. Make sure the graphics card is securely seated in the PCIe slot and that the PCIe power connectors are properly plugged in.
Additionally, check that the monitor cable is connected correctly. If the issue persists and you are met with a black screen, it is possible that the graphics card may be faulty. In such cases, it is advisable to seek technical assistance or consider replacing the card.
Remember to always double-check the installation process to avoid potential issues.